...
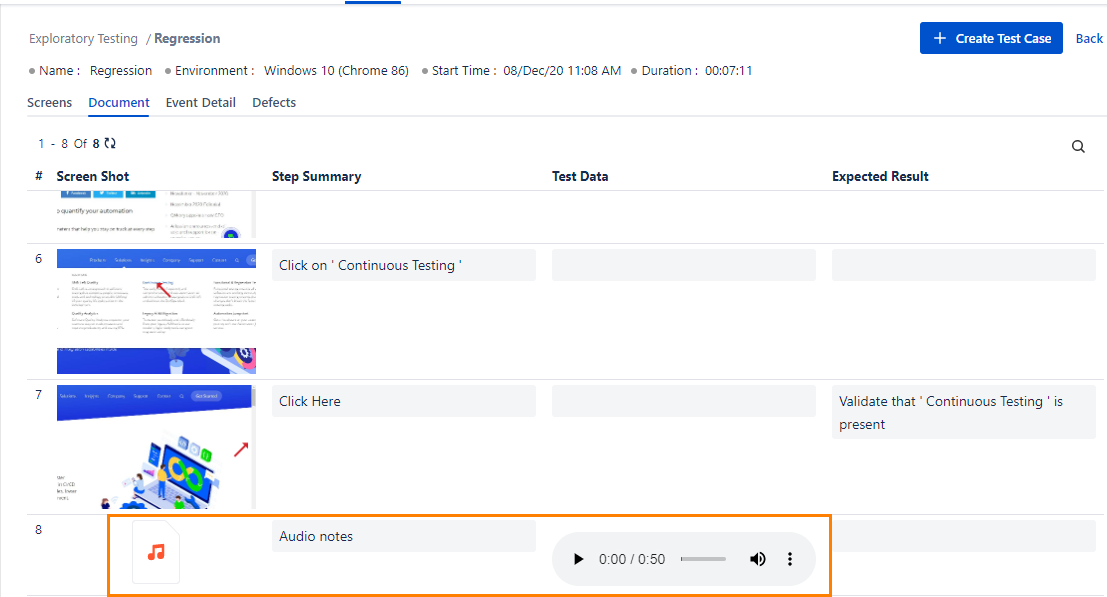
Open the test session to which the audio recording was attached.
Open the Document tab.
You can see the Audio Recordings on the screen.
Play the recorded audio.

Assertions
Users can use Assertion to get confirmation on the existence of particular components on the website, for example, a particular button, text, etc.
...
Annotating Screenshot: You can annotate the screenshot you captured using the features available on the editor. It allows you to describe any bug/defect/improvement more precisely, which ultimately makes it more comprehensive. Refer to Formatting Screenshot for more details.
...
Users need to fill all required values to log a bug. Following are the values that the user can log a defect with :
...
You can see the count of defects logged for the session/test once the session is completed.
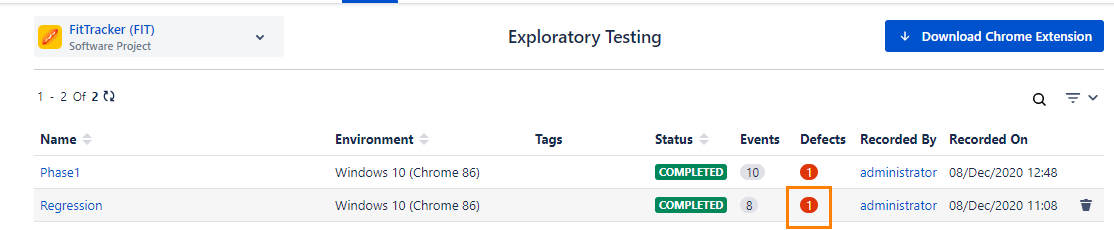

On clicking on the defect count in the grid will show the defect in the Defect tab.
...
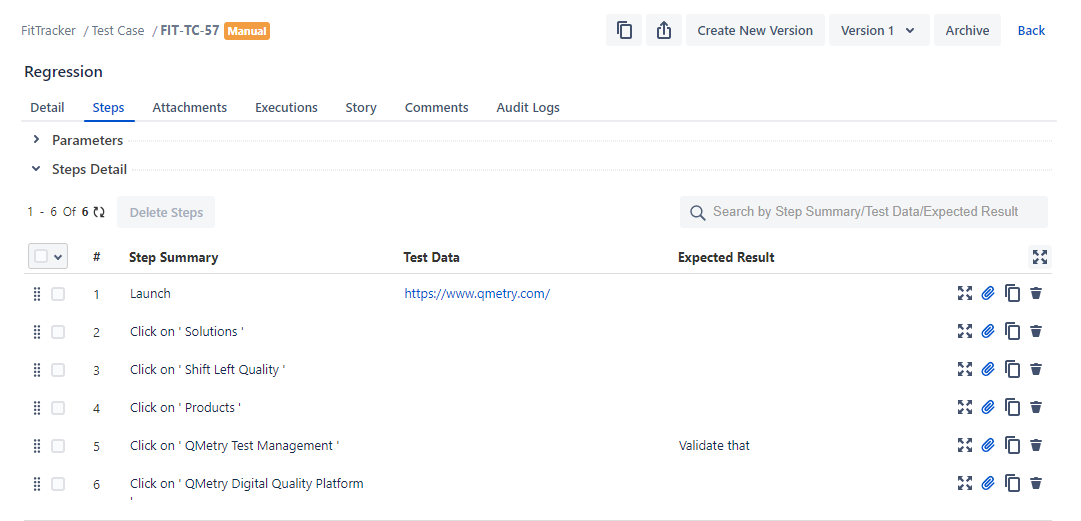
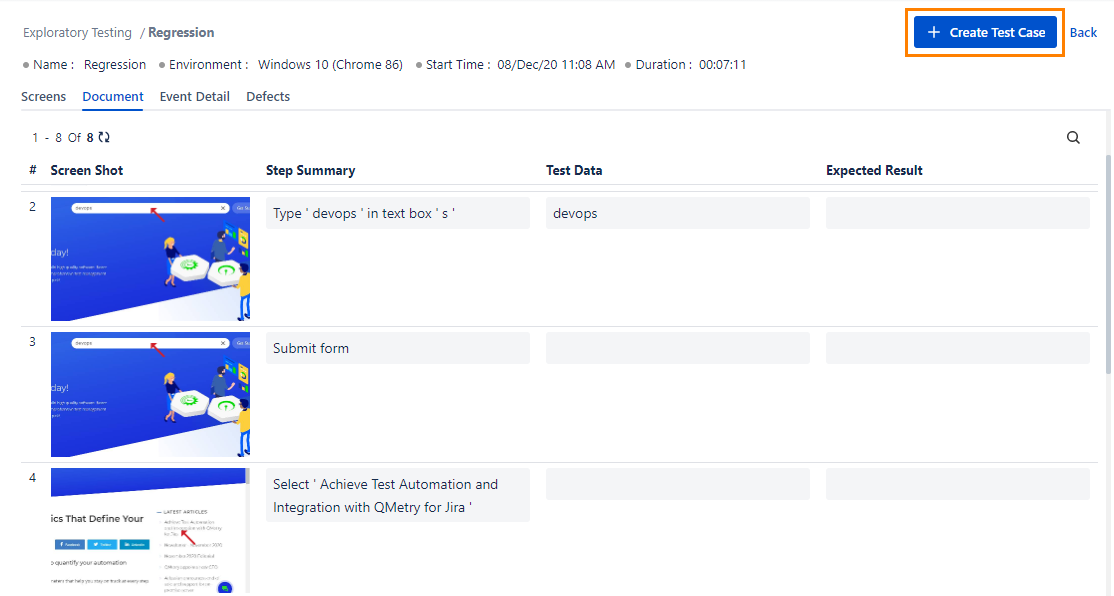
Step Details, Input Data and Expected Output fields are editable. You can modify the field values as per requirement.
The search box is provided at the top to search the required details by its Summary/Test Data/Expected Result.

Event Detail
The Event Detail tab displays event details of each event carried out during recording the session.
...
You can add/edit the required details for the test case. If a custom field is marked as mandatory in Configuration, users can enter values for such mandatory fields here and proceed towards test case creation.
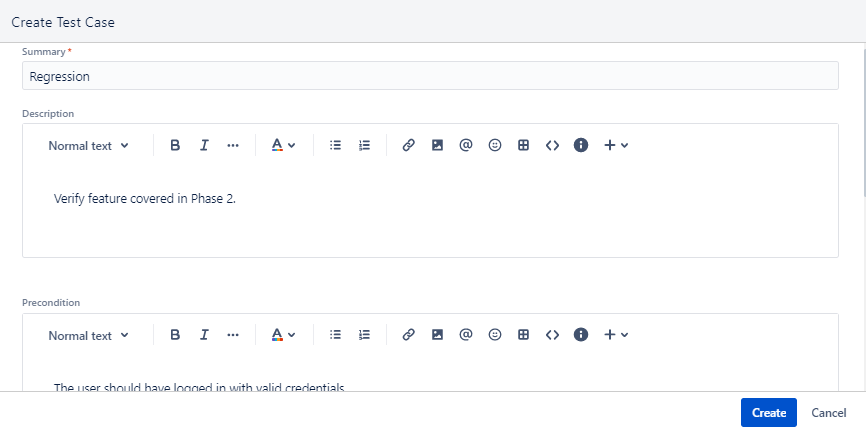

A test case is created in the Test Case tab under Test Management (QMetry menu > Test Management).
...
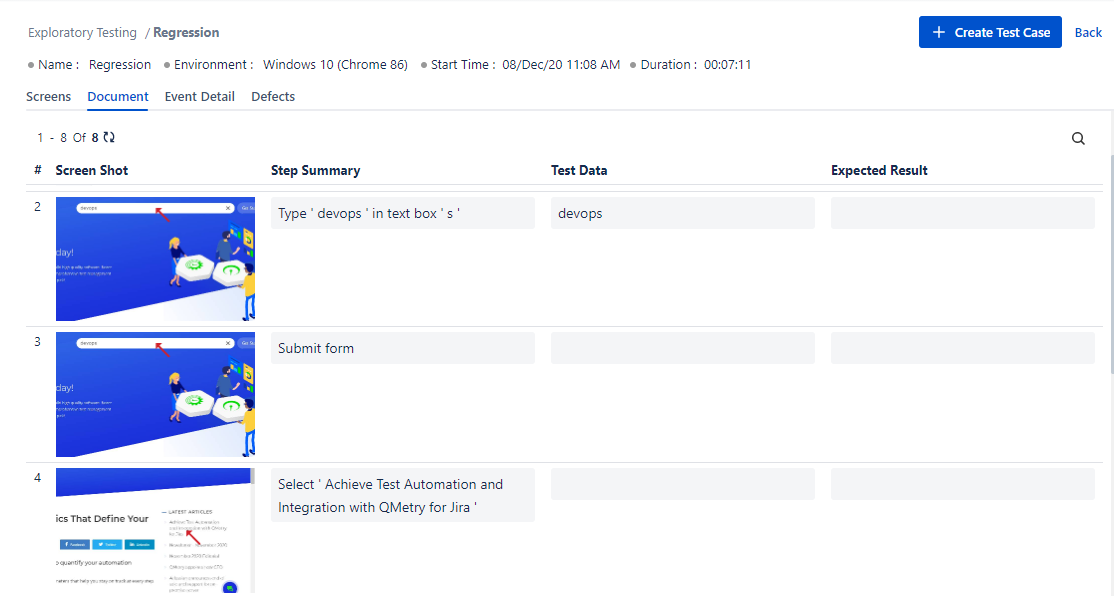
Images captured during the session are available as attachments with corresponding test steps.