| Table of Contents | ||
|---|---|---|
|
...
The QMetry Automation Agent has the following fields on it:
- URL: The URL of your QMetry Test Management application instance.
- API Key: Enter Automation Agent Key. To generate Automation Key, go to Integration > Automation Agent and click on the Generate Key as described under Automation Agent Key above.
- Agent Name: Enter name of your preference as Agent Alias to identify the specific agent.
- Running on VM: Users who want to run agent on virtual machine, can do so by setting this configuration. The manual settings are not required.
...
Note: QMetry Agents can be scheduled irrespective of the Approval workflow if the e-Signature feature is enabled.
...
Execution Command Input
Users can run Custom Command regardless of Test Framework or Build Framework. This is a command line input, which you provide on the command line interface.
Users can trigger and execute more than 255 characters (upto 5000) command through the Automation Agent.
For example,
The following command includes the Project path on your local drive and the test command to trigger the execution in accordance with the language and Framework you use. The result file will be generated in the Project directory accordingly.
...
| Expand | ||
|---|---|---|
| ||
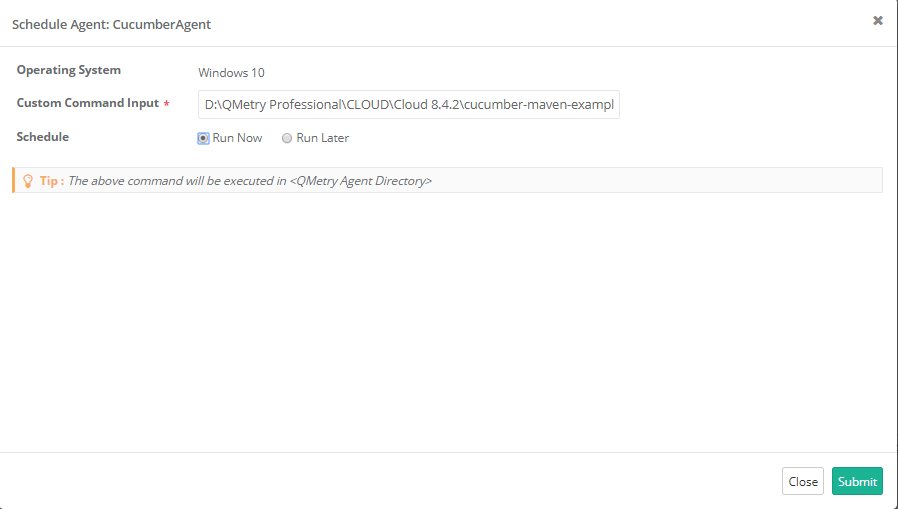
If you want to execute the Agent job immediately, then select the Run Now option and click Submit.
|

| Expand | ||||||||||
|---|---|---|---|---|---|---|---|---|---|---|
| ||||||||||
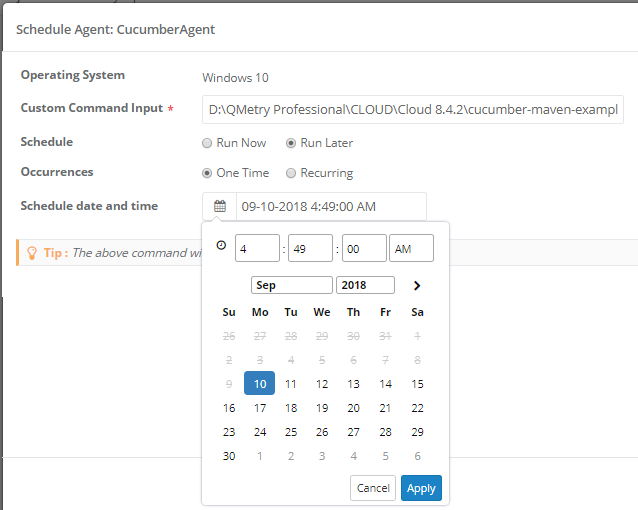
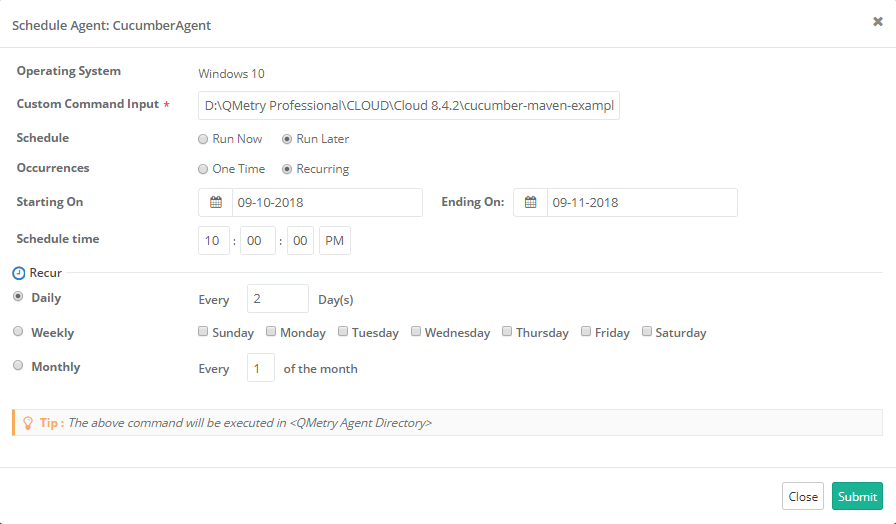
You can schedule the agent to run on a future date and time. Scheduling executions helps testers set execution schedule to be run one after the another.
|

View QMetry Automation Agent History
- Go to Integration > Automation Agent.
- On the Registered Agents section, click on the History button to view the schedule details of that particular Agent. A pop-up screen opens that displays schedule details of the Agent.


The columns include Custom Command Input, Scheduled At, Execution, and Execution Status.
...