| Table of Contents | ||
|---|---|---|
|
...
A. Connect Using Credentials
Note:
- Integrate with QMetry users using QMetry authentication. A QMetry user authenticated with SSO login can not be used for Integration. Recommended - Use the system admin (for cloud instances - the user who has registered for the QMetry instance) or administrator (for server customer - user "Admin" is the administrator) user for authentication.
- If the user has Two-step Verification enabled in QMetry, then they need to provide the Two-step Verification code to connect using this method. Users with Two-step Verification disabled can connect directly by providing credentials and Organization Code.
(1) Go to Jira settings >> (2) QMetry Configuration >> (3) Enter QMetry URL (4) Enter QMetry Admin Credentials and Organization Code >> (5) Connect the configuration.
...
Users can also integrate Jira with QMetry by using the Open API Key of QMetry (Integration > Open API).
Note: Open API Key is only available for users who have opted for the Integration app.
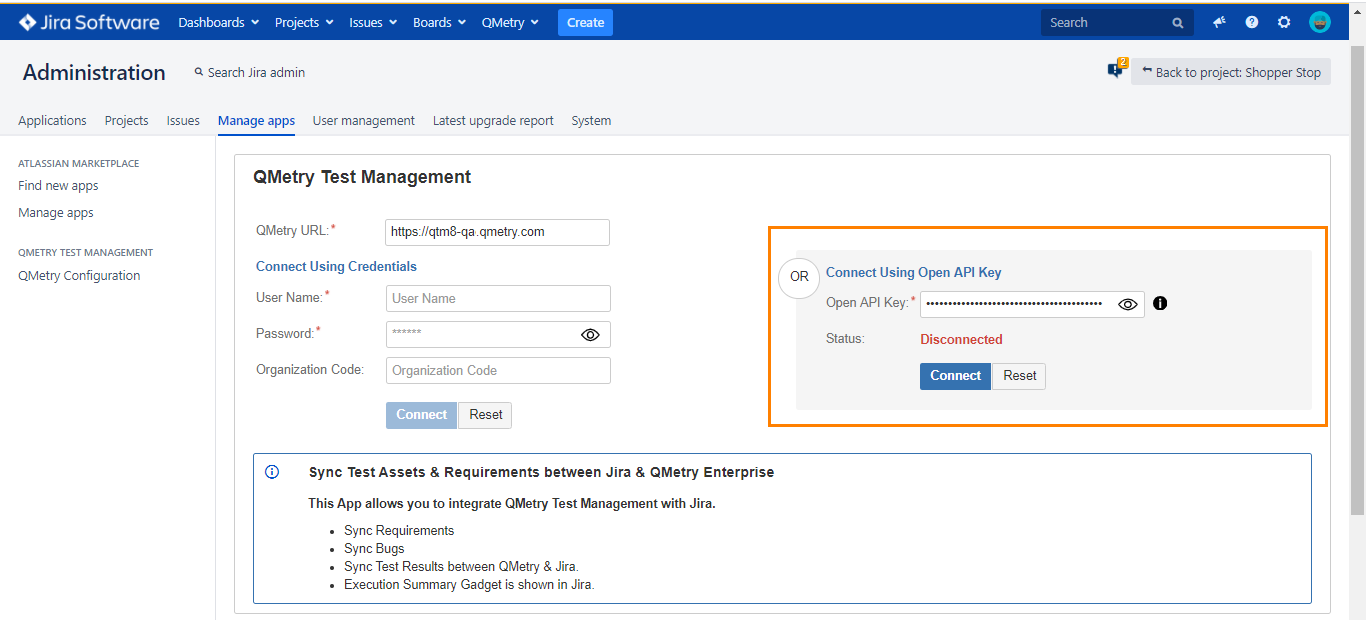
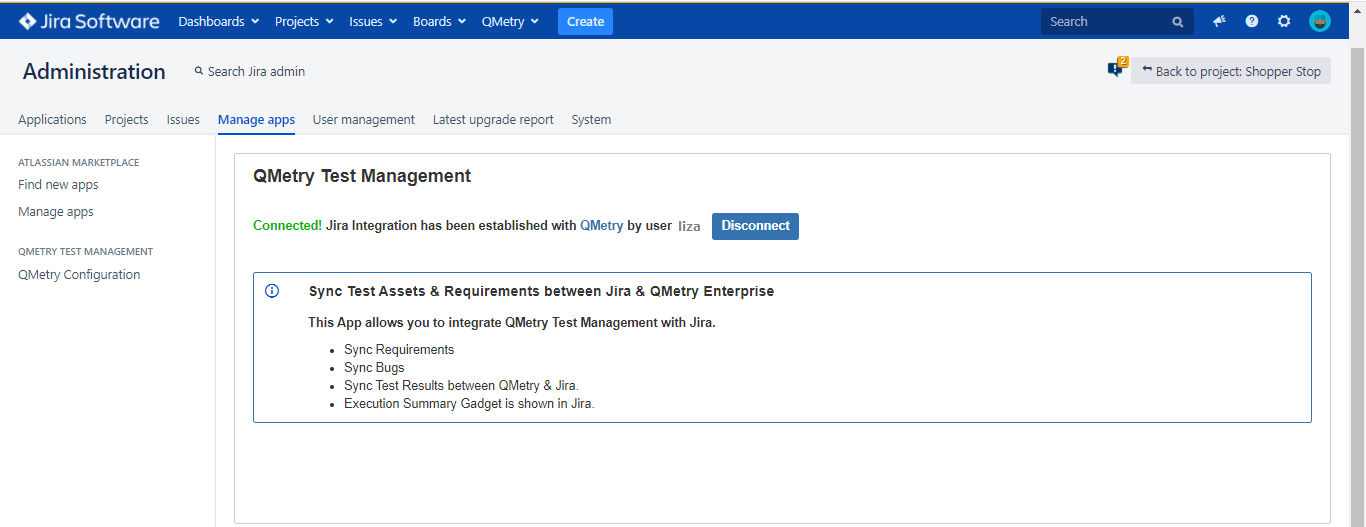
After entering the valid Open API Key and clicking Connect, the Jira integration is established with QMetry.
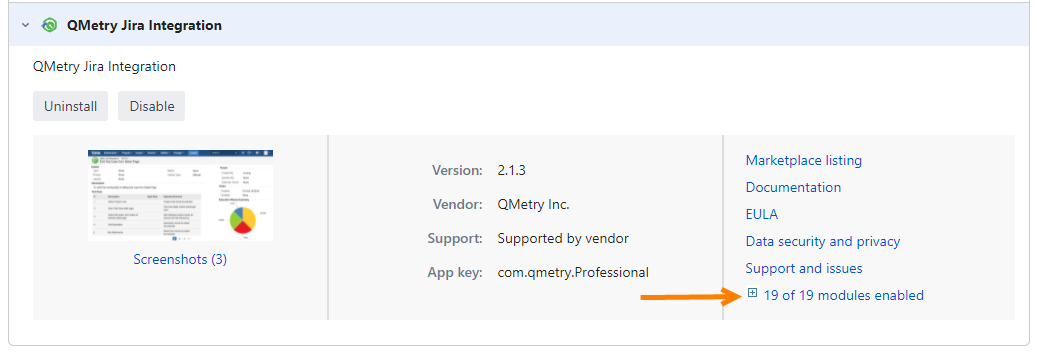
If you are using Cloud version of Jira, the integration app "QMetry Jira Integration" will be displayed as follows in Jira under the Apps > Manage apps section.
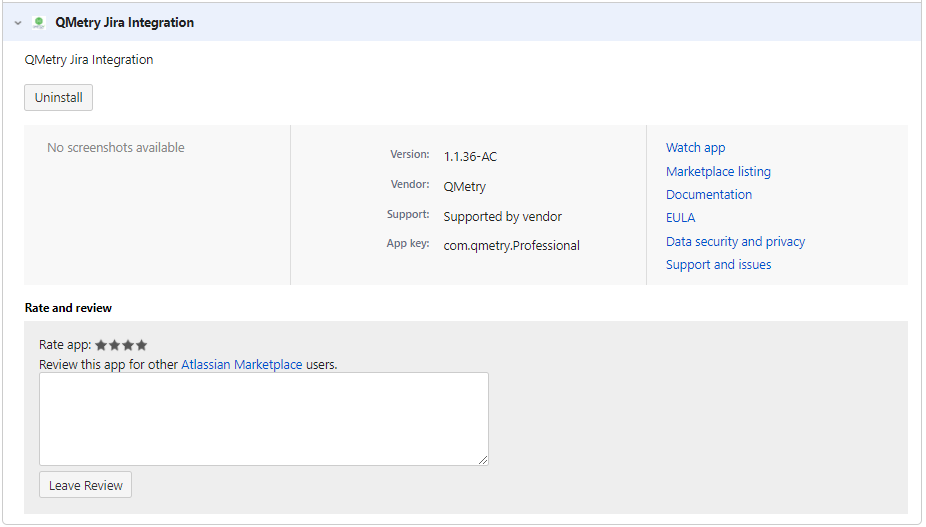
If you are on Server or Data Center version of Jira, the integration app "QMetry Jira Integration" will be displayed as follows in Jira under the Apps > Manage apps section.
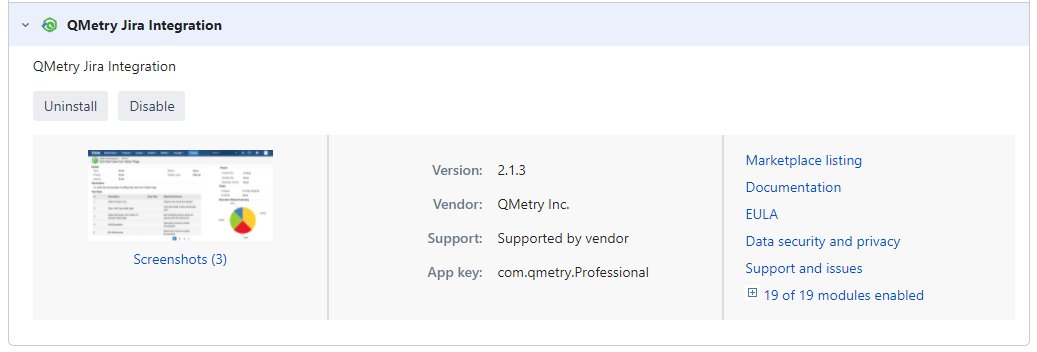
Step 3: Verify All Modules are Enabled (only for server or data center Jira editions).
Note: Skip this step if you're using Cloud Jira.
If you are on Server or Data Center version of Jira, then verify that all the modules are enabled on the Manage app screen.
- In Jira, go to Apps > Manage apps section.
- Expand the modules section and make sure that all the modules are enabled.
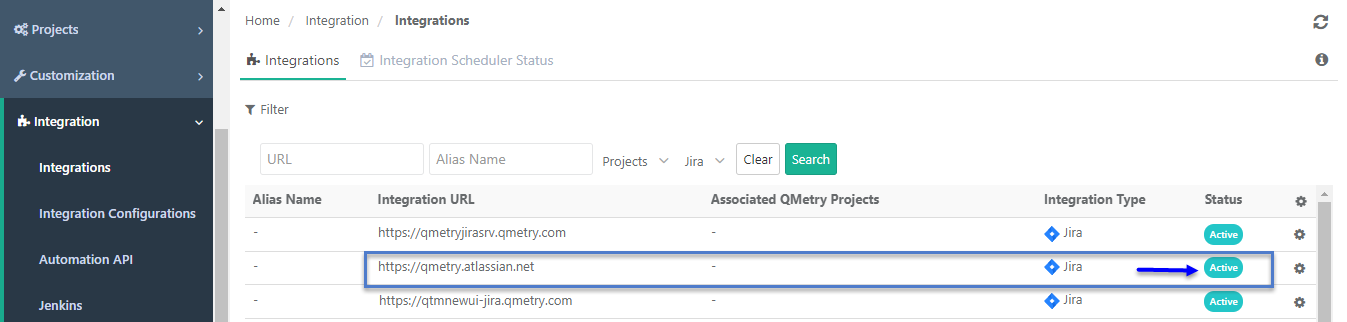
After the successful configuration with the above steps, QMetry "Integration" section will start showing "JIRA" configured as below.
...
The Associated QMetry Projects column will show QMetry projects configured with this integration.
Sync fields to Reports:
Note: The feature is only available to the customers who have opted for the Advanced Reports App.
Admin can opt for syncing the mapped custom fields of external tracker to the reports. You can include Jira's custom fields of Issues and Requirements modules in QMetry Insight tables for both Visual and Advance Query Reports to create a custom report with UDFs.
If the option is turned “On”, then the mapped custom fields for Issues and Requirements modules will be synced in the QMetry Insight module.
If the options is turned “Off”, then the synced fields in the QMetry Insight module will be removed.
Use Case: Project admin wants to create a custom report in QMetry Insights using Jira's custom fields, which are mapped n Project Integration Screen (Projects > Project/Release/Cycle > Integration).
→ Permission required: Users with Integration “Modify” rights can enable/disable the sync.
| Info | ||||
|---|---|---|---|---|
| ||||
|
Steps:
1. Go to Integrations and open the Integrations tab.
2. Turn the Sync fields to Reports option “On” for the integration to sync mapped external custom fields to QMetry Insights. By default, the option remains “Off”.

.png?version=1&modificationDate=1676099048816&cacheVersion=1&api=v2&height=250)
Step 5: Integrate Jira Project with A QMetry Project
...
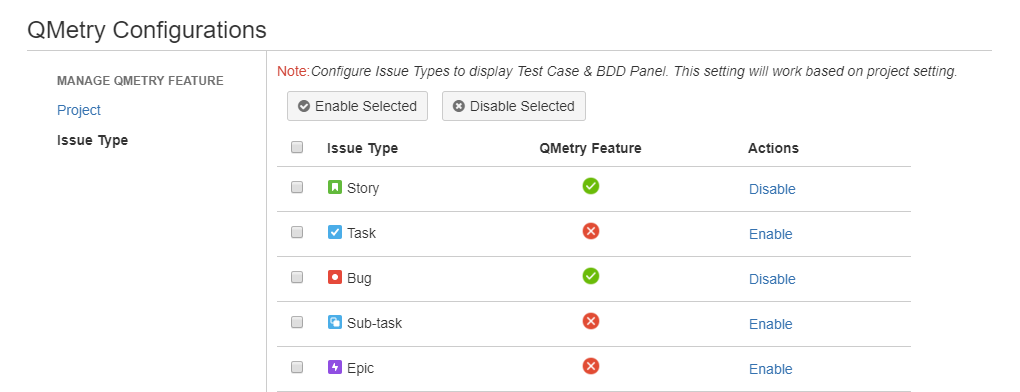
Step 6: Enable QMetry Test case and BDD panels for Jira Projects
Configuration to enable QMetry Test case and BDD panels for Jira Projects. This change is required for all Jira projects that are to be integrated with QMetry.
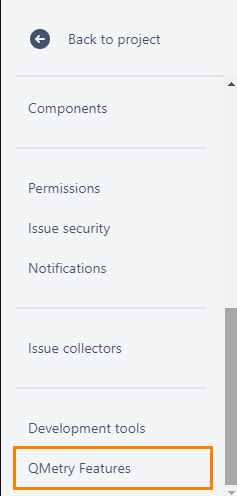
1. Log into Jira and open your Project. Click on Project Settings on the sidebar.
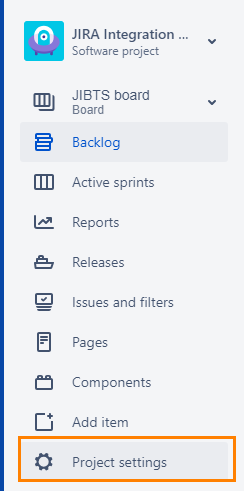
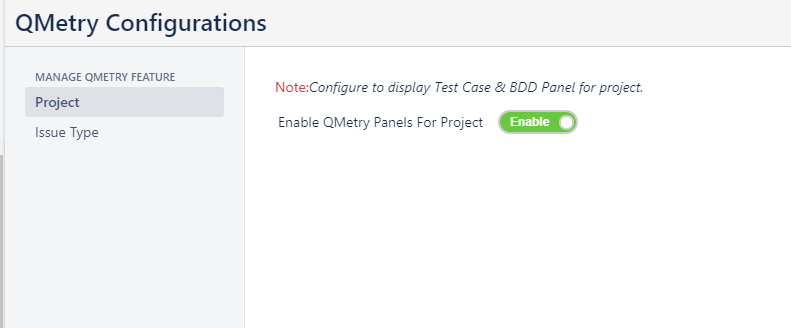
BDD and Test Case panels are enabled only for the current project (and not all other projects having the same project type).
...