| Table of Contents |
|---|
Introduction
| Expand | ||
|---|---|---|
| ||
QMetry allows users to import test cases from an Excel file to create new test cases as well as to make changes in existing test cases in QMetry. QMetry supports the seamless import of Excel files with multiple sheets. The import can create a new folder per sheet name and import the test cases accordingly. For example, there are 30 sheets in an Excel file with test cases on each of the sheets. The import will create 30 folders as per the Excel sheet names and import test cases into them if the Create folder with sheet name option is selected before starting the import. Two separate Test Case templates are available to download and set your test case data within the corresponding template file:
The import wizard helps users import test cases directly into particular folders/sub-folders of the Test Case modules under the current project. The test cases are imported in the same order that of in the Excel file, following are some of the reasons behind it. 1. In the organization test cases are ordered to produce the most efficient test flow. Hence, the QA Manager wants that the test case import order match the excel sheet. 2. A user creates a series of test cases in a logical order to be tested, one after another- and after creating those test cases the users want to import the excel file with the test cases in the same order as they are found in the excel file allowing them to be easily added to a test suite in the same order. Best Practice: To carry out the import process smoothly, it is recommended that the size of file you upload should be maximum of 10 MB. |
...
Download either of the Test Case templates provided below. Fill the template with your test case data that you want to import into QMetry. Enter comma separated values for fields with multi-lookup list. Make sure that all the columns in the Excel file have a corresponding field in QMetry. Majority of the columns in the Excel file should map to one of the QMetry fields. If there are columns which don’t really map, define those additional fields as Manage Fields in QMetry (Administration > Manage Fields).
...
| Expand | ||
|---|---|---|
| ||
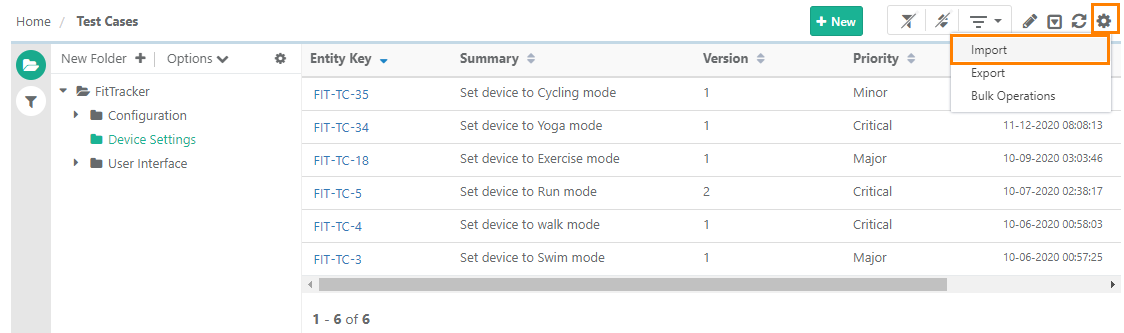
1. Go to the Test Cases module. 2. Click on the cog icon
It opens Test Case Import wizard showing the following three stages of import:
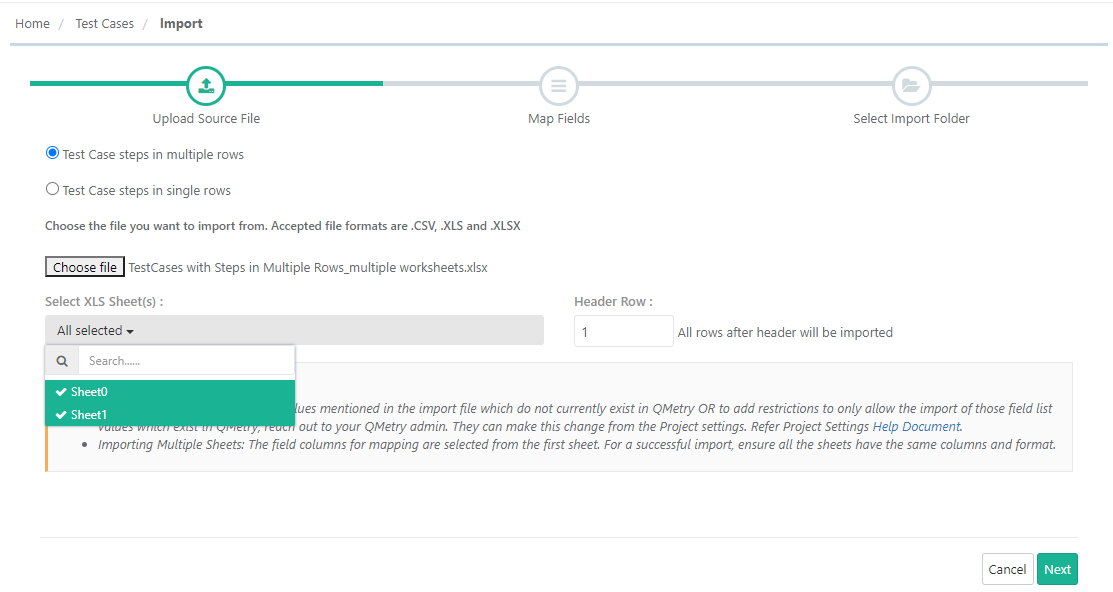
Step 1: Upload Source File Before uploading the Excel file to import, define the format of test steps that exist in the file. Select either of the following options:
Note: If you receive an “Invalid file” message while uploading some Excel file formats, then open the file in Microsoft Excel and save the file as type “Excel Workbook” with a different name. After that try to import the newly created file. Browse the file and upload it to import. The file name appears adjacent to the Choose File button.
→ Importing Multiple Sheets: The While importing multiple sheets, the field columns for field mapping are selected from the first sheet for the mapping purpose. For a successful import, ensure that all the sheets have the similar same columns and their format.
Click Next.
Step 2: Mapping the Fields The fields in the Excel file are displayed under Sheet Field and fields in QMetry are displayed under QMetry Field. Map the fields from Excel and QMetry one by one. Fields mandatory to map are displayed in red color.
Removing mapping between fields If you think that the mapping was not carried out properly, then you can remove the mapping of fields one by one. To remove a single field mapping, open the QMetry Field list and select the "Select QMetry Field" option on it. Step 3: Save Mapping Before moving on, save your map so that if you ever need to re-import more test cases using the same file format you can avoid replication of the same mapping process. You can save the field mapping using the Save Map button and giving the map a name. The saved mapping is available to use the next time when you go for mapping the fields. Just select the mapping name and automatically mapping will be done based on the mapping criteria set in the selected mapping. It will apply the same mapping as you did. Additional Mapping Options
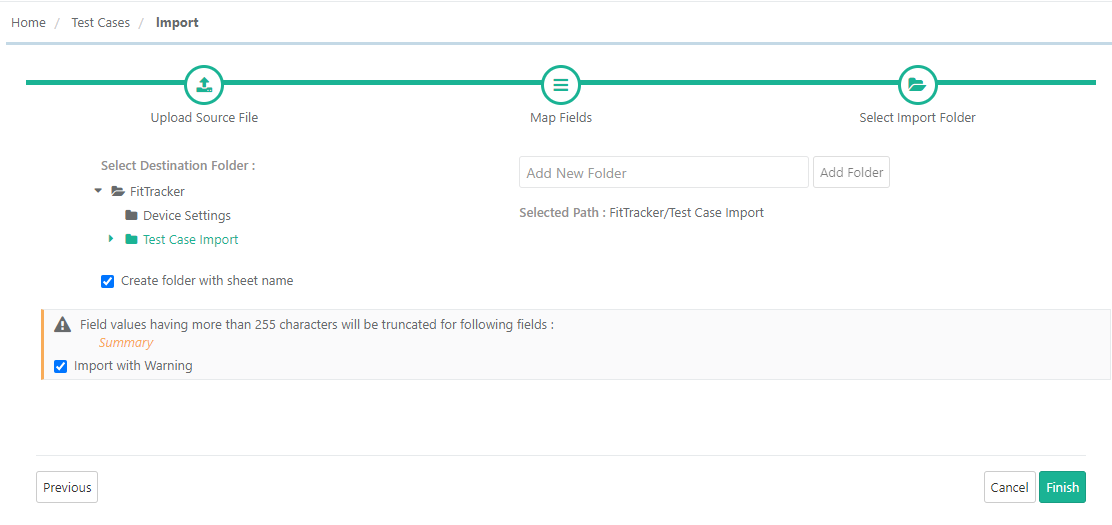
Click Next to proceed towards the next step for import. Step 4: Selecting Import Folder Select a destination folder on the tree in which you want to import the test cases. The “Selected Path” shows the destination folder path as soon as you select the folder on the tree. If you want to create a new folder under the tree, then first select the location on the tree, enter the folder name in the text box and then click on the Add Folder button.
Click Finish to complete the Import wizard and start the import process.
After completing the import wizard process, the import will be scheduled. The Import Scheduled message will pop up and you can view the progress in the notification window on the application header. This allows scheduled imports to run in the background and allows the user to continue with their other work.
Refer to Notification Window for Import Progress for more details. |


...