QMetry Custom Dashboard access depends upon the package you have purchased as mentioned in the table below.
...
Custom Dashboard provides an easy-to-use interface that allows you to organize custom gadgets in sequence. Dashboard generates "best-fit" charts for the report data automatically. User Users can add System/ Custom gadgets or Shared gadgets in to the Dashboard.
A Custom Dashboard can be either Public or Private. By default, it remains private when created.
...
Note: QMetry Custom Dashboard module will only be visible if the user has the View rights for Report. Similarly, users can make any changes within the module Users can create, edit and clone dashboards only if they have the Modify rights for Report.
...
You can perform the following operations on Custom Dashboard.
Table of Contents
Add Dashboards
You can add new custom dashboards and also modify them as per requirement. A Custom Dashboard can be created using system gadgets, custom gadgets or shared gadgets.
Steps:
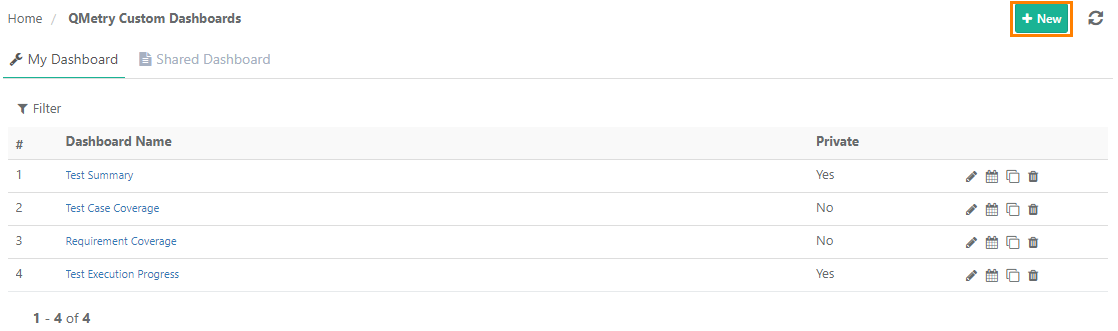
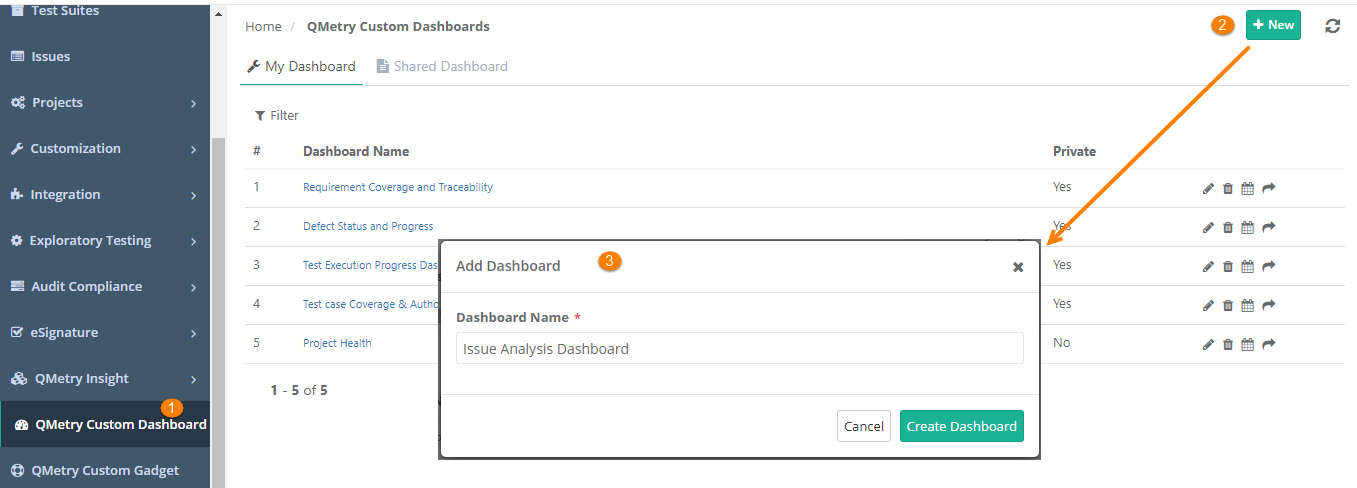
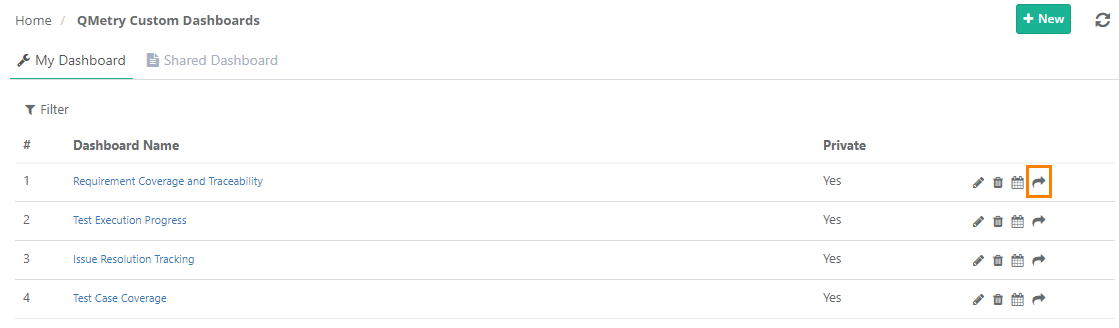
1. Click on QMetry Custom Dashboard on the navigation bar at left. The QMetry Custom Dashboards screen opens.
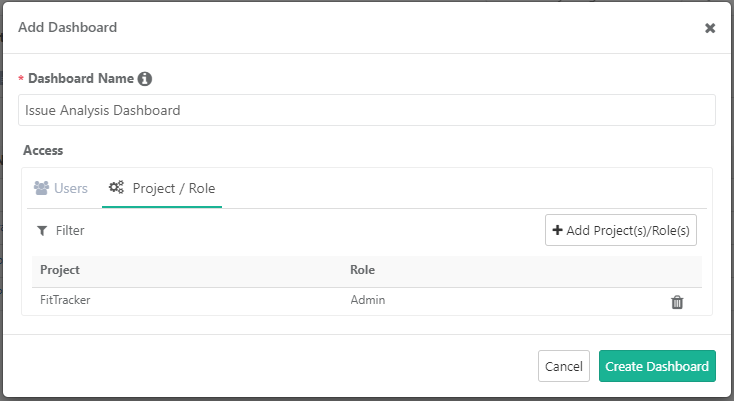
2. On the My Dashboard tab, click on the New button to add a new dashboard.
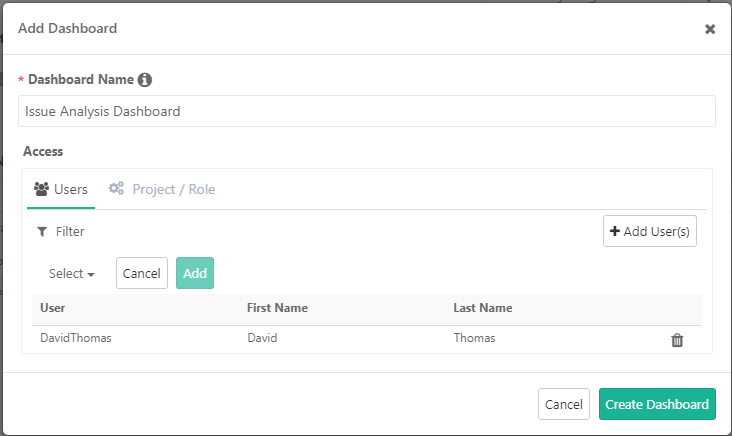
3. Give Dashboard Name, allow users access to the dashboard, and click Create Dashboard. QMetry Custom Dashboard can not be created with a duplicate name. Users can still access the shared Dashboard which may hold the same name as users' own Dashboard.
The Read more about Share Dashboard in the following sections.
On clicking on the Create Dashboard button, the list of available Gadgets are is displayed. A Custom Dashboard can be created using system gadgets, custom gadgets, or shared gadgets.
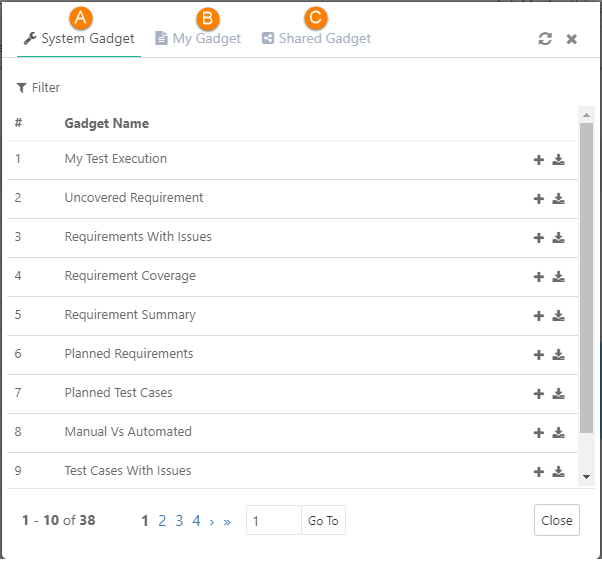
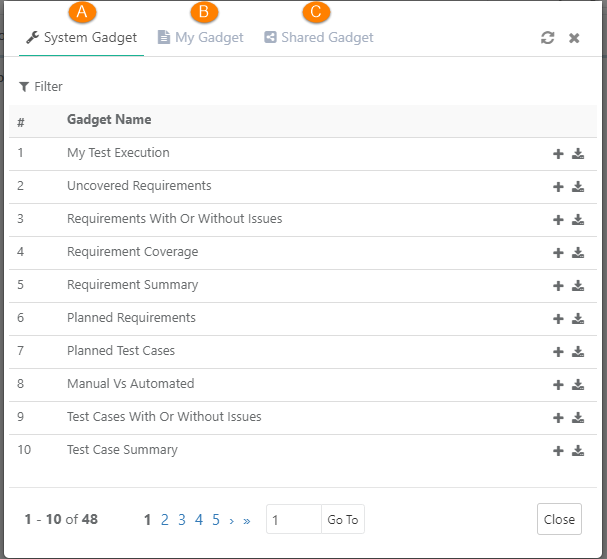
(A) Add System Gadgets: QMetry System Reports are available to add as System Gadgets. These predefined gadgets can neither be edited or nor be deleted. System Gadgets can be drilled down to view the details in tabular form and download it.
...
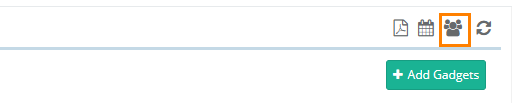
To add more gadgets to an existing dashboard, open the dashboard and click on the Add Gadgets button. Click on the + icon to add that gadget to the dashboard. You can add multiple gadgets at a time. You can also add a single gadget multiple times.
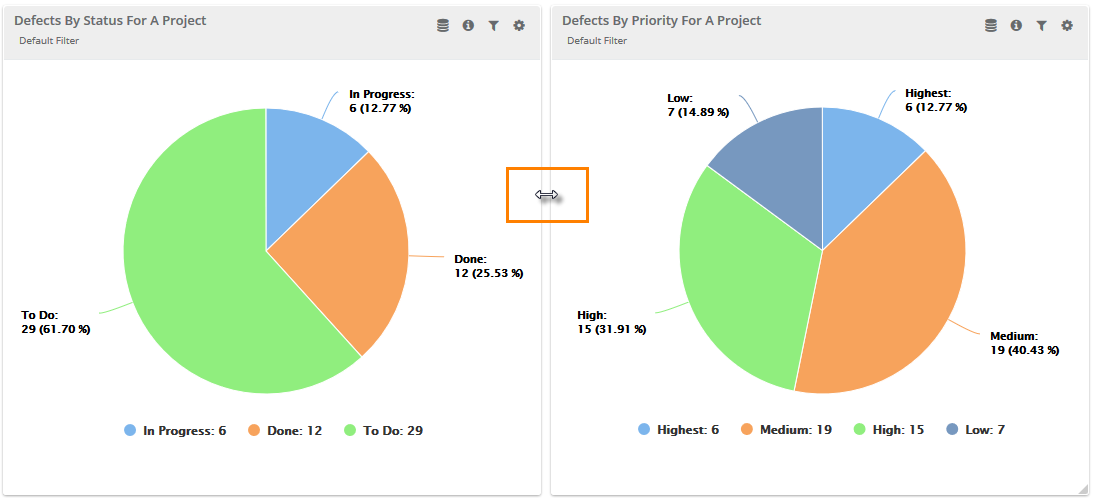
Rearrange and Resize Gadgets in Dashboard
- Rearrange Gadgets: Drag the gadget by holding the mouse key on the gadget header and drop it to your preferred place on the dashboard.
- Resize Gadgets: Drag the edges to resize the gadgets on dashboard. You can organize the gadgets by maximizing/minimizing their size.
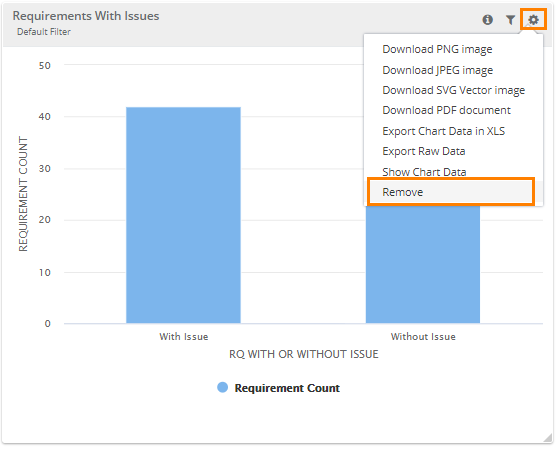
Remove a Gadget
You can remove a gadget from the dashboard. If the dashboard is shared with other users, then the removed gadget will also not displayed in that shared dashboard.
To remove a gadget from dashboard, click on the Cog icon for the gadget and select Remove.
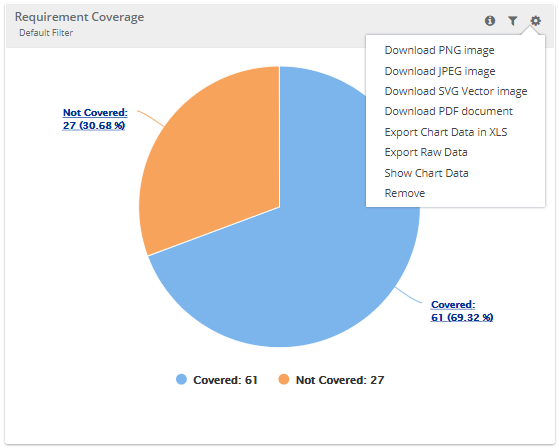
Download Gadget
You can download gadget with multiple options - if it is a graph, then you can download it in PNG, JPEG, SVG, PDF formats and if it contains tabular data, then you can export the data in XLS.
To download a gadget from dashboard, click on the Cog icon for the gadget and select required download option.
Filter Gadgets
The values/criteria provided during query execution will be saved and will be applied as default to the gadget added on dashboard. If you change the filter and that dashboard is shared with other user then the filter will also change for that user.
1. To modify the default filter, click on the Filter  icon for the gadget.
2. Select/deselect filter values and click Apply.
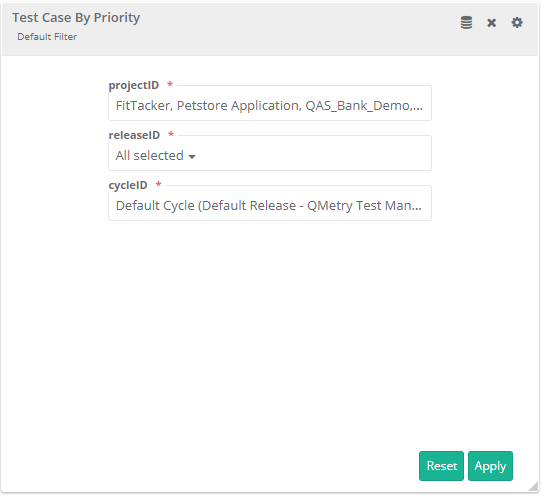
3. You can also tag the applied filter to identify it.
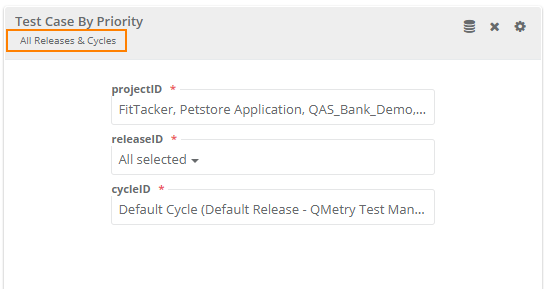
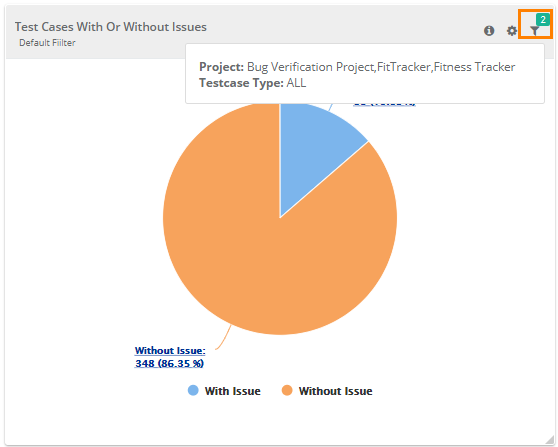
The filters you applied on the gadgets can be view on hover over the filter icon in the gadget. The filter count is also displayed.
Edit Gadgets
Click on the cog icon of a gadget and click Edit. Refer to Edit Gadget for more details.
Schedule Custom Dashboard
The custom dashboard can be scheduled one time/recurring as email notifications. To schedule outbound emails at particular frequency, click on the Schedule button for the report that you want to share. The report details will be sent in PDF to recipients as per defined schedule.
The scheduler  icon is provided on the Dashboard list screen with individual dashbord and on the dashboard header when it is open. Clicking on this icon opens a screen with the two tabs:
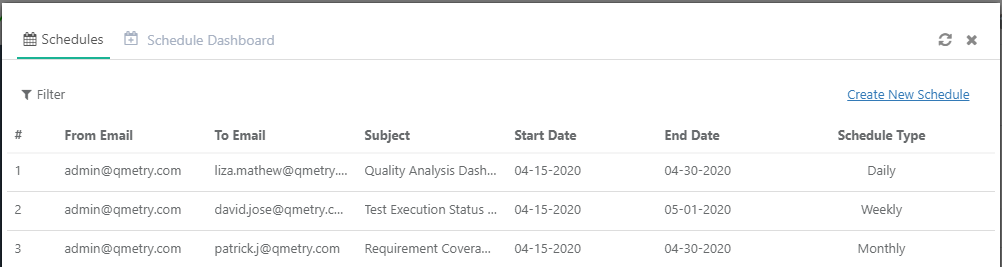
- Schedules: The tab shows list of scheduled dashboard.
- Schedule Dashboard: Template to schedule dashboard.
Scheduling Custom Dashboard
The report details will be sent in PDF to recipients as per defined schedule. The email recipients could be outside QMetry instance.
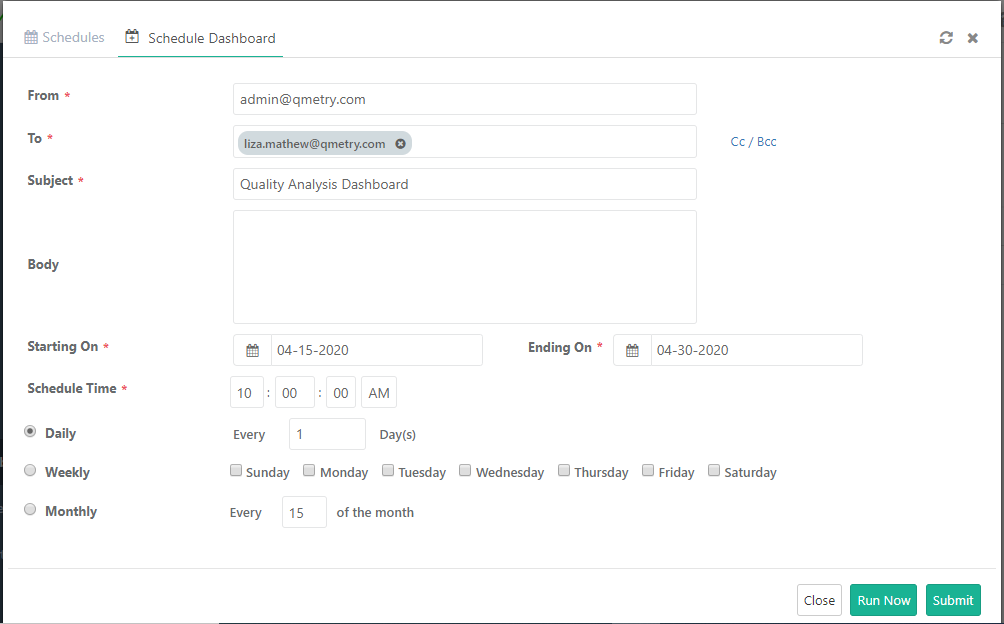
Open the Schedule Dashboard tab. It opens a template to fill the details and schedule the emails to be sent as notifications along with the report in PDF.
Note: Only Graphical reports can be emailed using Schedule Report. For tabular reports users have to export them individually in CSV and share them with the recipients.
Once you are done entering the details, click Submit to schedule the report. The report will be sent as per the set date, time and frequency.
To send the email instantly, click Run Now.
Scheduled Dashboards
Once you schedule the dashboards they will be displayed on the Schedules tab. You can edit and delete the schedules by clicking on the respective icons.
Export Dashboard to PDF
To export the dashboard gadgets to PDF, open the Custom Dashboard and click on the PDF  icon on the header.
Note:
...
You can also export all the custom dashboard gadgets through the API call. Refer to the link - API for Reports for more details.
Share Dashboard with Users
...
Share Dashboard with Users
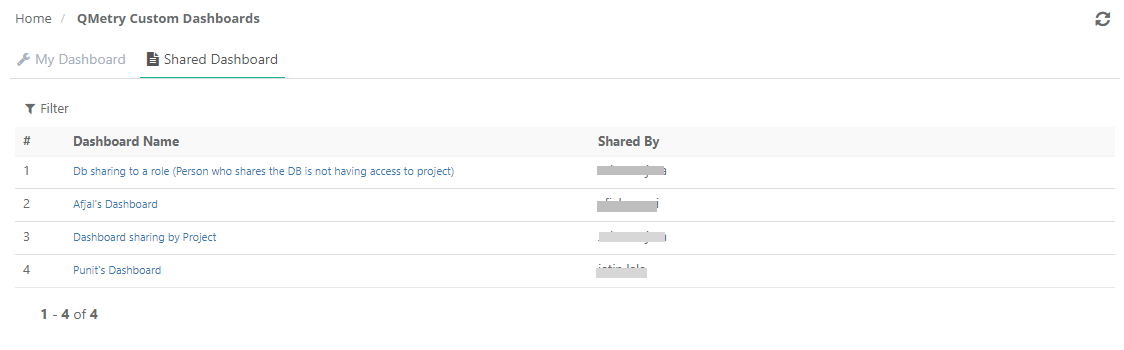
The user who has created a dashboard can share it with other users. Once a dashboard is shared, the user, with whom it has been shared, will be able to see that dashboard under the Shared Dashboard tab.
...
- The shared dashboard can be exported in PDF as a whole. Individual gadgets on the dashboard can be exported into CSV.
You can share the dashboard from -
(A) My Add Dashboard tabscreen
(B) Dashboard Page header
You can share dashboard from -
(A) My Dashboard tab
(B) Edit Dashboard screen (Edit icon is available on My Dashboard tab and Dashboard Page header
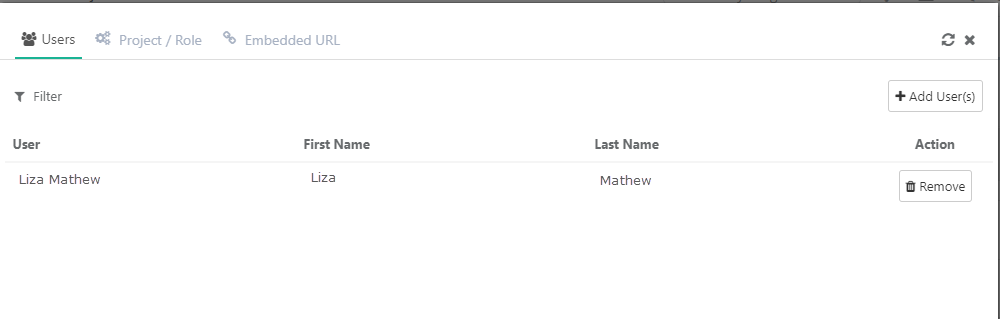
On clicking the Share Dashboard icon (either (A) or (B) above), the screen opens with three tabs on it : Users, Project/Role and Embedded URL.
Users: To share the dashboard to individual users, open the Users tab.
Project/Role: To share the dashboard to a particular role/project, open the Project/Role tab.
Users can share dashboards with other users. A dashboard can be shared to -
...
Users
...
A particular Project
...
)
(A) Add Dashboard screen
Share Dashboard by Adding Users
User The user who has created the dashboard can share it with other users using the user names in QMetry.
1. Open the Share Dashboard icon (either (A) or (B) above), the screen opens with two tabs on it: Users , and Project/Role and Embedded URL.
2. Click Add Users.
3. Select users on the drop-down list with whom the dashboard is to be shared.
4. Click Add.
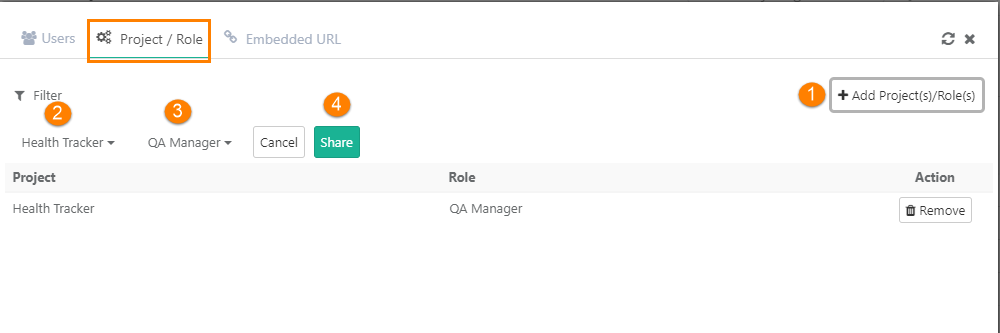
Share Dashboard by Project/Role
User The user who has created the dashboard can share it with other users by specifying either Project, Role or the combination of Project & Role in QMetry.
Open the Share Dashboard icon (either (A) or (B) above), the screen opens with three tabs on it: Users, Project/Role and Embedded URL.
Click Add Projects/Roles.
Open the Filter menu to see two filters: A. Project B. Role.
Once a dashboard is shared with the user, they will be able to see that dashboard under the Shared dashboard tab.
...
A shared dashboard will be read-only for the users with whom it has been shared. Users will not be able to apply or view any filters in the reports of the dashboard.
Unshare a Dashboard
The owner of the dashboard can stop sharing a dashboard for any user or a group of users by clicking on the Remove button from Share option > Project/Role tab > Remove.
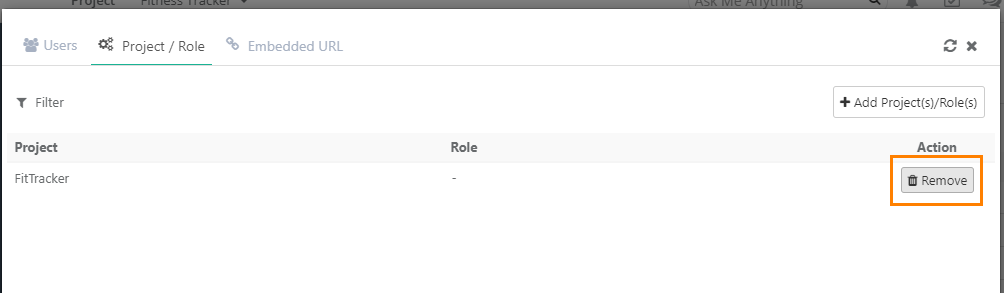
Remove selected Project/Role: The removal will discard the dashboard access to the users who were falling under the selection criteria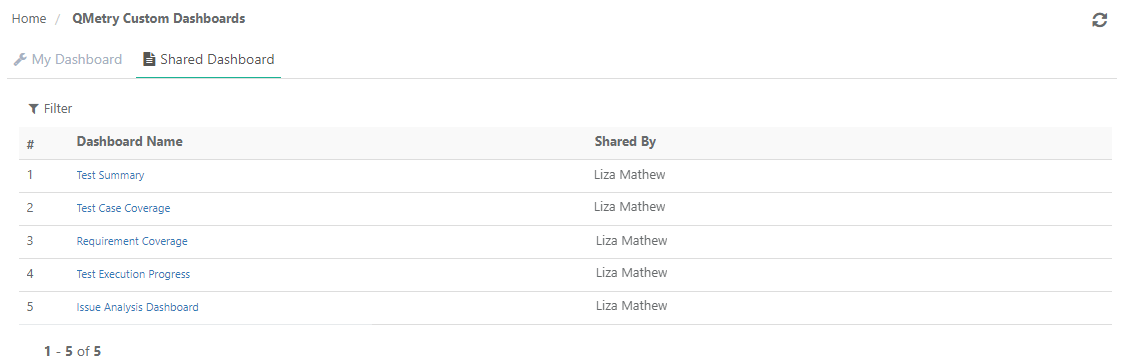
(B) Edit Dashboard screen
The dashboard Edit icon is available on -
My Dashboard tab
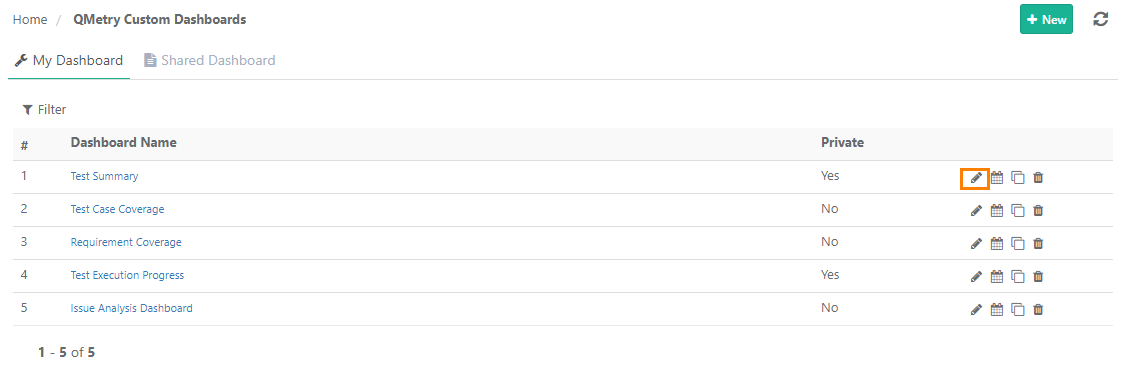
Dashboard Page header

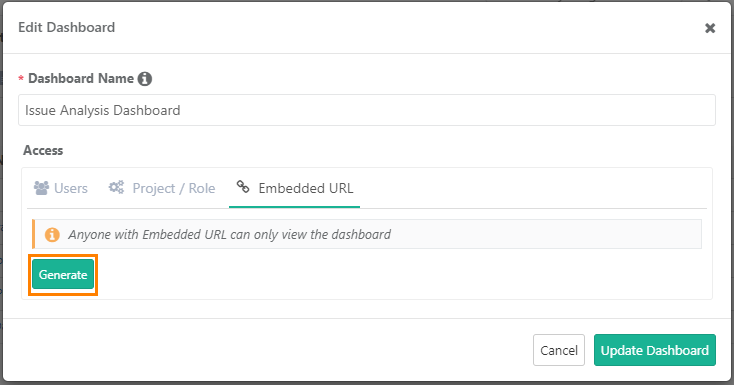
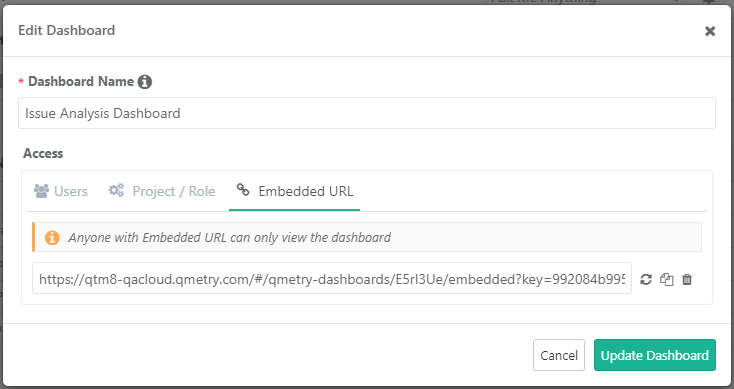
On clicking the Edit Dashboard icon, the screen opens with three tabs on it: Users, Project/Role and Embedded URL.
Users: To share the dashboard to individual users, open the Users tab.
Project/Role: To share the dashboard to a particular role/project, open the Project/Role tab.
Share Dashboard through Embedded URL
...
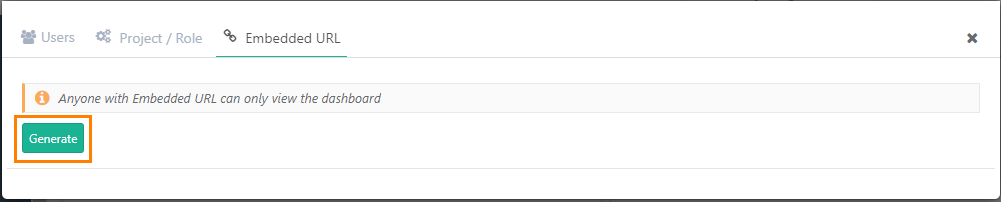
Generate Embedded URL:
1. Open the Share Dashboard icon (either (A) or (B) above), the Edit Dashboard screen. The screen opens with two the three tabs on it: Users, Project/Role and Embedded URL.
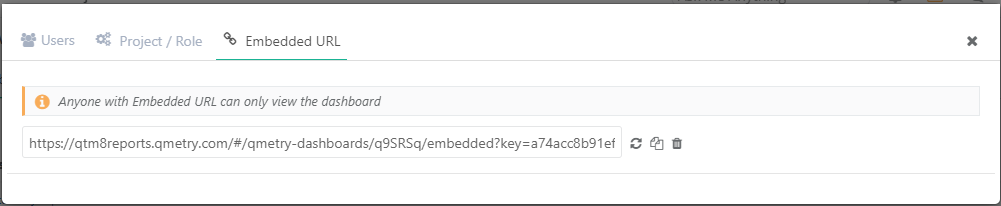
2. Open the Embedded URL tab.
...
The URL remains valid and active unless it is regenerated or deleted.
- Regenerate Embedded URL: If the user who has generated the Embedded URL wants to change the link, they can click on Refresh button to regenerate the link. This will make the older link disabled or invalid.
- Delete Embedded URL: If the purpose of Embedded URL is over, then the user who has created the dashboard can delete the URL by clicking on the Delete icon.
- Copy Embedded URL: To copy the generated Embedded URL, click on the Copy icon.
Use Embedded URL in Confluence
Refer to /wiki/spaces/QPro/pages/2830205621 for more details.
Unshare a Dashboard
The owner of the dashboard can stop sharing a dashboard for any user or a group of users from the Edit Dashboard screen.
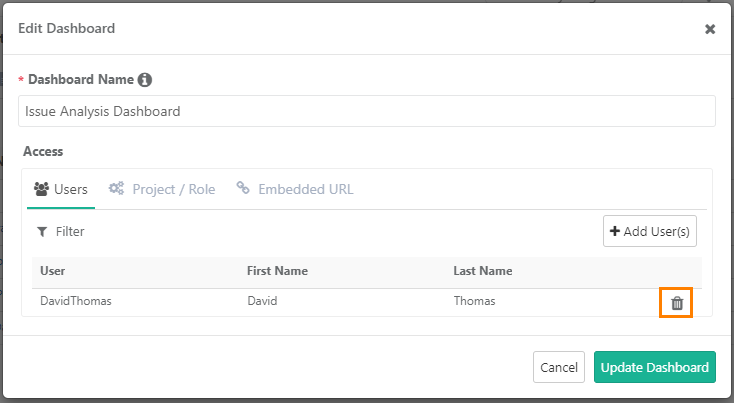
To unshare a dashboard with individual users -
- Open the Edit Dashboard screen and open the Users tab.
- Click on the Delete icon for the user to stop sharing the dashboard with that particular user.
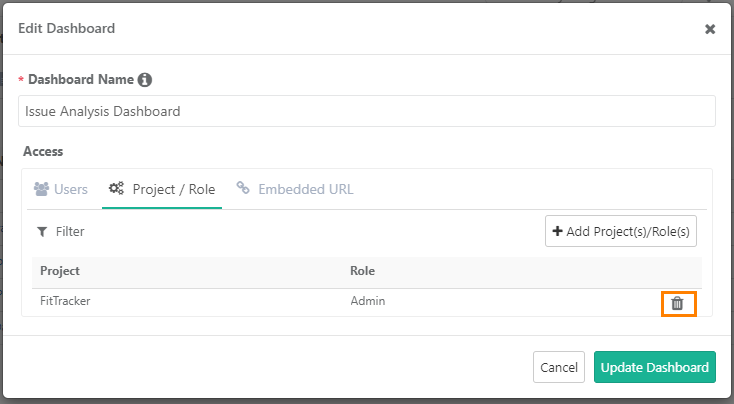
To unshare a dashboard with a group of users -
- Open the Edit Dashboard screen and open the Project/Role tab.
- Click on the Delete icon for the Project/Role to stop sharing the dashboard with users holding the role in that particular project. The removal will discard the dashboard access to the users who were falling under the selection criteria.
Clone a Dashboard
Users can copy the existing custom dashboard with all the gadgets added to it. The feature is useful when users want to reutilize the created dashboard with gadgets under it and add more details as per the new specifications. With the Clone Dashboard feature, users do not have to repeat the process of creating a new dashboard and searching and adding the same gadgets all over again. For example, users can create the same dashboard to be shared with Business leadership with different data points.
The dasboard is cloned with allocated rights. You can still modify the permission assigned to users/roles for the dashboard.
Permissions Required: Users with Report "Modify" rights for the project can create a clone of the dashboard.
Steps:
1. Click on QMetry Custom Dashboard on the navigation bar at left. The QMetry Custom Dashboards screen opens.
2. On the My Dashboard tab, click on the Clone icon to create a clone of an existing dashboard.
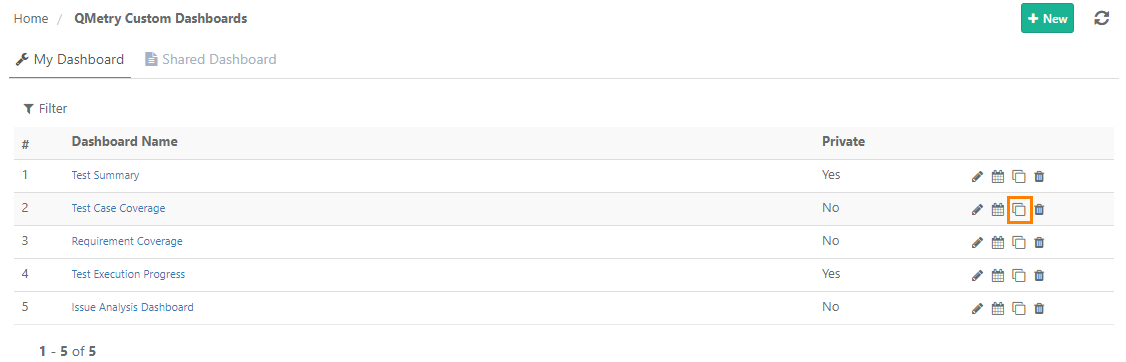
You can also access the Clone icon from dashboard header after opening the individual dashboard.

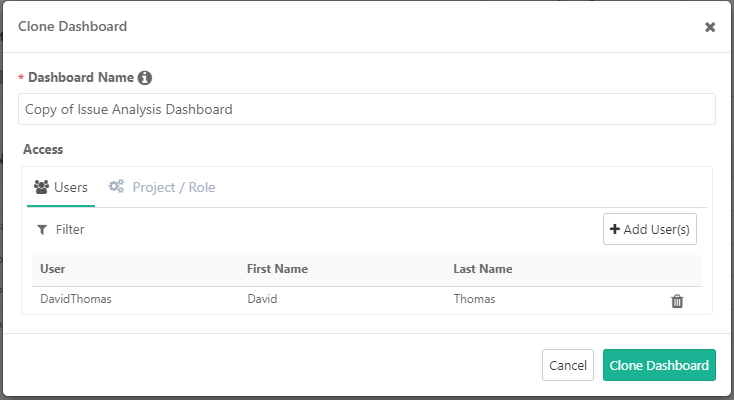
The Clone Dashboard screen opens.
3. You can add/remove Users/Roles to whom you want to share the cloned dashboard.
4. Click on the Clone Dashboard button.
Rearrange and Resize Gadgets in Dashboard
- Rearrange Gadgets: Drag the gadget by holding the mouse key on the gadget header and drop it to your preferred place on the dashboard.
- Resize Gadgets: Drag the edges to resize the gadgets on the dashboard. You can organize the gadgets by maximizing/minimizing their size.
Remove a Gadget
You can remove a gadget from the dashboard. If the dashboard is shared with other users, then the removed gadget will also not be displayed in that shared dashboard.
To remove a gadget from the dashboard, click on the Cog icon for the gadget and select Remove.
Download Gadget
You can download a gadget with multiple options - if it is a graph, then you can download it in PNG, JPEG, SVG, PDF formats and if it contains tabular data, then you can export the data in XLS.
To download a gadget from the dashboard, click on the Cog icon for the gadget and select the required download option.
Filter Gadgets
The values/criteria provided during query execution will be saved and will be applied as default to the gadget added on the dashboard. If you change the filter and that dashboard is shared with other users then the filter will also change for that user.
Refer to Add QMetry Custom Dashboard Embedded URL in Confluence 1. To modify the default filter, click on the Filter icon for the gadget.
2. Select/deselect filter values and click Apply.
3. You can also tag the applied filter to identify it.
The filters you applied on the gadgets can be view on hover over the filter icon in the gadget. The filter count is also displayed.
Edit Gadgets
Click on the cog icon of a gadget and click Edit. Refer to Edit Gadget for more details.
Schedule Custom Dashboard
The custom dashboard can be scheduled one-time/recurring as email notifications. To schedule outbound emails at a particular frequency, click on the Schedule button for the report that you want to share. The report details will be sent in PDF to recipients as per the defined schedule.
The scheduler icon is provided on the Dashboard list screen with the individual dashboard and on the dashboard header when it is open. Clicking on this icon opens a screen with the two tabs:
- Schedules: The tab shows a list of the scheduled dashboard.
- Schedule Dashboard: Template to schedule dashboard.
Scheduling Custom Dashboard
The report details will be sent in PDF to recipients as per the defined schedule. The email recipients could be outside the QMetry instance.
Open the Schedule Dashboard tab. It opens a template to fill in the details and schedule the emails to be sent as notifications along with the report in PDF.
Note: Only Graphical reports can be emailed using Schedule Report. For tabular reports, users have to export them individually in CSV and share them with the recipients.
Once you are done entering the details, click Submit to schedule the report. The report will be sent as per the set date, time and frequency.
To send the email instantly, click Run Now.
Scheduled Dashboards
Once you schedule the dashboards they will be displayed on the Schedules tab. You can edit and delete the schedules by clicking on the respective icons.
Export Dashboard to PDF
To export the dashboard gadgets to PDF, open the Custom Dashboard and click on the PDF icon on the header.
Note:
- Only Graphical reports can be exported through the Export as PDF option. For tabular reports, users have to export them individually in CSV.
- All reports are exported in the UTC time zone.
You can also export all the custom dashboard gadgets through the API call. Refer to the link - API for Reports for more details.
Refresh/Sync Custom Dashboard
...