| Table of Contents | ||||||||||
|---|---|---|---|---|---|---|---|---|---|---|
|
...
Users can define Agent Alias and add tasks for QMetry Agent. On activation, the Agent requests for tasks through QMetry. QMetry Automation Agent checks the schedule(s) set in QMetry and executes the automation tests. Users can run Custom Command regardless of Automation Framework or Build Framework. The automation agent can be run immediately or can be scheduled on future dates and times. Users can schedule recurring execution of commands. The execution will be scheduled automatically as per set occurrences. QMetry Agent keeps running the jobs accordingly.
...
Note: Automation-related rights are assigned from Customization > Roles. The logged-in user will have access rights over the Agent feature accordingly.
...
| Expand | ||||||||||||
|---|---|---|---|---|---|---|---|---|---|---|---|---|
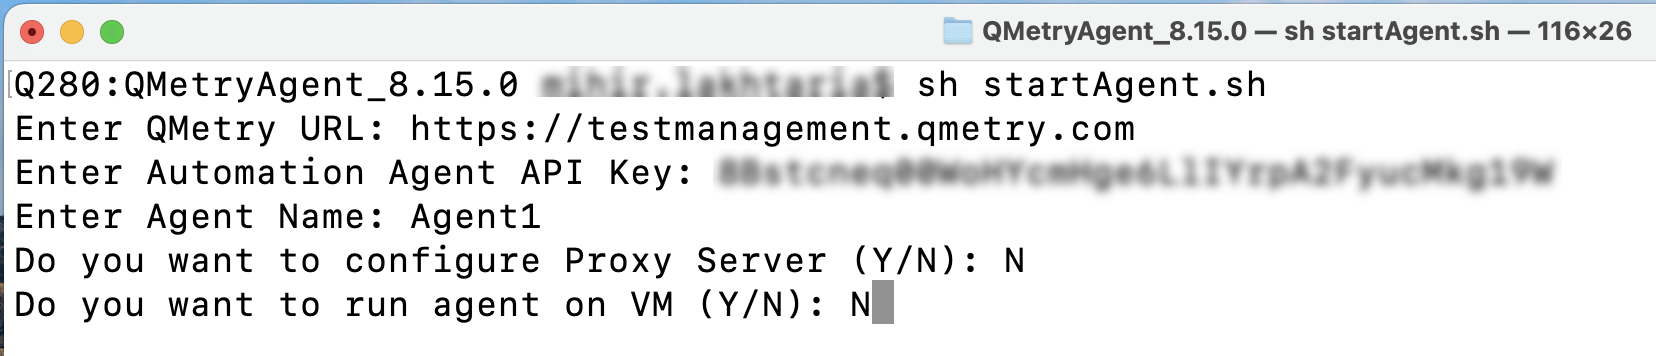
Step 1. Go to Integration > Automation Agent. Step 2. Expand the Download & Run Agent section, if not expanded already.  Step 3. You will find Agent download and installation instructions on the screen. Download QMetryAgent.zip by clicking on the Automation Agent download link. 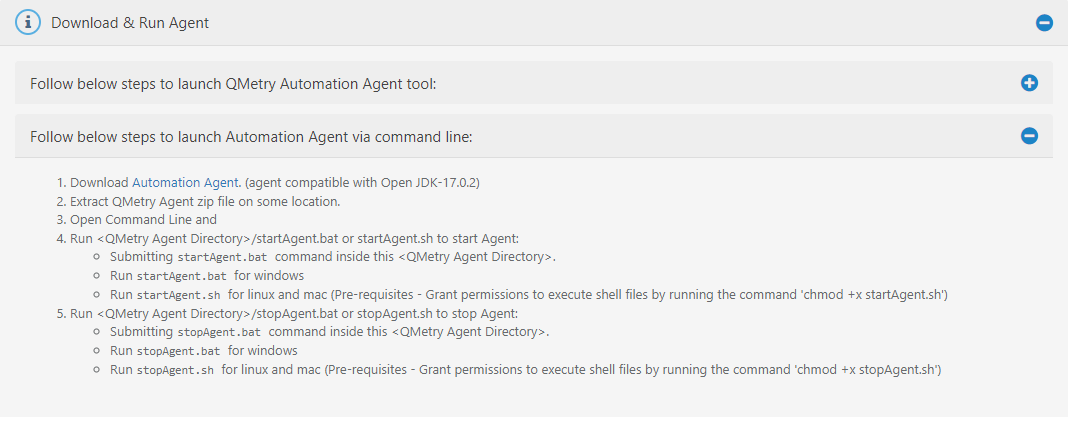 Note: The downloaded zip file will be in the format QMetryAgent_A.B.C.zip where A.B.C will be the version of QMetry Agent. Step 4: Copy the QMetryAgent_A.B.C.zip file to your server. Navigate to the directory where this file is kept and extract the zip file on the computer drive. 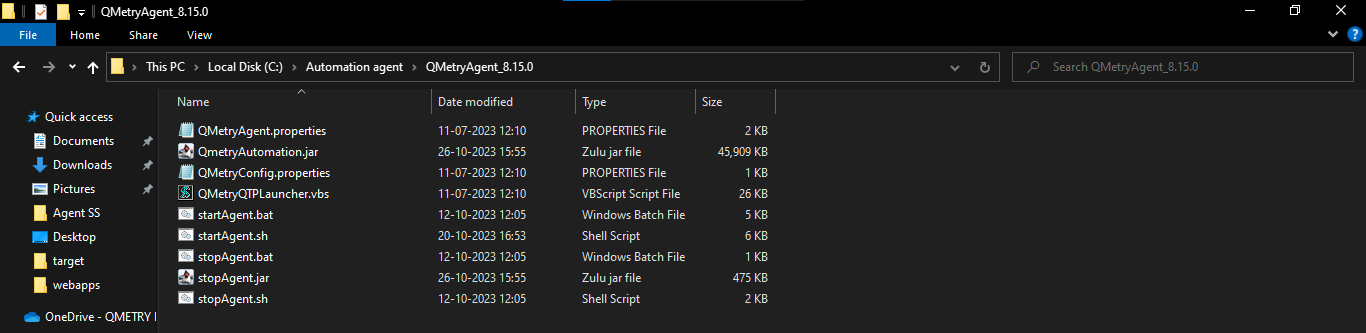 Step 5: Execute the following command to run the agent.
The QMetry Automation Agent command line wizard will open. Users need to fill required information.
Note: This will enable the agent to start automatically when the system reboots. To stop the running agent: Run stopAgent.bat by clicking on it. → Interval Time: By default, the interval time between two scheduled jobs will be 180 seconds. You can change the time by modifying the "Interval" parameter in the QMetryAgent.properties. The minimum value should be 60 seconds. |

...
| Expand | ||||||||||||
|---|---|---|---|---|---|---|---|---|---|---|---|---|
| ||||||||||||
Step 1. Go to Integration > Automation Agent. Step 2. Expand the Download & Run Agent section, if not expanded already.  Step 3. You will find Agent download and installation instructions on the screen. Download QMetryAgent.zip by clicking on the Automation Agent download link.  Note: The downloaded zip file will be in the format QMetryAgent_A.B.C.zip where A.B.C will be the version of QMetry Agent. Step 4: Copy the QMetryAgent_A.B.C.zip file to your server. Navigate to the directory where this file is kept and execute the following commands.
Note: Replace A.B.C with the actual version of QMetryAgent.  Step 5: Execute the following commands.
Note: Replace A.B.C with the actual version of QMetryAgent.  Step 6: Run the agent by executing the following command. The QMetry Automation Agent command line wizard will open. Users need to fill required information.
 Note: This will enable the agent to start automatically when the system reboots. To stop the running agent:
→ Interval Time: By default, the interval time between two scheduled jobs will be 180 seconds. You can change the time by modifying the "Interval" parameter in the QMetryAgent.properties. The minimum value should be 60 seconds. |
...
| Expand | ||||||||||
|---|---|---|---|---|---|---|---|---|---|---|
| ||||||||||
You can schedule the agent to run on a future date and time. Scheduling executions helps testers set execution schedules to be run one after the other.
|
Manage Schedule
Go to Integration > The Manage Schedule option for the agent allows users to alter the scheduled time and execution commands for the run later or recurring triggers.
Steps
1. Go to Integration > Automation Agent.
2. On the Registered Agents section, click on the Manage Schedule button to manage the schedule details of that particular Agent.
...
Edit Schedule: Click on the Edit Schedule button to Edit the schedule.
Delete Schedule: Click on the Delete Schedule button to Delete the schedule.
...
Edit Schedule:
1. Click on the Edit icon for the scheduled agent that you want to update.
...
The Edit Schedule Agent screen opens.
2. Make required changes in the schedule of the agent.
3. Click Update.
...
Delete Schedule:
Go to Integration > Automation Agent.
On the Registered Agents section, click on the Manage Schedule icon.
Click on the Delete icon to delete the schedule.
View QMetry Automation Agent History
...