Table of Contents
Steps to Uninstall Add on: "QMetry Jira Integration"
- Login in Jira with Admin Credentials. Administrator login is required to be able to uninstall the add-on from Atlassian Marketplace.

After login into the JIRA, in the right-sidebar, Go to the
 Jira settings option.
 - In the Jira Settings, go to the Apps.
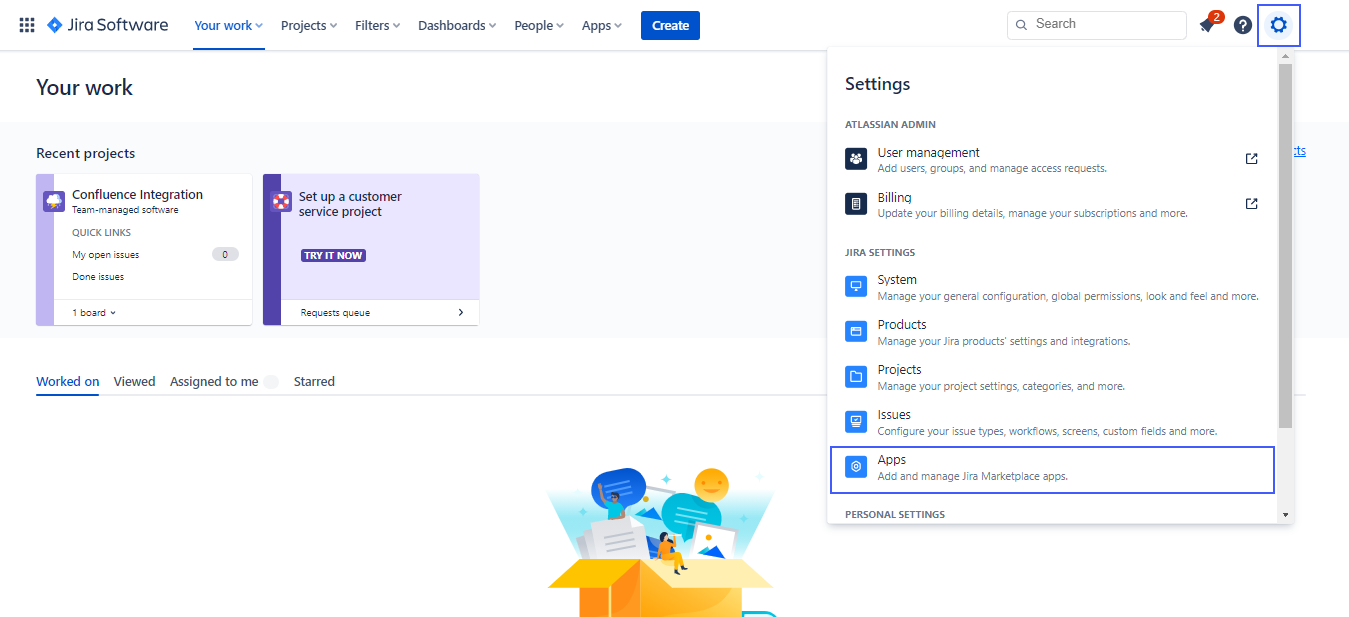
- In the Jira Settings, go to the Apps.
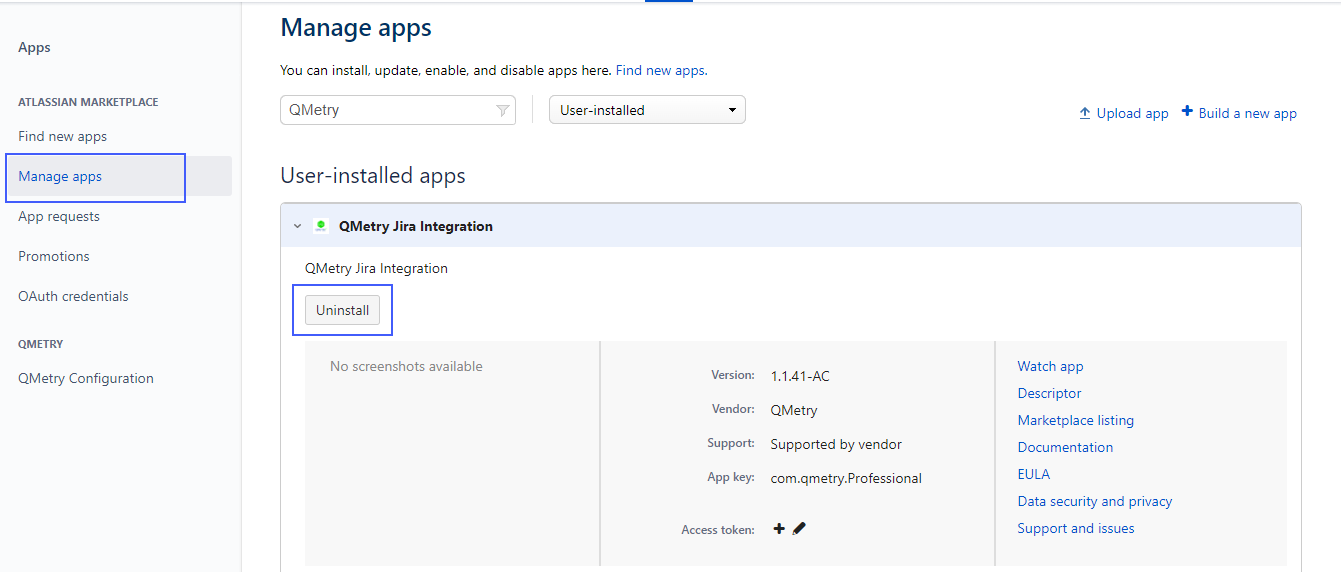
- In the Apps section, there is an option - "Manage apps". Search for the Add-On "QMetry Jira Integration". Click on Uninstall button to completely remove the add-on from the Jira.

Steps to Install Add-on: "QMetry Jira Integration"
Install "QMetry Jira Integration" add-on in your Jira Instance. It is free to download.
- Login in Jira with Admin Credentials. Administrator login is required to be able to install the Add-On from Atlassian Marketplace.
After login into the JIRA, in the right-sidebar, Go to the
 Jira settings option.
 - In the Jira Settings, go to the Apps.
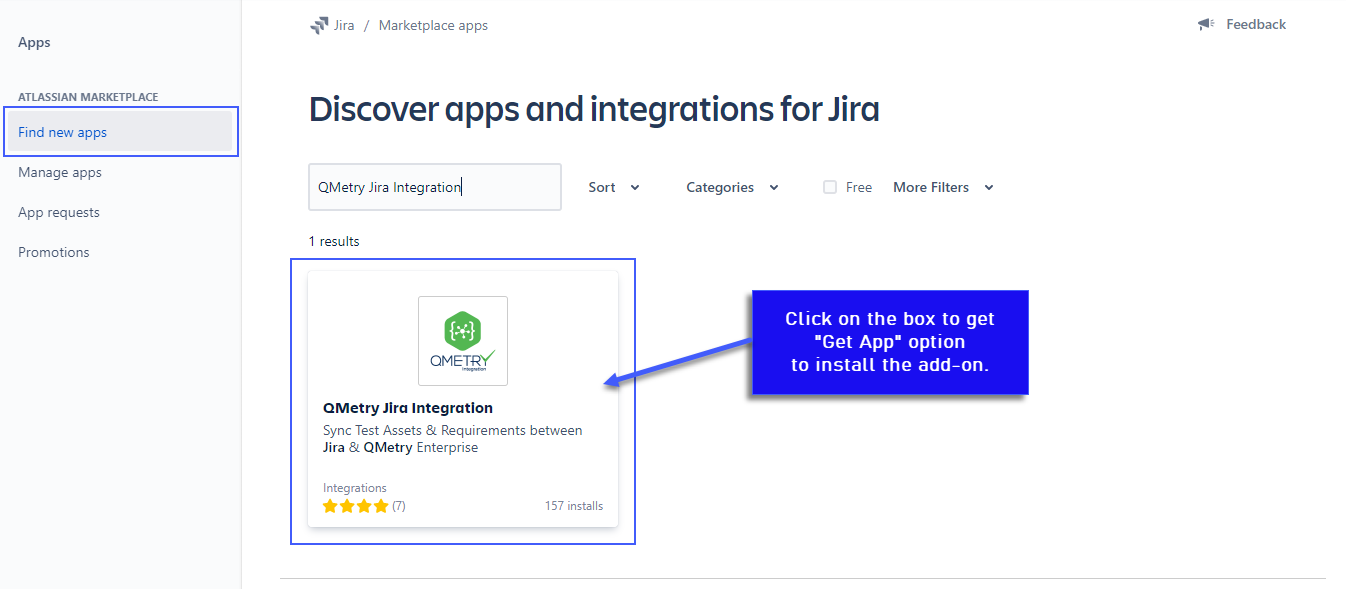
- In the Apps section, there is an option - "Find new apps" to find and install the add-on from the Marketplace. Click on the "Get App" button to install the add-on "QMetry Jira Integration".

Configuring JIRA add-on with QMetry Admin
- After installing the "QMetry Jira Integration" Add-On follow the below steps to configure Jira with QMetry. The integration requires QMetry admin credentials. Go to Jira settings
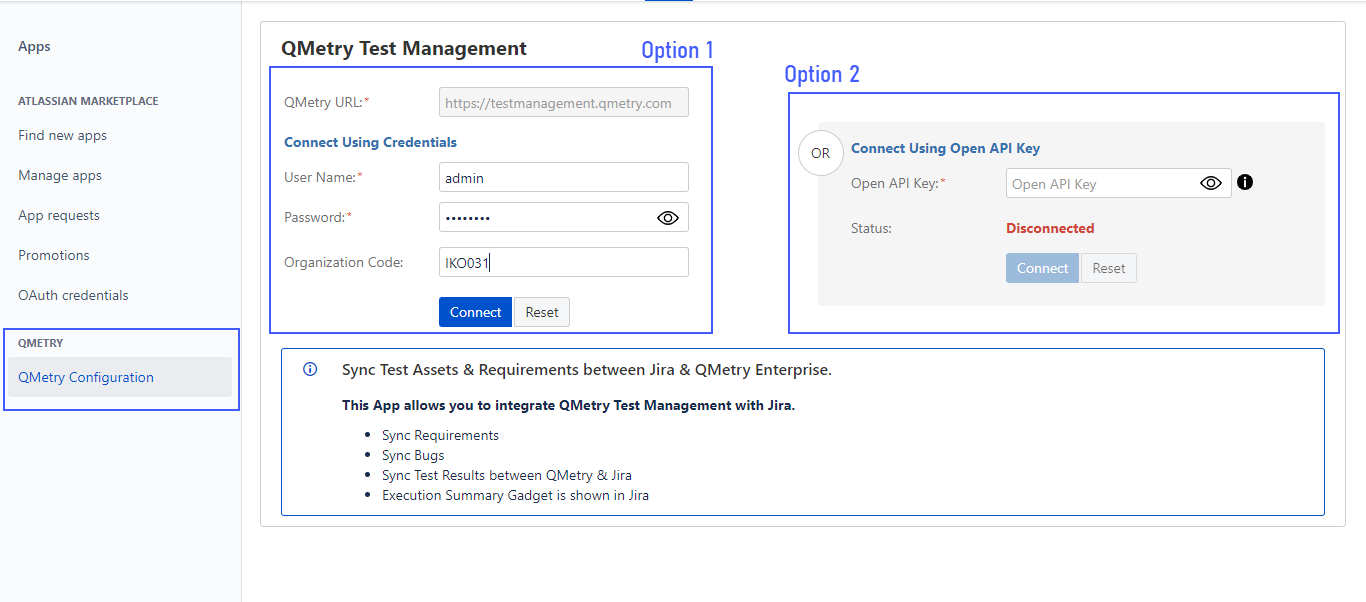
There are two options available to configure Jira with QMetry:A. Connect using Credentials: The integration should be done with QMetry admin credentials.
B. Connect using Open API Key: If you have an integration package enabled then only you will get the Open API key. You can use the Open API key for any user to connect QMetry with Jira.
(1) Go to Jira settings >> (2) QMetry Configuration
(2) >>>> (3) Enter QMetry URL (4) Enter QMetry Admin Credentials and
OrgCode (3) >> Test & Save (4)
After clicking on the "Test" button, it gives a success message if the provided credentials and OrgCode are correct.
After clicking on the "Test" button, click on the "Save" button to save the details. After saving, it shows a successful message.
Organization Code OR Open-API Key from QMetry (Integration → Open API) >> (5) Connect the configuration.
- After entering the valid credentials or valid Open API Key and clicking Connect, the Jira integration is established with QMetry.
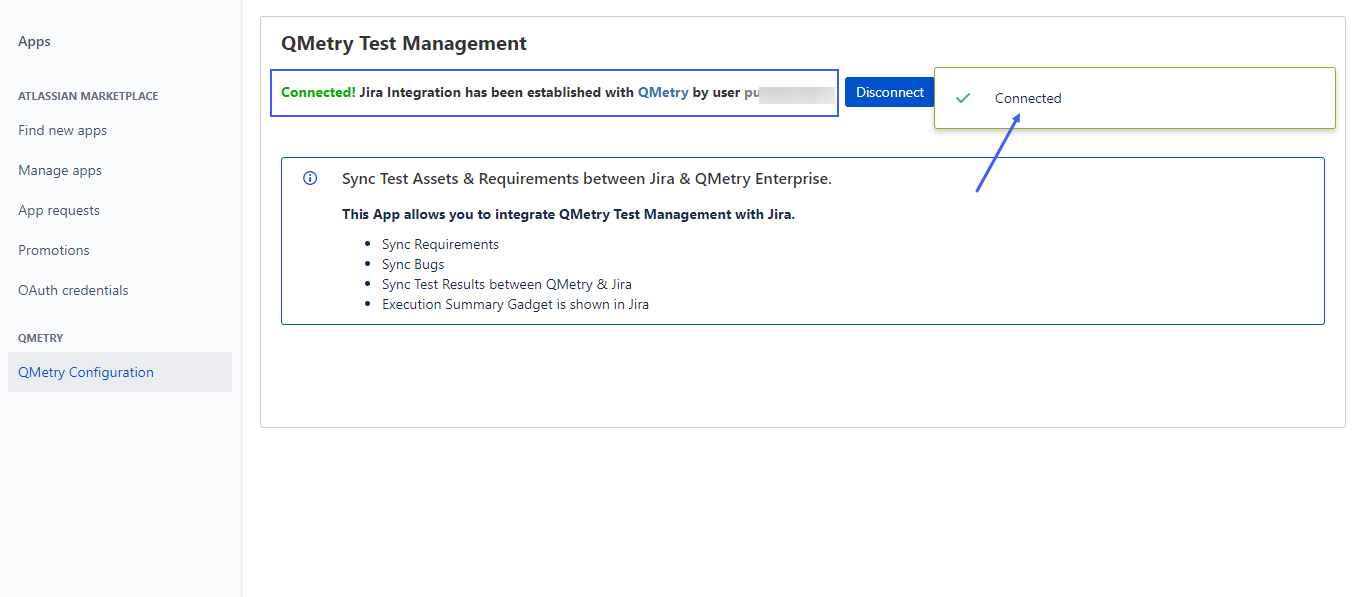
After the successful configuration with the above steps, QMetry "Integration" section will start showing "JIRA" configured as below.
Login to QMetry >> Integration >> Jira Integration >> Verify Integration URL and Status as "Active"
...
Steps to Sync mapped Jira Project & Issue Type with QMetry Project
...
Users can view the status of Jira Integration-related tasks like Jira Integration and Syncing with Jira on the notification window on the application header. This allows scheduled Jira tasks to run in the background and allows users to continue with their other work.
Expand Integration on the sidebar menu and select Jira Integrations > Jira Scheduler Status
...
The Associated QMetry Projects column will show QMetry projects configured with this integration.
