| Table of Contents | ||
|---|---|---|
|
...
Select the field you want to apply filter on. The filter parameter is added as Advanced Filters. Apply filter as per your requirement.
User can click on the '+' icon and select the field Entity Key to search test suites using comma separated entity IDs (i.e without specifying the complete Entity Key as described below)
...
Rich Text:
A. Use of Rich Text Editor allows users to apply text formatting for Description and reduces chances of missing important details. Users can also insert images, hyperlinks and tables to the field.
Image Upload Support in Rich Text Editor:
Users can add images to any Large Rich Text Editor field (System as well as Custom) up to 1 MB. The images can be uploaded in the fields (A) by browsing and uploading the image (B) by inserting the image through the URL. It is applicable to all the fields across QMetry wherever rich text editor is available.
Notes:
→ The supported file formats to upload are jpg, jpeg, png, and gif.
→ The maximum file size should be 1 MB (for images uploaded through browsing).
B. Users can paste the html/xml content into the Source editor of the "Large Text" field type and it auto-renders the code to show the text outputs on the screen.
Use Case: An organization is using Rich text for Description field, in which they copy-paste the content from their source in html/xml format.
Click on the Edit icon at the right to open the source editor.
Note: To enable rich text editor, the Enable Rich Text parameter should be enabled for the Project (Projects > Project / Release / Cycle). Refer to Enable Rich Text Editor for more details.
...
- Click on Link Test Cases from Requirement button.
- A pop-up window with list of Requirements opens. The window displays only those requirements which have test cases associated with them.
- Filter the requirements based on your scope of testing. Use filter option based on Summary, Version Id, Priority, Labels, Releases, Cycles, Created By, and Folder path.
- Select the requirements.
- Click on the Link Selected Requirement button.
- Test Cases associated with the selected requirements will be linked to the test suite.
...
- Select test cases that you want link to the test suite. The Filters will populate only for the selected Project. Additional filters Labels and Folder path are added for the ease of searching.
- You can select a particular Version of the test case to link to the test suite. Test Cases with multiple versions are expandable.
...
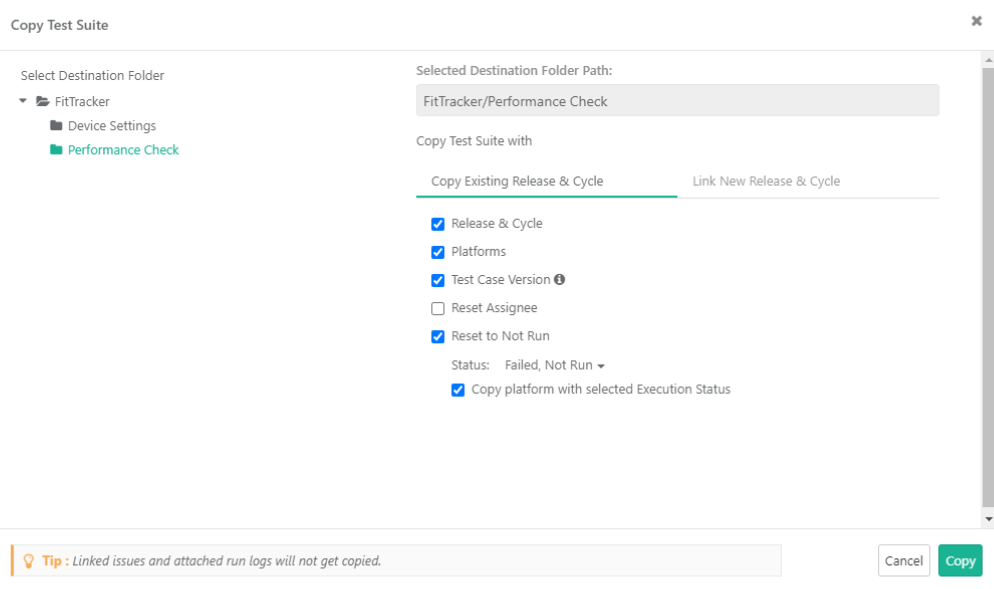
(A) Copy Existing Release & Cycle
Select a folder on the tree in which the test suite is to be copied.
The check boxes - Platforms, Release & Cycle and Reset to Not Run are selected by default.
- Platform: Select the check box to copy the associated platform with the test suite that is being copied. This option is selected by default; however, some companies who change platforms frequently between releases may opt to deselect this from time to time to avoid adding a lot of test runs with platforms that are not needed for testing.
Use Case: A QA manager of a mobile app company needs to copy the regression suite from the last release to the new test cycle; however, they do not want to copy platforms because the mobile devices they needed to test against have changed.
- Release & Cycle: Select the check box to copy Release & Cycle associated with the test suite. This option is selected by default. If you do not want to copy the releases and cycles associated with the test suite, then deselect this option.
- Test Case Version: It will sync test cases with the latest unarchived version of the test case that is associated with the test suite. This allows users to easily create regression suites using latest unarchived version of test cases. If you want to use the preserved version of the test case then deselect this option.
- Reset to Not Run: Select the check box to reset the test case execution status to Not Run.
- Reset Assignee: Select the check box to reset the Assignee.
- Execution Status: On the Execution Status drop-down, select the Execution Status of test cases you prefer to copy the test cases of.Copy platform with selected Execution Status: Users can copy Platforms based on selected Execution Status above. Only those platform will be copied which has test case with selected execution status. The check box is enabled on selecting the Execution Status. Select the check box to copy platforms which has test cases with selected status run.
Use Case: While copying a test suite, testers want to copy only "Failed" test cases, and only the Platforms that have the failed test cases, so that while testing in a new sprint, they test only the failed test cases, on the platforms on which they have failed. They do not need other platforms to be copied.
(B) Link New Release & Cycle
...
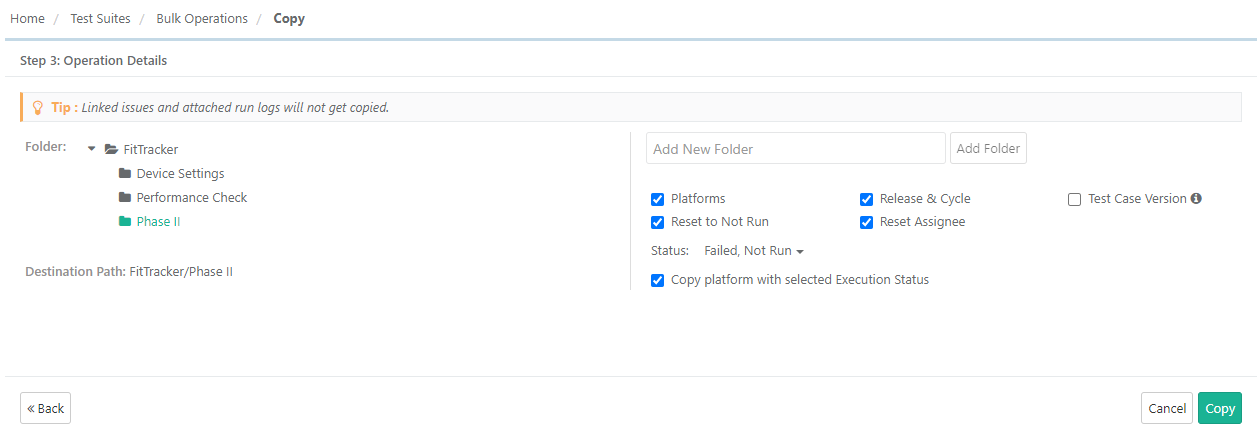
5. The following is the screen to select an existing folder/create a new folder and other options to copy test suites. Then click Copy.
Select a folder on the tree in which the test suite is to be copied.
The check boxes - Platforms, Release & Cycle and Reset to Not Run are selected by default.
- Platform: Select the check box to copy the associated platform with the test suite that is being copied. This option is selected by default; however, some companies who change platforms frequently between releases may opt to deselect this from time to time to avoid adding a lot of test runs with platforms that are not needed for testing.
Use Case: A QA manager of a mobile app company needs to copy the regression suite from the last release to the new test cycle; however, they do not want to copy platforms because the mobile devices they needed to test against have changed.
- Release & Cycle: Select the check box to copy Release & Cycle associated with the test suite. This option is selected by default. If you do not want to copy the releases and cycles associated with the test suite, then deselect this option.
- Test Case Version: It will sync test cases with the latest unarchived version of the test case that is associated with the test suite. This allows users to easily create regression suites using latest unarchived version of test cases. If you want to use the preserved version of the test case then deselect this option.
- Reset to Not Run: Select the check box to reset the test case execution status to Not Run.
- Reset Assignee: Select the check box to reset the Assignee.
- Execution Status: On the Execution Status drop-down, select the Execution Status of test cases you prefer to copy the test cases of.
- Copy platform with selected Execution Status: Users can copy Platforms based on selected Execution Status above. Only those platform will be copied which has test case with selected execution status. The check box is enabled on selecting the Execution Status. Select the check box to copy platforms which has test cases with selected status run.
Use Case: While copying a test suite, testers want to copy only "Failed" test cases, and only the Platforms that have the failed test cases, so that while testing in a new sprint, they test only the failed test cases, on the platforms on which they have failed. They do not need other platforms to be copied.
Moving Test Suites
You can move test suites in three ways -
...
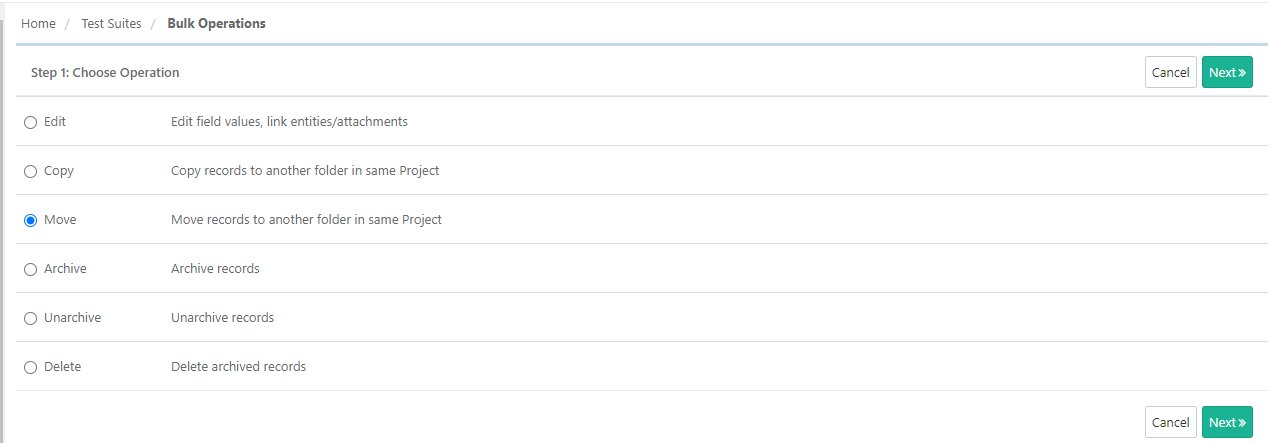
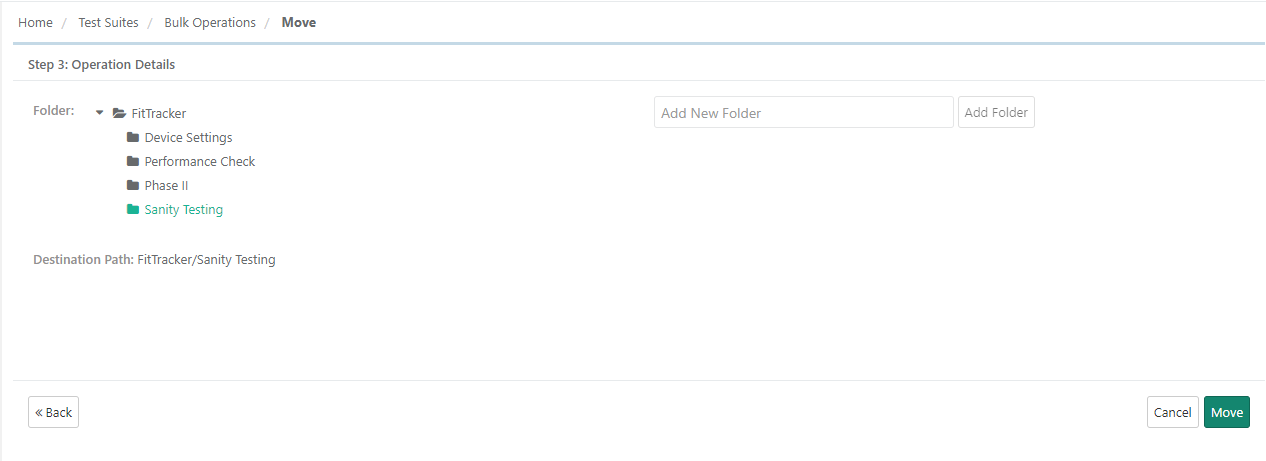
3. The Bulk Operations pop-up opens. Select the Move option and click Next.

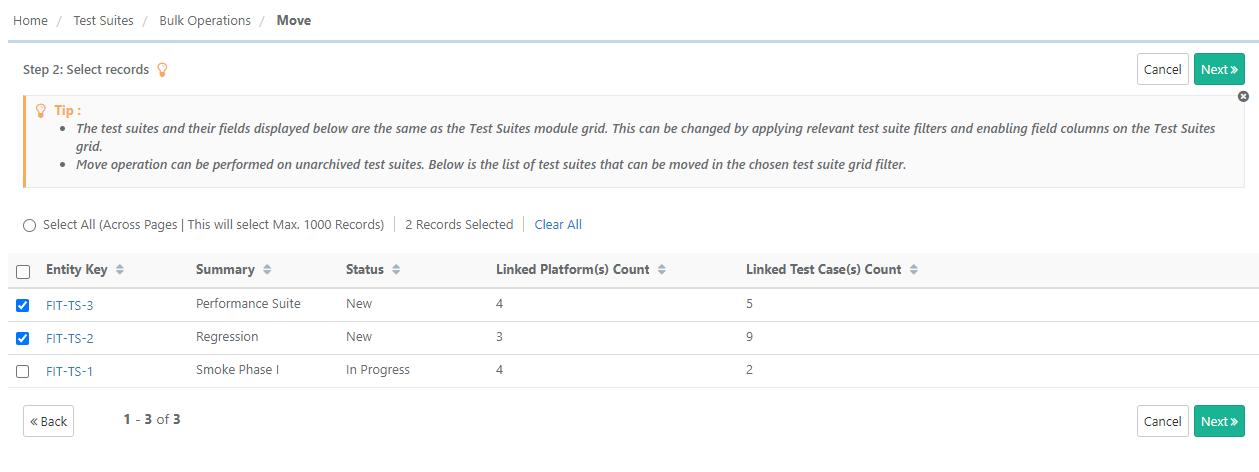
4. Select test suites to be copied and click Next.
5. Select the destination folder to move the selected test suites. You can also create a new folder to move the test suites. Click Move.
Deleting a Test Suite
You need to archive test suites before deleting them. The Delete option will be enabled only for archived test suites.
...