| Table of Contents | ||
|---|---|---|
|
...
Organize test cases into folders and sub folders
Add and Edit test cases manually
Import test cases from Excel and Jira
Execute test cases for ad-hoc testing
View status of individual test cases
Link relevant requirements to test cases
Test Case
...
Module UI
The Test Case module screen has the following UI.
...
Show More Columns: The ability to add columns in the view. If there are other columns that you think important to display on the module grid apart from the default view, then you can just select those columns to add them to the view.
Hide Columns: The ability to remove a column from view. If you do not want to include columns of less important on the module grid view, then remove column selection to hide those columns on the view.
Users can show/hide the Testing Type field in the Test Case module. If users want to use their own UDF instead of this field, they can hide it. The setting is provided in the Manage Fields section of the Customization module. Refer to Manage Fields for more details.
Re-arrange: The ability to arrange the columns in a different order through drag and drop functionality.
You can search for a particular column through the search box.
...
...
Options to select all columns, clear all selected columns and restore default column selection are provided on the Arrange Columns menu.
...
Resize Columns: The ability to expand and reduce column width. If you want to display the full content of the column, then you may want to change the column width. To change the width of one column, just place the cursor in between the columns and drag the boundary on the right side of the column heading until the column gains the width that you want.
...
Users can easily filter test assets by any system/custom fields on all module grids. It also helps users in carrying out bulk operations. Filters placed horizontally above the grid earlier, are now placed on the tree panel at left.
Testers can view details grid aligned with folder tree even when they are clicking a folder which is at the bottom.
Apply Filter
Users can apply basic as well as advanced filters to the records.
...
Note: To enable a rich text editor, the Enable Rich Text parameter should be enabled for the Project (Projects > Project / Release / Cycle). Refer to Enable Rich Text Editor for more details.
...
Testing Type: You can see this field on the test case detail page once a test case is created. The field shows how the test case was created in QMetry: Manual or Automated. If a test case is created through UI or imported from Excel, then it is identified as a manual test case. Test Cases that are created through Automation APIs are identified as Automated test cases. The Testing Type field remains read-only.
User Defined Fields: If UDFs are added for the test case module, then they are displayed on the Create Test Case screen and Test Case Details screen.
...
Note: To enable rich text editor, the Enable Rich Text parameter should be enabled for the Project (Projects > Project / Release / Cycle). Refer to Enable Rich Text Editor for more details.
...
User Defined Fields: If UDFs are added to the test step module, then they are displayed on the Test Steps section as columns beside the default fields of test steps.
...
2. Click in the cell to modify the steps. It opens the test case details page in editable mode.
...
It allows you to do inline editing in the field.
...
To create a new version of test asset, follow the steps mentioned below.
Edit Test Case Steps
Refer to the Edit entered steps section described earlier on this page.
Delete Test Case Steps
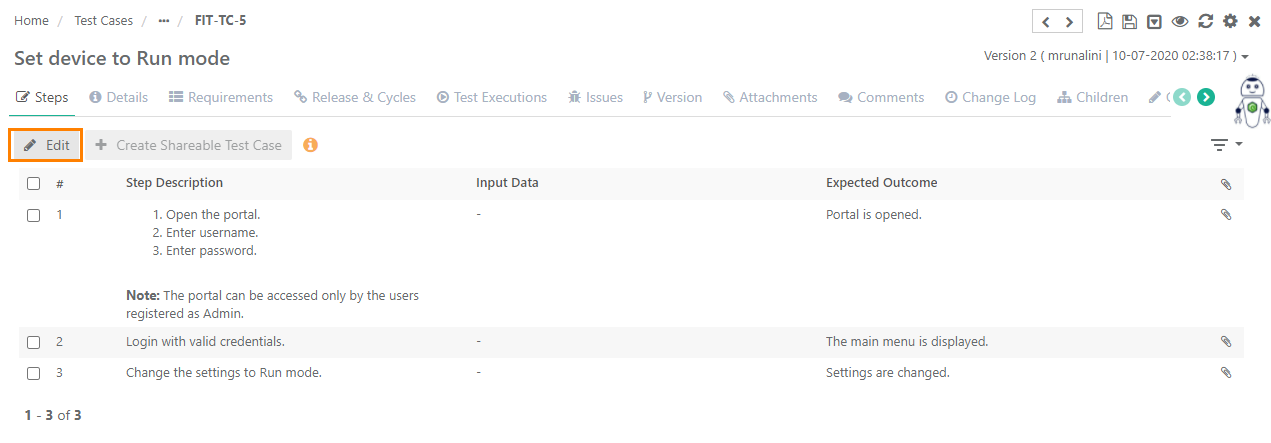
1. Go to the test case detail page.
2. Open the Steps tab and click on the Edit button.
...
A. Edit Test Step Inline
After clicking on the Edit button, you can edit the step details inline.
...
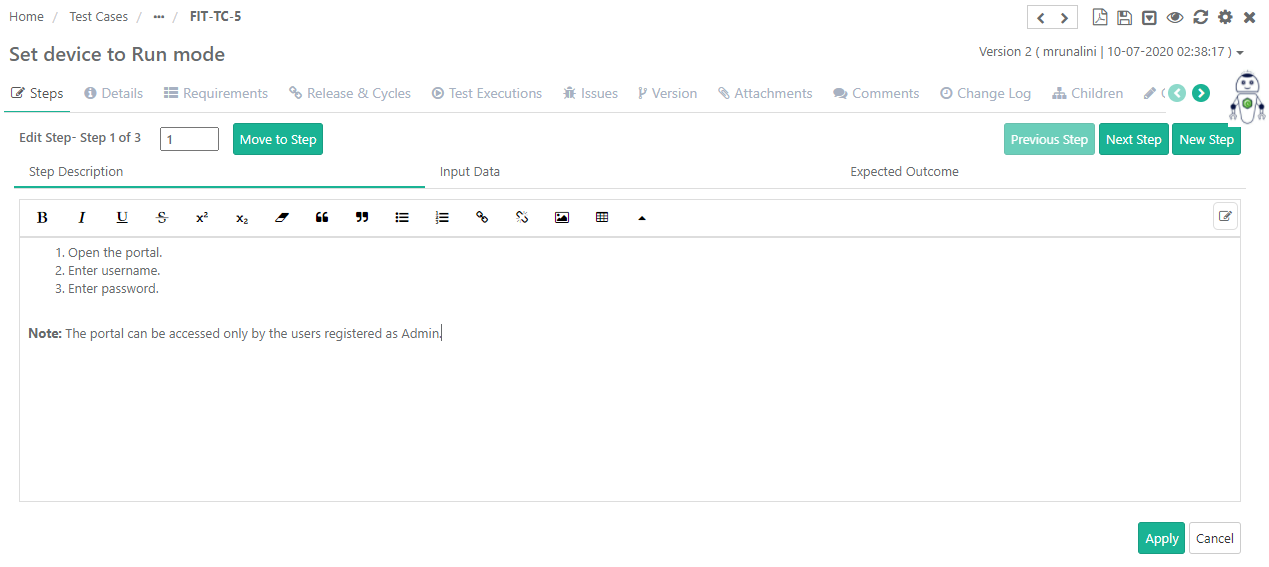
B. Edit Steps in Expanded View
After clicking on the Edit button, the Edit icons and Update button become visible. Click on the Edit icon for the step you want to edit.
...
The step section opens in the expanded view.
You can switch between Step Description, Input Data and Expected Outcome. To go back to the Step Description section, click on the Move to Step button.
You can use the Previous Step and Next Step buttons to navigate to the previous/next steps.
Use the New Step button to add a new step next to the current step.
Once you are done with editing the test step, click Apply to save the changes.
Delete Test Case Steps
1. Go to the test case detail page.
2. Open the Steps tab and click on the Edit button.
→ Delete/Remove a Single Test Case Step
...
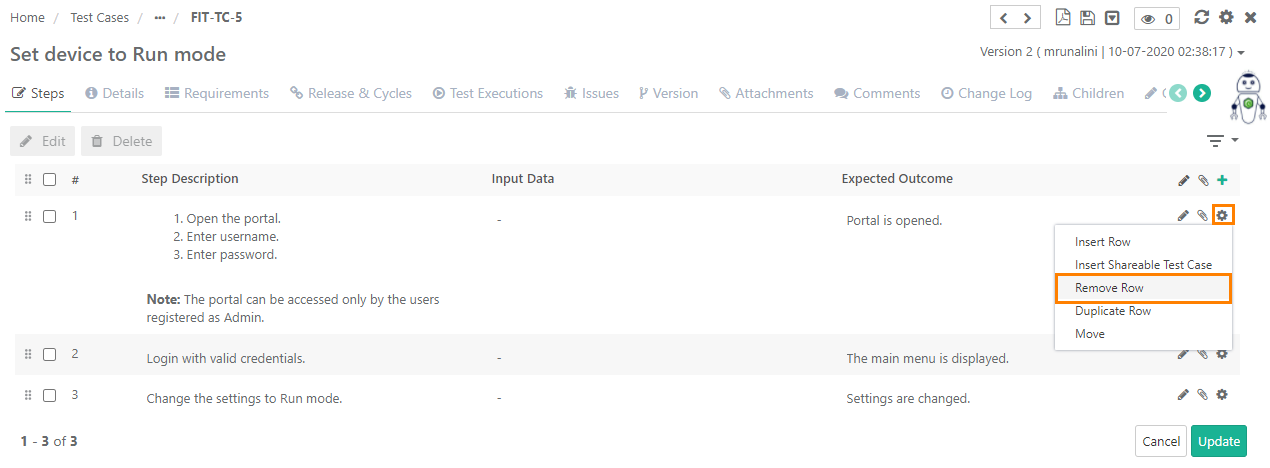
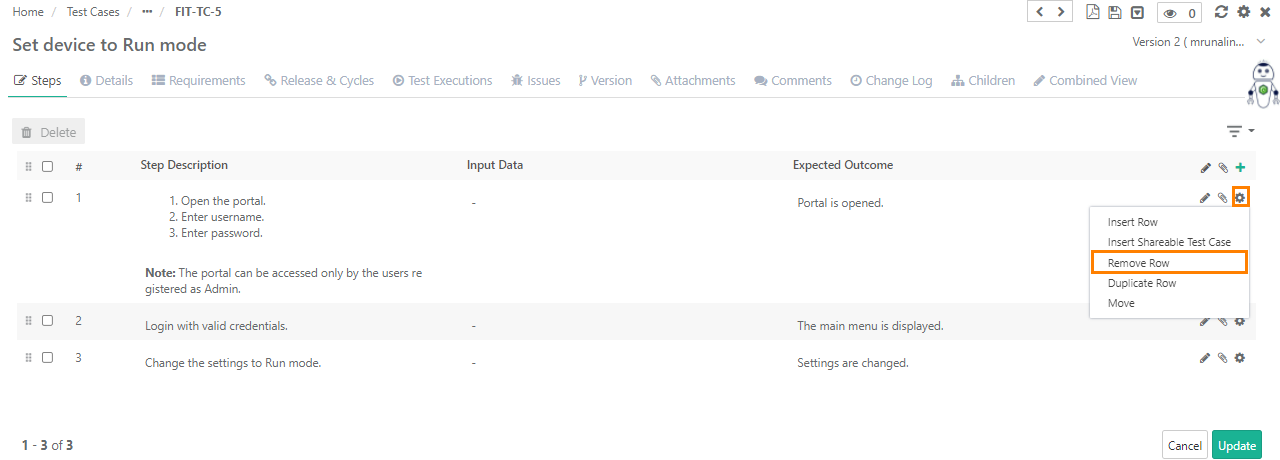
→ Delete/Remove a Single Test Case Step
On the Test Case Step(s) grid, click the Cog icon for the step you want to remove.
Select Remove Row.
Click Update.
→ Delete/Remove Test Steps in Bulk
...
Note: QMetry allows you to use different versions of a test case for testing. Read more about it on the Managing Test Case Versions page.
Archiving a Test Case
All the versions of the test case should be archived to delete that particular test case.
Archiving Entire Test Case
...
To delete a test case, first you need to archive it. All the versions of the test case should be archived to delete that particular test case.
It is a two step process:
...
Deleting Entire Test Case
All the versions of the test case should be archived to delete that particular test case.
A. From Test Case detail page
...
Open the Test Executions tab and Click on the Link Test Suites button. It opens Link Test Suites pop-up.
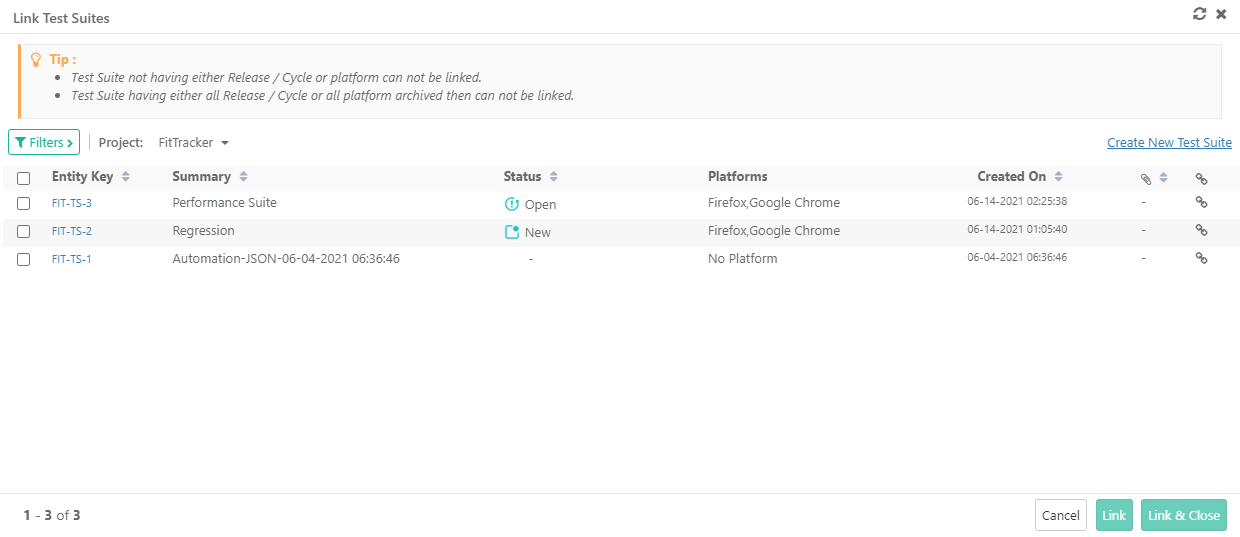
If you want to link test suites from multiple projects, then first select one project. Search records and link them before moving to other projects. For example, User A is in Project 1 and searches for some records and links them before moving to Project 2. Else, all the selection of Project 1 will be wiped off.
A. Linking a Single Test Suite: Click on the Link icon to link the individual test suite to the test case.
...
Test Suites key will be ignored if relevant test suite with that key is not found.
If a single key is mentioned multiple times, it will be linked only once.
Archived test suites will be skipped from linking. Only unarchived version of entities will be linked.
Skip Duplicate Linkage is "On": If the test case is already linked with a test suite, then the linked test suite will be skipped. Only those test suites will be linked which are not yet linked with the test case version from where the linking is being performed.
Skip Duplicate Linkage is "Off": The test case version from where the test suite is being linked, that version will get linked to all the test suites.
Steps
1. Go to the Test Executions tab of the test case.
...