| Table of Contents | ||
|---|---|---|
|
...
To open the requirement detail page in the new tab/window, right-click on the Requirement Key in grid view. Opening requirements in different tab/browser browsers makes a comparison between requirements easier. It also provides quick reference references while working on multiple assets.
...
The detail page is redesigned that allows one-click access to different sections using organizable tabs.
...
The detail page of QMetry assets has different tabs on it as described above. Users can customize the view of the detail page by changing the order of tabs. The tab order is preserved per user.
...
Each tab displays relevant details. The details of the tabs are editable.
...
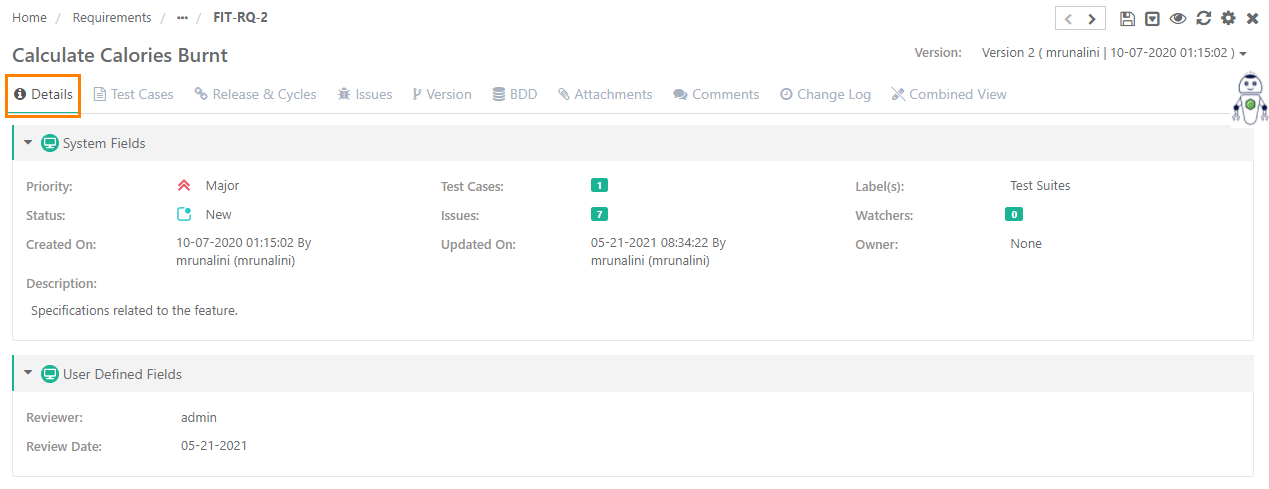
B. Combined View (Read Only View)
The tab renders the old view of the details page. You can view the details of all the section sections on a single page. The details displayed on the page are read-only and it can not be edited.
...
The Previous and Next buttons on the detail page are added for ease of navigation and updation updating of requirements.
Filter Requirements
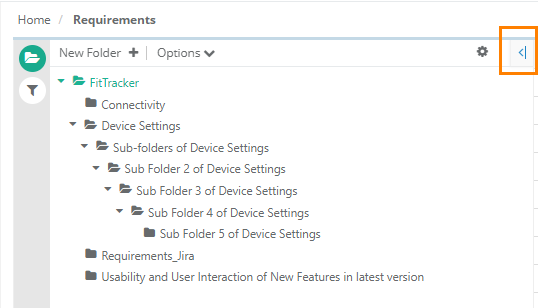
Users can easily filter test assets by any system/custom fields on all module grids. It also helps users in carrying out bulk operations. Filters placed horizontally above the grid earlier, are now placed on the tree panel at left.
Testers can view the details grid aligned with the folder tree even when they are clicking a folder which is at the bottom. It displays the top of the screen instead of the bottom of the screen.
Apply Filter
Users can apply basic as well as advanced filters to the records.A.
Basic Filters: By default, basic filter fields are provided to filter the records.
...
Advanced Filters: If users need more fields to filter test assets then click on the '+' icon. It opens the drop-down with a list of additional system and user defined fields corresponding to the module.
Select the field you want to apply a filter on. The filter parameter is added as Advanced Filters. Apply filter as per your requirement.
...
For example,
Users want to filter test assets on Priority, Entity Key and Status, then click on the '+' icon and select the fields on the drop-down list as shown below.
...
User can click on the '+' icon and select the field Entity Key to search requirements using comma separated entity IDs (i.e without specifying the complete Entity Key as described below)
...
Clear Filter and Sorting
Users can clear the applied filter and sorting applied to the records.
...
A. Clear Filter: Click on the Clear Filters button above the module grid or on the left pane. It will reset the view to default.
...
Once you are on the requirement details page, you can go back to the main screen of the requirement by clicking on the breadcrumbs.
...
Managing Requirement Folders
User Users can categorize different requirements and create different folders to put them. User Users can add a new folder to the root or as a child of an existing folder.
Use Case: The organization has received a bulk amount of project related requirements from its client. To manage these requirements, they need to be categorized. Requirements of similar category categories are added to individual requirement folders.
...
Open the Requirements module. The tree/folder panel is expandable that facilitates stretching of the area if you want to view longer folder names. You can also hover over the folder to view its full name.
...
...
Enter the following fields to add a new folder:
Folder Name: Enter the name of the folder.
Click Create.The new folder is reflected on the tree.
...
Editing a Requirement Folder
Select the folder on the tree and click on the Edit icon on the toolbar.
...
Select the archived folder on the tree and click on the Delete icon on the toolbar. The Delete icon is visible only for archived folders.
On deleting a folder, all the sub folders and entities within the folder will be deleted. Root The root folder cannot be deleted.
...
The Create screen opens for the requirement.
Enter the following fields to add a requirement:
Summary: Enter name of the requirement.
Priority: Select priority for the requirement from the drop down like Low, Medium, High.
Owner: All active users allocated a role in the current Project are listed on the drop down.
Label(s): You can select multiple Labels for a requirement. Labels are added from Projects > Labels.
Status: Select status of the requirement like New, In-progress, Archived, Closed.
Associated Releases: You can select multiple Releases to link the requirement with.
Associated Cycles: The list populates in accordance with the Release(s) selected above. You can select multiple Cycles to link the requirement with.
Description: Enter description for the requirement. Description can be added either in Plain Text or Rich Text.
...
Note: To enable rich text editor, the Enable Rich Text parameter should be enabled for the Project (Projects > Project / Release / Cycle). Refer to Enable Rich Text Editor for more details.
...
User Defined Fields: If UDFs are added for the Requirements module, then they are displayed on the Create Requirement and Requirement Details screen.
...
BDD / Gherkin Editor: Refer to BDD Implementation for more details.
Update Requirements
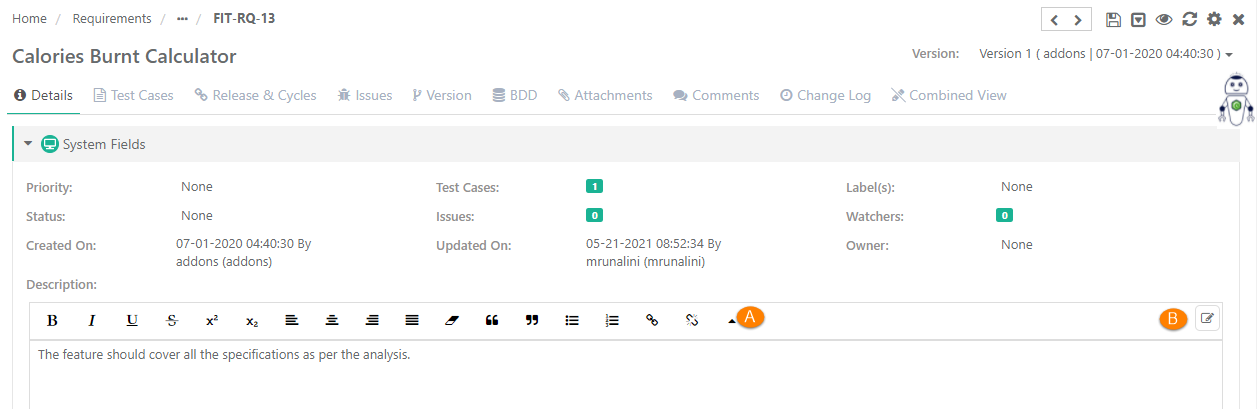
Users can save the requirement without creating its new version. InThe in-place editor is provided on the detail screens for all test assets. Just hover over the field and click on the edit icon.
It opens the field in editable mode. In case of text field, enter the value and save the details.
...
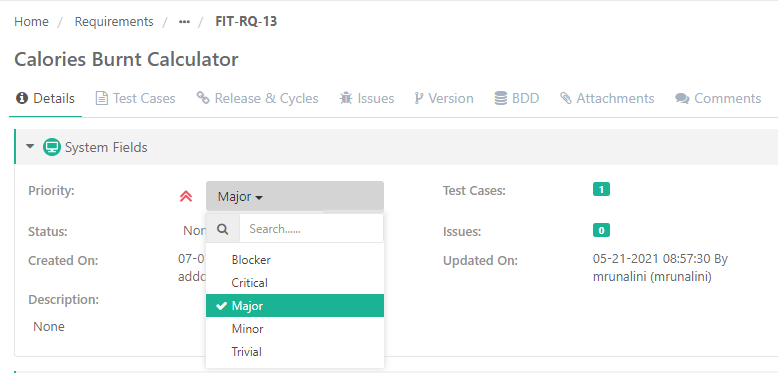
In-place edit will always update the test asset.
To create a new version of the test asset, follow the steps mentioned below.
...
Archiving a Specific Requirement Version
Read about Archiving a Specific Requirement Version.
Deleting a Requirement
It is a two step process:
...
Deleting Entire Requirement
All the versions of the requirement should be archived to delete that particular requirement.
A. From Requirement detail page
...
Deleting a Specific Requirement Version
Read about Deleting a Specific Requirement Version
Bulk Operations on Requirements
Read about Bulk Operations
Linking Test Cases to Requirements
...
To view the test case of other project, click on the Test Case Entity Key. It opens the test case detail page in the respective project and will change your current project.
...
Link Test Case By Entity Key
...
2. Click on the Link By Entity Key button.
...
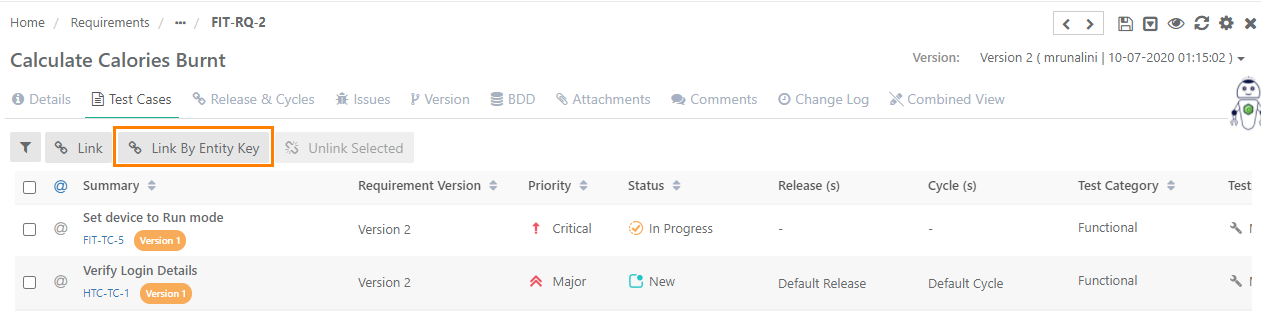
3. It opens the Link Test Cases pop-up. Mention comma separated test case keys on it.
...
When Jira project is configured with QMetry project, you have to select the Jira instance and its project from which you want to link Jira issues to requirements in QMetry.
You can apply Filters which allow quick filter of issues to link with the requirement.
...
How to Unlink Issues Linked to a Requirement?
...
The Execution column on the Requirements > Issues tab shows the count of test executions the issue has been linked to.
Clicking on the count opens the Execution Runs pop-up with execution details of the issue, executed Platform, Release, Cycle, Linkage Level, etc.
The Linkage Level column shows the issue is added on test case level or test step level on the execution screen.
...

When Jira is integrated with QMetry -
...
Requirement Version
Read about Requirement Version
Change Log
Read about Change Log
...
Importing Requirements from Excel File
Sync Requirements & Issues from Jira
Export Requirements
You can export requirements either as XLSX or CSV Format.
...