| Table of Contents | ||
|---|---|---|
|
Introduction
The Test Data Parameterization functionality allows testers to execute the same test case multiple times with different data inputs
| Table of Contents | ||
|---|---|---|
|
Introduction
The Test Data Parameterization functionality allows testers to execute the same test case multiple times with different data inputs; without having to create duplicate test cases. It replaces the traditional practice of entering hard-coded input values with parameters. Test Data parametrization allows QA teams to store reusable test data in one centralized location, Import existing parameters, and data sets, and share data across QMetry projects. Parameterization of test data is one of the ways to make your tests consistent and manageable. You can create automated data-driven tests quickly using Test Data Parameterization in QMetry.
Example
The following values need to be validated against Employee IDs in an organization.
...
Hence, first of all, we will create Parameters with their values and then Data Grid.
Step 1: Add Parameters
Steps to Add Parameters
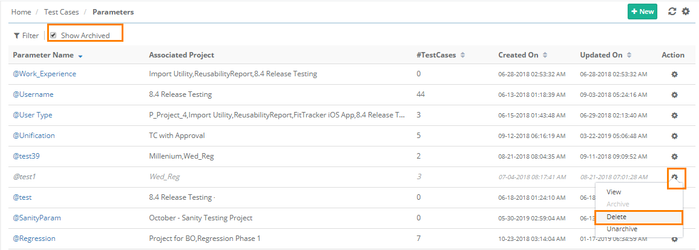
Go to Test Cases > Data Parameter.
...
These archived Parameters can be deleted individually. Click the Con icon for the parameter you want to delete and select Delete.
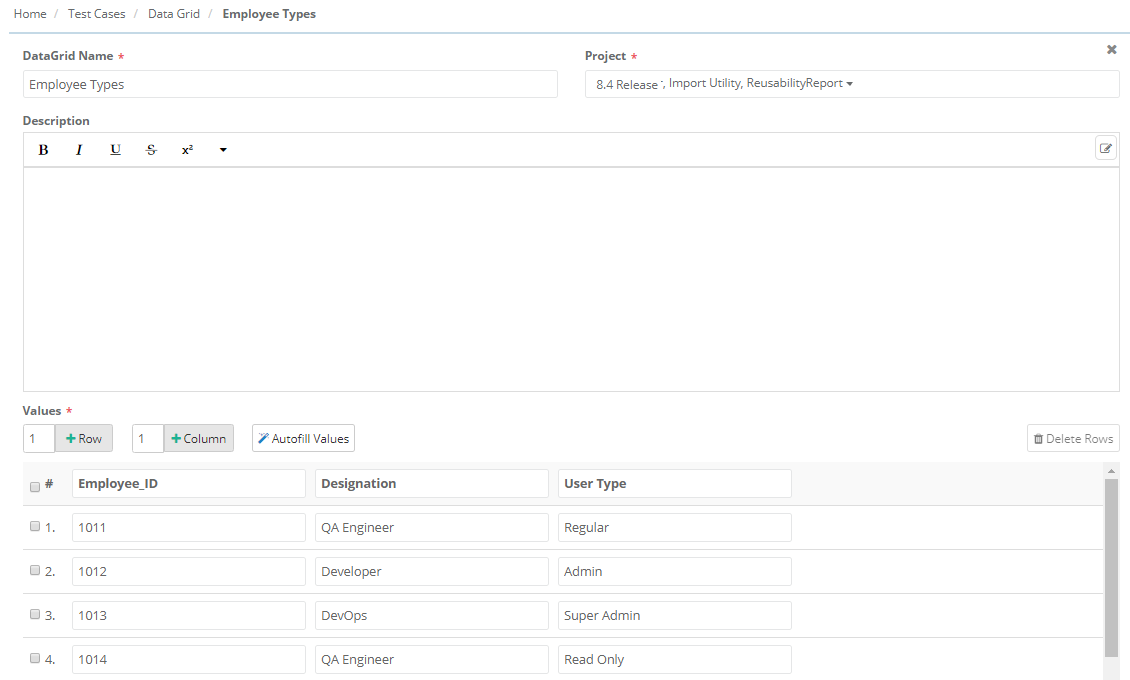
Step 2: Add Data Grid
Data Grid is a kind of table that will have rows and columns within it.
Steps to Create a Data Grid
Once you are done adding parameters with values, you can create different combinations of these values i.e. Data Grid to run the test.
...
Note: A maximum of 100 rows and 20 columns can be added to a Data Grid.
This way you can create multiple Data Grid for multiple data sets that will be executed.
Note: If you have already entered Data Grid manually, then the use of the Autofill Values option will reset those values.
...
Data Grids can be deleted individually. Click the Con icon for the Data Grid you want to delete and select Delete.
Step 3: Use Parameters in Test Cases
Till now you have created test data sets through Parameters and Data Grid. Now we will see how we can use the parameters in test steps of a test case.
...
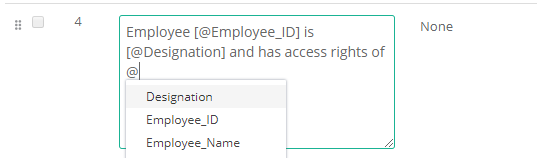
The list of parameters populates on entering @ sign.
Parameters can be mentioned for Step Description, Input Data, and Expected Outcome.
To use the parameter, just press @ on your keyboard and the available parameters will populate.
The test step field looks like this:
Step 4: Link Test Cases to Test Suite
Now link the parameterized test cases to the test suite. Manual test cases can also be linked to the test suite along with parameterized test cases. The test case with the test data parameter gets a tag of Parameterized. 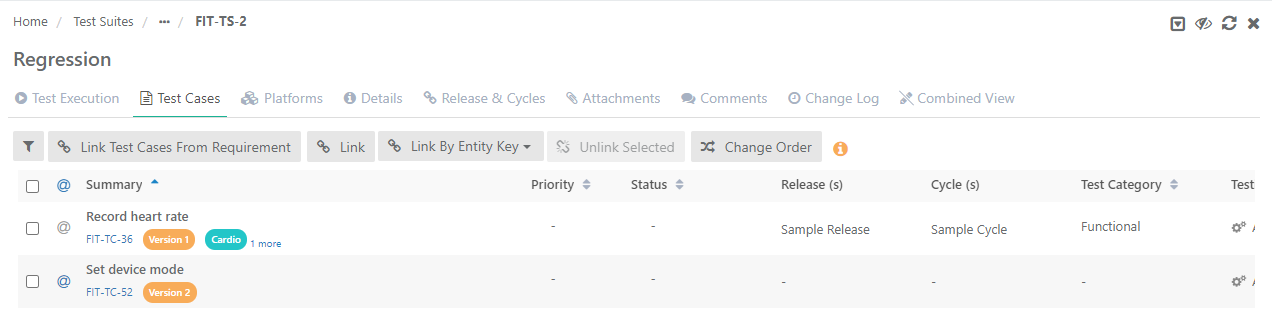
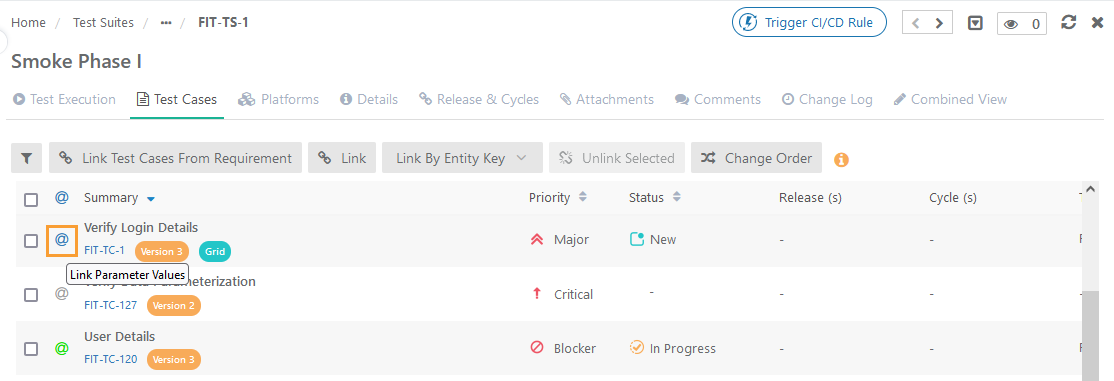
A color code indicator is provided to quickly identify whether the parameter values have been assigned to the test case parameters or not on the execution screen. It helps the test execution planner quickly identify such test cases that do not have values assigned to their parameters.
Use Case: A test execution planner, who is responsible to create and plan the test executions and assign them to the testers for actual executions, needs an indicator to identify parameterized test cases that contain a parameter that does not have any data values assigned for executions.
Color of @ sign | Indication |
@ in Grey | It indicates non-parametrized test cases. |
@ in Blue | It indicates parameterized test cases that do not have data values (for either all or any of the parameters) assigned for executions. |
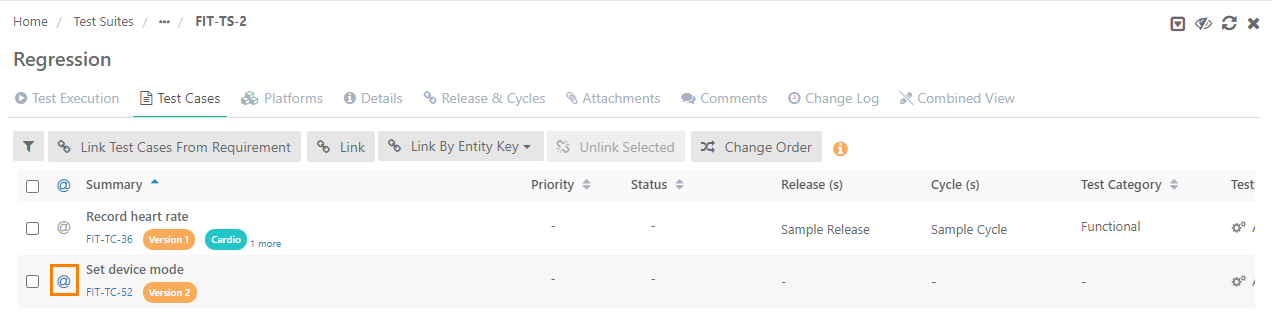
@ in Green | It indicates parameterized test cases having values assigned for all parameters. |
→ When either all or any one of the parameters do not have values, the @ sign appears in Blue.
→ Once values are assigned/mapped to all the parameters, the @ sign appears in Green.

Mapping Data Grid
On the test suite detail page, go to the Test Cases section. If you have linked Parameterized test cases with the test suite, then the information is displayed on the screen like below.
Click on the @ sign to add values to the parameters. You can see that the @ sign for parameterization is highlighted and has a hyperlink on it.
The Mapping DataGrid screen opens.
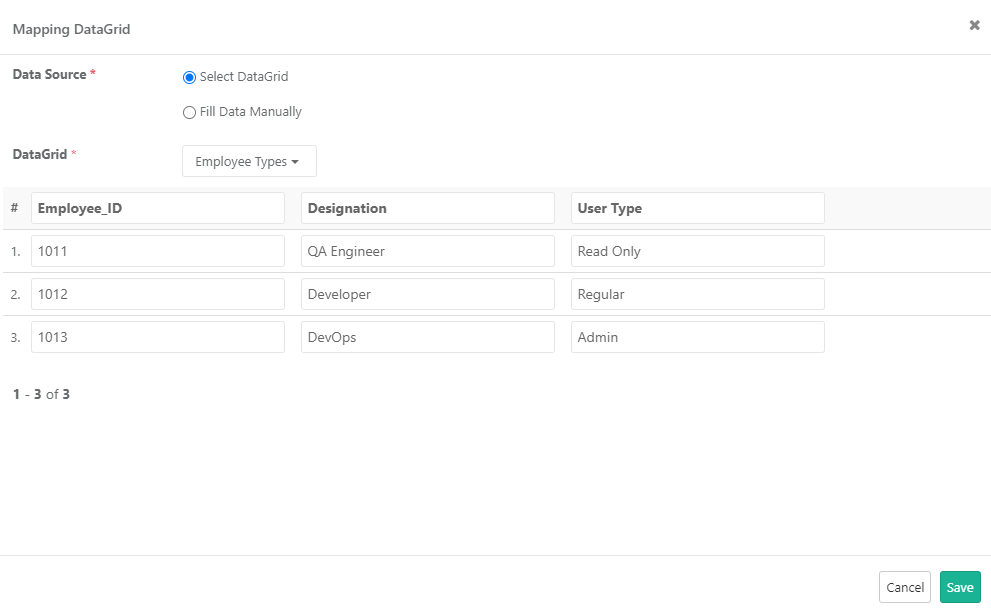
You can select either of the following as Data Source:
Select DataGrid: If you want to Select the option to select the Data Grid created under the Data Parameterization module.
- Data Grid: The drop-down displays all the Data Grids created under the Data Parameterization module. The data is populated in the below table as per the grid selection.
Fill Data Manually: As an alternate, you can enter the parameter values manually, then select this option. Map values with corresponding parameters.
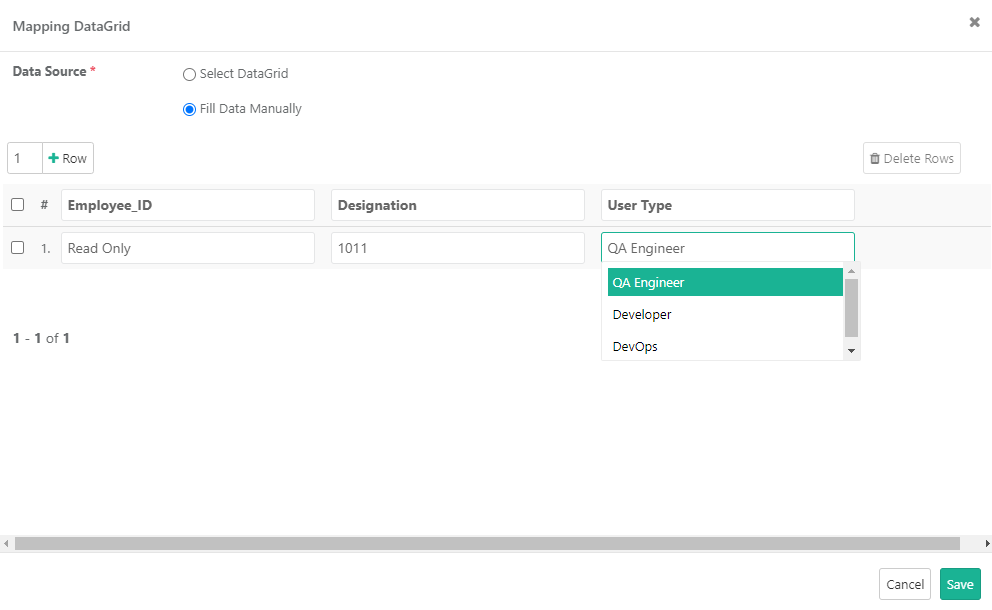
Click Save to save the mapping of the Data Grid.
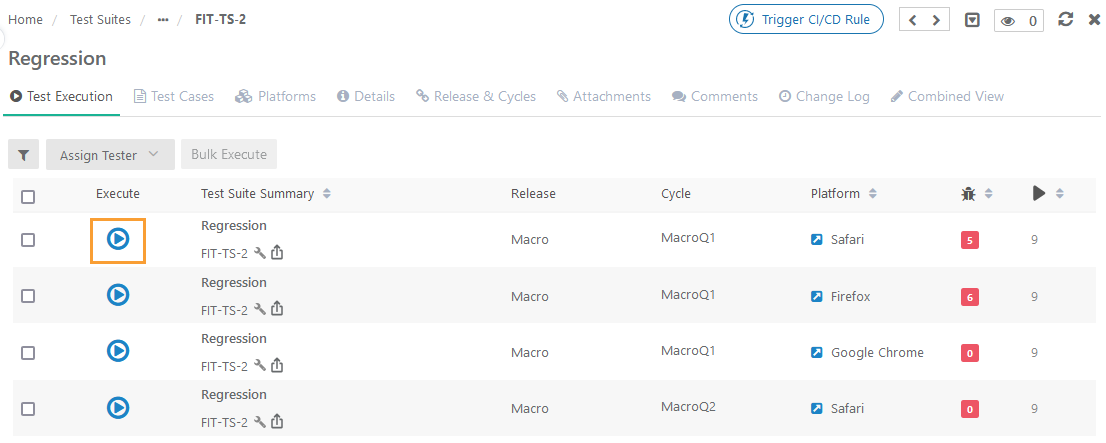
Step 5: Execute Parameterized Test Cases
Open the test suite detail page and open the Test Execution tab on it. Click on the play icon to navigate to the Test Execution Screen to run the test and record the status.
On the Test Execution Screen, when you click on the Expand All button, the test cases with parameterization get expanded up to Parameter Groups.
The steps count at the test case level displays (the count of test steps X count of data sets).
...