Introduction
Users can log bugs at the test case as well as test step levels. Users can add issues and attachments to test steps. It allows users to log bugs and attach test run logs at step level. The attachments are also displayed on the Test Executions tab of the test case.
On the Test Run screen, click on the Bug icon for the test case for which you want to log issues. It opens the issues screen. Once a bug is added, the Bug icon turns red.

Issues Screen
The Issues screen has these tabs on it: Available Issues, Linked Issues, Link New Issues, and Link External Issue.
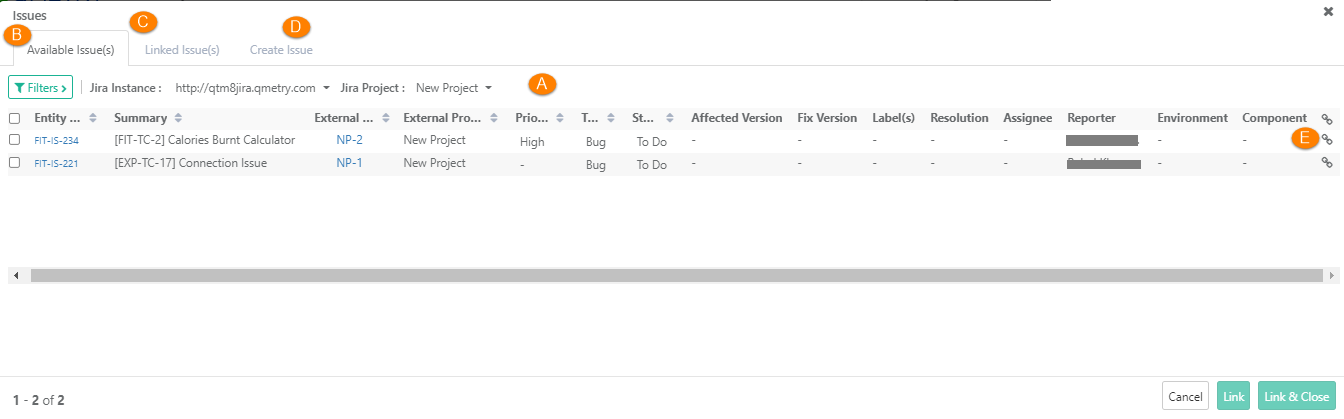
A. Jira Instance and Jira Project: You can link issues from multiple instances and across projects. The Project drop-down displays configured projects on which you have access.
B. Available Issues: The tab shows issues added under the project and is available to link with the test case.
- Issues from External Tracker: If you have configured an external tracker with the QMetry project and issues are logged in the tracker, then those issues are displayed with External Key.
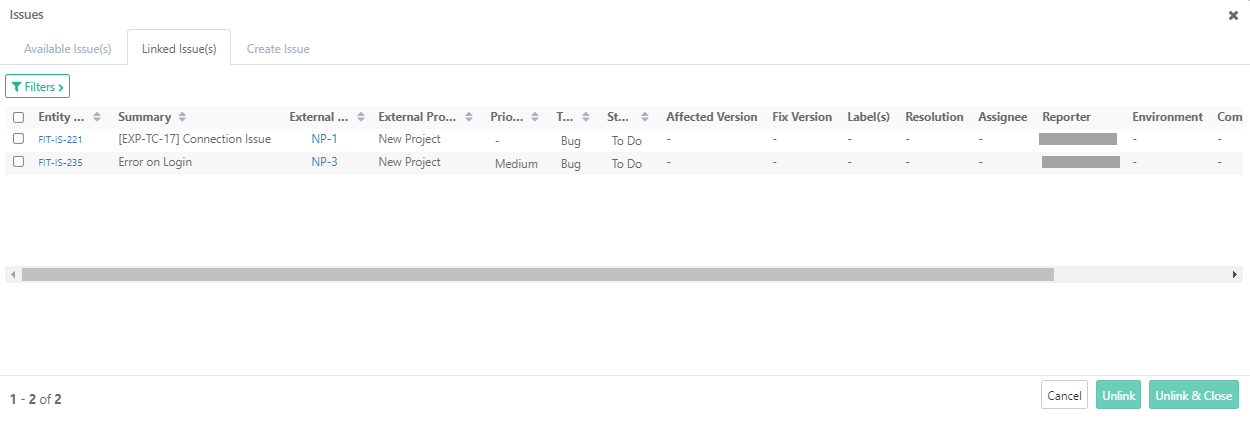
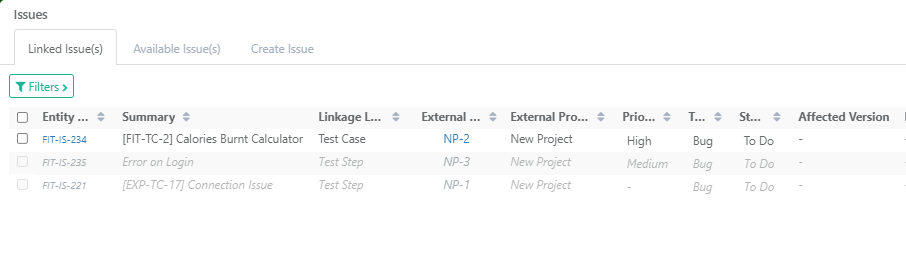
C. Linked Issues: The tab shows issues already linked with the test case.
D. Create Issues: The tab opens Create Issue screen. Add new issues and link them directly with the test case. The linked issue is displayed under the Linked Issues tab. The test case steps are added as Description.
E. Click on the Link icon to link the individual issues to the test case.
To link multiple issues in one go, select the issues and click either on the Link (to link the issue and keep the window open) button or the Link & Close (to link the issue and close the window) button.
Issue IDs of the issues associated with the test case appear on the Linked Issues tab. Clicking on the Issue ID link opens the Issue details page in QMetry.
Issues already linked to the test case are displayed on the grid with the details of Summary, Ext ID, Platform, and Linked Date. The details help users understand for which platform a particular defect was logged.
Link New Issues
- On the Test Run Screen, click the Bug icon for a test case to which the issue is being added.
- Open the Link New Issue tab to add issues and link it to the test case.
- When a new issue is logged (in QMetry as well as in Jira) from the execution screen, the Issue Summary field will be auto-filled with Test Case ID and Test Case Summary for easy reference to the relevant test case the bug is logged for.
The Description field populates with Test Case Summary and Test Step details.
- Follow the same process of adding an issue from the Issue module. Enter the issue details and click Create.
- Once you add an issue, it is automatically linked to the test case and it is displayed on the Linked Issues tab.
Linking Existing Issues
- On the Test Run Screen, click on the Bug icon.
- The Issues screen opens.
- Open the Available Issues tab. It shows issues available to link with the test case. Issues added in QMetry as well as in External Tracker are displayed on the screen. Issues added in External Tracker can be identified by its External Key.
- Select issues on the screen and click on the Link button.
Log Jira Issues from QMetry
If Jira is configured with the QMetry project, then the Issue module in QMetry will not be available. Defects in Jira can be logged from the Execution Screen of QMetry.
Logging an issue for the First Time
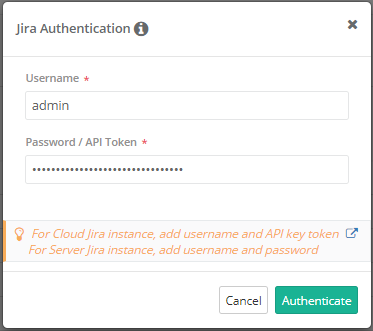
You will be asked for Jira authentication through a pop-up.
Note: Enter Jira Username and Password (if Server Jira) or API Token (if Cloud Jira) to authenticate and modify the Jira entity based on provided user credentials.
- Username: Enter Username.
- API Token: Follow the steps mentioned in the article Login using API Token to generate API Token.
To Edit/Revoke Authentication
If your Jira credentials are changed, then follow Revoke Authentication to modify the credentials in QMetry.
Create and Link New Jira Issues
On the Test Run Screen, click the Bug icon for the test case/step to which the issue is being added.
1. Open the Create Issue tab to add issues and link it to the test case.
2. Jira Instance and Jira Project: It shows the Jira instance and Jira project that has been configured with your current QMetry project. Select the Jira instance and project to which the issue is to be added.
3. The Description field: Issues raised to Jira from Test Execution Screen of QMetry fields include field values from QMetry. In QMetry, you can use the text formatting notations as per Jira Wiki Editor in the Description field.
The following fields will be auto populated from QMetry test case to Jira issue Description field:
- Test Case Summary
- Test Case Description
- Comment
- Step details:
- Step Description
- Step Input Data
- Step Expected Outcome
- Step Actual Outcome
- Execution Status
- Comment
Issue name will be appended with QMetry Test Case ID.
You have to fill in other details of the issue like Label, Priority, Type along with Reporter and Assigned To fields.
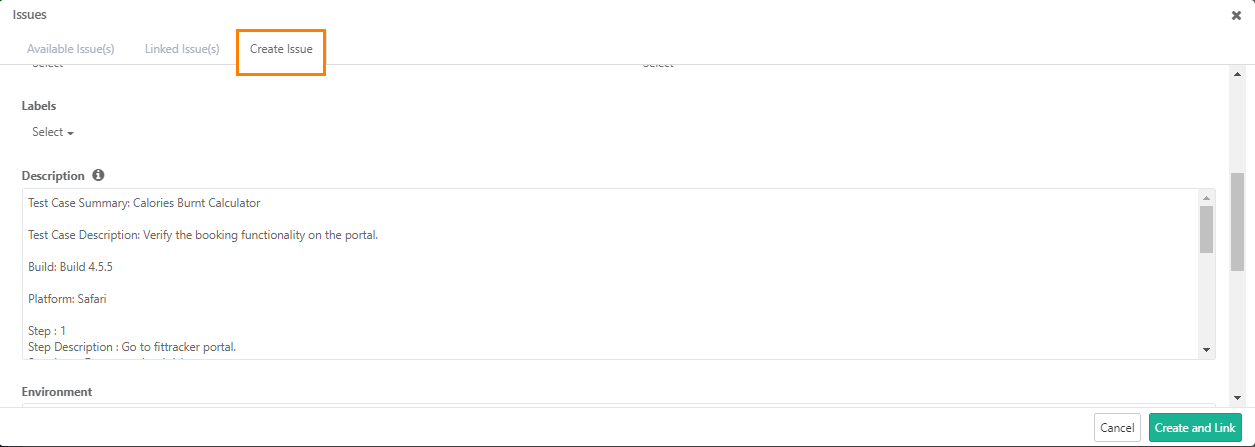
4. Follow the same process of adding an issue from the Issue module. Enter the issue details and click on the Create and Link button.
The issue is generated with Jira ID.
Once you add an issue, it is automatically linked to the test case and it is displayed on the Linked Issues tab.
It also displays the Linkage Level i.e. Test Case or Test Step to which the issue has been logged.
Link Existing External Issues
The Available Issues tab displays issues that can be linked to the test case.
External Issues are identified with their External Key.
To link a single issue, just click on the individual link icon.
To link multiple issues at a time, select issues and then click on the Link Selected Issues at the bottom.
Unlinking Issues
You can remove the issue linkage. To unlink a linked issue, open the Linked Issues tab.
In case of an individual issue, click the Unlink icon for that issue.
To unlink multiple issues at a time, select issues and then click on the Unlink button.
Issues Linked to Test Step
Issues linked at Test Steps will be displayed at Test Case on the execution screen.
Users can view step-level bugs at the test case level because they want to see all associated bugs at the Test Case level.
Bugs are linked to a particular version of the test case and test steps under that test case. For example, on the Execution screen, a bug is logged with TC1 Version 1. Now the test case details are updated and the test case is saved with Version 2. When the test case version is synced on the Execution screen, the bug will only be displayed with the earlier version.
On Execution Screen, hovering over the Bug icon displays two distinct counts - issues linked to test case and issues linked to test steps.

- On the test case list view, the Linked Issues Count column displays the count of issues linked at test steps level as well as test case level.
- On the test case detail page, the Issues tab displays Linkage Level of the issue along with Test Case Version.
- On the Issue detail screen, the Execution Runs tab the grid displays Linkage Level of the issue along with Test Case Version.