Back to QMetry All Products Help Page
Integration with QTM
Integrate QTM with QAS
You can upload the QAS execution results to other products of QMetry product suite - QMetry Test Management.
First you need to integrate QMetry Automation Studio with QMetry Test Management.
There are two alternate ways to access the Integration with QMetry screen:
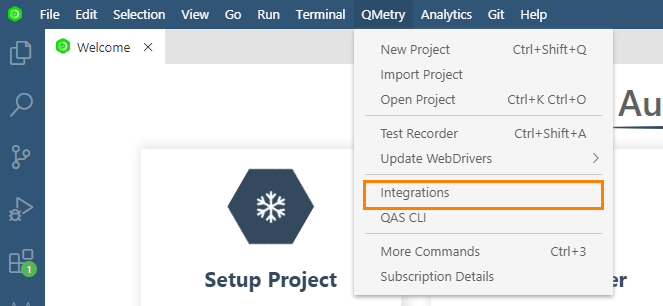
(A) Select QMetry > Integrations.
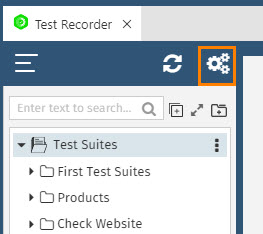
(B) As an alternate way, open QMetry > Test Recorder. Then click on the Configuration icon above the tree.
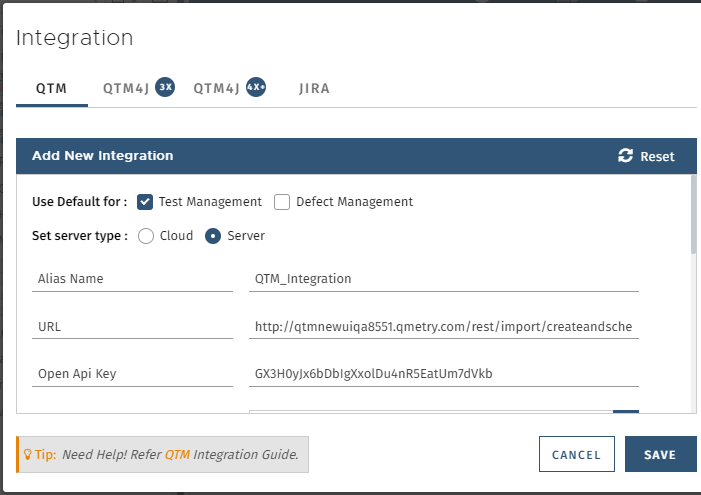
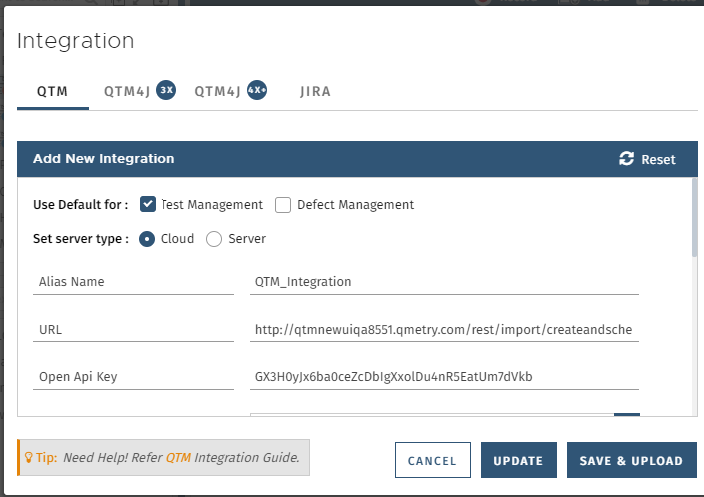
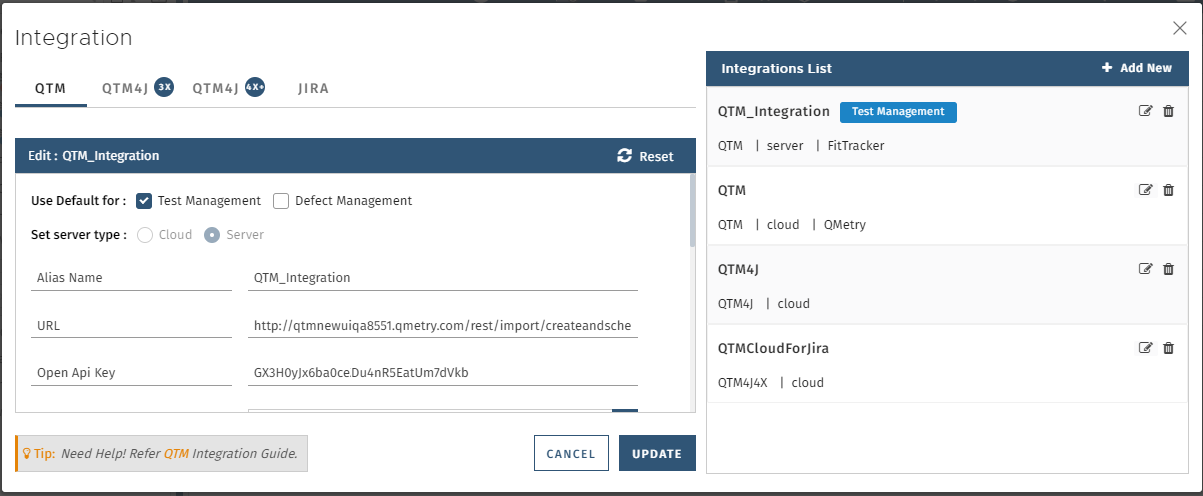
On the Integration screen, select Cloud or Server versions that you want to integrate with QAS.
- Test Management: Set this configuration as a default to use it while uploading Execution results from terminal.
- Defect Management: Set this configuration as a default Defect Management to create issue from Test Report screen. Whenever a bug is logged from the test report screen in QAS, an issue will be created in the Issue module of QMetry Test Management.
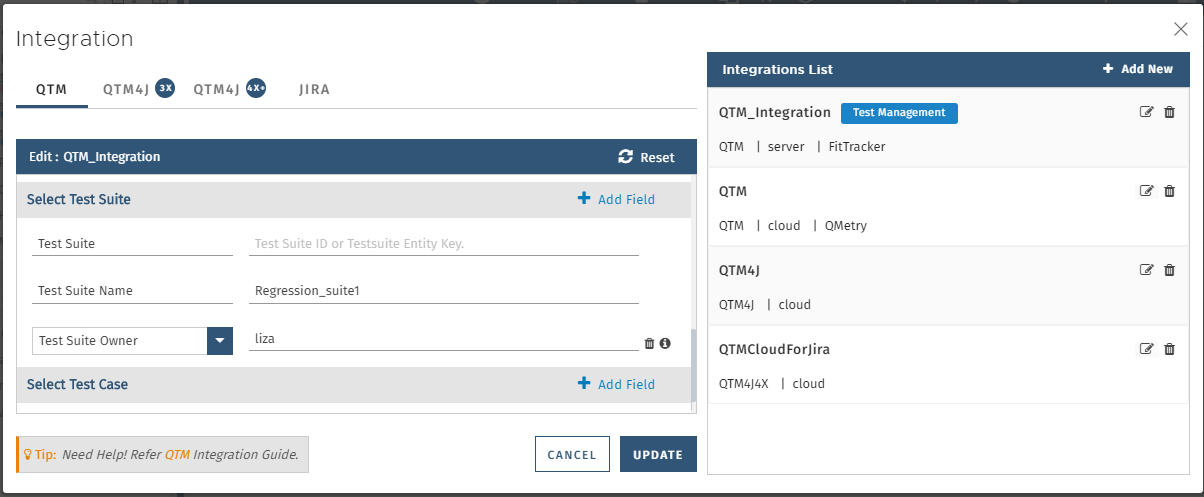
On the Integration List, the default configuration will be marked accordingly.
By default, Form is displayed to enter Integration details.
Note: The QTM URL should be suffixed with the following to upload results in QTM
- QTM URL: /rest/import/createandscheduletestresults/1
- Project: The drop-down lists out QMetry projects over which you have access in QMetry.
- Add Test Suite and Test Case fields and their values. If you have mandatory fields in your test case/test suite then set those fields here, else the test case/test suite will not be created. The values mentioned here will be set in the created test cases/test suite when the automation test runs.
- Requirement Key: Users can link test cases executed for particular integration to a requirement in QMetry Test Management. Enter the Requirement Key of QMetry Test Management.
Provide other integration details and save the integration.
For TestNG and JUnit Projects
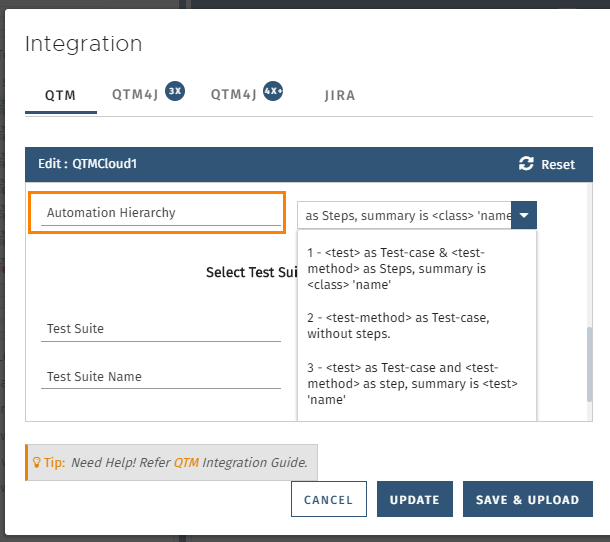
You can define Automation Hierarchy for TestNG and JUnit projects.
Refer to the following table for more details on the parameters.
Parameters
| Parameter Name on UI | Parameter used in API | Required | Schema | Description | Default |
|---|---|---|---|---|---|
| file | yes | string | The result file will be uploaded automatically. | - | |
| entityType | yes | string | The format of the result file will be automatically defined according to the platform. Supported formats:TESTNG or CUCUMBER or JUNIT or HPUFT or QAF | - | |
| Automation Hierarchy | automationHierarchy | no | string | The parameter applies only when you are importing results for TestNG and JUnit frameworks. The field will not be visible for other projects. Define the hierarchy of a Test case i.e. Test Case-Test Step or Test Case or Test Suite-Test Case. TestNG 1 Create Test Case -Test Step. The tag <class> is referred as Test Case and tag <test-method> as Test Step. (The default value is 1) JUnit 1 Create Test Case-Test Step. The tag <testsuite> referred as Test Case and tag <testcase> as Test Step. (The default value is 1) 3 Create Test Suite-Test Case. The tag <testsuite> referred as Test Suite and tag <testcase> referred as Test Case.In this case multiple Test Suites will be created. | 1 |
| Alias Name | Alias Name | yes | string | QTM Integration Alias Name as per user preference. | |
| URL | URL | yes | string | For QTM Cloud, the URL will be selected automatically. For QTM Server, the URL to upload execution test results. Example: https://{domainname}/rest/import/createandscheduletestresults/1 | |
| Open Api Key | API Key | yes | string | Your API Key. API Key is unique for a specific user in a single project. The result will be imported for the project associated with the given API Key. Generate API Key from QTM > Integration > Open API. | |
| Platform | platformID | no | string | Target Platform Id or Platform Name. Platform Id can be fetched using List Platform API and Platform Name can be obtained from detail view of target Platform. | No Platform |
| Project | projectID | no | string | Target Project ID or Project Key or Project name. Project id can be fetched using List Project API and the Entity Key or name can be obtained from list view of target Project. | - |
| Release | releaseID | no | string | Target Release ID or Release name. Release id can be fetched using List Release API from list detail of target Project. | - |
| Cycle | cycleID | no | string | Target Cycle Id or Cycle Name. Cycle Id can be fetched using List Cycle API and Cycle Name can be obtained from detail view of target Cycle. | - |
| Build | buildID | no | string | Target Build ID or Build name. Build id can be fetched using List Build API from list detail of target Project. | - |
| Requirement Key | Requirement Key | no | string | Requirement Key of QMetry Test Management to which test cases executed in the integration are to be linked. | |
| Add Test Case Fields | Test Case Fields | no | Mention system defined fields and user defined fields for test case. For JSON format, refer to the section below. | ||
| Add Test Suite Fields | Test Suite Fields | no | Mention system defined fields and user defined fields for test suite. For JSON format, refer to the section below. | ||
| Test Suite Name | testsuiteName | no | string | By default auto generated test suite name would be created. To provide your desired test suite name use this parameter. Note: This parameter will be ignored if automationHierarchy for JUnit framework is provided as 3 (multiple Test Suites). In that case, the name of Test suite would be based on <testsuite> tag. | - |
| Test Suite | testsuiteId | no | string | This parameter is used if you want to reuse an existing Test Suite. Parameter accepted Test Suite ID or Testsuite Entity Key. Testsuite id can be fetched using List Testsuite API or the Entity Key can be obtained from detail view of target Test Suite. Note : This parameter will be ignored if automationHierarchy for JUnit framework is provided as 3 (multiple Test Suites). | - |
JSON format
{
    "Alias Name": "NewTestAutionmtion",
    "URL": "https://testmanagement.qmetry.com/rest/import/createandscheduletestresults/1",
    "ApiKey": "iqHPNY75nS5hHSt64PAN6kbZ6EKxYpk6WhemqkJX",
    "projectID": {
        "id": 3761,
        "name": "FIT"
    },
    "releaseID": {
        "id": 7615,
        "name": "FIT_Release"
    },
    "cycleID": {
        "id": 14113,
        "name": "FIT_Cycle"
    },
    "buildID": "",
    "platformID": {
        "id": 13050,
        "name": "No Platform"
    },
    "automationHierarchy": {
        "name": "1 - @Test Methods as Steps",
        "id": 1
    },
    "tsid": "",
    "testsuiteFields": "{\"name\":\"Regression\",\"description\":\"This is Regression suite.\",\"userDefinedFields\":{\"Note\":\"Priority 1\"}}",
    "testcaseFields": "{\"description\":\"Verify Import\",\"userDefinedFields\":{\"ReviewedBy\":\"Alex\"},\"component\":\"['Regression','Test Case']\"}"
}
Refer to Import Automation Results through REST API for more details on configuration parameters.
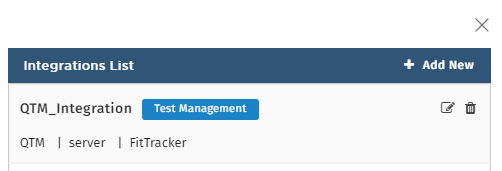
Once you save the integration, it appears on the Integration List.
To edit the integration details, click on the Edit icon.
Modify the details and click Update to save the details.
Else, click on the Save & Upload button to save the integration and upload the execution results into QTM.
To upload the execution results into QTM, you can also click on the Upload button on the Integration List.
Automation test suite/test cases will be created in QTM.
Push Test Results to QTM
Upload Test Results of already Executed Test Case
Option 1. Click on the Upload option and select QTM.
If the integration already exists, then the integration name will appear on the list. Select the one. In the absence of saved integration, click Other and follow Option 2.
To upload automated test cases with their execution results to QTM, click Upload.
Select QTM on the list.
Option 2. In the absence of saved integration, click on the Upload option and select Other.
The Integration screen opens. You can add a new Integration and Save it.
You can also upload the execution directly while saving the Integration by clicking on the Save & Upload button.
The saved Integrations are displayed on the Integration list.
Click on the Upload icon for the integration to which you want to upload the test results.
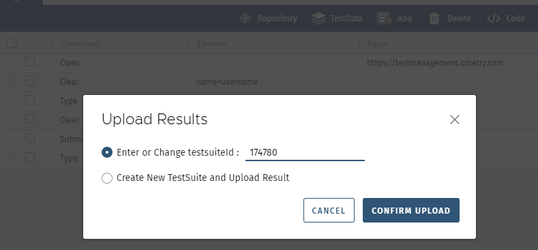
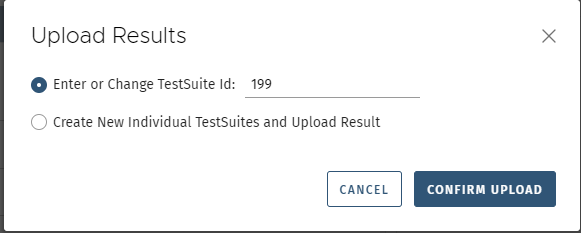
The Upload Results pop-up opens.
If Requirement Key is provided while Integration, then it will be visible on the Upload Results pop-up.
Select either of the following options:
- Enter or Change TestSuite Id: It will use an existing Test Suite to upload test result. If Test Suite ID is not mentioned while configuration, you can mention the ID here to which the test results are to be uploaded. If the Test Suite ID is already mentioned while configuration, it will display here. You can change the Test Suite ID, if you want.
- Create New TestSuite and Upload Result: If the option is selected, a new test suite will be created in QTM and the test results will be uploaded in that test suite.
Confirm the upload.
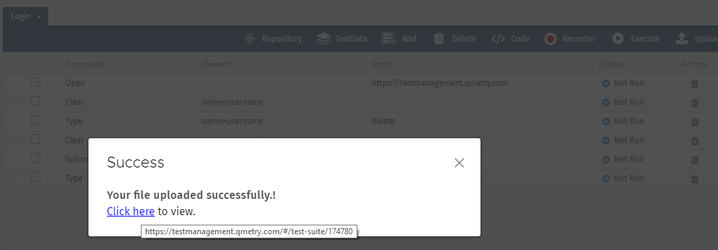
The success message appears with a link to the test suite which is updated with test results.
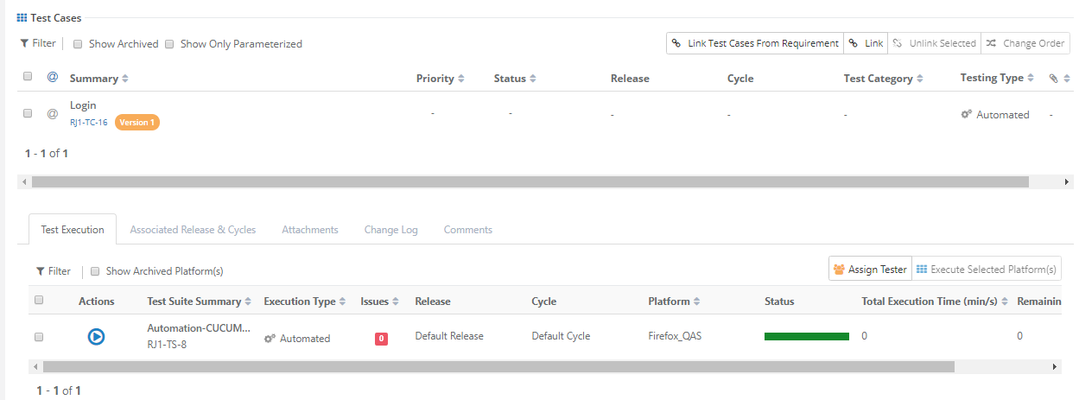
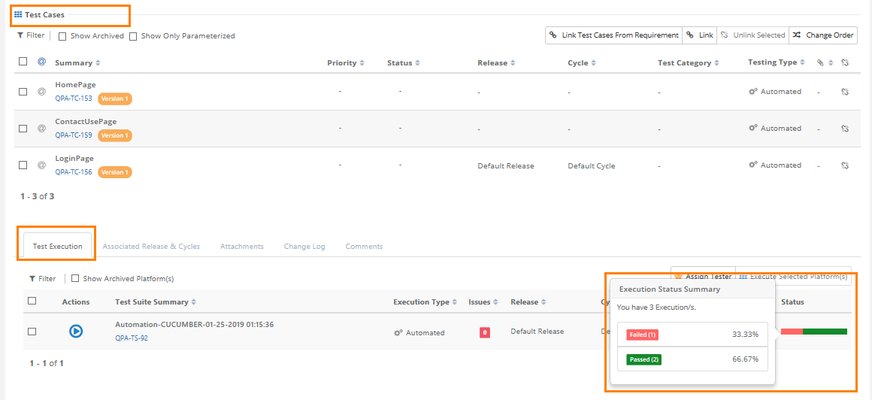
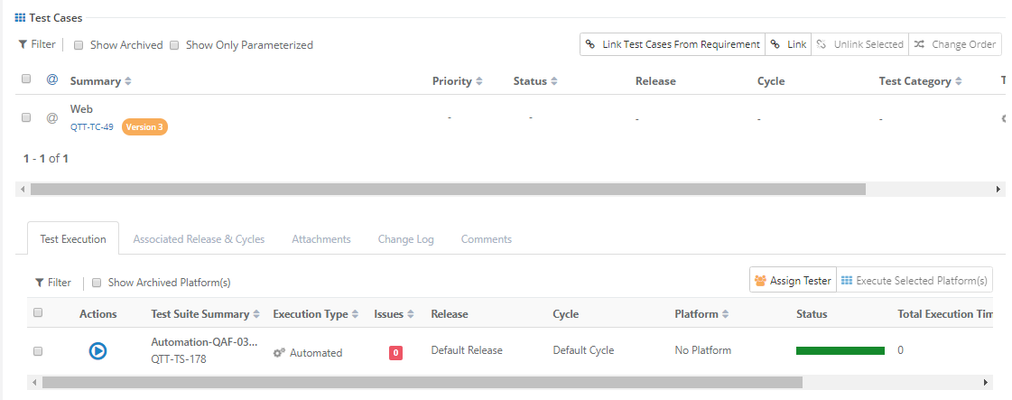
The test suite is updated with test case and test execution in QMetry as shown below.
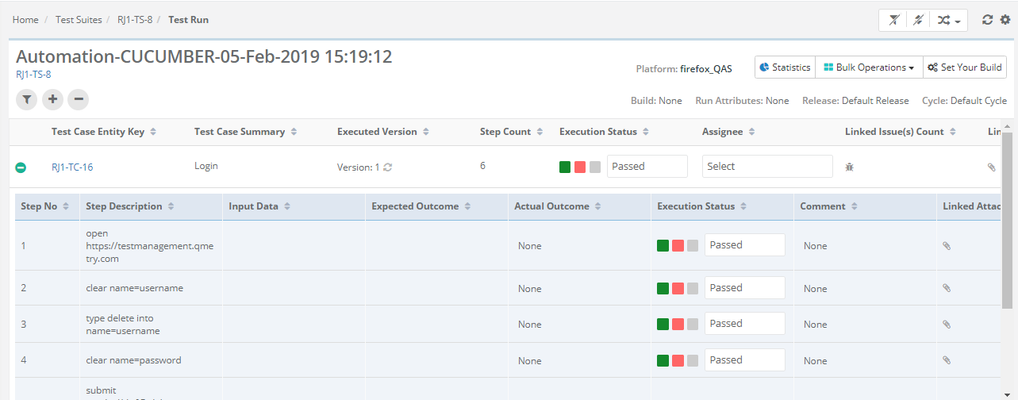
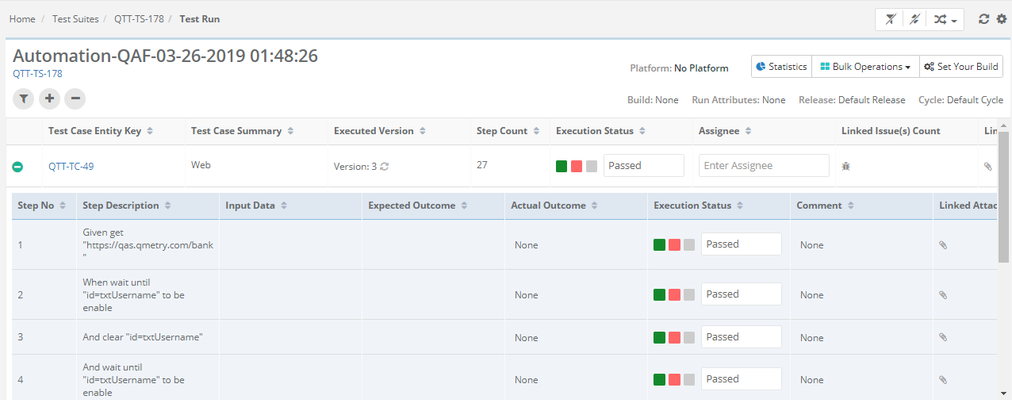
The Test Execution screen displays test case and test steps with updated execution results.
If Requirement Key is provided while Integration, you can view the associated test cases with requirement in the Test Case tab in QMetry Test Management once the results are uploaded.
Impact on Test Case Versioning
For example, there is a test suite "A" in which automation test results are already uploaded to QMetry with test cases "a" and "b" holding version 1.
Now the parameter values of test case "b" is changed and the test case is executed again.
When the test results are uploaded again in QMetry, being the same Test Case Summary, the test case version is updated to version 2. If new steps are added, then steps will also be appended to the new version. Test execution results are uploaded in version 2.
Execute Test Case/Test Suite and Upload Test Results
Scenario 1. Execute a Single Test Case
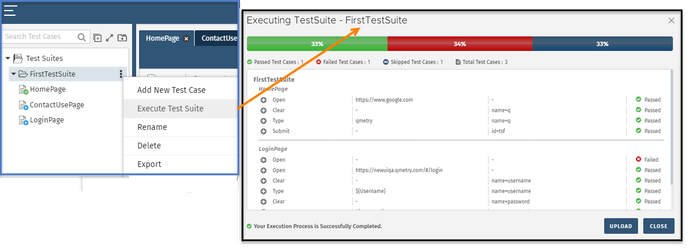
When you execute a single test case from the tree and then upload its test results to QTM.
Once the execution is completed, click on the Upload button.
It opens the Integration screen. Click on the Upload button for the integration.
The Upload Results pop-up opens. Select either of -
- Enter or Change TestSuite Id
- Create New TestSuite and Upload Result
Scenario 2. Execute a Single Test Suite
When you are executing a single test suite and then upload the test results to QTM.
Once the execution is completed, click on the Upload button.
It opens the Integration screen. Click on the Upload button for the integration.
The Upload Results pop-up opens. Select either of -
- Enter or Change TestSuite Id
- Create New TestSuite and Upload Result: A new test suite is created with auto-generated name and test cases added to it. The test results are uploaded accordingly.
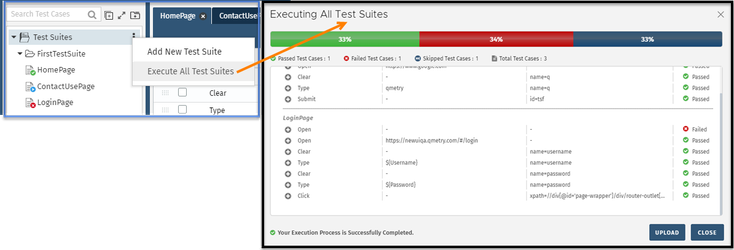
Scenario 3. Execute All Test Suites
When you execute all test suites at once and then upload the test results to QTM.
Once the execution is completed, click on the Upload button.
It opens the Integration screen. Click on the Upload button for the integration.
The Upload Results pop-up opens.
- Enter or Change TestSuite Id: The existing test suite with particular ID will be updated with all the test suite results.
- Create New Individual Test Suites and Upload Result: For all the executed test suites in QAS, individual test suites will be created in QTM.
Execute Test Script and Upload Test Results
You can easily upload test results into QMetry Test Management/QMetry Test Management for Jira and set the configuration as default. Whenever you run the automation code via CI, Command Line, test results will be pushed to system, so that you can track the details.
Either QTM Configuration or QTM4J Configuration can be set as default to upload test results at a time.
- Set this configuration as a Default: Check the box to set the QTM configuration as default for uploading the test execution results whenever the test is executed using CI/CD tools. On the Integration List, the default configuration will be marked accordingly.
Note: If the QTM Configuration is set as default, then the results will be uploaded to QTM as and when a build is triggered through CI/CD tools.
If the Test Management (QTM configuration) is set as default, then the qmetry.properties file, under the resources directory (resources/qmetry.properties), will auto populate the configuration details.
The following is the code snippet of qmetry.properties file.
#This properties file contain qtm/1tm4j server/cloud related information
#as per requirement modified it.automation.qmetry.enabled=true
automation.qmetry.type=QTM
automation.qmetry.onpremise=false
automation.qmetry.url=https://testmanagement.qmetry.com/rest/import/createandscheduletestresults/1
automation.qmetry.apikey=QoWpSwKaHW7PPBAS01y9uW9Qdooa1TixyBHW
automation.qmetry.clycleid=
automation.qmetry.platformid=
automation.qmetry.testsuiteid=199
automation.qmetry.projectid=
automation.qmetry.realeaseid=
automation.qmetry.buildid=
automation.qmetry.debug=false
Steps to Upload Test Results to QTM
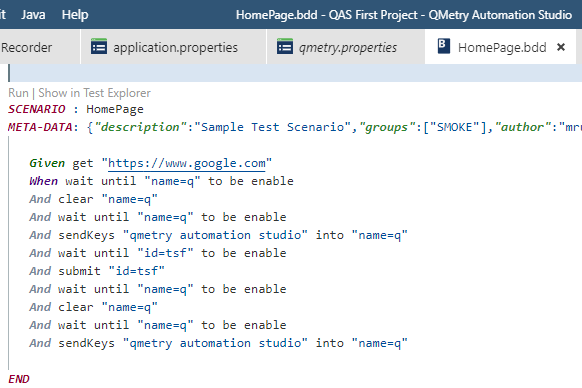
1. Record test case and export.
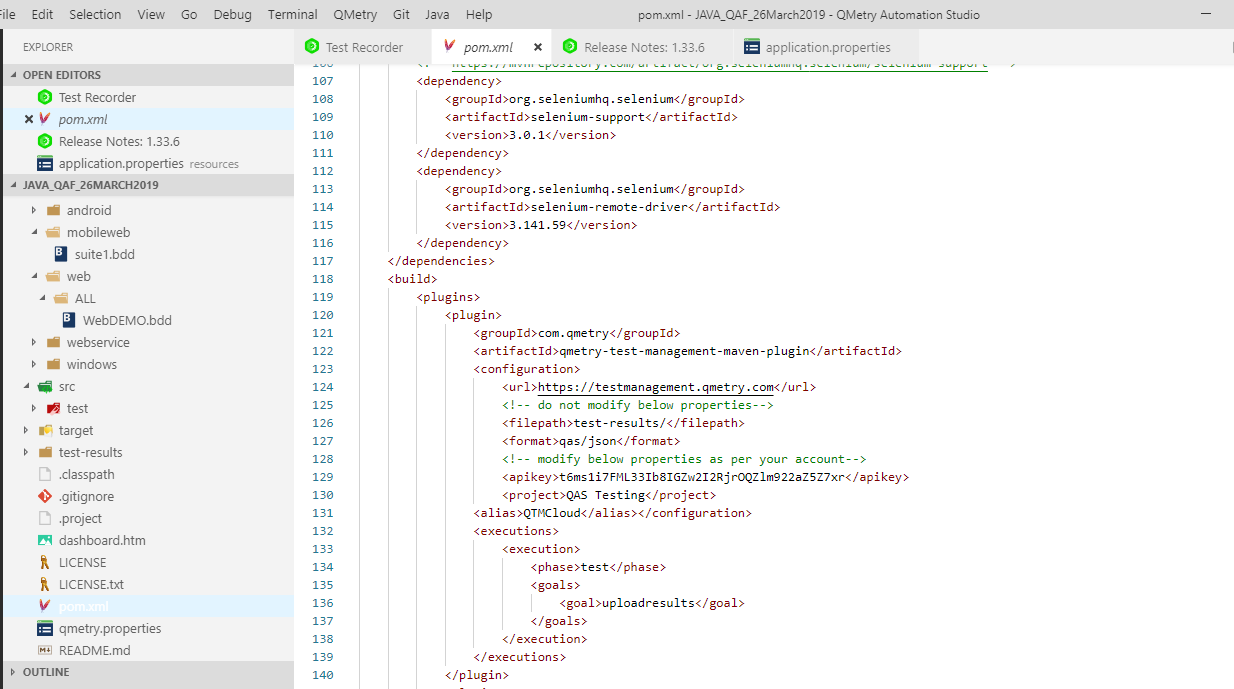
2. pom.xml file: If QTM configuration is set as default, then the pom.xml file will auto populate the configuration details.
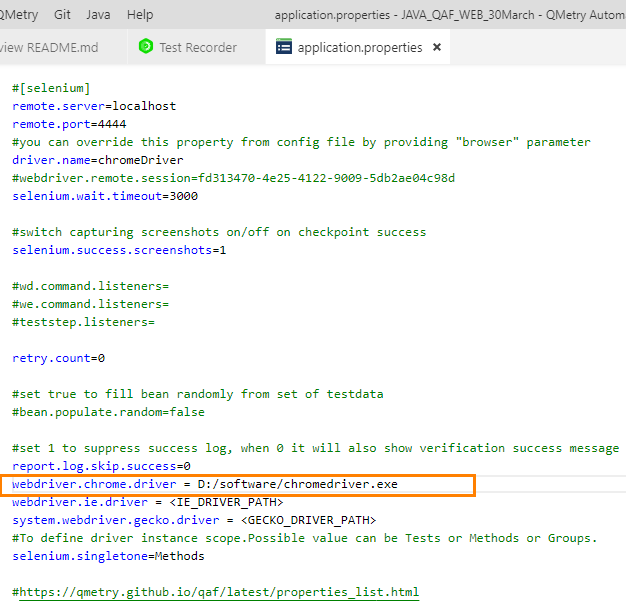
3. application.properties file: Open the application.properties file and set webdriver path.
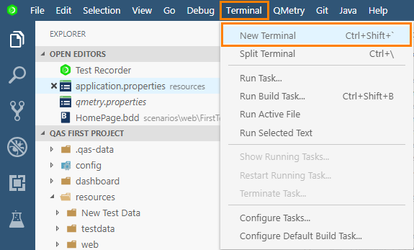
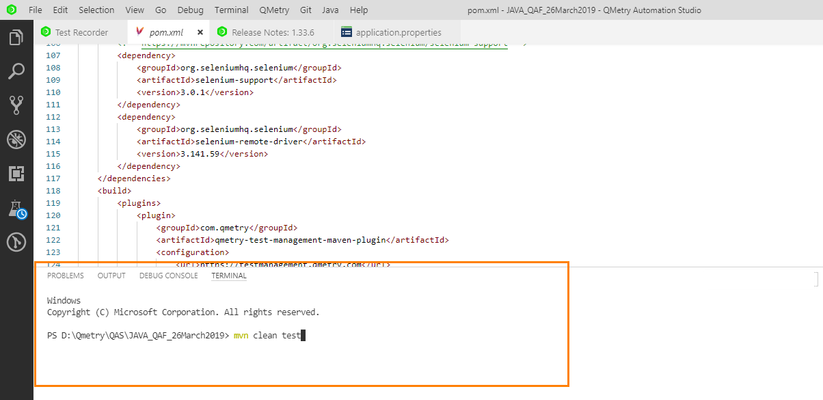
4. Open terminal and run command: mvn clean test
It will run the exported test case in the browser whose driver path is set in the application.properties file as per Step 3.
5. Success message is displayed once the results are uploaded to QTM.
Click on the entityURL to open the test suite in QTM in a browser.
You can see the test cases under the test suite.
Open the Test Execution tab and click on the execution icon to view the test execution results on the execution screen.
The test execution screen opens with uploaded test results from QAS.
Back to QMetry All Products Help Page
