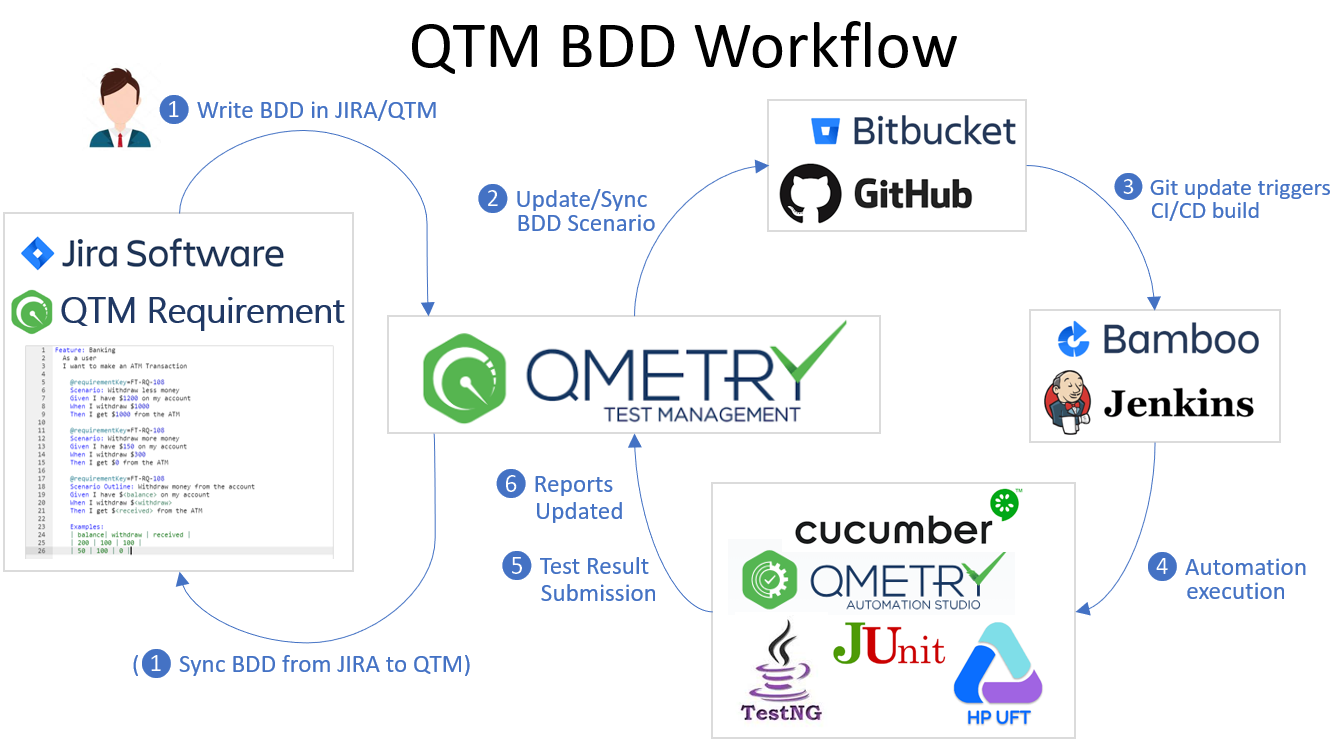
Enterprise teams practicing Behavior-Driven Development (BDD) can author, store and sync features files directly to/from Version Control Systems (VCS) like SVN, Git and BitBucket, using the built-in Gherkin editor in QMetry requirements. The two-way syncing between QMetry & VCS keep developers, testers and product owners up-to-date with the latest source code change commits with automated step definitions. Using QMetry automation agents, test executions could be triggered directly from QMetry. Test cases are smartly created/reused authored based on the feature step definitions and link them to requirements. Test Suite stores the automation execution results ensuring complete feature traceability with requirements.
How the use of BDD Code with Requirements help maintain quality
Organizations inject BDD (Behavior-driven Development) techniques to continuously maintain the quality of product. BDD scenarios align development and testing teams to a common goal. The Automation team transforms the provided usage scenarios into tests. The test run results are then analyzed that enable developers to develop and deliver the functionality as expected.
Workflow
Pre-requisites
Users should have the following rights in QMetry:
Users can write BDD Code in -
Steps
1. Go to Projects > Project / Release / Cycle.
2. Open the Project details page and open the BDD Configuration tab on it.
3. Click on the + sign to add BDD Configuration.

4. The Add Configuration screen opens. Enter the following details on it:
Bitbucket: QMetry supports Cloud and Server version of Bitbucket Version Control System. |
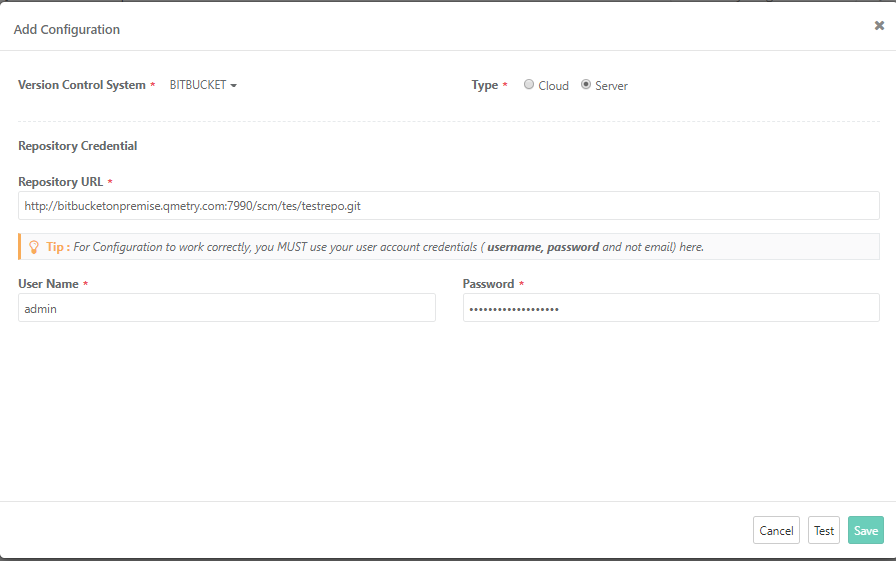
5. Click Test to verify the provided Repository credentials.
6. Once the Test is verified successfully, click Save to save the repository details in QMetry.
The configured version control system for BDD is displayed on the BDD Configuration tab.
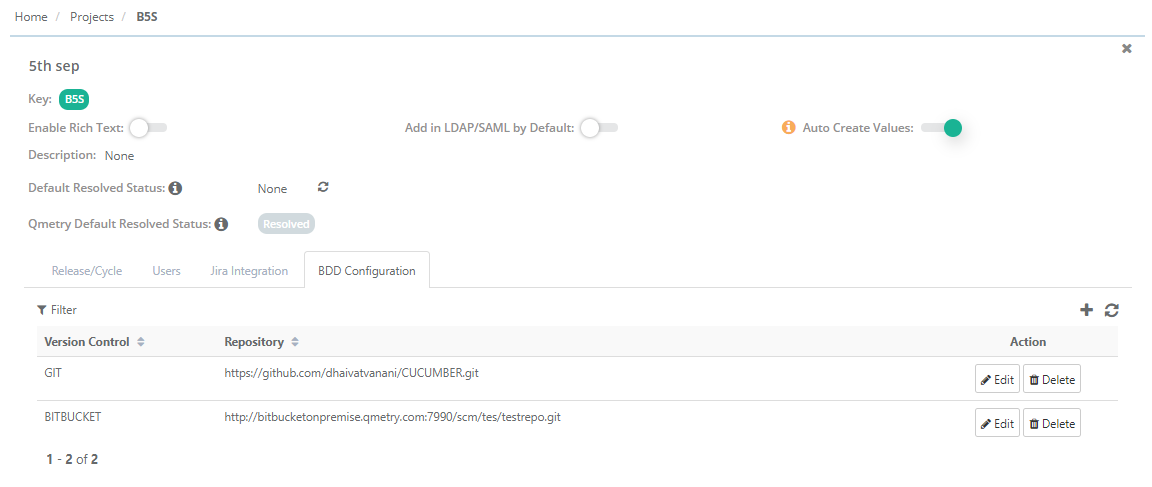
To edit the configuration details, click on the Edit button.
To delete the configuration with the project, click on the Delete button.
BDD section in the Requirements module will be visible only when a version control system is configured for the QMetry project. |
Gherkin editor is provided in the Requirements module. Test Scenarios for requirement are written in BDD code. Once the code is finalized, it can be pushed to GitHub/Bitbucket/SVN for the use of automation testing. It combines requirements and corresponding scenarios at one place and reduces isolated communication with Automation Engineers. The shorter span of testing cycle enables development of high-quality product.
1. Open the Requirement details page.
2. Open the BDD tab on the page. You can see the Gherkin editor at left and fields of required details at right.
3. Write the BDD Code in the editor.
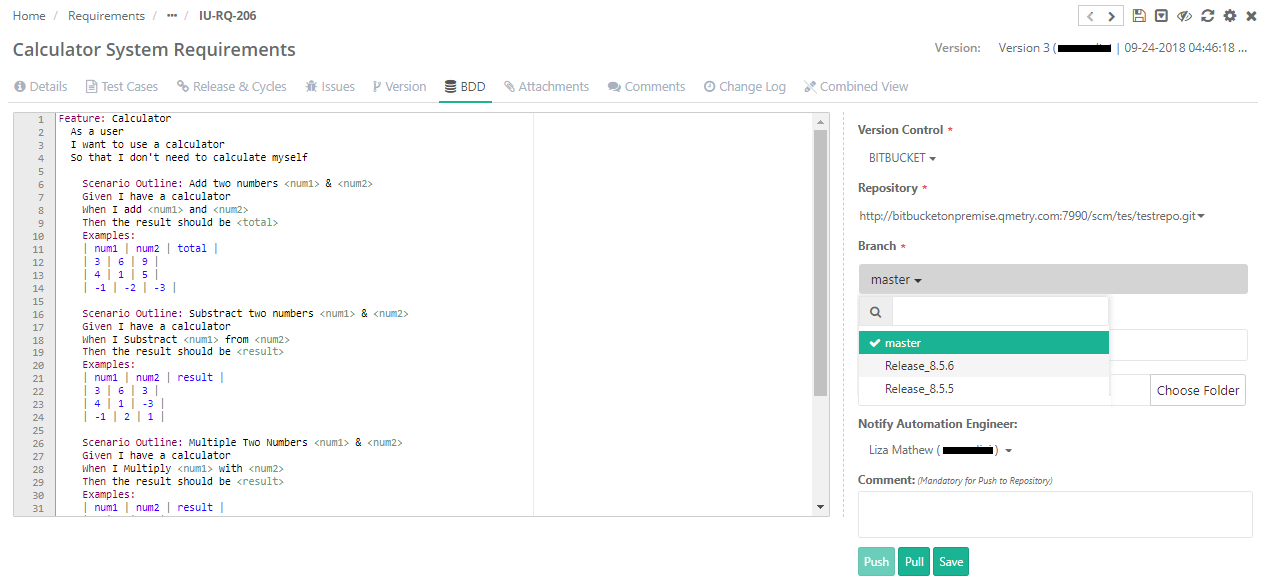
4. Enter the following details in support of the code:
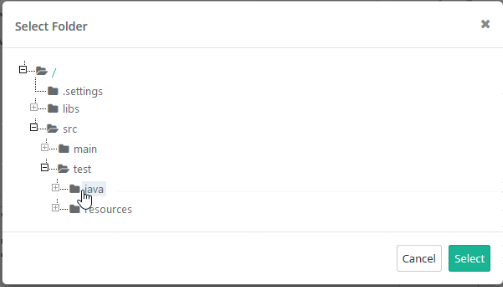
5. You can do either of the following -
If you are writing BDD code while creating requirement, then you can only save the code.
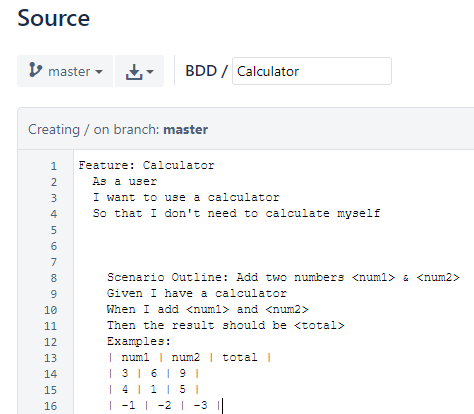
Now the code is already pushed to repository and updated in the repository. Users can pull the updated code from repository to QMetry.
1. Open the Requirement details page.
2. Open the BDD tab on the page.
3. Click on the Pull button. After showing the warning message, it will pull the latest code from repository and save it automatically in QMetry.
BDD is also implemented in the QMetry Jira add-on to facilitate test scenario creation and syncing of code directly to code repository even when requirements are imported from Jira.
The BDD panel will be available in Jira add-on for the issue types synced with "Requirement" in QMetry.
Note: If requirements are imported from Jira, then users can not edit the BDD code in QMetry. To edit the code, the requirement should be opened in QMetry Jira add-on.
Requirements/Stories imported from Jira are displayed with External Key in QMetry. Clicking on External Key opens the requirement detail page in QMetry Jira add-on.
The BDD panel is also added to requirement detail page that allows you to enter BDD code and Push the code to repository. Users can also pull the latest BDD code from repository.
1 .Open the Requirement details page in Jira add-on.
2. Select QMetry Project and the QMetry Key will populate to which the Jira story is synced in QMetry.
3. Locate the BDD section on the page.
4. Write/edit the BDD Code in the editor.
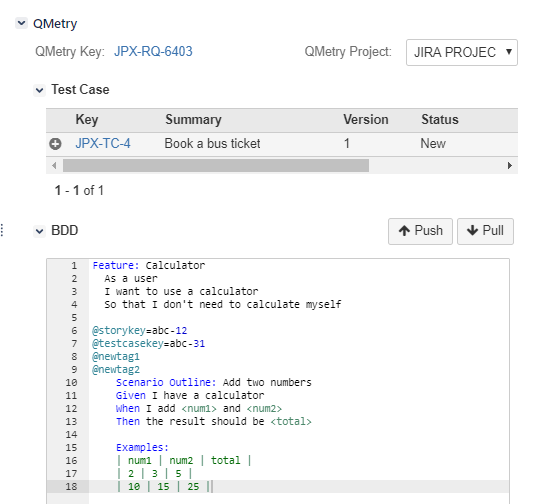
4.Click on the Push button. The BDD Configuration pop-up opens.
5. Enter the following details in support of the code:
You can do either of the following -
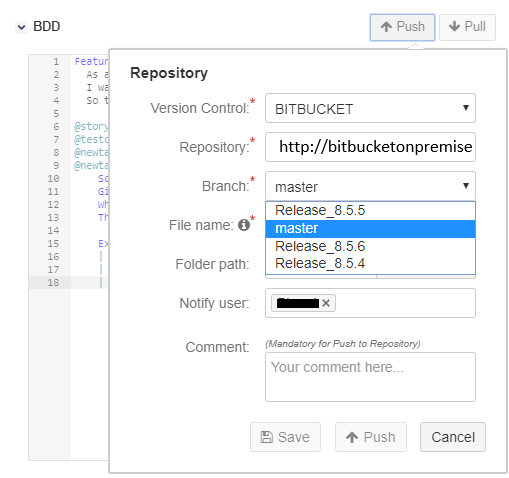
Now the code is already pushed to repository and updated in the repository. Users can pull the updated code from repository to QMetry Jira add-on and store it in QMetry database.
1 .Open the Requirement details page in JIRA add-on.
2. Locate the BDD section on the page.
3. Click on the Pull button. It will pull the latest code from repository and save it automatically in QMetry.
On completion of the test process,
Users can reuse the existing test case for automation testing using the BDD code written in the Requirements module.
The Test Case ID of existing test case is mentioned in the BDD code using annotation. Individual test case ID can be mentioned for individual scenarios.
The test scenarios written in the Requirement BDD section are added as test steps of the test case mentioned with annotations.
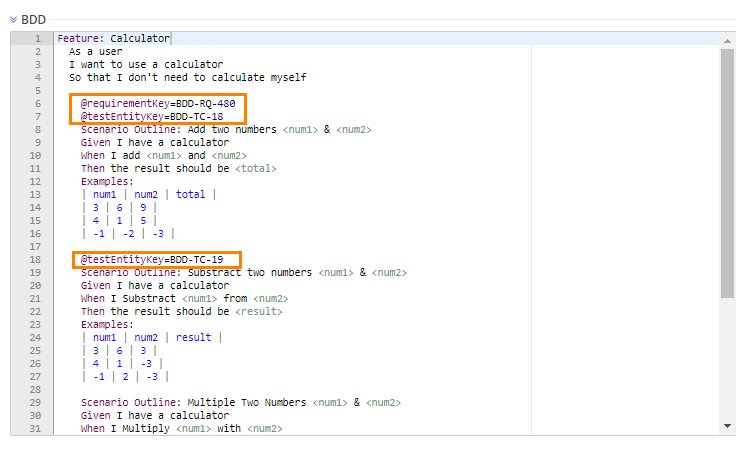
Let us take the following example.
In BDD code, Test Case ID "BDD-TC-18" is mentioned using annotation as @testEntityKey=BDD-TC-18.
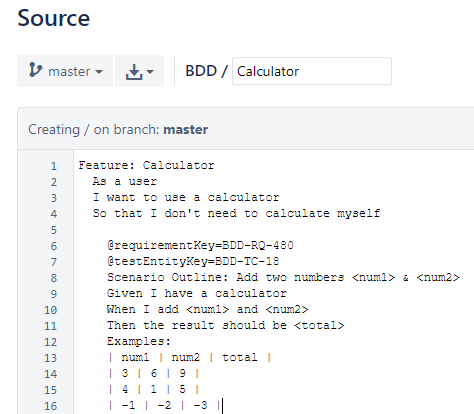
In repository-
When the BDD code is executed,
Test Scenarios written in the BDD code are added as test steps to the test case.

Once the BDD code is executed, the automation test case is either created/updated. To trace the test coverage, users can link such test cases to requirement.
To link such test cases to requirement, Requirement ID should be mentioned in the same test scenario of the BDD code where the Test Case ID is mentioned. The Requirement ID is mentioned using annotation.
When Test Case ID and Requirement ID both are mentioned using annotations in the same BDD code, then the test case created as BDD execution result will be automatically linked to that requirement.
Let us take the following example.
In BDD code, Test Case ID "BDD-TC-18" is mentioned using annotation as @testEntityKey=BDD-TC-18.
Requirement ID "BBD-RQ-480" is mentioned using annotation as @requirementKey=BDD-RQ-480.
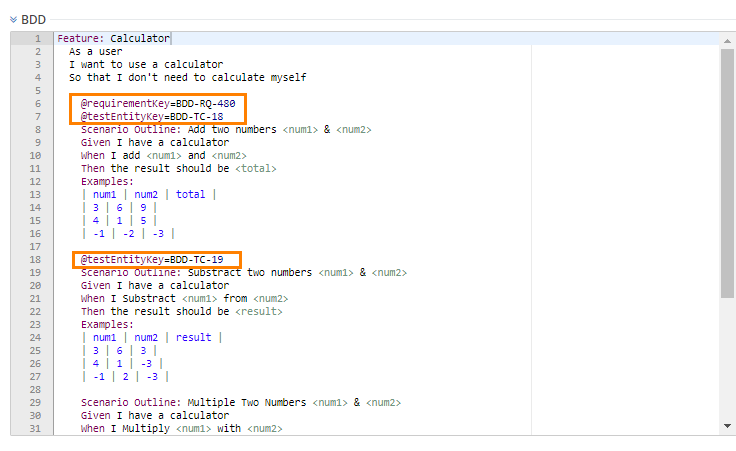
On the requirements details page, open the Test Case tab and verify that the test case is linked to the mentioned Requirement ID.
