There are three tabs on the page: General Settings, Audit and Configure Logo.
These are general settings that will be applicable to all the users of QMetry unless the System Admin or the user makes any changes in the settings.
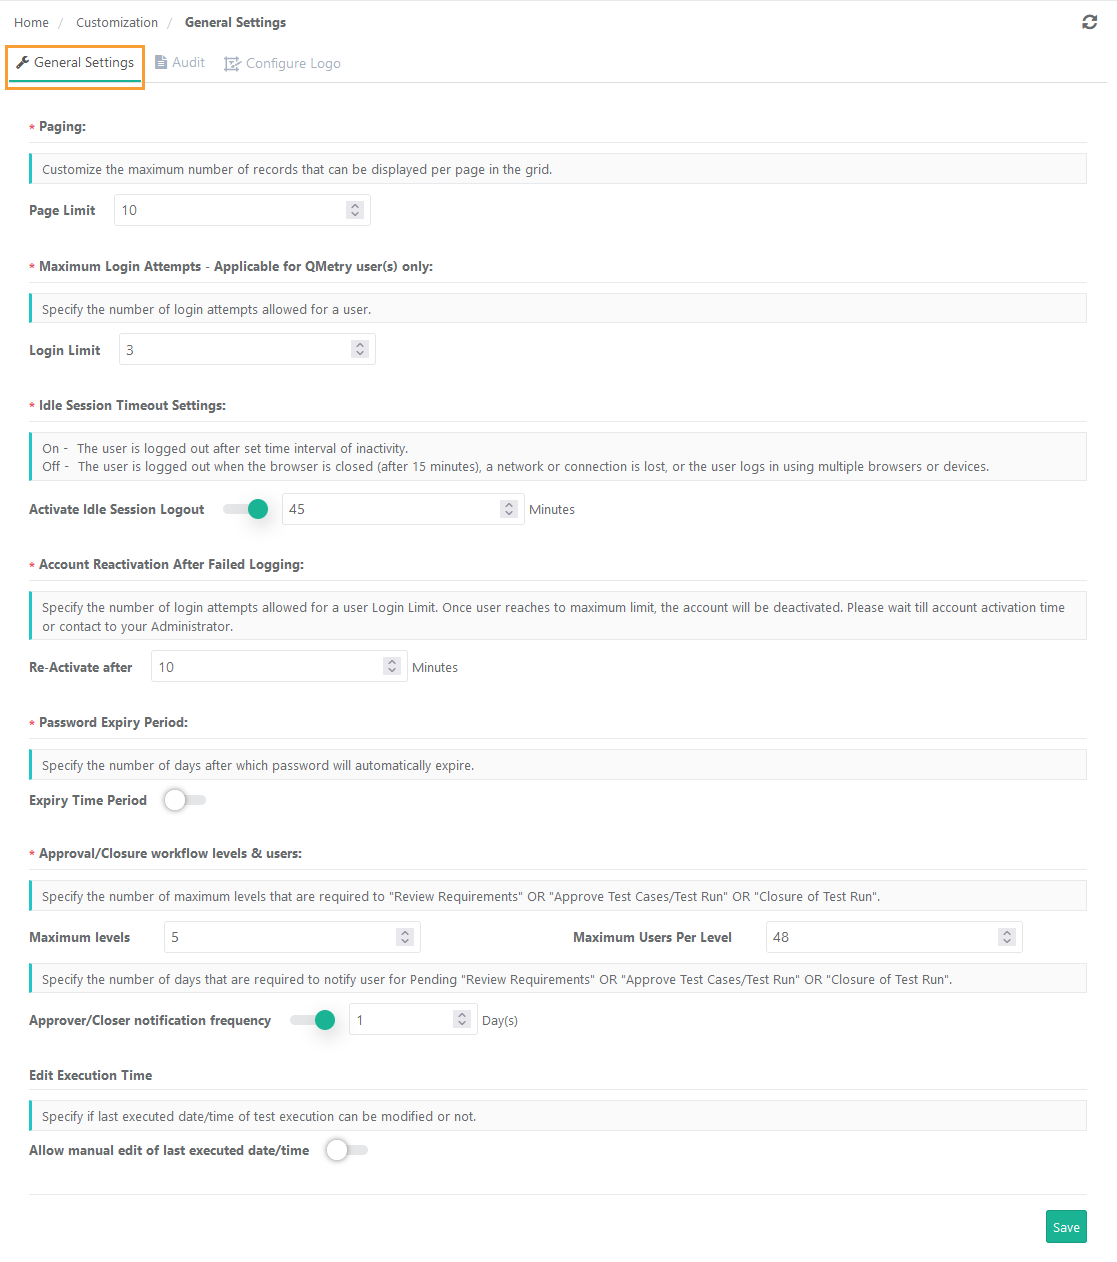
Paging: Customize the maximum number of records that can be displayed per page in the grid. You can restrict total number of records to be displayed on one page by setting value of Page Limit. Maximum is 100 records per page.
Note: "Records initially loaded" value in Default User Settings cannot exceed the number mentioned here.
Maximum Login Attempts: Specify the number of login attempts allowed for a user. Mention the number of attempts in the Login Limit field.
Idle Session Timeout Settings: System Administrators can configure Idle Session Timeout Settings and make the idle users log out of QMetry forcefully after set time interval or by default after 60 minutes. The settings are applicable to QMetry, LDAP, SSO authenticated users.
Use Cases:
→ Effective license utilization for customer having concurrent license : When users do not log out or close browser, their session remains active, thereby preventing other waiting users to login even if the seats are available and are unused.
→ Organizations in highly regulated industries like banking, healthcare and life sciences have regulations that the idle users sessions should logout after set time interval as per their compliance standards.
The Activate Idle Session Logout toggle option is provided on the General Settings tab of General Settings & Audit.
The option remains “Off” by default. The user is logged out only when the browser is closed (after 15 minutes), a network or connection is lost, or the user logs in using multiple browsers or devices.
If the option is set “On”: The idle user is logged out after set time interval of inactivity. Enable Activate Idle Session Logout and the specify the inactive time in minutes after which the idle user will be logged out of QMetry. The minutes field shows 60 minutes by default. You can set the idle session time duration between 15 minutes to 240 minutes. The log out details are displayed in the Login Summary Dashboard.
Account Reactivation After Failed Logging: Once user reaches the maximum Login Limit as mentioned above, the account will be deactivated. Set the time in the Re-activate after for a user-account to stay locked after exceeding the Login Limit.
Password Expiry Period: Specify the number of days after which password will automatically expire. Enable the Expiry Time Period and the enter the number of days in the Days field.
Password Expiry Notification: Specify the number of days before which user will get email notification about the password expiry. This option is enabled only if the Password Expiry Period is set.
Only QMetry authenticated users (Non-LDAP and Non-SAML) will receive this email notification.
Note:
The ability to customize the settings is available only for users who have purchased the Customization app.
Users who do not have the Customization app, the setting defaults to five days before password expiry.
Make sure the Notification Period is less than the Password Expiry Period mentioned in the settings.
Approval/Closure workflow levels and users: Specify the number of levels and users per level required to “Review Requirements” OR “Approve Test Cases/Test Runs” OR “Closure of Test Run”. (if the eSignature feature is enabled)
→ Maximum Levels: Specify the maximum number of levels required to review Requirements OR approve Test Cases/Test Runs OR closure of Test Runs.
→ Maximum 5 approval levels can be added to the approval workflow.
Once the Maximum Level is set and levels are added, Admin cannot alter the Maximum Level to make it lesser than the levels which are already added.
For example, initially the Maximum Levels is set as 5. Admin has already added 4 levels. Now, the Admin can not make the Maximum Level 3 which is lesser than the levels already added i.e. 4 in this example.
→ Maximum Users per Level: Specify the number of users per level required to review Requirements OR approve Test Cases/Test Runs OR closure of Test Runs.
→ Maximum 50 users can be added as approvers per level.
Once the Maximum Users per Level is set and approvers/reviewers/closers are added, Admin cannot alter the Maximum Users per Level to make it lesser than the approvers/reviewers which are already added for a level.
For example, initially the Maximum Users per Level is set as 25. Admin has already added 20 approvers/reviewers/closers for a level. Now, the Admin can not make the Maximum Users per Level 15 which is lesser than the approvers/reviewers/closers already added i.e. 20 in this example.
Approver/Closer notification frequency: Specify the number of days that are required to notify user for pending "Review Requirements" OR "Approve Test Cases/Test Run" OR "Closure of Test Run". The reminder emails will be sent to the recipient every specified day here. (if the eSignature feature is enabled)
Edit Execution Time: To allow users to modify test case execution date and time on the Execution Screen, enable Allow manual edit of last executed date/time.
The Executed At field is editable only if this flag is turned On. The Date and Time can be changed at two levels: individual test cases and bulk test cases through Bulk Operation.
Click Save to save the settings.
Administrator can configure the number of days they require to retain information of Audit Log and Change Log within QMetry Test Management. The logs can be downloaded in CSV format for the days configured here.
Use Case: For organizations in regulated domains like life science, pharma, etc. have a compliance regulatory requirement to keep the audit logs, change logs, test result logs, eSignature Approval/Closure/Review logs and details for all the assets for long time.
Retention Policy: Mention the details below to retain information for operational or regulatory compliance needs.
Note: You can modify the settings only if the Customization and Audit & Compliance packages are enabled on your QMetry instance.
No of days: The log retention limit can be set from 30 to 1095 days. By default, the logs are retained for 180 days. Mention the days in the box and click Save to save the configuration.
Note: If the number of days set is increased on a certain day, the data for the difference in the number of days increased will be made available in future. Older data from current date to the previous set days will be available, but for the increased days in the past the data won’t be available.
Download logs in CSV format: Select the date range you want to download the logs for. The calendar allows to select the dates in accordance with the number of days set above. You can configure the dates from current date to past date up to which you need the logs.

When you click on the buttons to download the logs, a notification is added to the notification window.
Click on the notification icon on the header. It shows the list of Activities.

Click on the Scheduled Task button.
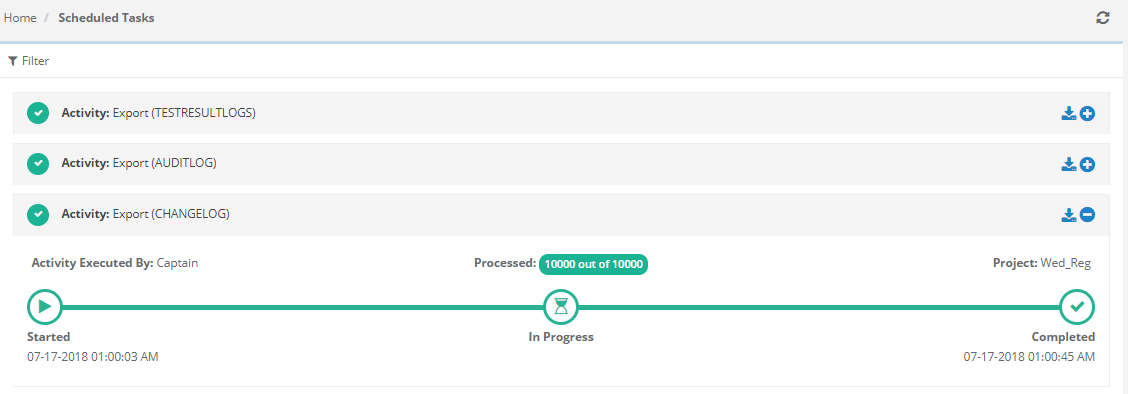
The screen shows all the activities completed or in queue.
Expand the Activity related to Audit Log and you can see its progress. You can also download the log by clicking on the Download icon for the activity.
System Administrators can now add their organizations logo to the PDF and Word exports for test executions, test cases, System Reports, Custom Dashboard, scheduled reports as well as on the email notification templates. If permitted by the system administrator, project administrators can override the default logo configured by the system administrator and add their project logo to the PDF and Word exports for the project.
Note: The feature is only available for customers who have purchased the Customization app.
Use Case: Organizations share the Word/PDF exports of test assets (test cases, test executions, exploratory testing), System Reports, Custom Dashboards for their clients or approval authorities for showing testing progress. They need an ability to add their own or client logos on Word/PDF exports.
Notes:
Users can either upload a new logo or use the default QMetry logo. Logos uploaded in the past are not preserved.
Settings of Project settings will be given higher preference than the Instance level settings.
Events of upload/change the logo on the Instance or Project level are captured in the Audit Logs.
Email notifications will always display the logo configured at the instance level.
Required Permissions:
Users should have Customization “Modify” permission for Instance level configuration.
Project level settings are enabled by the Admin from the Instance level. Once it is enabled, users should have Project “Modify” permission to configure the Project level settings.
Image Specifications:
The image should have the following characteristics:
JPG or PNG format
Horizontal proportions (Recommended 144 x 50 px)
White or transparent background
1 MB maximum size
Configure Logo at Instance level
Steps:
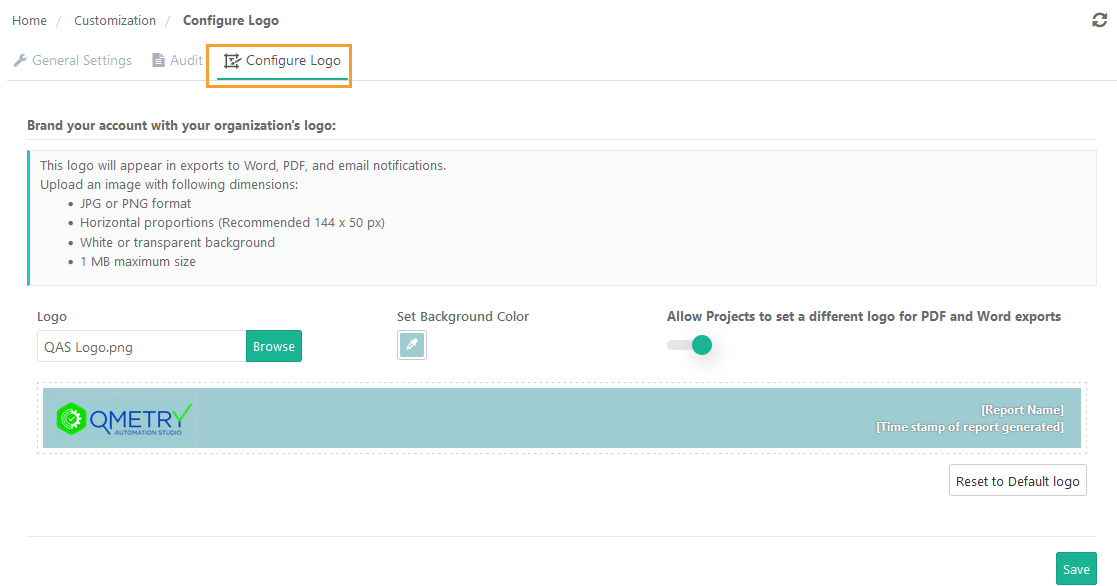
1. Go to Customization > General Settings & Audit.
2. Open the Configure Logo tab.
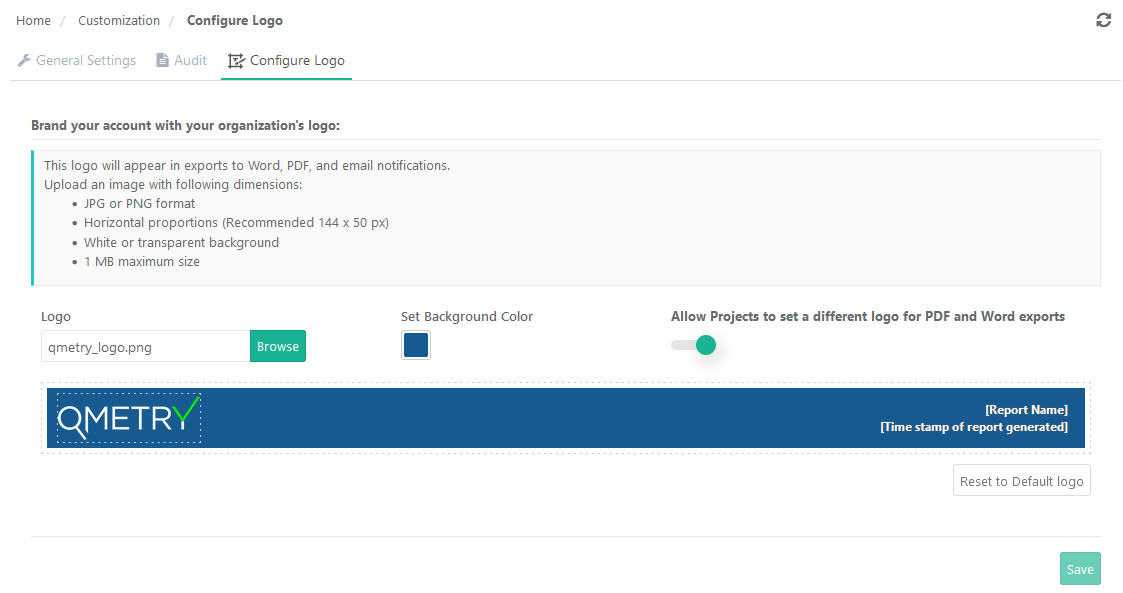
The QMetry logo is default logo.
Browse and upload your preferred logo, if you want to replace the default logo with the desired one. The preview of logo is displayed on the screen.
Set the background color of the logo by clicking on the Set Background Color.
Allow Projects to set a different logo for PDF and Word exports: Enable the option to allow users to set the logo at Project level.
Reset to Default Logo: Click on the button whenever you want to replace the uploaded logo with the default logo.
3. Click Save to save the settings.
Configure Logo at Project Level
If permitted by the system administrator, project administrators can override the default logo configured by the system administrator and add their project logo to the PDF and Word exports for the project i.e. test case export, test executions export, Exploratory Testing, System Reports, Custom Dashboards, and scheduled reports.
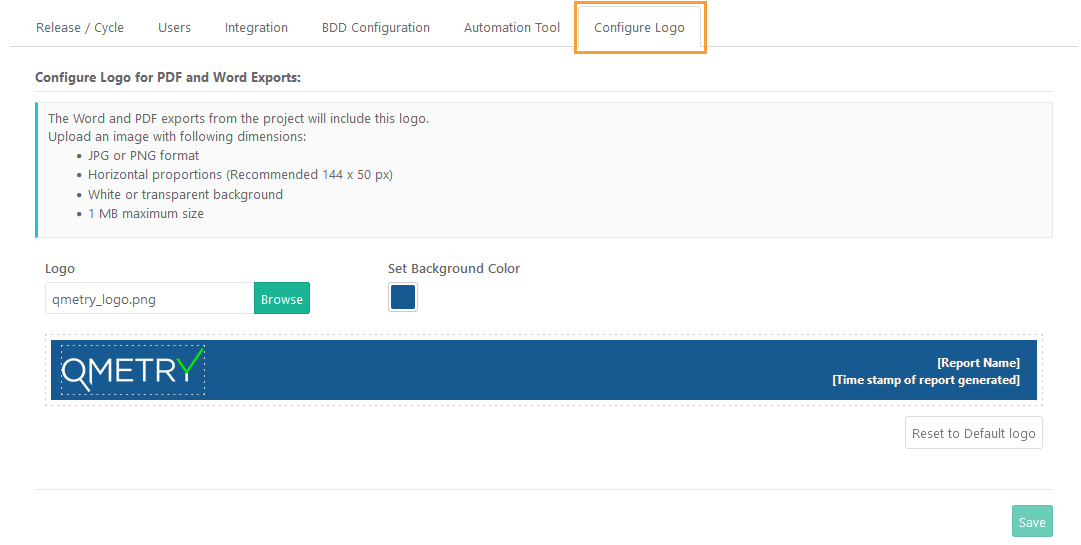
The Configure Logo tab will be visible under Projects > Project/Release/Cycle, if the Allow Projects to set a different logo for PDF and Word exports option is enabled in Customization > General Settings & Audit > Configure Logo.
Note: Email notifications will always display the logo configured at the instance level.
Steps:
1. Go to Projects > Project/Release/Cycle.
2. Open the Configure Logo tab.
The QMetry logo is default logo.
Browse and upload your preferred logo, if you want to replace the default logo with the desired one. The preview of logo is displayed on the screen.
Set the background color of the logo by clicking on the Set Background Color.
Reset to Default Logo: Click on the button whenever you want to replace the uploaded logo with the default logo.
3. Click Save to save the settings.
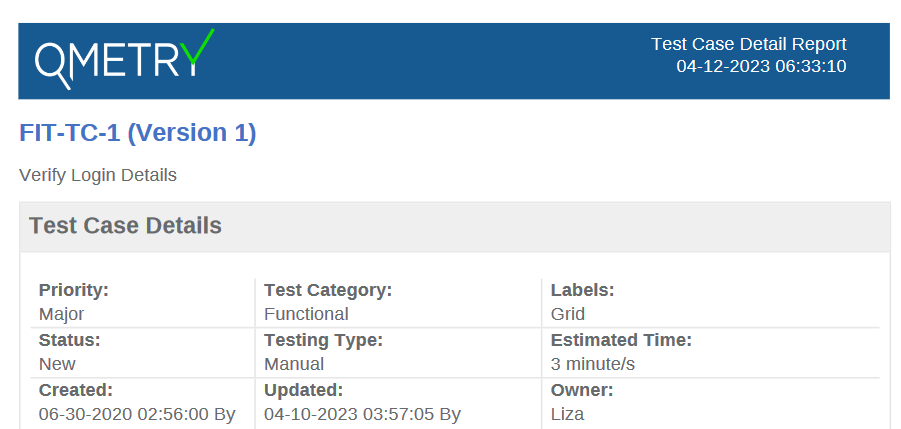
Sample of Test Case Detail Export
