How to add platform attributes? (5) (5)
Platform attributes are custom values which can be used to help track and identify testing results and pass-fail trends. An attribute can be added and then re-used by linking to any platform. Platforms can have multiple attributes that define features and/or configurations of platforms.
For example, an organization may need to test a mobile app against the latest Android OS. They are not concerned about the specific device as much as the operating system itself. Each platform can have an attribute for OS which specifies the version. During test, they can test multiple different mobile phones (often based on availability) and use the attribute OS to record which version of the OS was tested.
To add platform attribute, go to Projects > Platform & Attributes > Platform Attributes.
Click on the New button icon at the top right corner of the screen.
It opens the Create screen for Platform Attribute.
- Field Type: Users can create different types of field: String, Large Text, Number, Lookup List, Multi Lookup List, Date Time Picker. Select the type of the field you are adding for the platform attribute. The remaining fields become visible as soon as you select the Field Type.
Let us add a Platform Attribute with Field Type as "LOOKUPLIST".
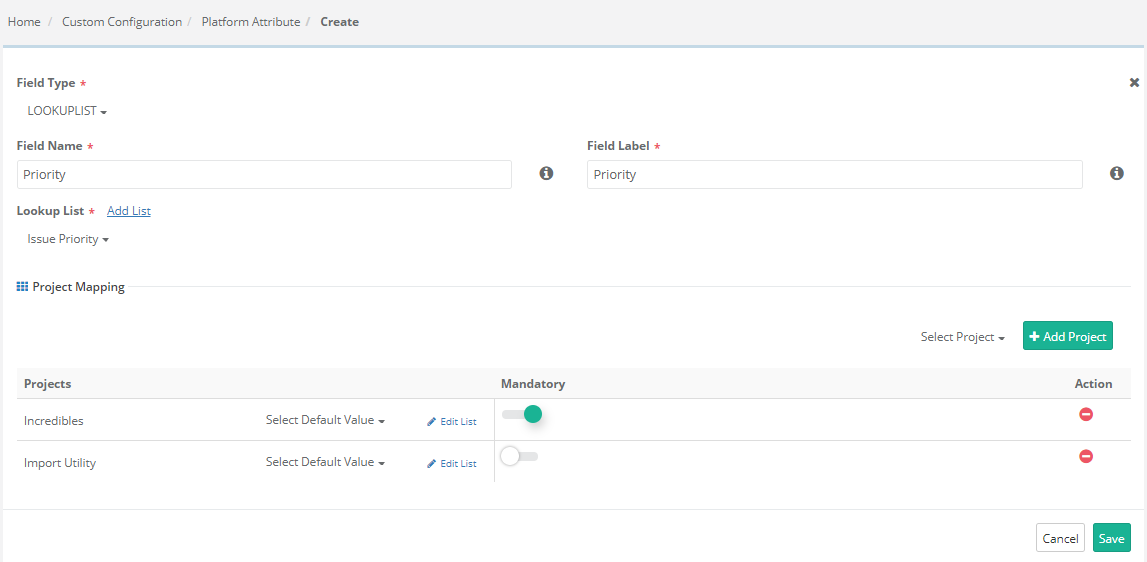
- Field Name: This field represents the unique ID for the field. It remains the same in any project. Blank space is not allowed in the name.
- Field Label: Enter the label that will be displayed on the screen. It is like a field alias and can be changed on project wise.
- If the Field Type is Lookuplist, then you need to select the list that will appear for the field. If the list does not exist, then click on the Add List link to create new lists.
- Default Value: Mention the Default Value you want to maintain for that list.