Migrating from HP ALM to QMetry using QMetry Migration Tool (5) (5)

In this guide, we will run you through the steps to migrate your data from HP-ALM to QMetry Test Management. This documentation enlists all the information on migration process like what can be migrated, and what are the assets/data that may not be migrated, features of the migration utility along with System Requirements and Pre-requisites to be taken care before proceeding with migration.
What ALM assets are migrated?
| ALM Assets | QMetry Assets |
|---|---|
| Requirements | Requirements |
| Tests | Test Cases |
| Test Sets | Test Suites |
| Test Runs | Test Execution |
| Defects | Issues |
Capabilities of the Migration Tool
- Migrates Requirements, Tests and all their versions, rich text in Test Steps.
- Migrates Test Data in Test Steps, Test Sets, Test Runs/Executions, Defects.
- Migrates custom fields & their values for all the assets.
- Migrates folder structure.
- Migrates comments for all the assets.
- Migrates linkages between assets.
- Migrates creation date for all the assets.
- Migrates all the attachments & URL links.
- Resumes migration failed / stopped due to an error.
- Support for Enumerated Mapping of ALM fields and their values with QMetry fields.
System Requirements
- JDK 1.8.0_151 or above needs to be installed.
- MySQL 5.6 or above needs to be installed.
Before you begin (Prerequisites)
- Get your QMetry Migration Tool license from your account manager/QMetry Support
- Copy the "qmetry-license-version-1.0" license key under tomcat's ../apache/bin/ directory.
- Create HP ALM users in QMetry.
- For test assets like Requirements, Test cases, etc. there could be several HP ALM / project-specific fields that might not be present in QMetry. Such fields can be created as user-defined fields in QMetry. Here is a quick help on how you can create user-defined fields in QMetry.
ALM Utility Details
- Get the ALM Migration utility file from QMetry Support which contains qmalm.war & init.sql
Migration Steps
- Before proceeding with the migration, get HP ALM → QMetry migration utlity up and running.
- Go to your tomcat installation directory. To deploy the utility, copy the 'qmalm.war' file to the ../apache/webapps/ directory, it will auto-extract to 'qmalm' folder.
- Your MySQL services should be started and login credentials should be : username - root, password - root.
- Import Database script 'init.sql' saved in C:/ into MySQL DB using below commands:
- Run Command Prompt in Windows and login to MySQL DB: C:/mysql/bin/mysql -uroot -proot
- Import the database script using the command: SOURCE C:/init.sql;
- Wait for the utility database import to complete.
- Ensure your Migration Tool is license as per Prerequisites Step 1.
- Start tomcat to run the application by executing the ./startup.sh in linux OR startup.bat in windows located under ../apache/bin/ directory.
The application should be accessible from the same machine using the URL : http://localhost:8080/qmalm . Once you're on the ALM login page of the Utility, proceed with steps below:
Step 1: ALM Login
We recommend logging in using Admin Credentials so that the Projects available for migration are not restricted by a user's permissions.
- Base URL: HP ALM URL in the format: http://<IP Address>:<Port>
- Username: HP ALM Username and Password

Step 2: QMetry Login
We recommend logging in using Admin Credentials so that the Projects available for migration are not restricted by a user's permissions.
- Base URL: Your QMetry login : example: https://testmanagement.qmetry.com
- Username and Password: QMetry Username and Password
- Organization Code: Enter QMetry Organization Code, or leave it empty.

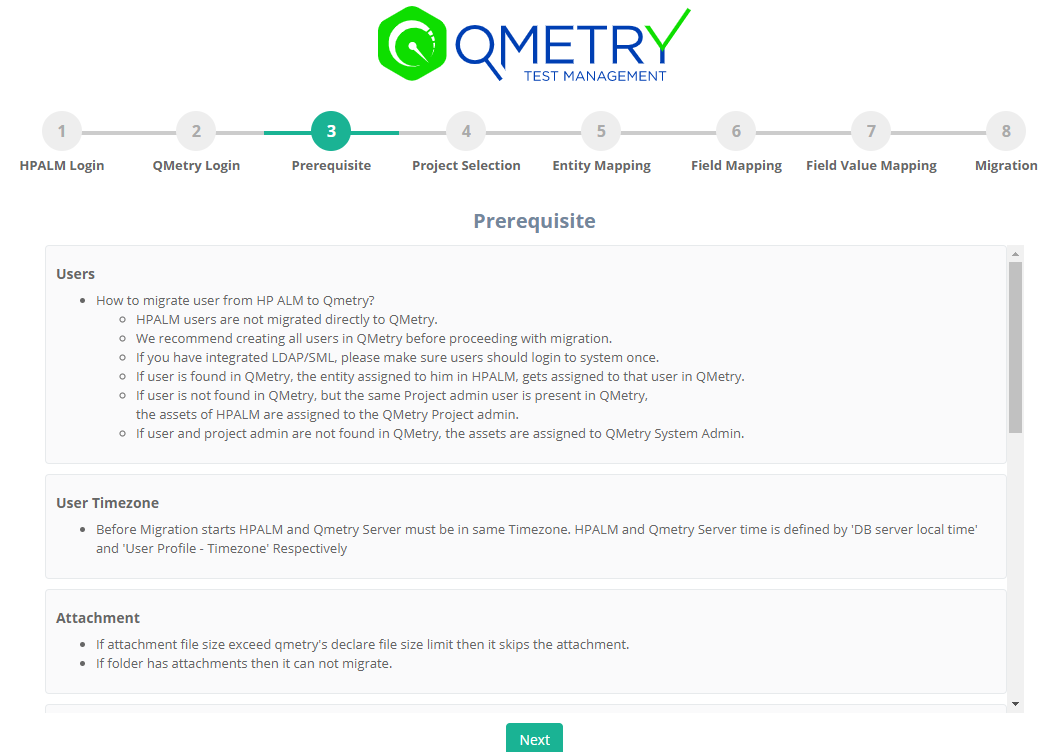
Step 3: Prerequisites
Go through the Pre-requisites section to know more about how users, user-defined fields, etc. need to be created and managed during the migration process.
Step 4: Project Selection
- Select ALM Projects you would like to migrate into QMetry. The selected projects are migrated one by one.

Step 5: Entity Mapping
Under this section, map your HP ALM assets being migrated into relevant QMetry Assets.

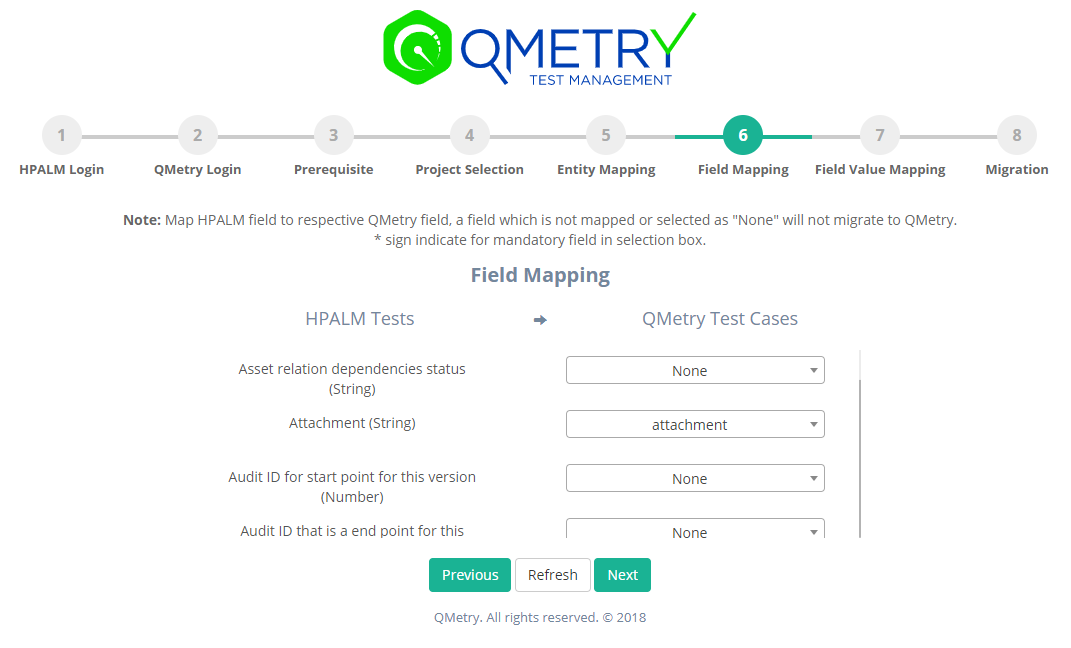
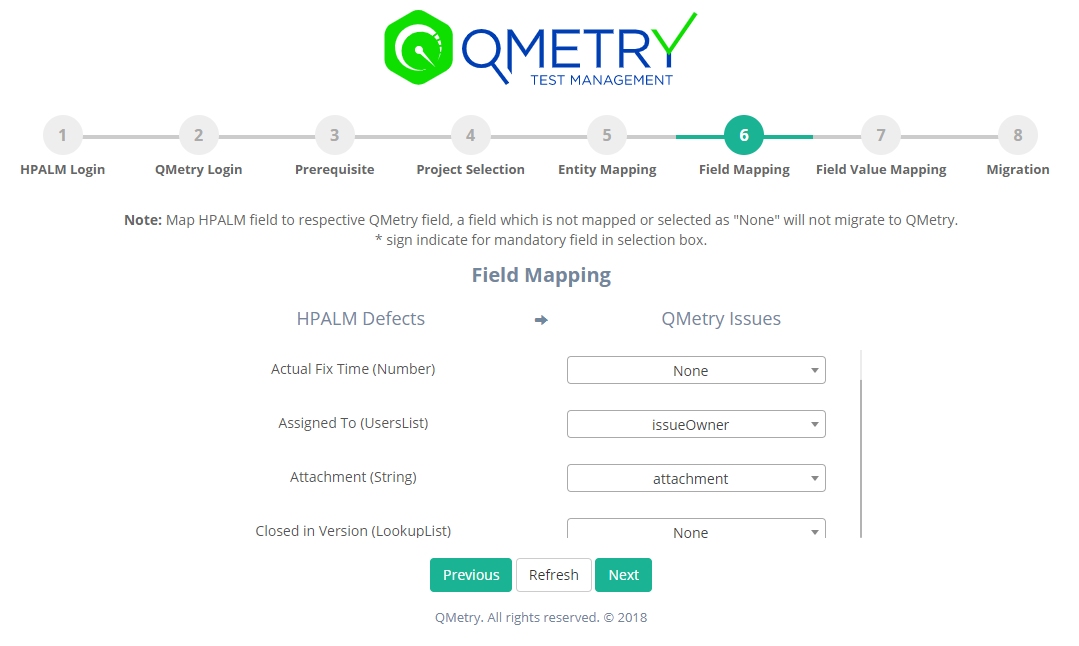
Step 6: Field Mapping
Field mapping helps you to migrate the data from the fields of your ALM assets to respective QMetry fields. Complete the field mapping for as many fields as possible to get their data migrated in QMetry. Fields can be mapped for Requirements, Tests, Test Sets, Test Runs and Defects.
Note: There would be several fields that are present in HP ALM, which might not be present in QMetry. In such cases, we recommend creating those fields as custom fields (user-defined fields) in QMetry before proceeding with the migration.
- See Pre-requisites point 2.
- Here is a quick link on creating user-defined fields
Field Mapping for ALM Requirements → QMetry Requirements

Field Mapping for ALM Tests → QMetry Test Cases
Field Mapping for ALM Test sets -> QMetry Test Suites

Field Mapping for ALM Defects → QMetry Issues
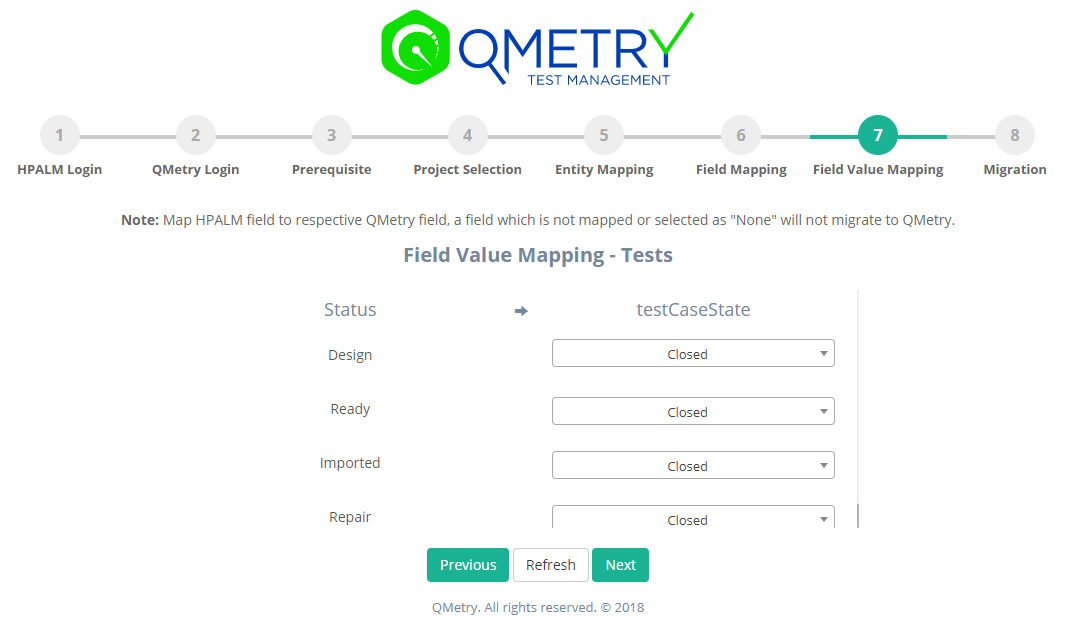
Step 7: Field Value Mapping
You can map the values of your different fields of HP ALM, whose values may not match with QMetry field values.
For example,
- In HP ALM, you have Priority Field having values : Low, Medium, High, Very High, Urgent, while;
- In QMetry Priority Field may only have values : Hight, Medium, Low.
You can map such field values to have appropriate values while they are migrated in QMetry.
Field Value Mapping for Requirements

Field Value Mapping for Tests (QMetry Test Cases)
Field Value Mapping of Test Sets (QMetry Test Suites)

Field Value Mapping for Executions

Migration Summary. Click "Migrate" to start Migration.

The migration progress can be monitored until it is completed.
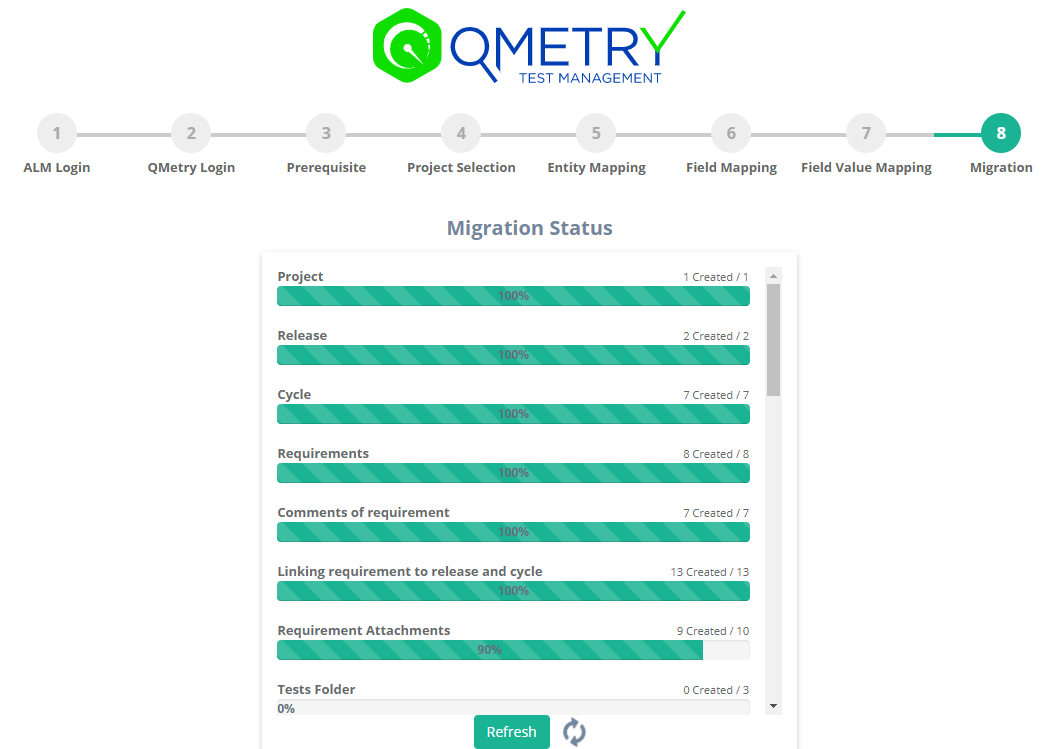
Once the migration is completed, you can login to QMetry and verify the all the migrated data in your given projects.
Need Assistance?
If you run into any questions or concerns during your migration, you can reach out to QMetry Support by sending an email at : qtmprofessional@qmetrysupport.atlassian.net, or you can also raise a ticket directly on our Support Portal. We would be happy to assist you!