Back to QMetry All Products Help Page
How to perform bulk operations on test suites?
Where to access the Bulk Operation feature for test suites?
- Open Test Suites module list view.
- Click on the Con icon
 at the top right corner on the toolbar and select Bulk Operations.
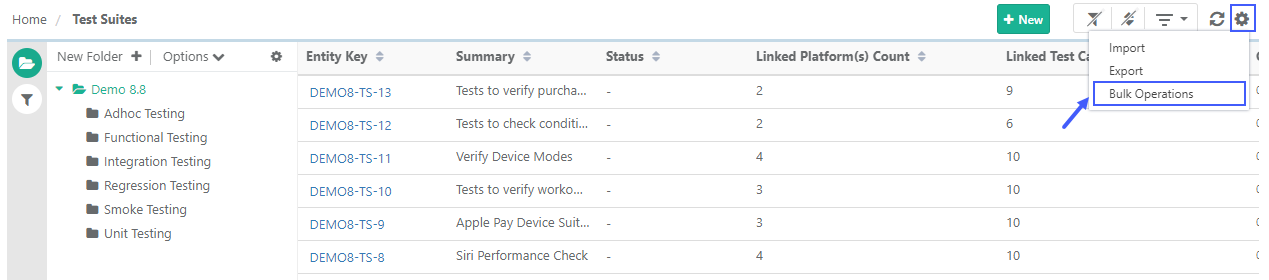
Note:
- The Bulk Operation option remains disabled by default if there are more than 1000 test suites.
- Bulk Operation can be performed on a maximum of 1000 test suites at a time. You can make use of different filters to search specific records based on different criteria on the grid - It will help you pick the required items and narrow down the test suites count and move ahead with the bulk operation.
- The filters applied on the test suite grid are carried forward on the bulk operation screen. In this way, you can easily perform bulk operations with filtered records.
- All the columns enabled on the grid are also carried forward on the bulk operation screen. You need to enable required columns on the grid from the "Arrange Columns" option to view them on the bulk operation screen.
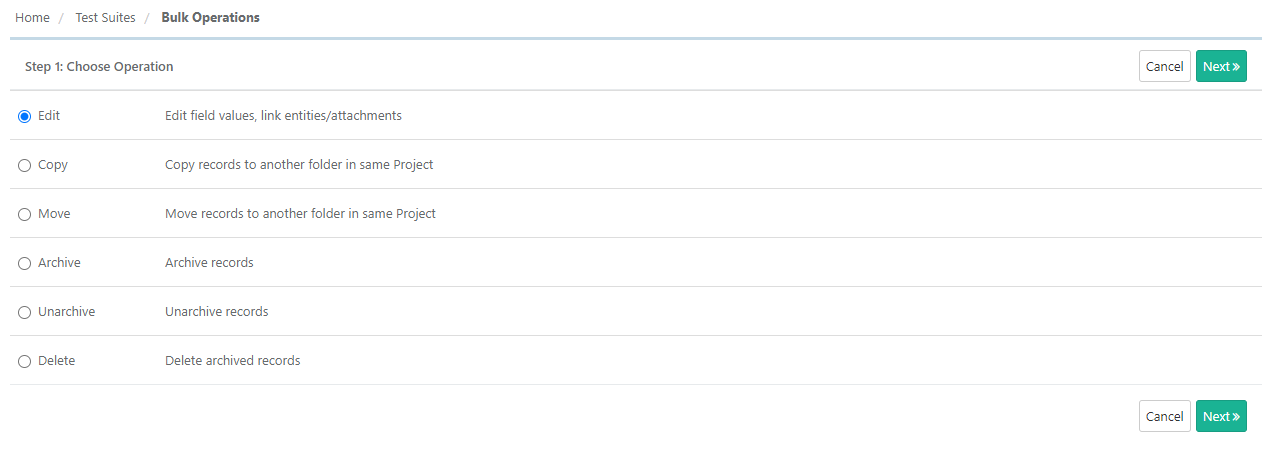
The following bulk operation feature is provided for test suites to perform -
Bulk Edit
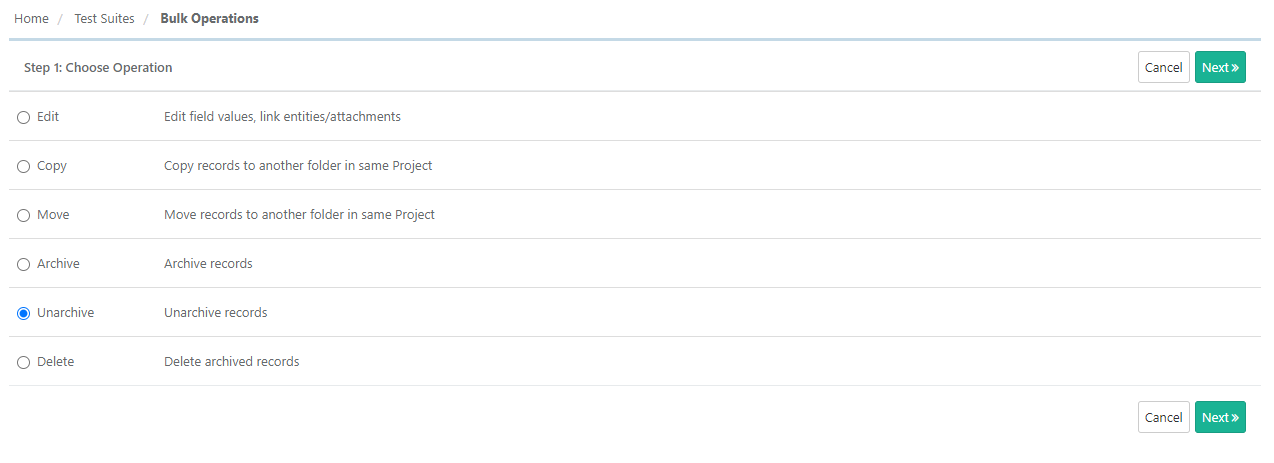
- Select the Edit operation you want to perform on the assets and click Next.
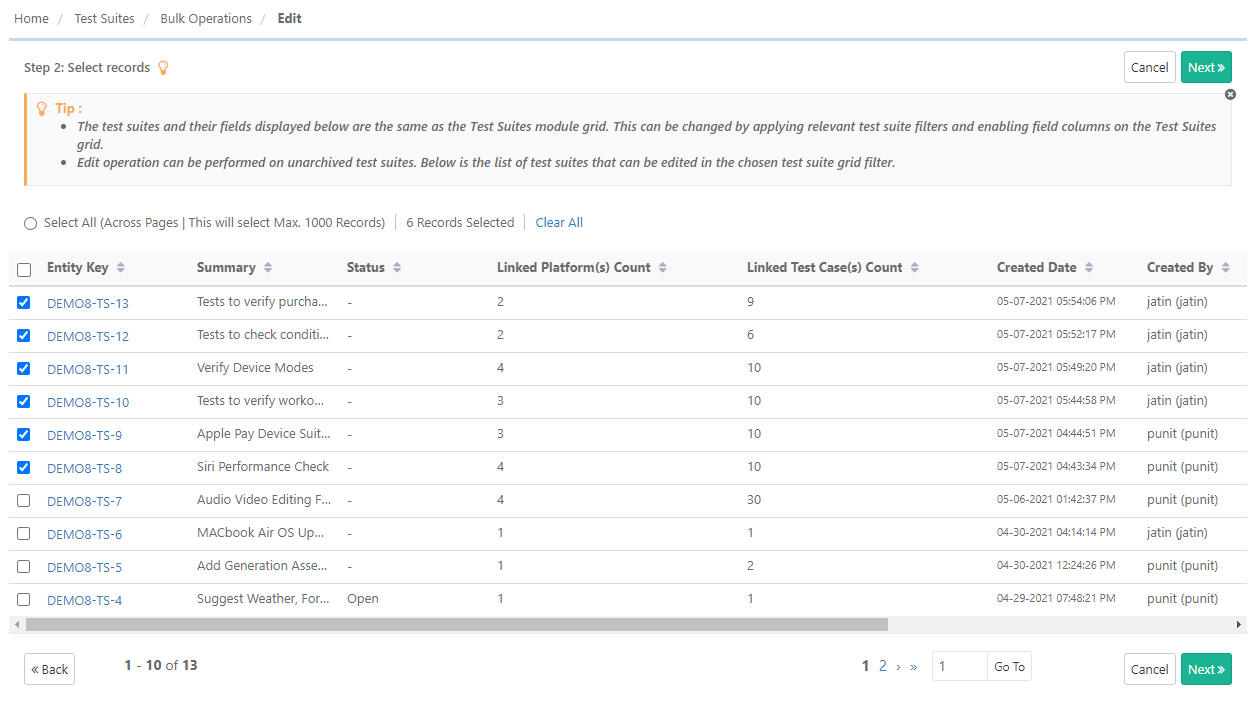
- Select records - The next screen displays records with the check box.
- Select individual assets by selecting checkboxes or choose "Select All (Across Pages | This will select Max. 1000 Records)" to perform bulk operations and then click Next.
The screen opens with system fields for editing bulk test suites. Below is the list of options you will get to edit selected test suites in bulk.
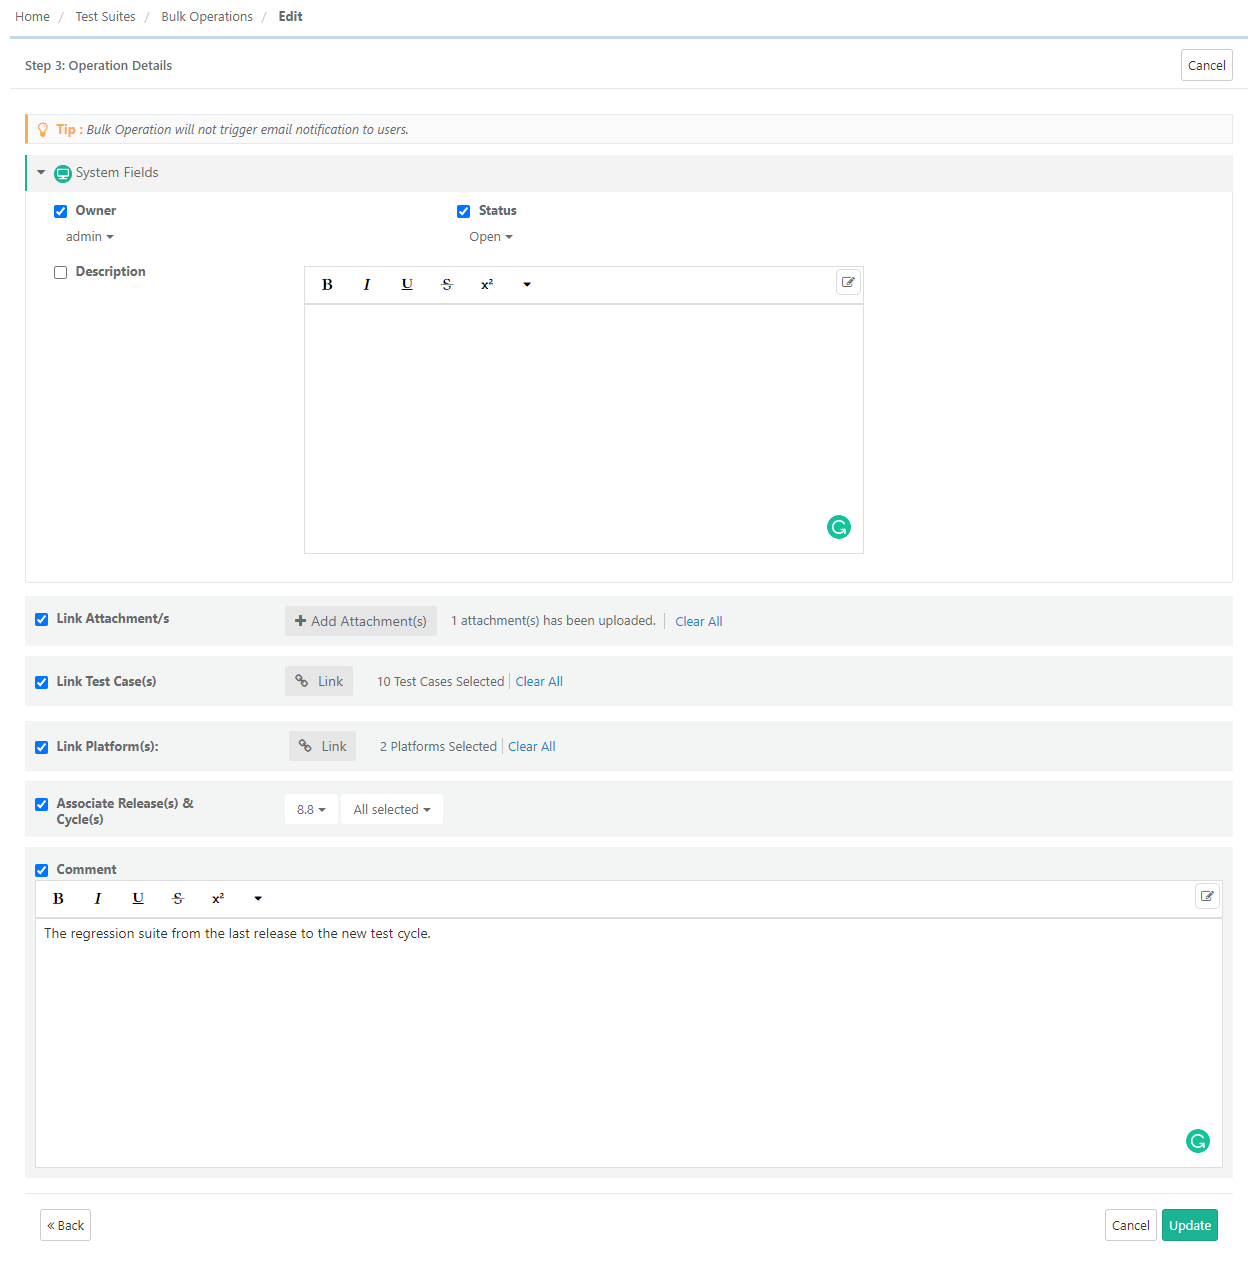
Once you are done changing field values, click on Update to save the changes.
Bulk Copy
The Copy operation can be performed on unarchived test suites. Users can copy/move test suites within the same project to root or different folders. You can not bulk copy the test suites from one project to another.
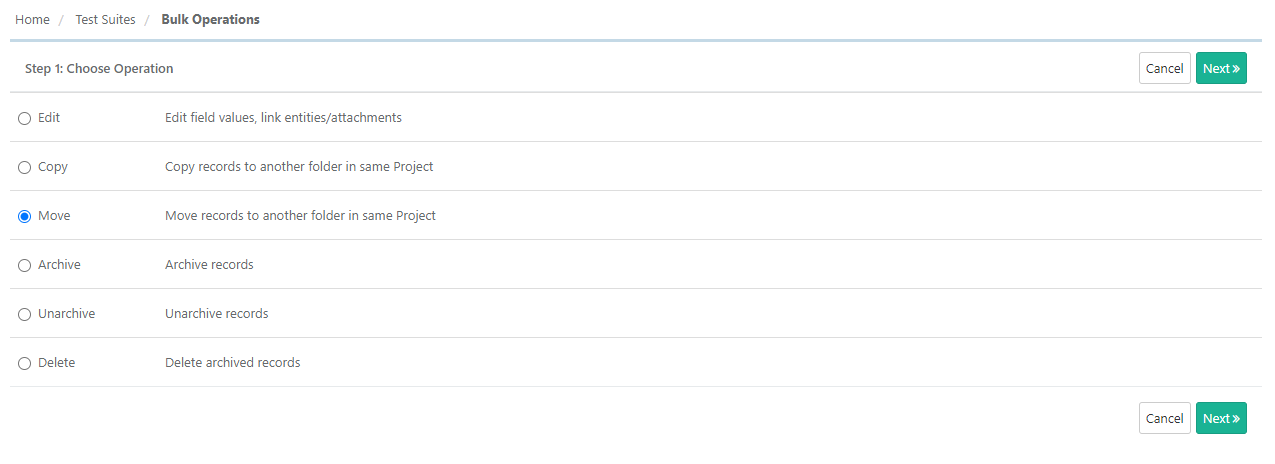
- Go to Bulk Operations.
- Select Copy as the operation to perform and click Next.

- Select test suites which are to be copied. If you want to copy all the test suites across pages then select the Select All (Across Pages) option. Maximum 1000 records can be selected at a time.

- Click Next.
- The following is the screen to select folder and other options to copy the test suite.
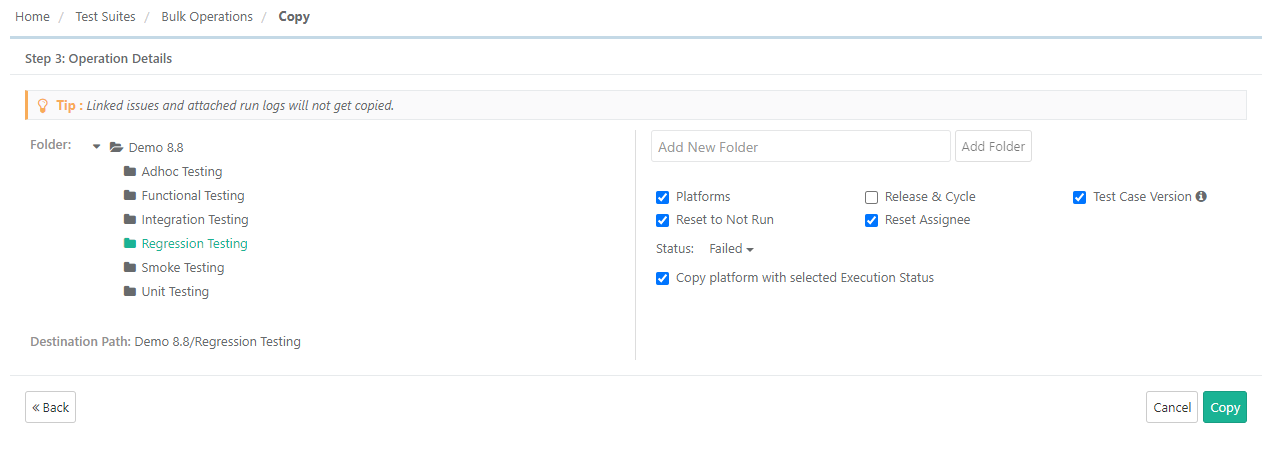
Select a folder on the tree in which the test suite is to be copied.
The checkboxes - Platforms, Release & Cycle and Reset to Not Run are selected by default.- Platform: Select the check box to copy the associated platform with the test suite that is being copied. This option is selected by default; however, some companies who change platforms frequently between releases may opt to deselect this from time to time to avoid adding a lot of test runs with platforms that are not needed for testing.
- Release & Cycle: Select the check box to copy Release & Cycle associated with the test suite. This option is selected by default. If you do not want to copy the releases and cycles associated with the test suite, then deselect this option.
- Test Case Version: It will sync test cases with the latest unarchived version of the test case that is associated with the test suite. This allows users to easily create regression suites using latest unarchived version of test cases. If you want to use the preserved version of the test case then deselect this option.
- Reset to Not Run: Select the check box to reset the test case execution status to Not Run.
- Reset Assignee: Select the check box to reset the Assignee.
- Execution Status: On the Execution Status drop-down, select the Execution Status of test cases you prefer to copy the test cases of.
- Copy platform with selected Execution Status: Users can copy Platforms based on the selected Execution Status above. Only those platforms will be copied which has a test case with selected execution status. The check box is enabled on selecting the Execution Status. Select the check box to copy platforms which has test cases with selected status run.
The following matrix shows the impact of the option selected on the screen.PlatformsRelease & CycleReset to Not RunReset AssigneeExecution StatusCopy platform with selected Execution StatusWhat will be copied?N N N N N N (a) Only linked test cases will be copied with the same version. Y N N N N N (b) All the linked test cases and all linked platforms will be copied. Y Y N N N N (c) Along with (b) above, associated release and cycle will be copied with assigned execution status and assignee. Y Y Y N N N (d) Along with (b) above, associated release and cycle will be copied with assignee. Execution Status will be reset to "Not Run". Y Y Y Y N N (e) Along with (b) above, associated release and cycle will be copied, Execution Status will be resent to "Not Run" and Assignee will be reset. Y Y Y Y Y N (f) Only test cases with selected Execution Status in any of the platforms will get copied for all the platform and release-cycle combinations. Y Y Y Y Y Y (g) All test cases and platforms will be copied as per the selected execution status.
- Click Copy.
- The count of copied entities is displayed in the Scheduled Task window that can be opened by clicking on the icon on the application header.
Bulk Move
The process is the same as Bulk Copy except for the version selection. Test Assets will be moved with all the linked entities within the same project/folder selections.
- Go to Bulk Operations.
- Select Move as the operation to perform and click Next.
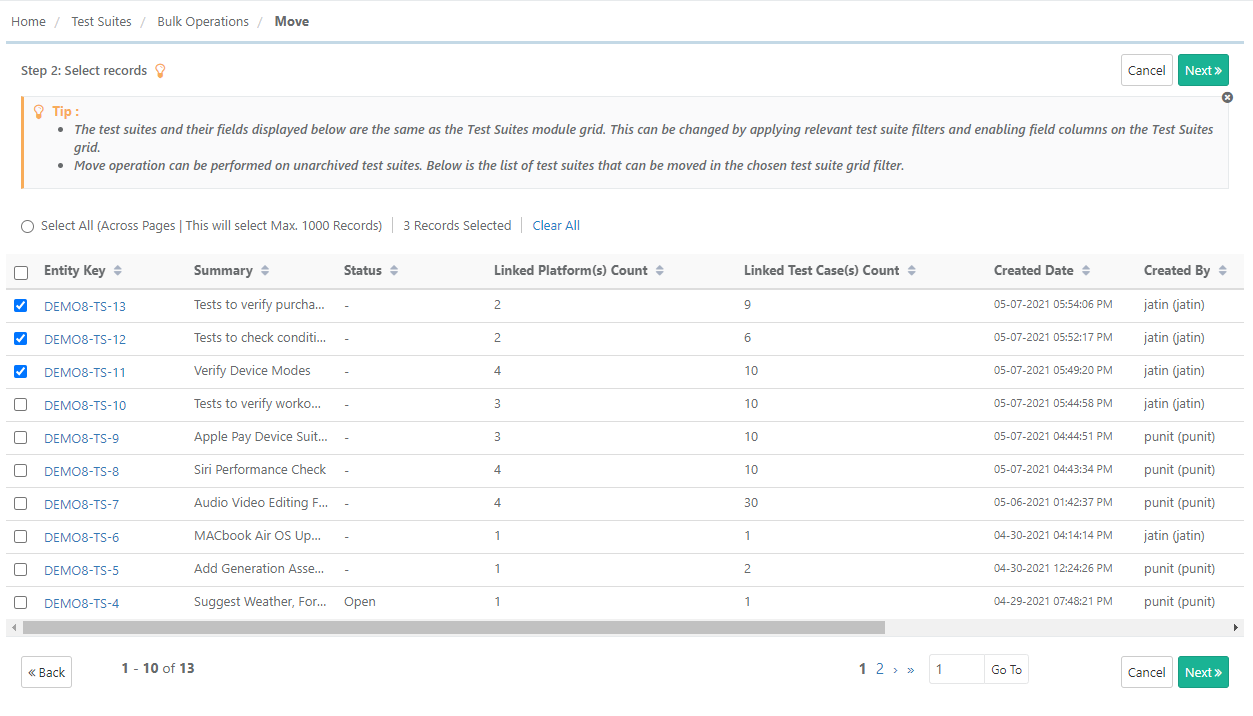
- Select test suites which are to be moved. If you want to copy all the test suites across pages then select the Select All (Across Pages) option. Maximum 1000 records can be selected at a time.
- Select the destination folder where you want to move the test suites.
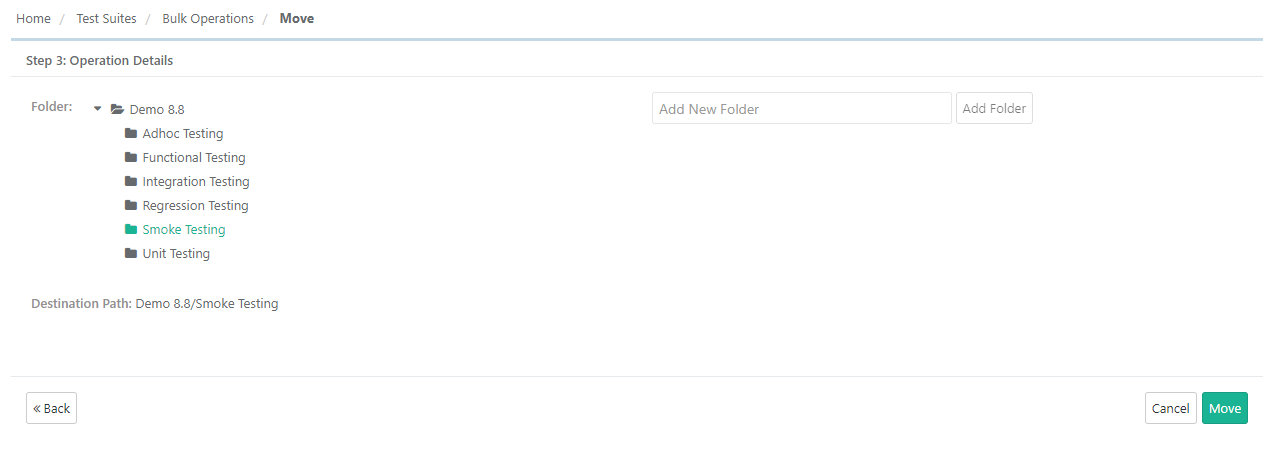
- Click Move.
- The count of moved entities is displayed in the Scheduled Task window that can be opened by clicking on the icon on the application header.
Bulk Archive
Archiving the test suites will hide them from the test suites default list view. The archived test suites will still exist in the project. To delete these test suites, they should be archived first. Archived test suites can be viewed by enabling the "Show Archived Items" option from test suites filters.
- Go to Bulk Operations.
- Select Archive operation and click Next.

- Select test suites which are to be archived and click on the Archive button. Confirm the operation on the dialogue window.
The following operations will be available for archived assets:
- Unarchive: Unarchive selected requirements.
- Delete: Delete archived requirements.
Bulk Unarchive
Unarchive operation can be performed on the archived test suites. The operation helps you unarchive a list of archived test suites based on the chosen test suites grid filter.
- Go to Bulk Operations.
- Select Unarchive operation and click Next.
- The screen shows archived records.
- Select the records you want to unarchive and click on the Unarchive button.

Bulk Delete
To delete the test suites in QMetry, they should be archived first. It is a two steps process - Archive test suites & Delete archived test suites. Deleting the test suites will remove them permanently from the system and these deleted entities can't be recovered back, hence, the operation should be performed with care.
- Select Delete operation and click Next.

- The screen shows archived records. Select records you want to delete by checking checkboxes. To select all the records across pages select the Select All option.
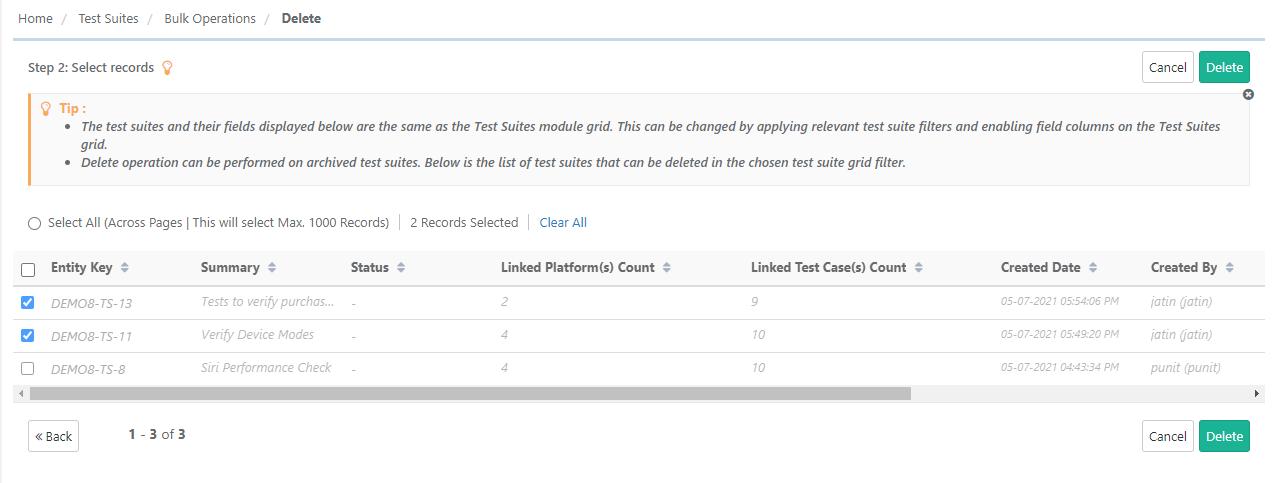
- Once you are done with selecting the records, click on the Delete button. Confirm the operation on the dialogue window that pops up.
Scheduled Task
Click on the Scheduled Task ![]() icon available in the application header. The Scheduled Task icon turns Orange in color whenever any of the following actions is initialized. The icon color changes to original as soon as you click on it to view the task status.
icon available in the application header. The Scheduled Task icon turns Orange in color whenever any of the following actions is initialized. The icon color changes to original as soon as you click on it to view the task status.
- All bulk operations
- Import - IS, TC, TS, RQ
- Export - IS, TC, TS, RQ, Test execution
- Project clone
The screen shows all the activities completed or in the queue.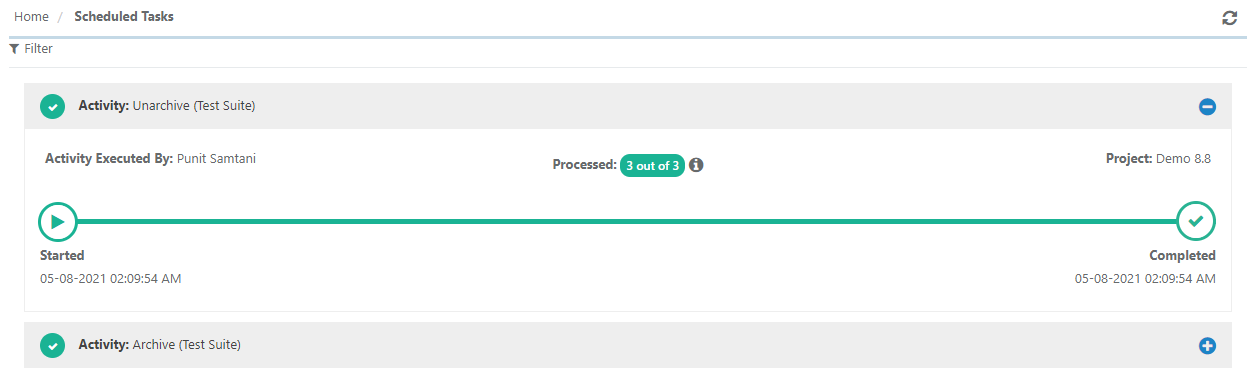
Back to QMetry All Products Help Page