Back to QMetry All Products Help Page
QMetry - Jira integration workflow
Flow Chart


Install & Configure QMetry's JIRA integration Add-On
Install Add on : "JIRA Integration - QMetry Enterprise"
Install "JIRA Integration - QMetry Enterprise" add-on in your Jira Instance. It is free to download.
| Jira Edition | Jira Add-on Availability | Upgrading Jira add-on |
|---|---|---|
Cloud | Already Installed | Automatic Upgrade on 29th Dec '18 and Configuration Required |
| Not Installed | Installation and Configuration Required | |
Server | Already Installed | Upgrade and Configuration Required |
| Not installed | Installation and Configuration Required |
1. Login in Jira with Admin Credentials. Administrator login is required to be able to install the Add-On from Atlassian Marketplace.

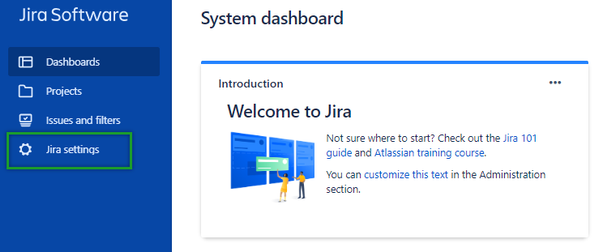
2. After login into the JIRA, in the left side panel Go to the ![]() Jira settings option.
Jira settings option.
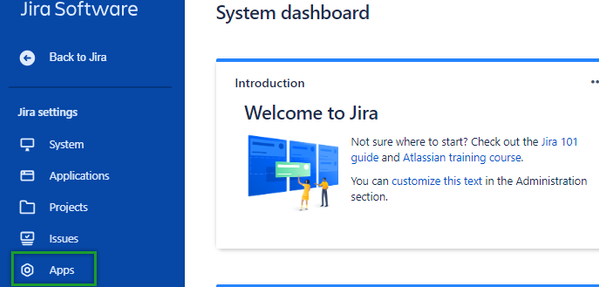
3. In the Jira settings, go to the Apps.
4. In the Apps section, there is an option to find & Install the Add-On from Market place. Click on Install button to install the Add-On "Jira Integration - QMetry Enterprise".

Configuring JIRA add-on with QMetry Admin
1. After installing the "Jira Integration - QMetry Enterprise" Add-On follow below steps to configure Jira with QMetry. The integration requires QMetry admin credentials.
Go to Jira settings (1) >> QMetry Configuration (2) >> Enter QMetry Admin Credentials and OrgCode (3) >> Test & Save (4)
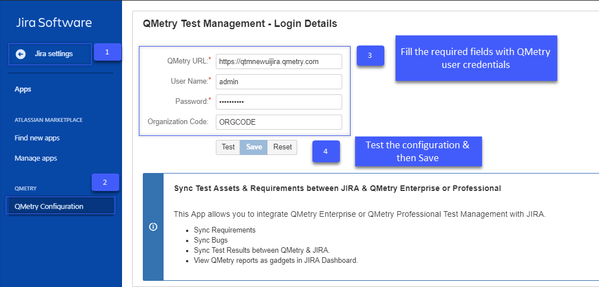
2. After clicking on "Test" button, it gives success message if the provided credentials and OrgCode is correct.

3..After clicking on "Test" button, click on "Save" button to save the details. After saving, it shows successful message.
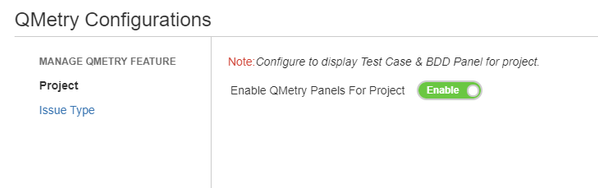
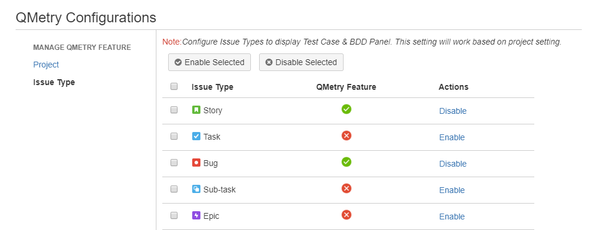
Enable QMetry Test case and BDD panels for Jira Projects
Configuration to enable QMetry Test case and BDD panels for Jira Projects. This change is required for all Jira projects that are to be integrated with QMetry.
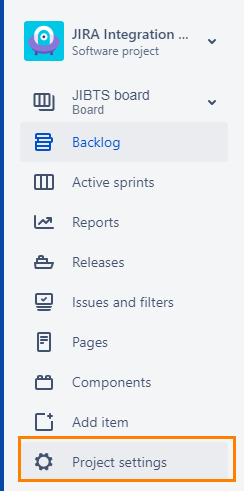
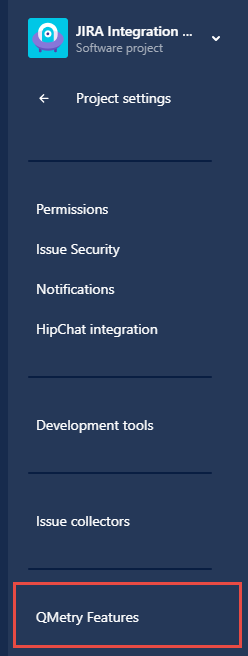
1. Log into Jira and open your Project. Click on Project Settings on the sidebar.
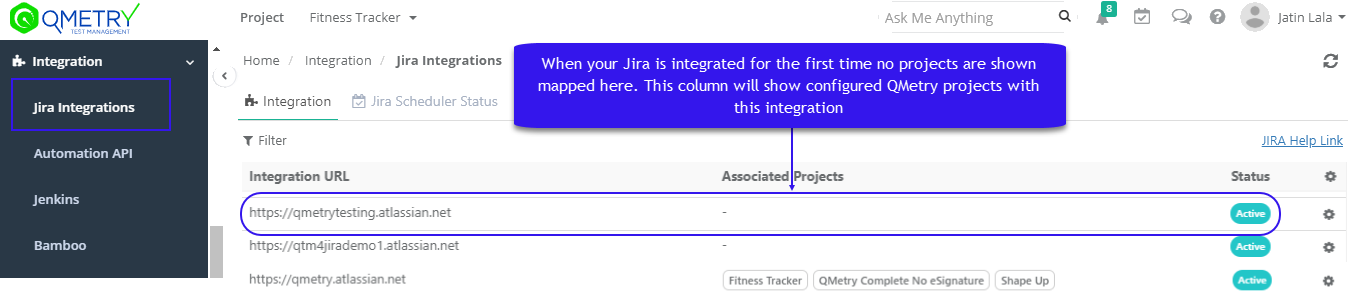
After the successful configuration with above steps, QMetry "Integration" section will start showing "JIRA" configured as below.
Login to QMetry >> Integration >> Jira Integration >> Verify Integration URL and Status as "Active"
Map JIRA projects, Issue type and Fields with QMetry Project
Map Jira Project & Issue Type with QMetry Project
Map Single Jira Project with QMetry Project
These steps have to be performed in QMetry by Login as QMetry Project Admin :
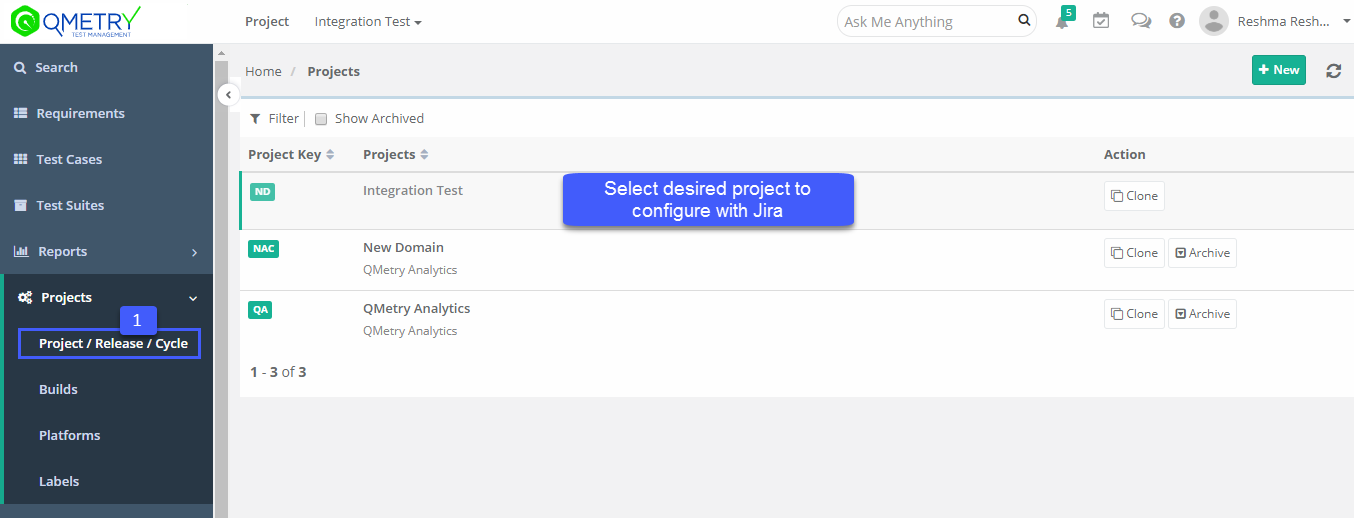
- Go to Projects > Project/Release/Cycle
- Open the Project > Jira Integration tab.
- Select the Jira URL with which this QMetry project mapping has to be done.
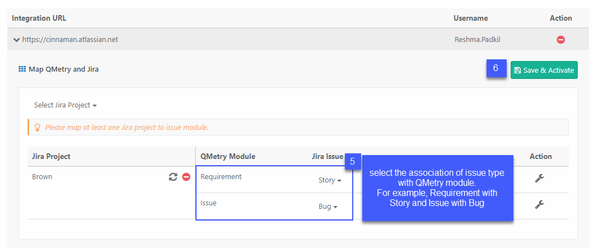
- Select the Jira project to configure with this QMetry Project.
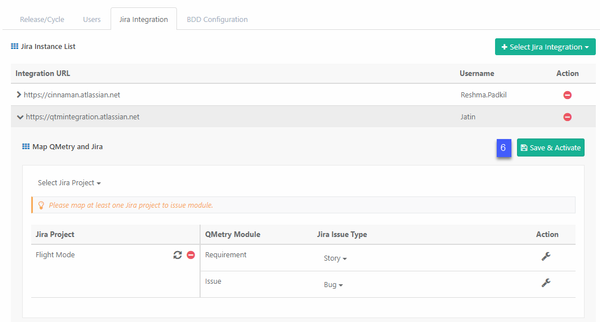
- Once the Project is selected, select Issue Type <> QMetry Module associations. The issue type is a multi-select list.
- Click on Save and Activate.

Map multiple Jira projects from a single Jira instance with one QMetry project
QMetry 8.5 allows multiple Jira projects to be configured with one QMetry project. Below are the steps for the same :
- Go to Projects > Project/Release/Cycle
- Open the Project > Jira Integration tab.
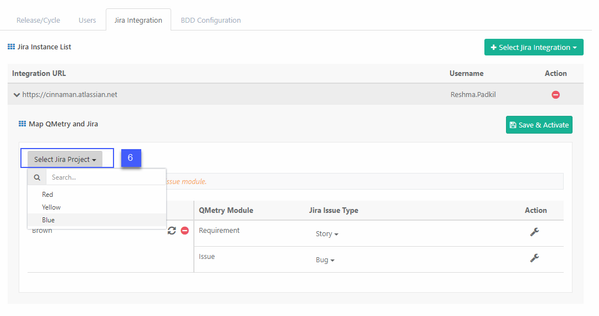
- Select the Jira URL with which this QMetry project configuration has to be done.
- Select the Jira project to configure with QMetry Project.
- Once the Project is selected, select Issue Type <> QMetry Module associations. The issue type is a multi-select list.
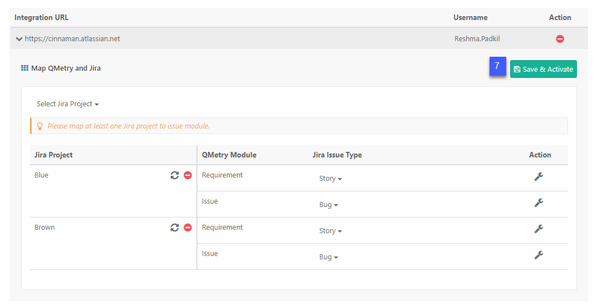
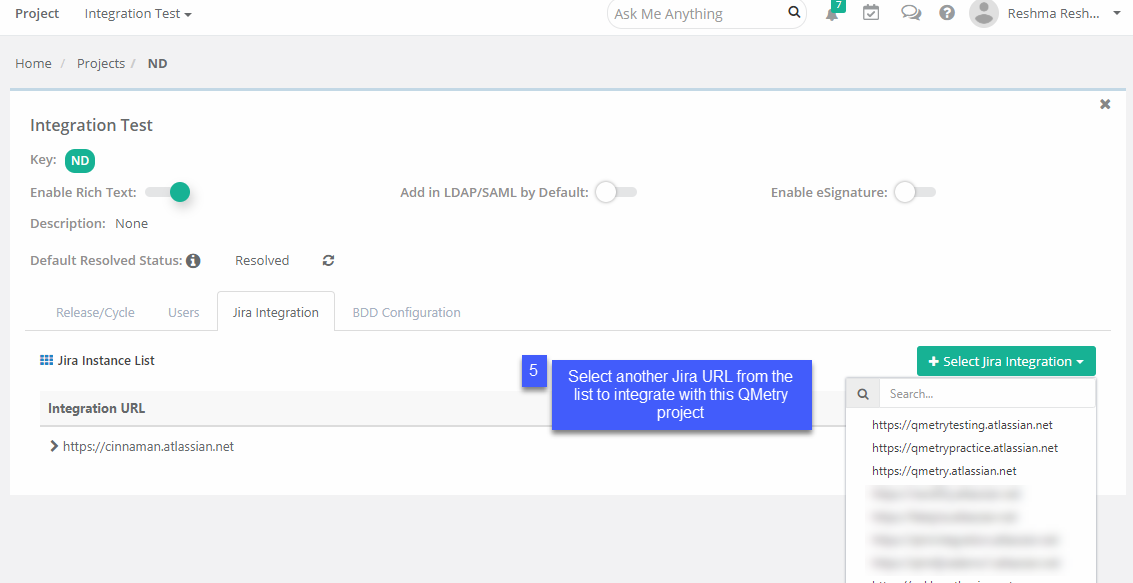
- Once the Jira Project is configured select another Jira project from the list and configure it the same way. This way you can select multiple Jira projects to integrate with one QMetry project.
- Click on Save and Activate. ("Update" if Jira integration was already Saved and Activated for the QMetry project.)
Map multiple Jira projects from a multiple Jira instance with one QMetry project
QMetry 8.5 allows multiple Jira instances to be configured with one QMetry project. Below are the steps for the same :
- Go to Projects > Project/Release/Cycle
- Open the Project > Jira Integration tab.
- Select the Jira URL with which this QMetry project configuration has to be done.
- Configure the projects > Save and Activate the Integration.
- Once the Project is selected, select Issue Type <> QMetry Module associations. The issue type is a multi-select list.
- Select another Jira URL from the Jira Integration list.
- Configure the projects > Save and Activate the integration.
- Once the Project is selected, select Issue Type <> QMetry Module associations. The issue type is a multi-select list.
- This way you can integrate multiple Jira instances with QMetry Project.
Configure Custom Jira fields for QMetry Module
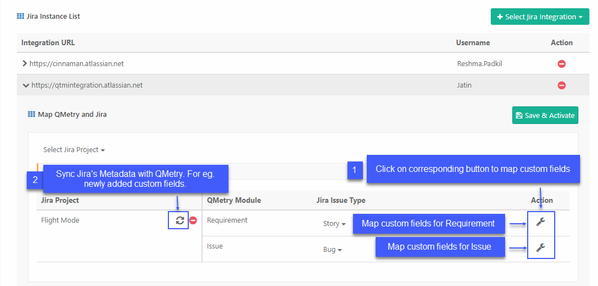
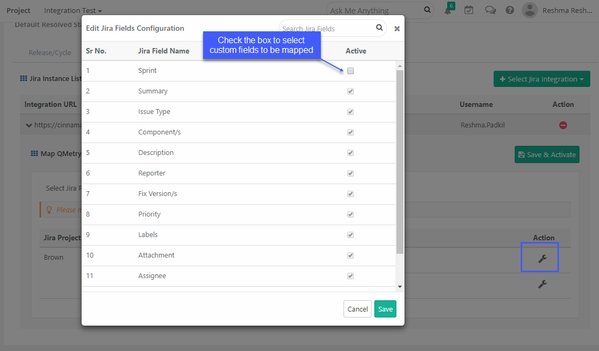
QMetry displays default Jira issue fields in QMetry Modules. Project Admin can choose to display Jira custom fields as per project needs. Configuration of custom fields have to done separately for every configured Jira Project and Issue Type. Below are the steps :
Note : Incase QMetry does not display a Jira field in the configuration screen - "Sync" project data to configure the field.
- Configure custom fields for Requirement and Issues.
- Sync Jira data to QMetry. For example, newly created custom Fields etc.
Note : At-least one of the Jira Project should be integrated with Issue Module. Once the Jira is integrated with QMetry project the internal issue module will be disappeared from the QMetry project.
Sync Requirements & Issues
Sync Requirements from Jira to QMetry
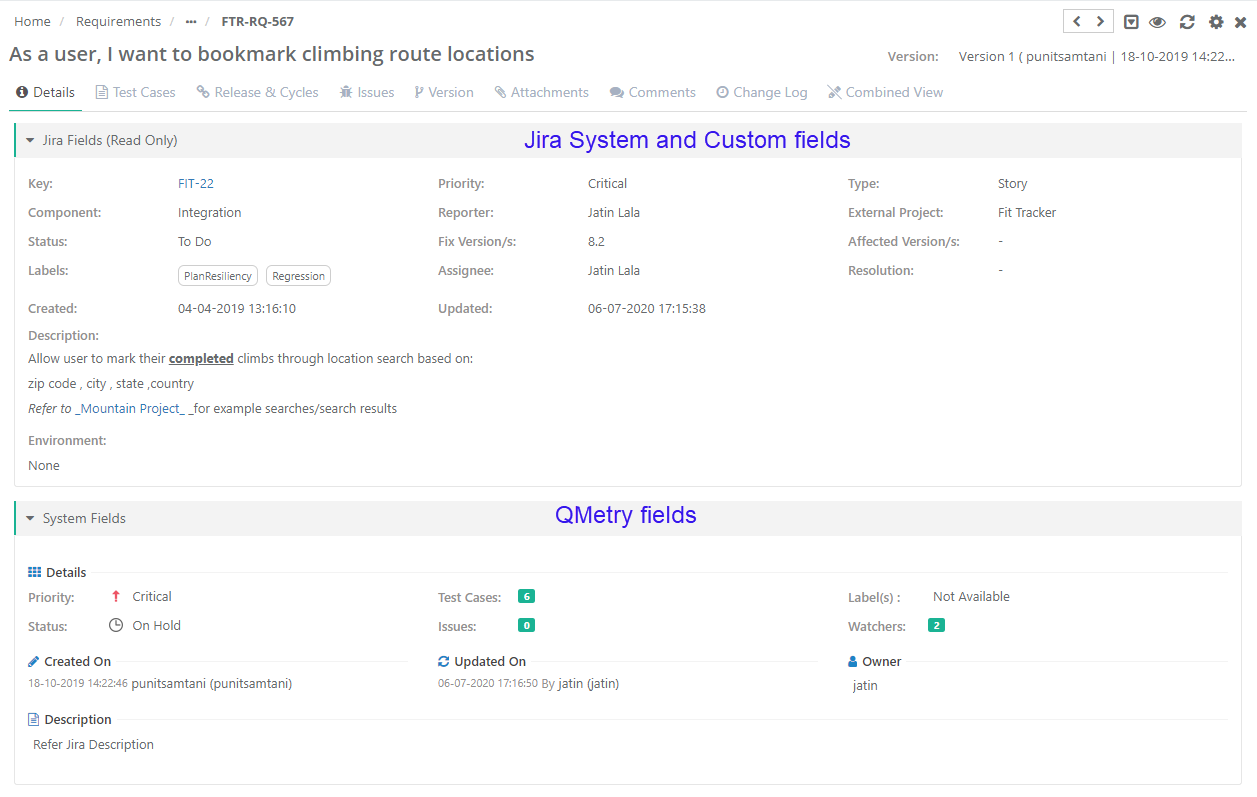
Once Jira Project is configured with QMetry Project and Mapping of issue type with QMetry Requirement module is done. Requirements will be imported in Requirement module in Imported folder. Syncing of Jira fields is unidirectional i.e from Jira to QMetry. Once the requirements are imported only the QMetry fields can be edited, the Jira fields will be Read Only.

Requirement detail screen displays below information of Jira issues :
- Jira Fields - System and Custom Fields
- Latest 10 Comments & Attachments from Jira issue.
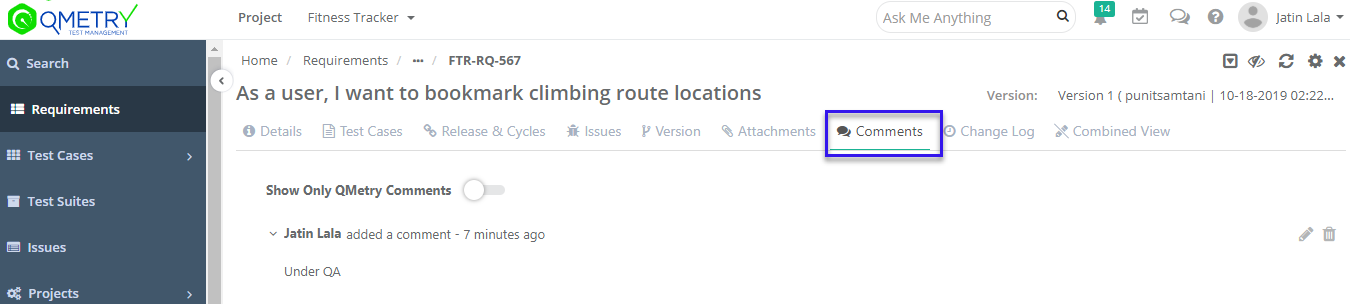
Test case linkages to Requirement are shown in Jira on issue page under QMetry panel.
Sync Issues (Defects/Bugs) from Jira to QMetry
Once Jira Project is configured with QMetry Project and Mapping of issue type with QMetry Issue module is done. User can create new issue from QMetry to Jira while executing test cases, link existing issues of Jira and view already linked issue. Issue can be linked to Test case or Test case steps.
Note : Once QMetry Project is integrated with Jira Project, QMetry internal Issue module would be hidden.
Create Jira issues from Test suite execution window
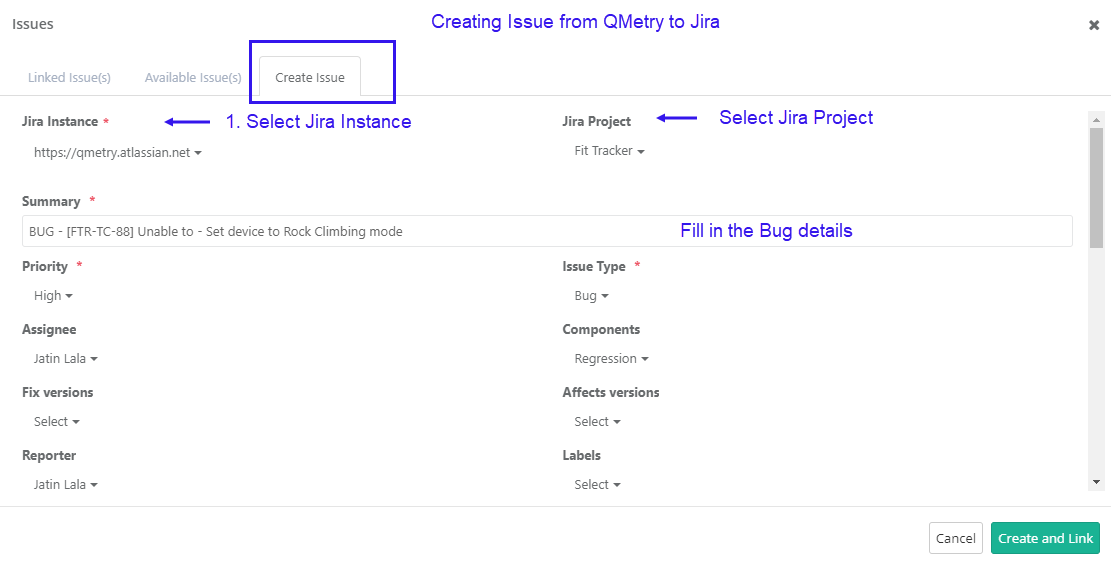
Test case and Step details are automatically added to Issue Description
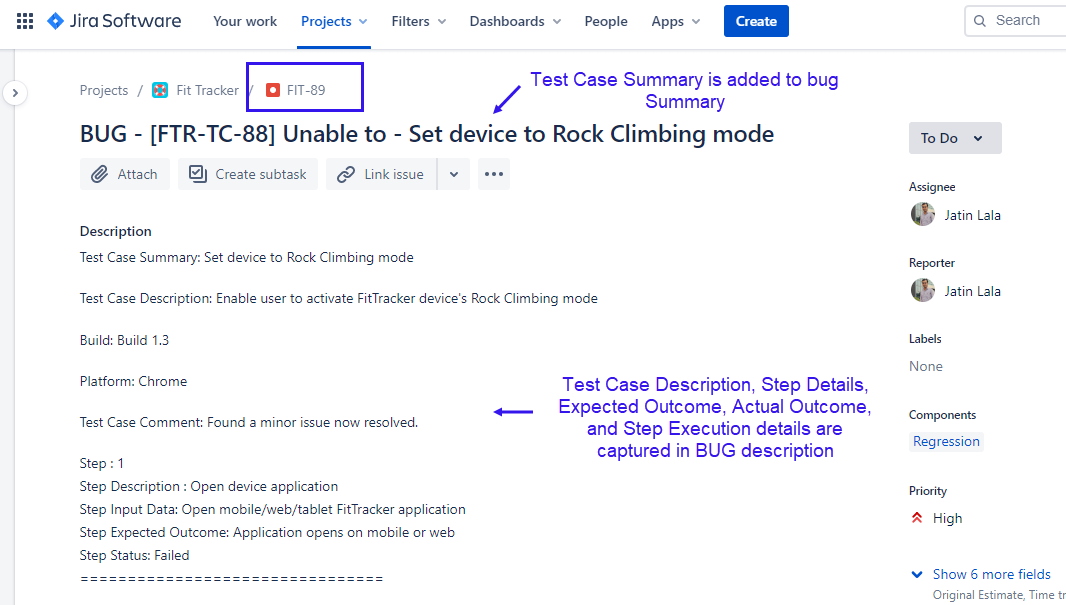
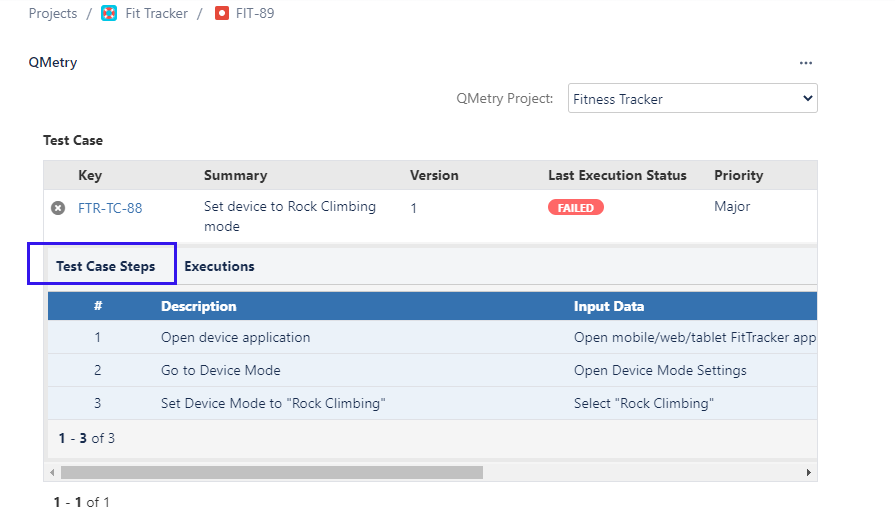
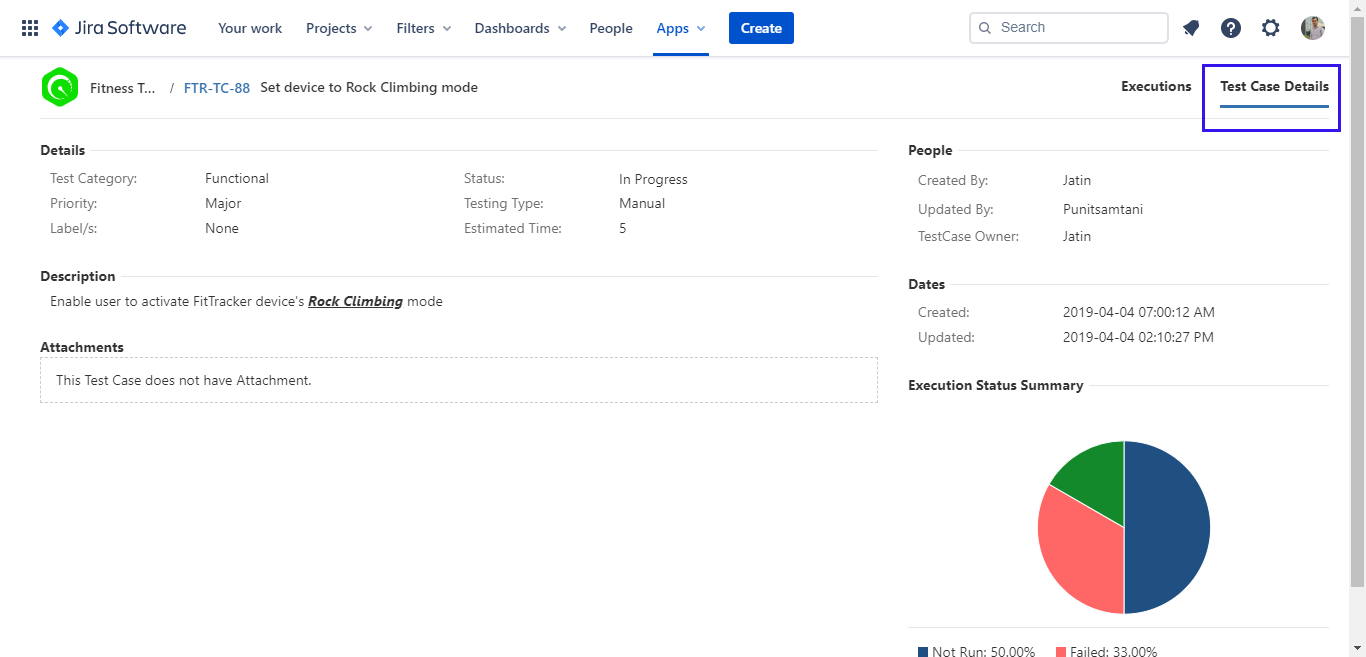
Test case Section in Jira will show the details like Test Case last execution status, test case steps, execution details, etc.
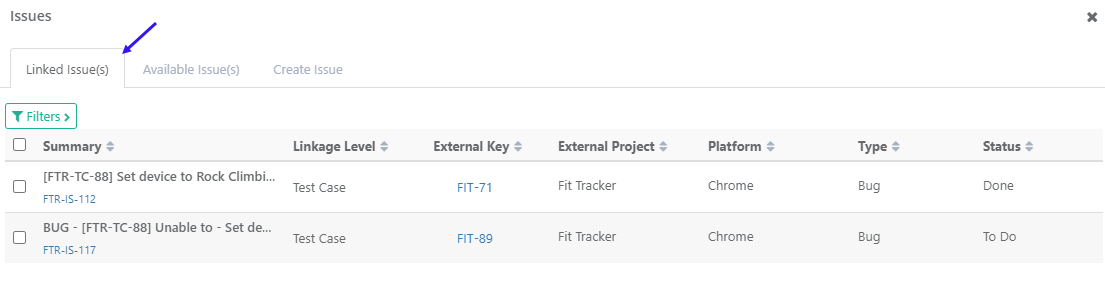
Link existing Jira issues (already created) from the Test suite execution window
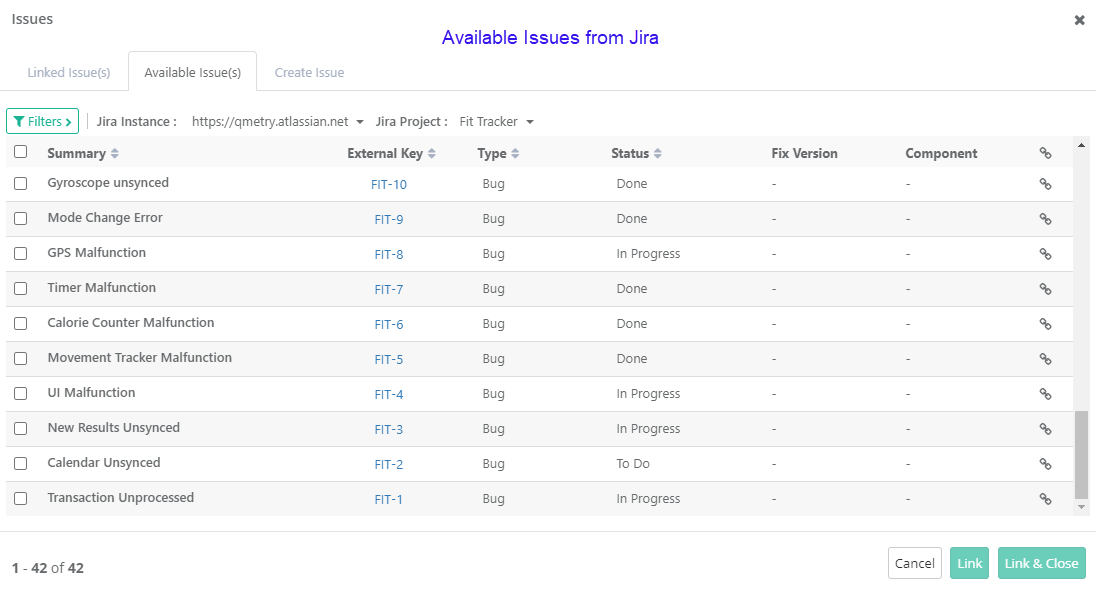
View already linked/ new created issues on the Test suite execution window.
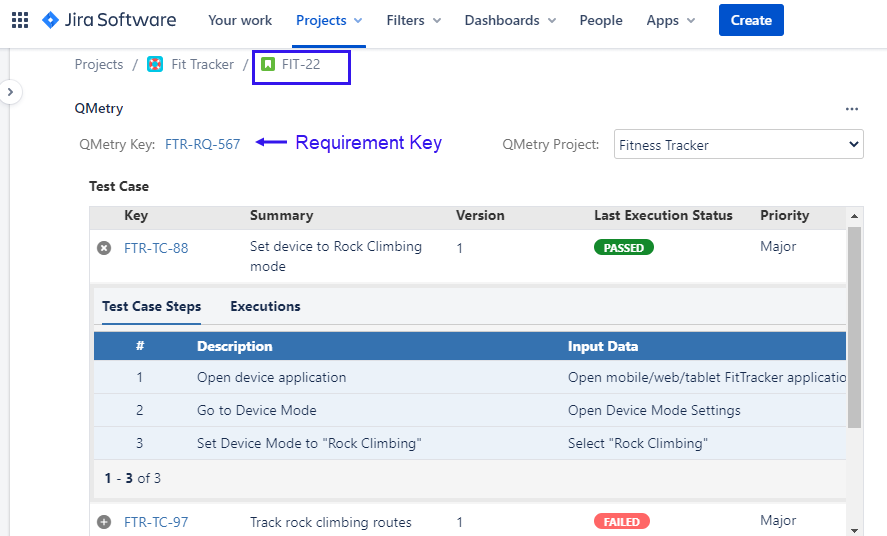
View Traceability for Story, Test cases, Executions & Bugs
Traceability in Jira
- Go to the Jira Story that is synced with QMetry Requirements linked to Test Cases.
- Under Story the Test Cases section will display the all the Test cases linked to the Requirement.
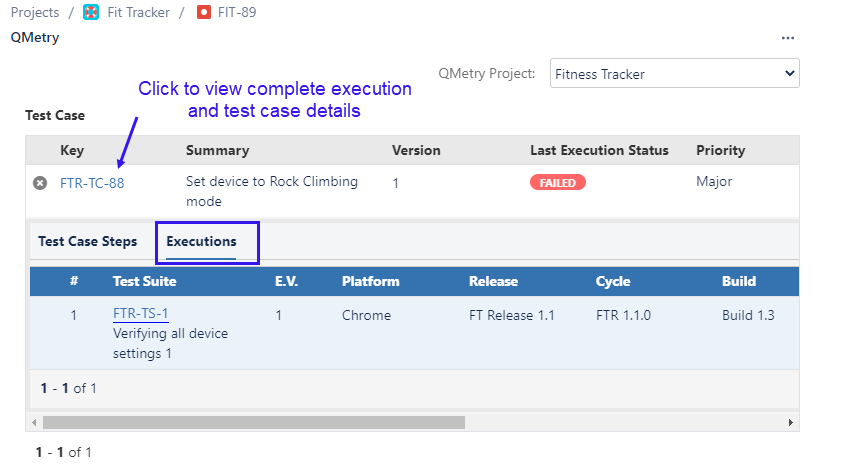
- Click on any of the Test case link to view the test execution details.
- Under the "Execution" section details like Test Suite ID, Summary, Execution Status, Release, Cycle and linked Defects are available.
- Click on defect Icon to view the linked bugs.
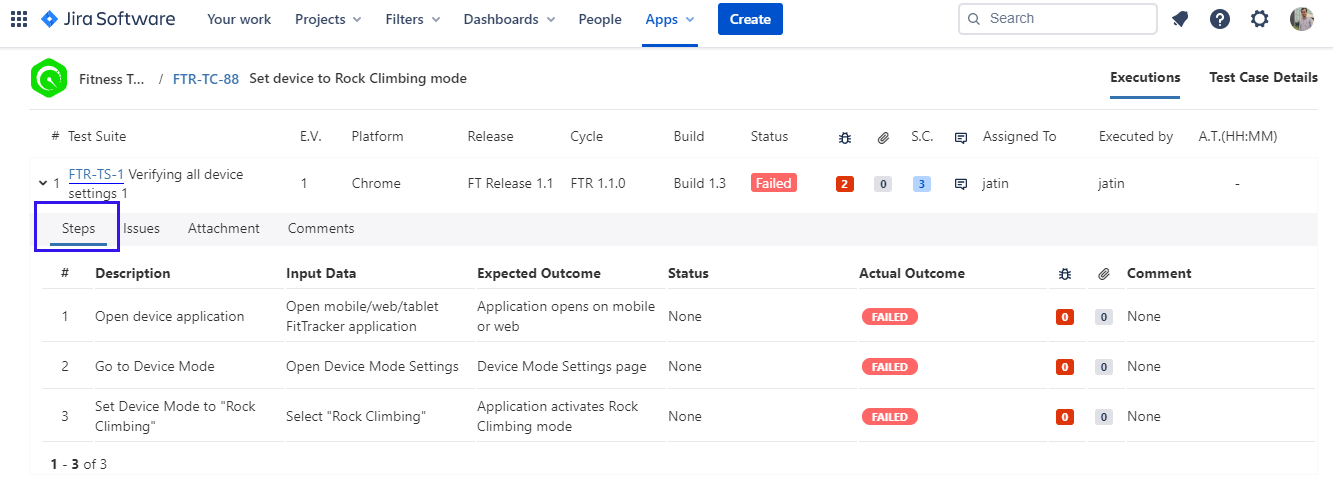
Steps
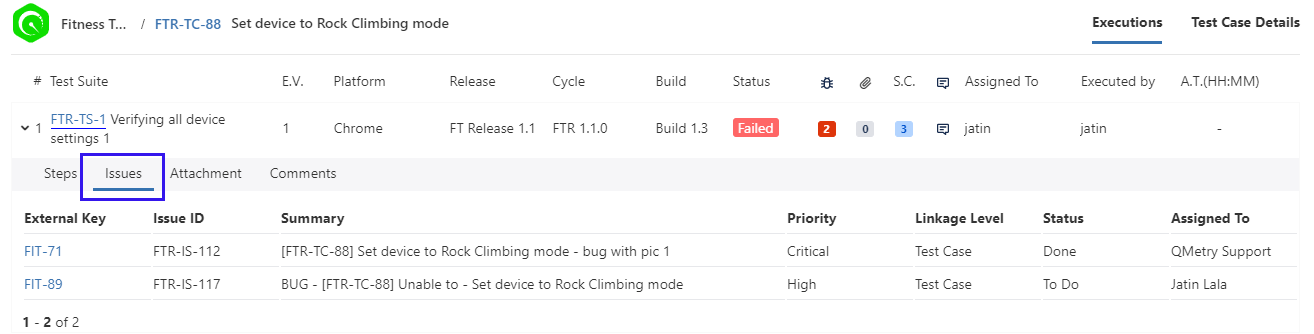
Issues Linked
Traceability in QMetry
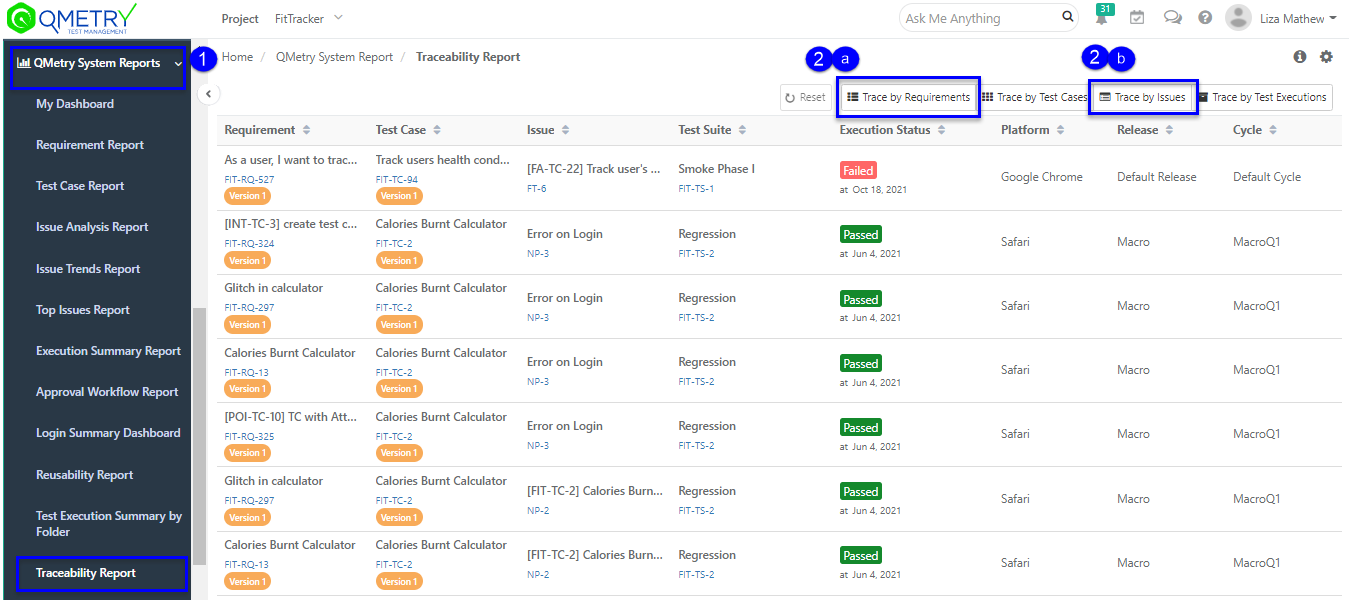
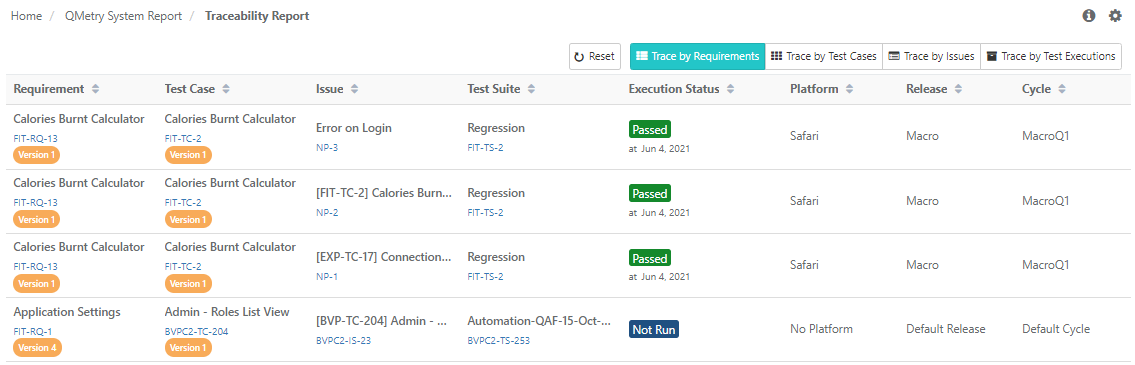
- Go to Reports > Open Traceability report.
- Select Trace by :
- For Requirement Traceability : Select Trace by Requirement
- For Issue Traceability : Select Trace by Issue
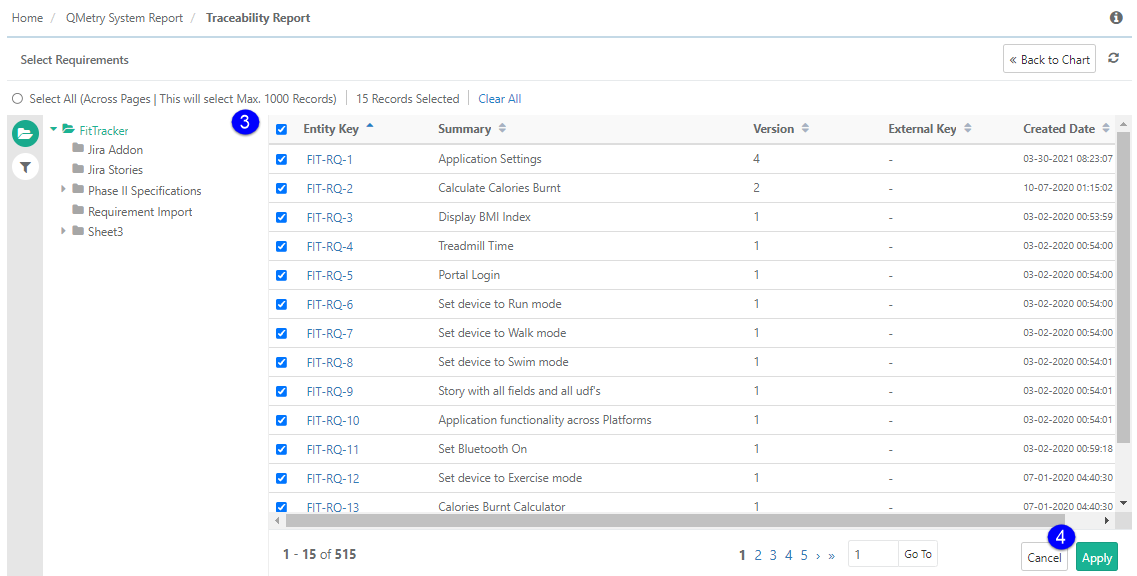
- Select entity > Apply
Back to QMetry All Products Help Page