Add Parameters
Parameters functionality allows testers to execute same test case multiple times with different data inputs; without having to create duplicate test cases. The functionality allows QA teams to store reusable test data in one centralized location. It also helps you to keep your test data consistent and manageable.
Example
| Color Code | Display | Bluetooth Versions | Tracker Version |
|---|---|---|---|
| 1234 | OLED | Bluetooth v4.0 | Tracker Series 5 |
| 1237 | LED | Bluetooth v4.5 | Tracker Series 3 |
| 1236 | MOLED | Bluetooth v4.3 | Tracker Series 1 |
| 1234 | OLED | Bluetooth v4.1 | Tracker Series 2 |
Here, Color Code, Display, Bluetooth Versions and Tracker Version are parameters with values.
The combination of parameter values creates a data set.
Hence, first we will create Parameters with their values, and then we will create Data Set using both.
Add Parameters
Parameters are added from Configuration > Project Configuration > Parameter.
Add Data Set
These added parameters are used in test steps as shown below.
1. Open the test case detail page.
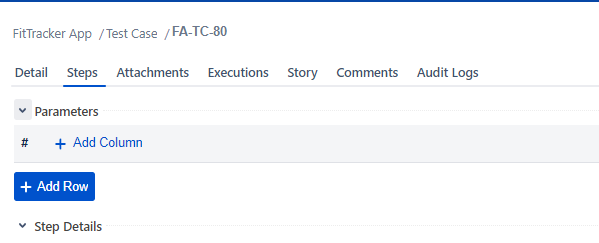
2. Open the Steps tab. You can see the Parameters expandable section along with Step Details. To create a table of parameters, you need to add Columns and Rows. Columns will contain parameter names and rows will contain corresponding parameter values.
3. To add a column, click on Add Column.
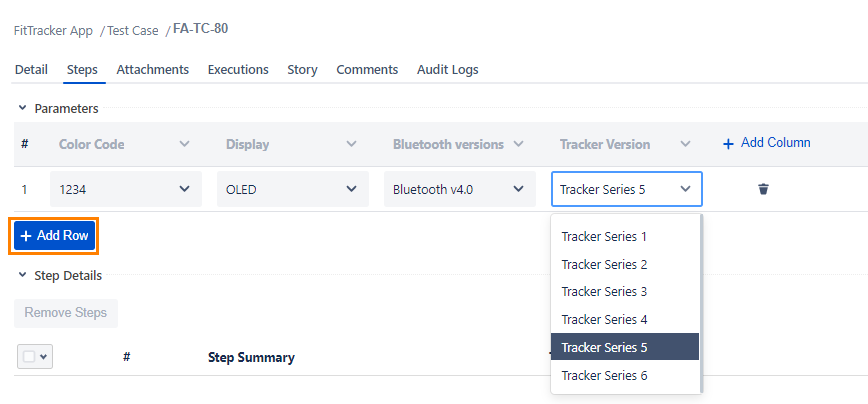
A drop-down is enabled which has the list of parameters you entered in the Configuration section (Configuration > Project Configuration > Parameter).
4. Select one parameter for the column. One parameter can be used only once for column.
5. Now add values to the parameter. Click Add Row to add a row under the column. The drop-downs display values in accordance with the parameter.
6. Select a value for the parameter column. One parameter value can be used multiple times.
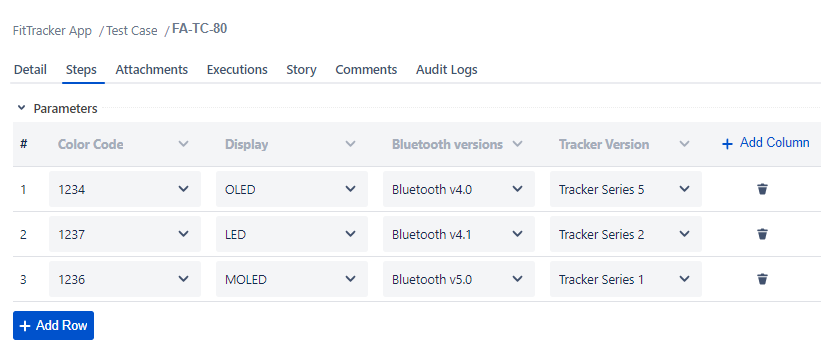
This way you can keep adding columns as per available parameters and their values.
A table of Data Set is created as shown below.
Use of Parameters in Steps
Till now you have created test data sets through Parameters. Now we will see how we can use the parameters in test steps of a test case.
1. Go to the Test Cases tab.
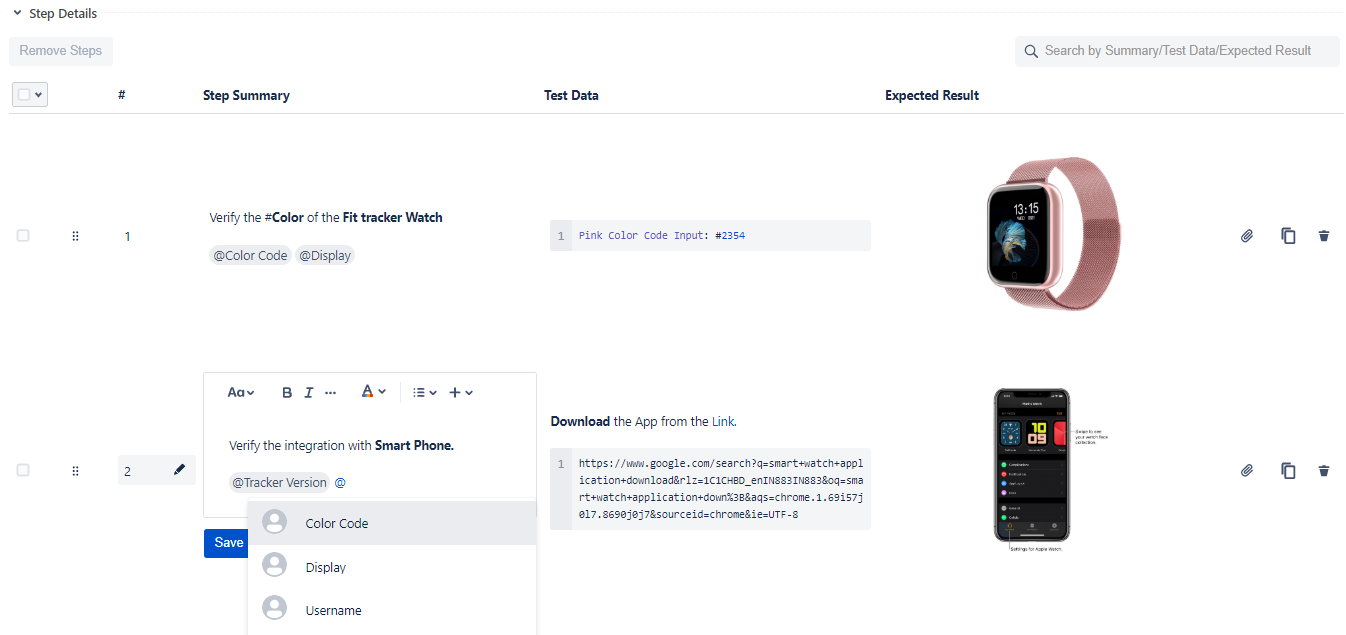
2. Open test case detail page and open the Steps tab. Parameters can be mentioned for Step Description, Input Data, and Expected Outcome.
3. To use parameter, write it in this syntax @parameter. When you press@ on your keyboard, the available parameters will populate.
The Step Details will look like below.
Execute Parameterized Test Cases
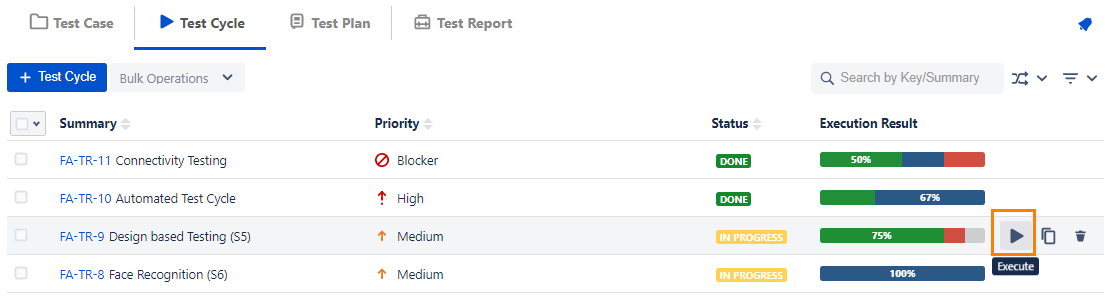
1. Once the test case with Parameters is ready, go to Test Cycle and link that test case with a test cycle.
2. Hover over the test cycle record, the Execute icon becomes visible.
3. Click on the Execute icon to navigate to the Test Execution Screen to run the test and record the status.
On the Test Execution Screen, you can see the Parameter Groups under Step Details. Each Parameter Group has its test steps under it.
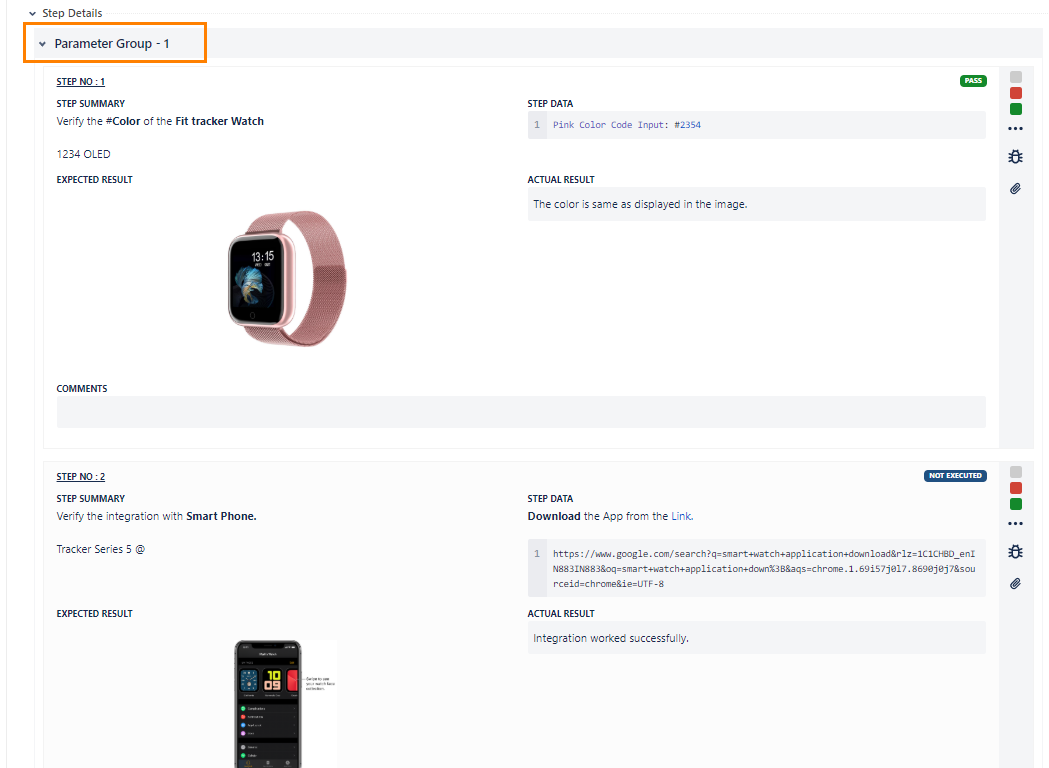
Execute the test steps under individual Parameter Groups on the screen.
Sync Steps
If steps are updated in test case, then the Sync Steps button will be visible. Click on the Sync Steps button to get the updated content of steps.
