Create Test Plans
Introduction
User should have the “Test Plan Create” permission for the project to be able to create a test plan in QMetry Jira add-on.
Steps to create a Test Plan
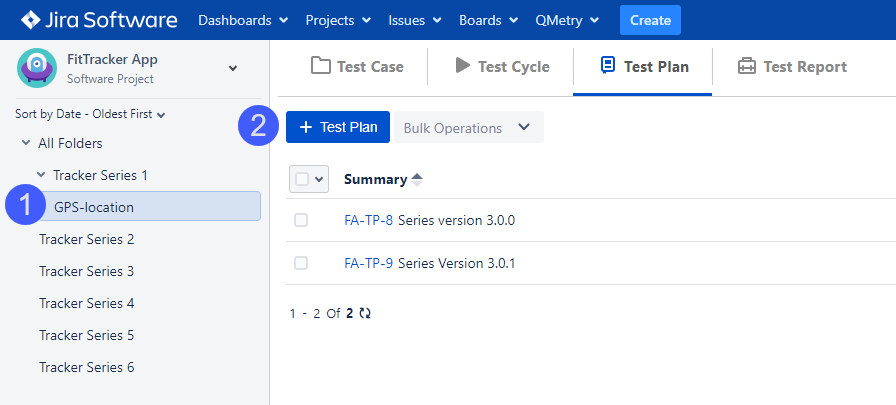
You can create a new test plan and directly associate it with folder.
1. Select a folder on the tree at left and click on the Test Plan button at right. The new test plan will be associated with the folder you selected on the tree.
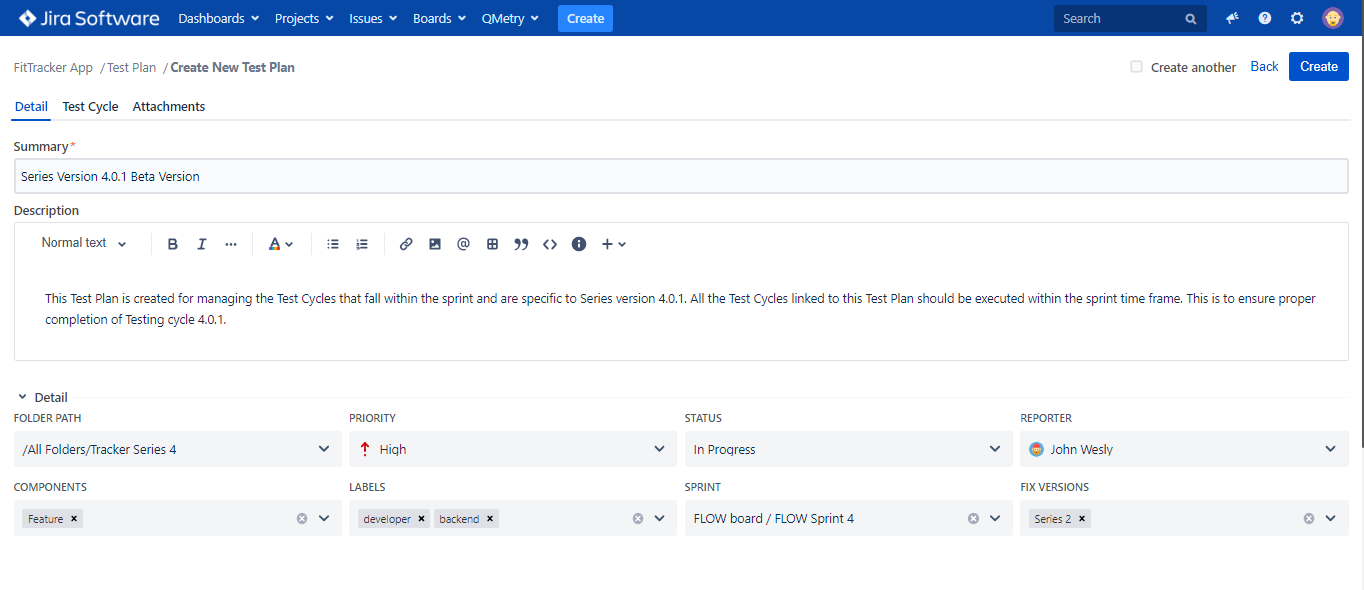
There are three tabs: Details, Test Cycle, Attachments.
2. Enter Test Plan Details.
- Summary
- Description: The field has a Wiki markup editor. You can use different options that are available to apply to the text. Refer to Text Formatting.
- System Fields: These are system defined fields. Enter/select values for the fields. The list values are entered in Configuration > Project Configuration.
- Custom Fields: Users can add additional fields other than system fields. Custom Fields are added from Configuration > Custom Fields.
The Create another checkbox allows users to keep creating one test plan after another without having to click on the "Create" button again and again. It is helpful when you have to create a series of test plans.
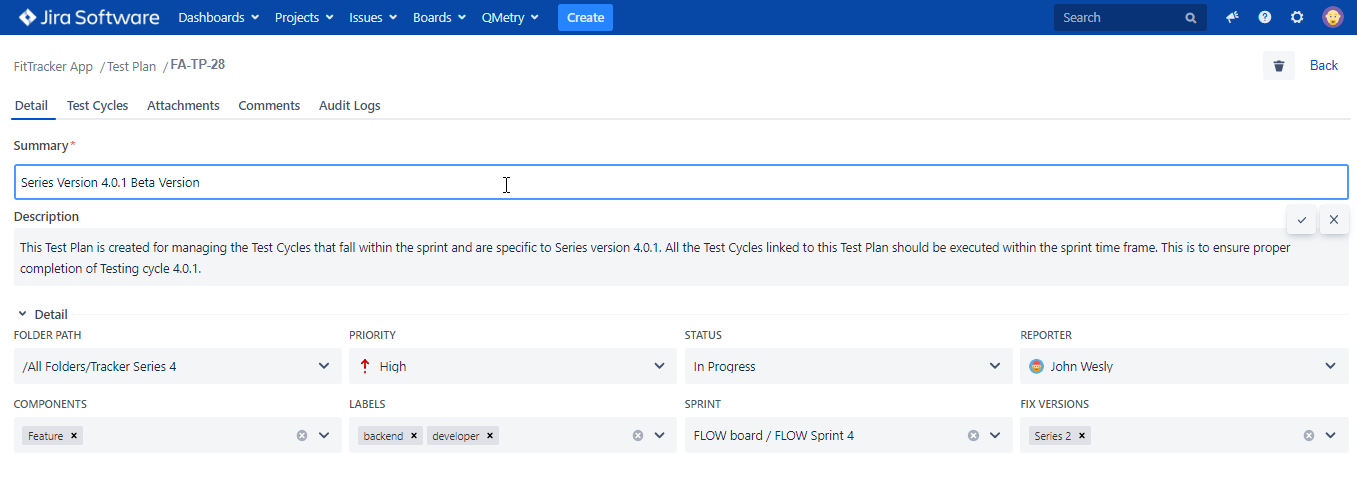
Edit Test Plan
Users can edit Test Plan details in line.
- Open the test plan you want to edit.
- Open the tab you want to edit the details of and edit the details.