Configure and Generate Report
Reports are generated in accordance with their configuration. The reports can be configured to generate by applying filters on Test case, Test Cycle, Test Plan, Execution, Story, Defect fields. Reports can be generated for a single project as well as for cross projects. QMetry preserves the last used filter criteria for user, however user can save filter by a naming convention. These saved filters can be used to generate the Dashboard report.
Permissions Required
Jira Permissions :
- Browse Project permissions are required.
QMetry Permissions :
- If Enabled then below permissions are required.
- Report View
- If not Enabled then any user with Jira browse project permission can view report.
Apply Filter Criteria
The report is configured based on following criteria.
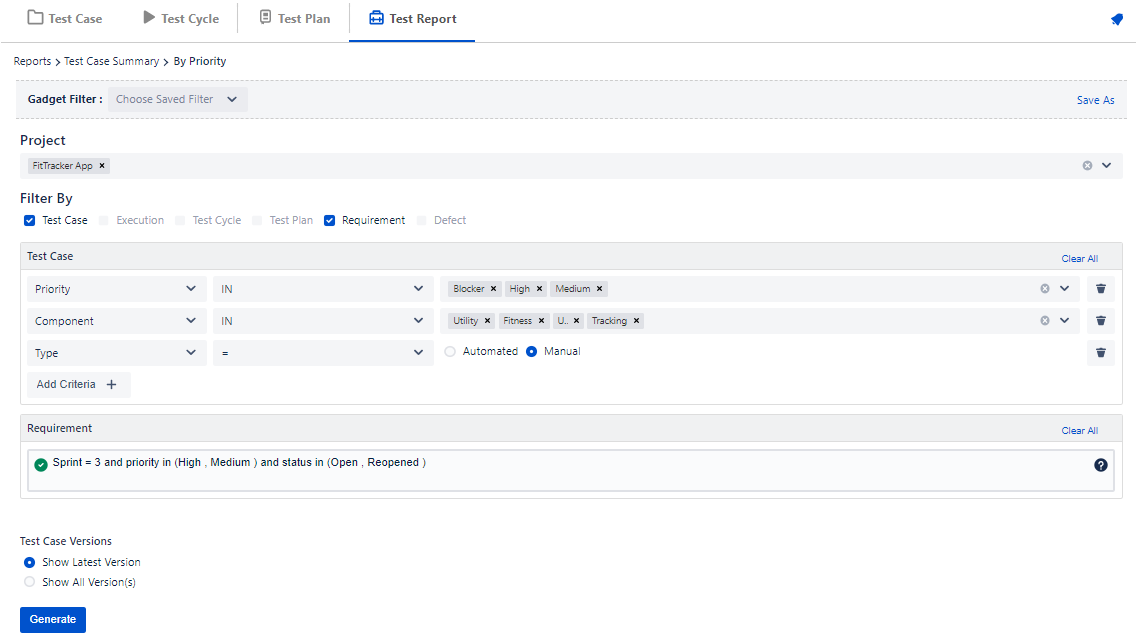
Project
By default the select project get selected in this Filter. User needs to have Jira browse project permission to select a project in this filter. User can select multiple projects to generate cross project report.
Filter By
You can define the criteria and apply the filters based upon these criteria. You can apply filter to get desired data. The filters can be applied on various fields of Test case, Execution, Test Cycle, Test Plan, Requirement(Story) and Defects. Once the filter is applied and report is generated the filter is preserved for user until it is changed again.
Steps to apply filter
- Apply filter on Test case, Execution, Test Cycle, Test Plan
- Select the module you want to filter the report data on. You can select only 2 modules at a time. As soon as you select the module, its criteria panel appear on the screen to define the criteria to filter report data.
- Click on the Add Criteria button. A row is added to define Operation, Operator and corresponding value to construct a criterion to filter the data. You can delete a criterion by clicking on the Delete icon.
Repeat the same steps for another module, if you have selected to apply the Filter.
- Apply filter on Requirements and Defects : For Requirement and Defects, JQL panel is provided to apply a filter. User can apply the JQL filter as per the requirement, same as provided in Jira advanced search. It allow users to use multiple Jira fields like Project, Issue key, Issue Type, Issue Status, Priority etc. in the JQL filter to generate the report. The JQL panel supports autosuggestion.
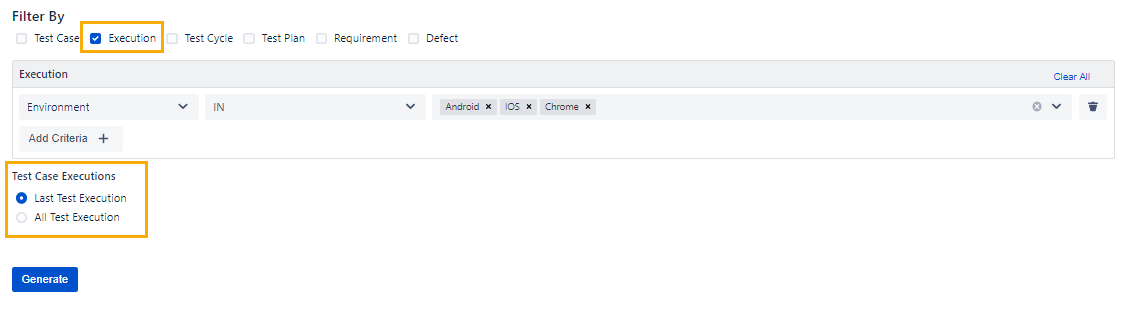
Test Case Executions
This filter criteria is available only for Test case execution reports. It is enabled if user chooses Execution module for filter.
- Last Test Execution : Select if you want to view the report only for latest executions. This option is selected by default.
- All Test Execution : Select if you want to view report for all executions.
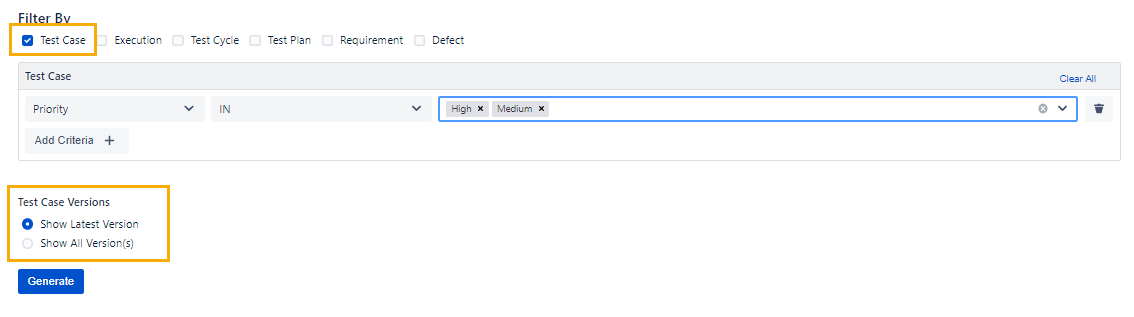
Test Case Versions
This filter criteria is enabled if user chooses Test case module for filter.
- Show Latest Version : Select if you want to view the report only for latest version of Test case. This option is selected by default.
- Show All Version(s) : Select if you want to view report for all versions of Test case.
Click on the Generate button.
Note: The report gets updated dynamically if new data is added matching the selection criteria.
Save and Manage Filters
Save Filter
QMetry preserves the last used filter criteria for user; however, users can save the Filter criteria with which they have generated a report. Furthermore, users can also update the saved filter or delete it.
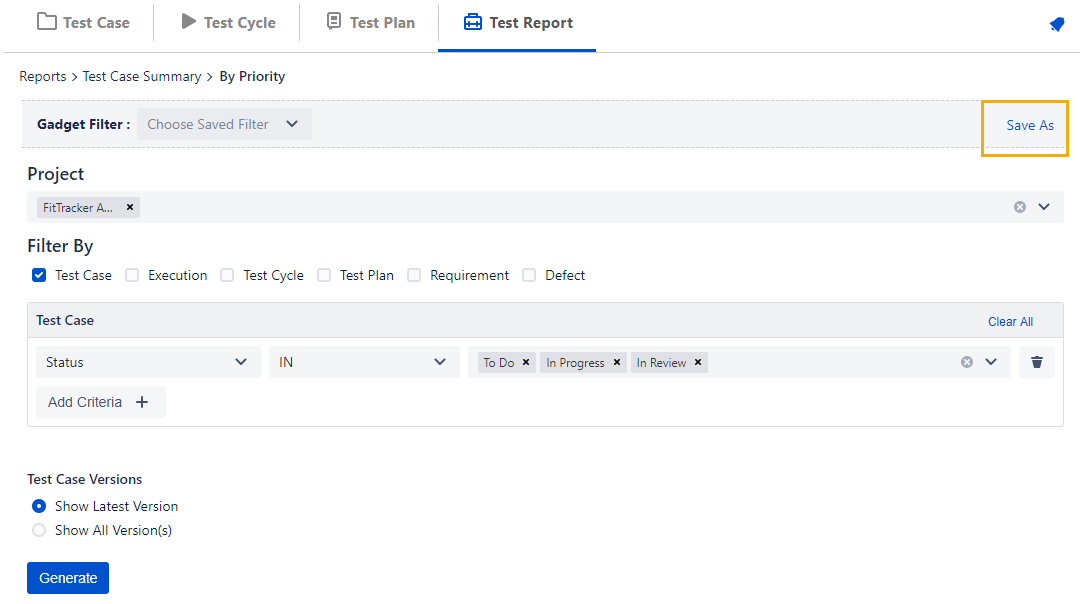
- On the Test Report tab select the Project
- Select the report for which you want to save the filter
- Apply Filter criteria
- To save the applied filter, click Save As.
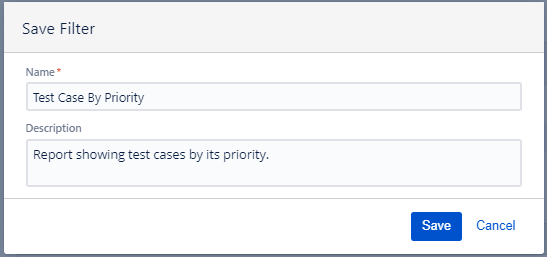
The Save Filter pop-up opens.
Enter Name and Description for the filter and click Save.
The saved filter can further be used to view a report on Dashboard.
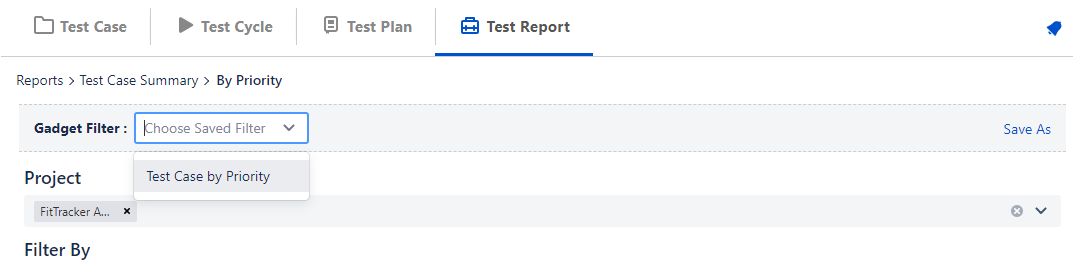
Select saved filter
- Go to Test Report tab
- Select Project > Select the report for which the filter is saved
- Click on Gadget Filter drop down and select your saved filter
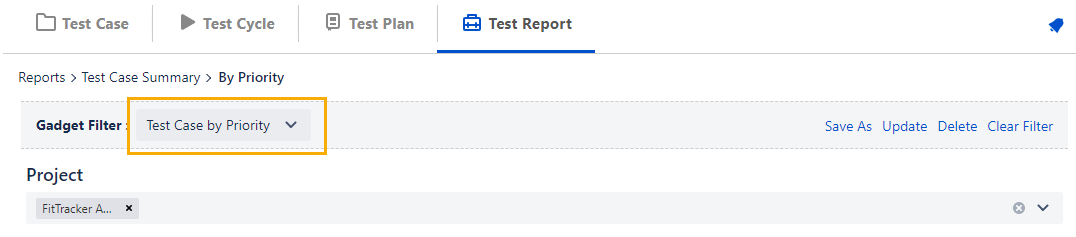
The following operations are available on filters.
- Update: Update Filter Name and Description.
- Delete: Delete the Filter. The filter will not available for use.
- Reset: Reset the screen to its default mode i.e. without any filter applied on it.