Back to QMetry All Products Help Page
Organize Test Cases
QMetry allows testers to organize and manage test cases in a Folder structure based hierarchy. Testers can group related test cases and organize them systematically during authoring/post authoring. As an example testers can create folders like Regression Test, Smoke Test, Sanity Test, etc to group related test cases. Each new test case folder creates next level of test case organization in your test case tree. It helps carrying out bulk operations like associating test cases to a story/test run, copy test cases from source folder to destination folder.
Where to find the feature?
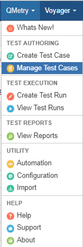
Click on the QMetry menu item. It opens the menu like below. Select Manage Test Cases on it.
The Manage Test Cases screen opens. The left pane displays folder structure of test cases. The right pane displays all test cases until you select a particular folder to view particular test cases.

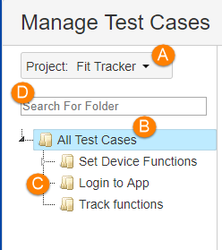
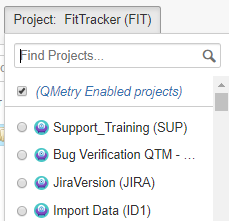
A. Project selection. By default, the project that you selected in Jira will be displayed here. You can select other project. The folder tree is rendered in accordance with the project selection.
Users can opt to show only projects, wherein the QMetry Add-on features is enabled by selecting the QMetry Enabled Projects check box.
Project Names are displayed with respective Project Key in parenthesis.
B. Root test case folder, which shows all the test cases created within the project irrespective the folder within which it is created.
C. Sub folders within the root folder
D. Search for Folder: You can search any folder/sub folder by entering its name in the search box. The folders matching the search text will be filtered and highlighted.
Create Test Folders/Sub Folders
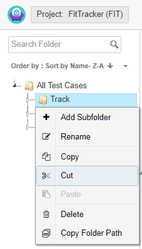
Right click on the folder and select Add Subfolder. It creates a sub folder under the selected folder.
Note: The root folder All Test Cases will have only one option of Add Subfolder.
A New Folder is added to the tree on the sub-level hierarchy.
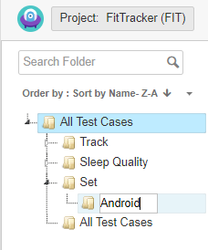
Give a name to the folder.
Rearrange/Sort Folders
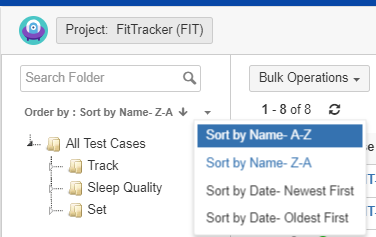
Test Case folders can be arranged on Name and Date. Open the Order by drop-down and select the option to arrange the folders on the tree. The folders can be sorted alphabetically and by date of creation in ascending/descending manner. By default folders are sorted on Oldest First.
Rename Folders
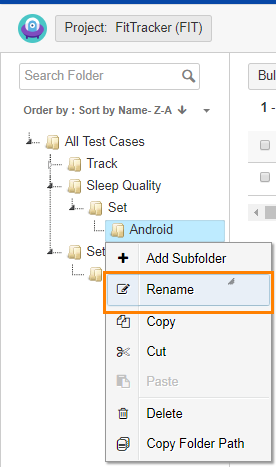
Right click on any folder and select Rename. It allows you to edit the name of the selected folder.
Copy/Cut and Paste Folder
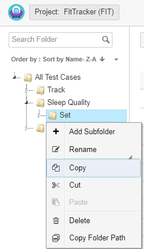
Copy & Paste: You can Copy a folder and Paste it to other folder. This will create a copy of existing folder with test cases under it.
Cut & Paste: You can also Cut a folder and Paste it to other location/folder on the tree to change the hierarchy. All the test cases under the folder will also move along with the folder.
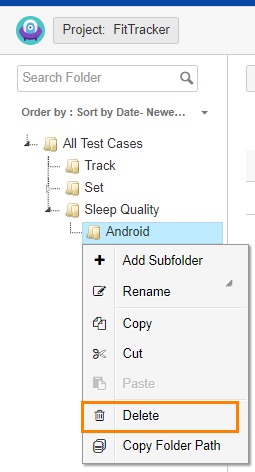
Delete Folders
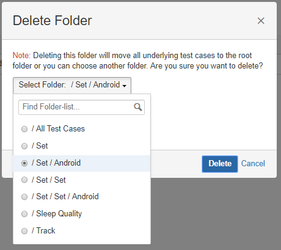
Right click on any folder and select Delete. Select the option to delete that particular folder. All the test cases under that folder will be disassociated with the folder. If there are sub-folder under the folder, then all these sub-folders will be deleted. All the test cases under such folders will be disassociated with the folders.
On clicking Delete, the user is asked to select a folder in which they want to move the underlying test cases.
If a folder is not selected, then the test cases will be moved to the root folder. i.e. "All Test Cases" folder here.
Copy Folder Path
The folder path is used in a JQL that returns a list of Test Cases which are linked with given folder.
The right click option copies the folder path on clipboard. You can then paste the Folder Path in the JQL: getTestCasesLinkedWithFolder ("Project Key",”Folder Path”).

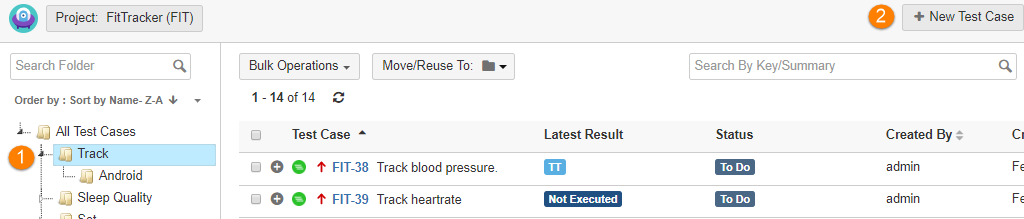
Create a Test Case within Folder
You can create a new test case and directly associate it with folder.
Select a folder on the tree at left and click on the New Test Case button at right.
Create the test case and it will be associated with the folder you selected on the tree.
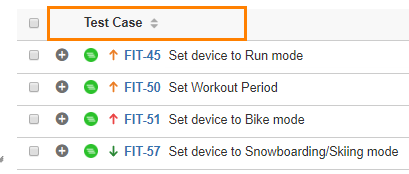
Sorting Test Cases
Test Cases can be sorted by clicking on column heading.
For example, Testers want sorting on column so that they can find test cases easily.
Test Cases can be sorted on the following columns:
- Test Case: Test Cases are sorted based on Issue Key.
- Created By: Test Cases are sorted on Created by User who has created the test cases.
- Created Date: Test Cases are sorted on Created Date on which the test cases were created.
- Updated By: Test Cases are sorted on Updated by User who has modified the test cases.
- Updated Date: Test Cases are sorted on Updated Date on which the test cases were modified.
- Type: Test Cases are sorted on its testing type i.e. Manual and Automation.
Expandable Test Case Rows
Users can expand test case row and view test steps under the test case on the Manage Test Cases Screen. When a test case is expanded, it shows all the test steps a test case is collapsed, it hides the test steps under it.
For example,
Testers do not want to open a test case in new window to view test steps. They want to see test steps on the same screen of Manage Folder.
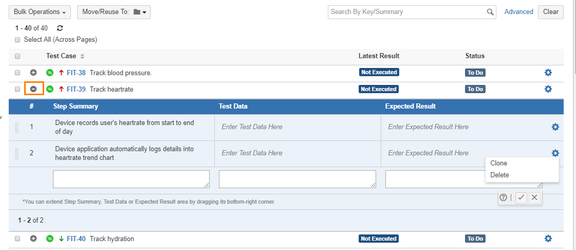
- Add New Test Steps: Add step details in the inline text boxes and save the row.
- Clone Test Steps: Click on the Con icon for the test step and select Clone.
- Delete Test Steps: Click on the Con icon for the test step and select Delete.
- Reorder Test Steps: Drag and drop test steps to reorder them within test case.
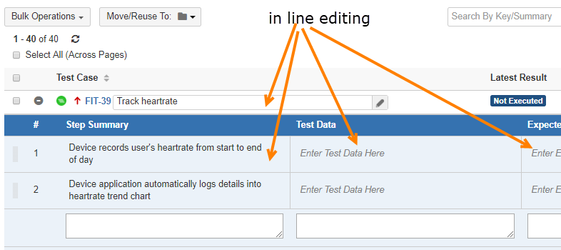
Inline Editing
Users can edit values of Test Case Summary, Step Summary, Test Data, and Expected Result in line.
For example, Testers have to do quick edit in test case. Using inline edit, they can edit field values quickly without opening the test case detail page .
Clone Test Cases
Users can create a clone of existing test cases with their test steps. Click on the Con icon and select Clone. A new test case with "Clone" prefix will be added.
The clone is created on the folder level you are currently on.
For example, Testers need test cases for next release. These new test cases may have with some common field values as existing test cases. The test case is the existing test case. So they create a copy of existing test case using the Clone feature.

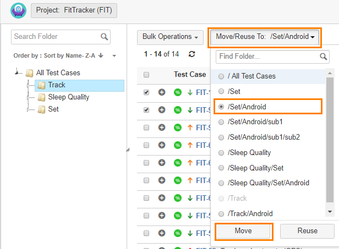
Move Test Cases
You can move test cases from a particular folder to another folder.
Note: The Move option will remain disabled when you are on the root folder i.e. All Test Cases folder. You can only reuse test cases from the root folder.
- On the folder tree at left, select the source folder wherein the test cases lie.
- Select test cases that you want to move to another folder.
- Open the Move/Reuse drop-down menu at the top and select the destination folder in which you want to move the selected test cases.
- Then click on the Move button on the drop-down menu.
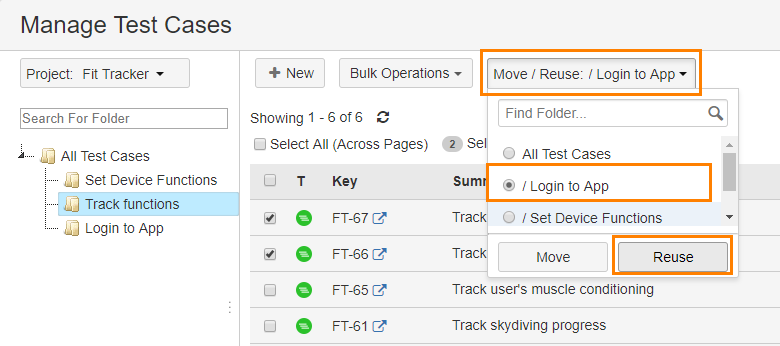
Reuse Test Cases across Folders
You can reuse existing test cases by copying them from one folder to another.
- On the folder tree at left, select the source folder wherein the test cases lie.
- Select test cases that you want to copy to another folder.
- Open the Move/Reuse drop-down menu at the top and select the destination folder in which you want to copy the selected test cases.
- Then click on the Reuse button on the drop-down menu.
Search Test Cases
You can apply either Basic Search or Advance Search to search test cases. The search criteria will be applied to the selected Test Case Folder on the tree.
- Basic Search: You can search a particular test case(s) on the basis of its Issue Key/Summary. Enter the Issue Key or Summary in the text box and press the ENTER key.

- Advanced Search: You can use JQL to search required test cases. Enter JQL in the text box and press the ENTER key. You can search test cases across projects and link them to test folders in current project. The query in JQL search is preserved until you change it.

- Clear: To reset the applied search criteria, click on the Clear button.
Creating Test Runs from Test Folders
You can create a new test run and associate test cases of a particular folder to it at the same time.
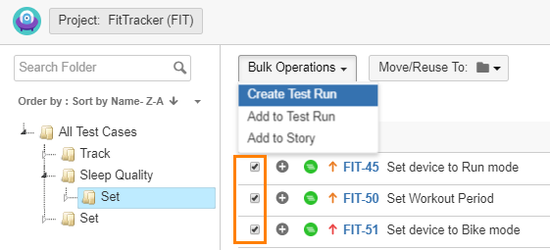
- Select test cases which you want to include in the test run that is being created.
- Open the Bulk Operations drop-down menu and select Create Test Run on it.
- The Create Issue screen of Jira opens with Issue Type "Test Run".
- Enter the test run details and click Create.
Link Test Folder to existing Test Run
You can link test cases of a particular folder to one of the existing test runs.
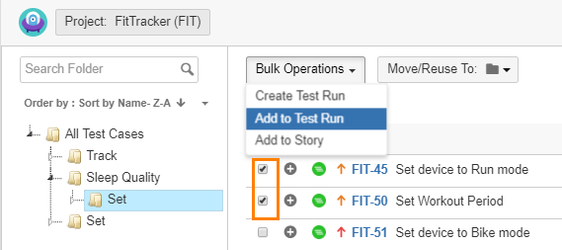
- Select test cases which you want to link to the existing test run.
- Open the Bulk Operations drop-down menu and select Add to Test Run on it. The pop-up opens with list of test runs on it. You can apply different filters and search criteria on records.
- Select the test run to which the test cases are to be linked and click Submit.
Link Test Folder to Story
You can link test cases to an existing Story/Jira issue.
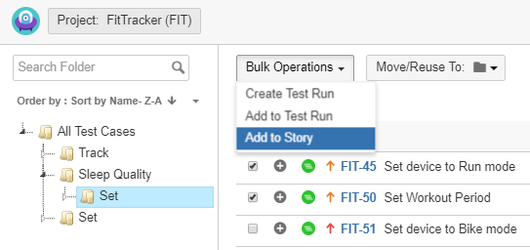
- Select test cases which you want to link to the existing story.
- Open the Bulk Operations drop-down menu and select Add to Story on it. The pop-up opens with list of Stories/Jira Issues on it. You can apply different filters and search criteria on records.
- Select the story/Jira Issue to which the test cases are to be added and click Submit.
Manage Column View
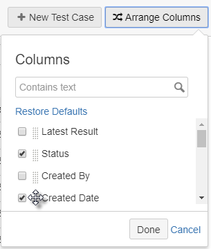
The Arrange Columns option allows users to create a customized view of their test case grid. The view is saved for future use.
For example, Testers want to manage the view of columns from Manage Test Cases screen. They want to ability to Hide/Show/Reorder field columns from the screen and save the view.
The following customization can be applied:
- Show More Columns: The ability to add columns in view. If there are other columns that you think important to display on the test case grid apart from the default view, then you can just select those columns to add them to the view.
- Hide Columns: The ability to remove a column from view. If you do not want to include columns of less important on the module grid view, then remove column selection to hide those columns on the view.
- Re-arrange: The ability to arrange the columns in a different order through drag and drop functionality.
You can search for a particular column through the search box.
The display of following fields can be controlled through Arrange Columns:
- Priority
- Test Case
- Created By
- Created on
- Updated By
- Updated on
- Status
- Execution result
- Type
Jira Fields
- Labels
- Components
- Fix Versions
- Affected Versions
- Sprint
- Assignee
- Reporter
Restore Defaults: These fields will be shows in default view - 'Test Case' , 'Latest Result', and 'Status'.
Back to QMetry All Products Help Page