Back to QMetry All Products Help Page
Create Test Scenarios
Table of Contents
Introduction
User should have the “Create Issue” permission for the project to be able to create a test scenario in JIRA. JIRA administrators can allow such rights.
Note: The following steps describe Test Scenarios Creation from JIRA as usual. You can also create test scenarios from the story page itself.
Steps to create a test scenario
- To open the Create Issue screen, follow either of the ways:
- Keyboard shortcut: 'c'.
- Click the Create button on the top navigation bar.
- Click the Create Issue link while browsing a project.
- The Create Issue screen opens. Enter the test scenario details.
- Select “Test Scenario” for Issue Type.
- If you want to create another test scenario with similar details, select the Create another check box.
- The field details, except the Summary field, are pre-populated on the Create Issue screen when you opt for creating another issue immediately after creating one.
- Click the Create button.
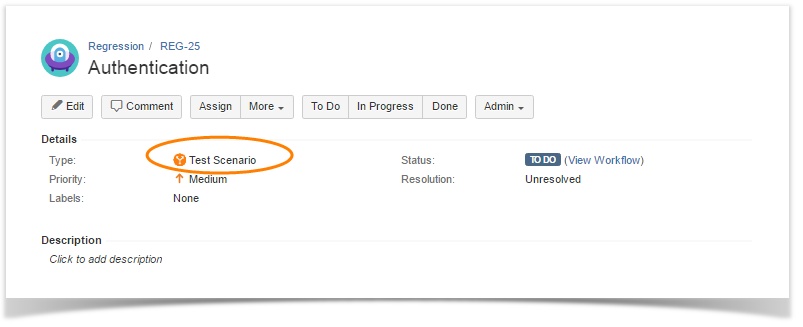
The JIRA issue with Type "Test Scenario" is created like below:
Associating Test Cases with Test Scenario
You can link Test Cases relevant to the test scenario.
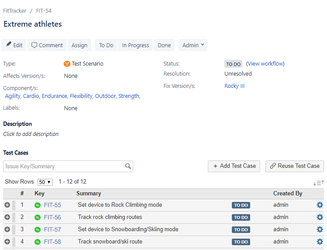
- Open the test scenario you want to link Test Cases to.
- Expand the Test Cases section of it.
You can either –
a) link existing Test Cases or
b) create new Test Cases and link them right away
A) Reuse Test Case: Linking existing Test Cases
In addition to linking test cases from current project, you can also link test cases from cross projects - other projects as well.
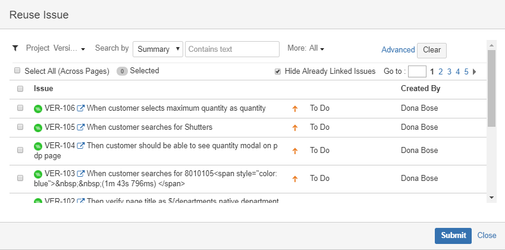
The Reuse Issue screen opens.
- Hide Already Linked Issues: Check the check box to hide issues which are already linked to the test scenario. The flexibility is provided to avoid linking them again.
Project: Select the Project to get project specific test case list. To view test cases of all projects, do not select any project on the list.
If the story/test case/test scenario list is long, apply filters to the list. You can filter records through Basic Search and Advanced Search.
- Basic search: You can search a particular test case by "Issue Key" or “Summary” through the search box. There are more options like Priority and Status to narrow down the search.
- Advanced search: The advanced search allows you to build structured queries using the JIRA Query Language (JQL) to search for issues. Click on the help icon for the field, to get Syntax Help. You can use different parameters - Label, Version, Component, Status, Issue Type, Board, Sprint - in your query to filter test cases.
Select All (Across Pages): Select the check box to select all the test cases across pages to link in one go. All the issues on all the pages will get selected instead of only current page.
Note: You can add maximum 1000 test cases at a time.
Select test cases and click on the Submit button to add them to the test scenario. You are navigated back to the test scenario detail page, which displays the test cases linked to the test scenario.
B) Add Test Case: Creating a new Test Case and linking it
- To create a new Test Case directly, click the Add Test Case button under the Test Cases section.
- The Create Issue screen opens with “Test Case” as selected Issue Type.
- The Test Case gets linked directly to the test scenario as soon as you create it.
There is an icon  beside each ID under the Test Case column, clicking on which the Test Case opens in a new tab.
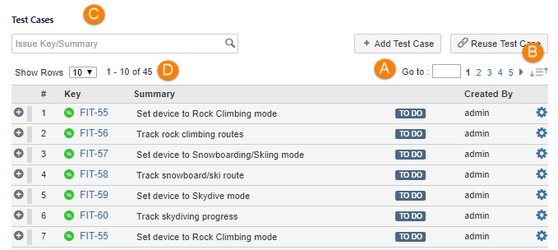
A. Pagination: Pagination allows users to navigate through pages. Enter page number in the box and press the ENTER key of keyboard to jump on to a specific page.
B. This feature is added to change order of test cases across pages by mentioning sequence number.
C. Search text: For Jira issue and test scenario, a search box is provided on authoring panel. It will also search on nested level in case of story > test scenario > test case.
D. Show Rows: Once you set the rows to display on the grid for an Issue type (story, test case, test run), then it is saved. You will see the same rows displayed on the grid when you visit that particular Issue Type next time.
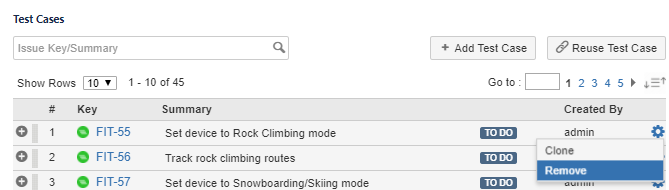
Removing Test Case Linkage
In case Test Cases linked to the test scenario do not relate to that test scenario anymore, you can remove the association of such Test Cases.
- Click the action icon for the Test Case you want to remove the linkage of.
- Select Remove.
Back to QMetry All Products Help Page