Back to QMetry All Products Help Page
Approval Access
Users can add approvers to the project. Users having Admin rights of the project can add/remove reviewers/approvers for requirements, test cases and test suites.
Notes:
- Maximum 5 approval levels can be added to the approval workflow.
- Maximum 5 users can be added as approvers in one level.
- Admin users are not approvers by default and they need to be added as approvers.
Adding a New Level
Note: Users should have Customization "Modify" rights to be able to add/remove Levels.
When a new level is added above an existing level, the assets move to the new level with pending status.
Users can add a maximum up to 5 levels as per the configuration done in Customization > General Settings & Audit > General Settings.
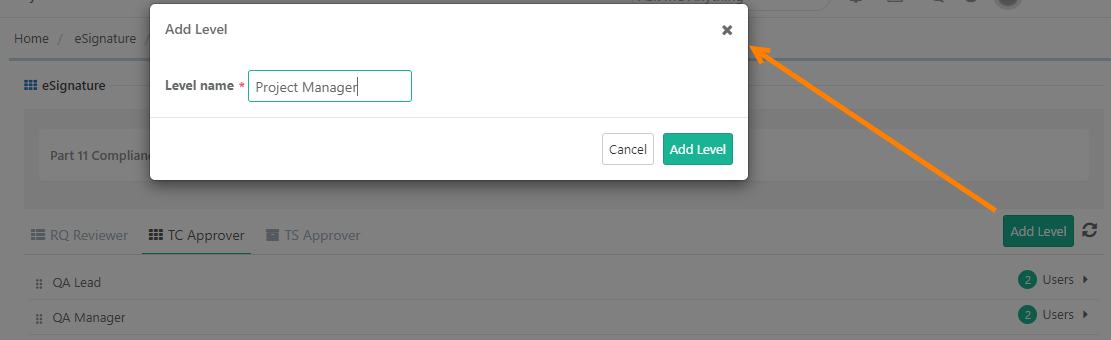
- Click on the Add Level button. A pop-up opens.
- Enter the Level Name and click on the Add Level button on the pop-up.
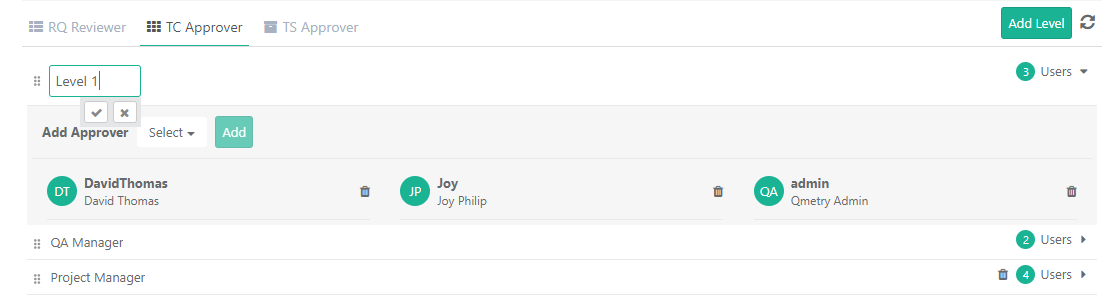
Edit Level Name
To edit the level name, click on the Level and change the name as required.
Change Sequence of Levels
You can change the sequence/hierarchy of the levels through the drag and drop operation.
When the sequence of levels is changed, the approval status persists and entities stay to the last level of Approval. For example, Alpha, Beta, Gamma are the available levels and the entity is Approved at Beta. Now the levels are resequenced as Alpha, Gamma, Beta. The entity will stay as Pending at Gamma (which is actually Level 2), so now the user will Approve it at Gamma and final approval will be at Beta.

Delete Approval Levels
You can only delete the top-level of the hierarchy. In the presence of top-level, the lower levels can not be deleted. You can change the sequence of levels and can then delete the level.
- Once an approval level is added, it is not possible to delete the last approval level if the remaining approval levels have been deleted.
- Once an approval level is deleted, any requirements/test cases/test suites pending on that approval level will no longer be pending and will be considered approved on the previous approval level.

Adding Reviewers/Approvers to Levels
There can be multiple approvers/reviewers at each level. But to mark an entity as approved, approval from any one of the approvers is required. The entity is then moved to the next level of approval or is considered as approved if it is the last level.
Follow the steps mentioned below to add reviewers/approvers under levels.
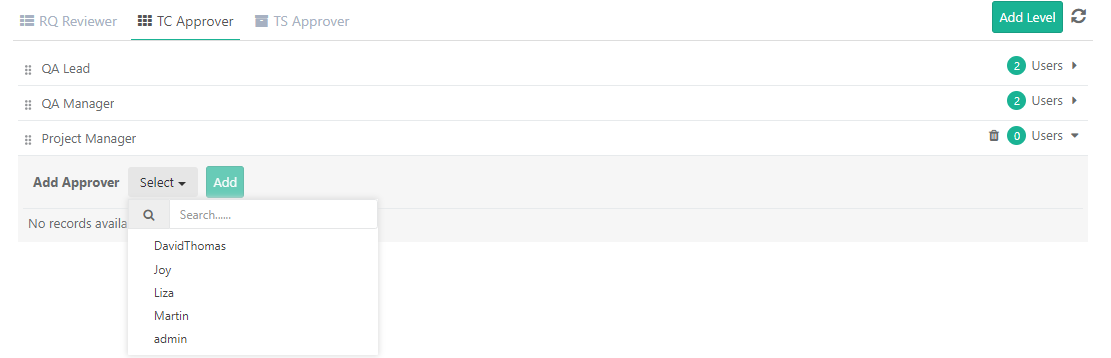
- Open the RQ Reviewer/TC Approver/TS Approver tab.
- Open the Select drop-down menu and select the users whom you want to assign as reviewers/approvers for the level.
- Click on the Add button.
Delete Reviewer/Approver under Levels
Follow the steps mentioned below to delete reviewers/approvers from levels. You can not delete all the reviewers/approvers from the level. At least one reviewer/approver should exist under levels.
- Expand the level to view users under it.
- Click on the delete icon adjacent to the reviewer/approver that you want to delete from the level.

Add Requirement Reviewers
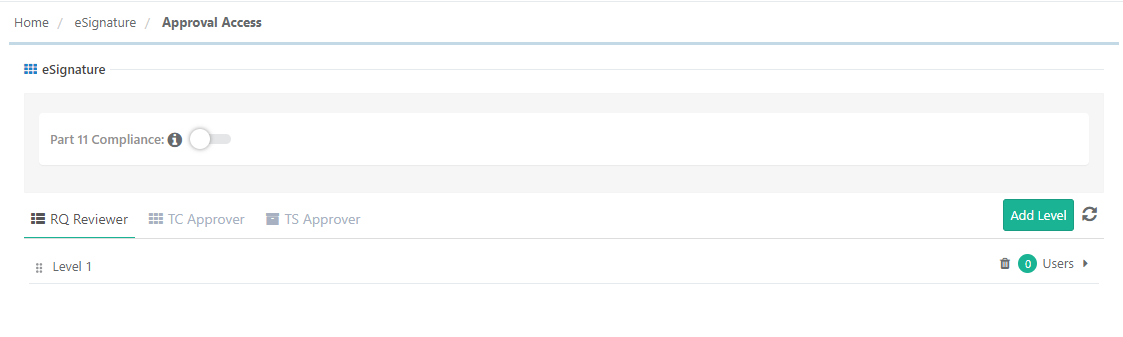
Expand eSignature on the tree and click on the Approval Access option.
The screen opens with three tabs on it: RQ Reviewer, TC Approver and TS Approver.
Requirement reviewers should be added as per their authorization levels. Level 1 is provided as a default level. You can add more levels as per requirement. You can also change the names of levels.
Adding Reviewers to Levels
Follow the steps mentioned below to add reviewers under levels.
- Open the RQ Reviewer tab.
- Open the Select drop-down menu and select the users whom you want to assign as requirement reviewers for the level.
- Click on the Add button.
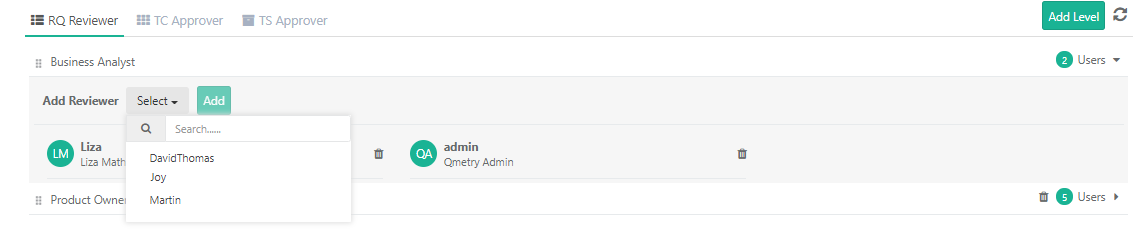
The reviewers get added for the level.

Add Test Case Approvers
Expand eSignature on the tree and click on the Approval Access option.
The screen opens with two tabs on it: RQ Reviewer, TC Approver and TS Approver.
Test Case Approvers should be added as per their authorization levels. Level 1 is provided as a default level. You can add more levels as per requirement. You can also change the names of levels.
Adding Approvers to Levels
Follow the steps mentioned below to add approvers under levels.
- Open the TC Approver tab.
- Open the Select drop-down menu and select the users whom you want to assign as test case approvers for the level.
- Click on the Add button.
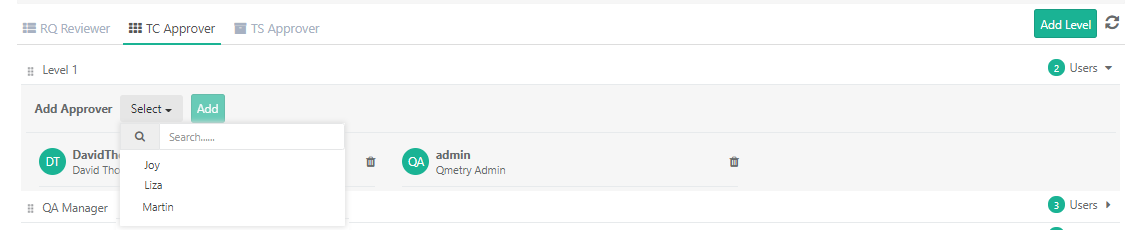
The users are added as TC Approvers. To add more approvers, follow the same steps.

Add Test Suite Approvers
Expand eSignature on the tree and click on the Approval Access option.
The screen opens with two tabs on it: RQ Reviewer, TC Approver and TS Approver.
Test Suite Approvers should be added as per their authorization levels. Level 1 is provided as a default level. You can add more levels as per requirement. You can also change the names of levels.
Adding Approvers to Levels
Follow the steps mentioned below to add approvers under levels.
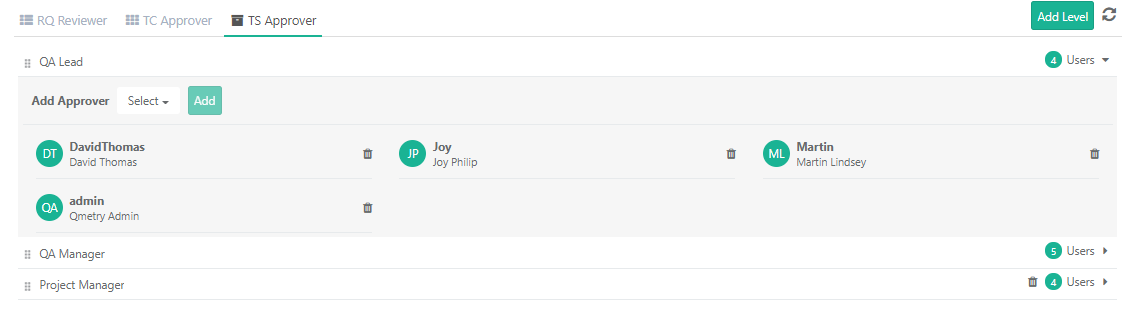
- Open the TS Approver tab.
- Open the Select drop-down menu which displays users with the “Execution” rights in the project. Select the users whom you want to assign as test suite approvers for the level.
- Click on the Add button.

The users are added as TS Approvers. To add more approvers, follow the same steps.
Back to QMetry All Products Help Page