Back to QMetry All Products Help Page
How to make clone of an existing Project?
Users can add a clone of an existing Project with either Folder Structure or Folder Structure along with Data.
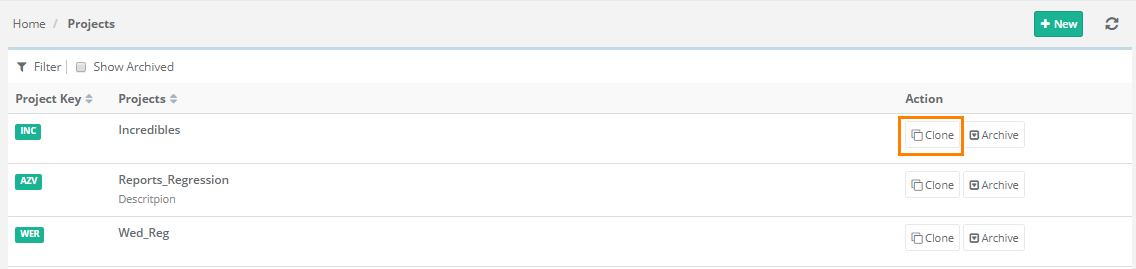
- Go to Projects > Project/Release/Cycle. It displays the list of Projects of which you have rights.
- Click on the Clone button for the project you want to clone.
- The next screen opens with Project Name and Project Key fields on it. Make required changes to the Project Name and Key. By default, it will suffix "_copy" to the Project Name.
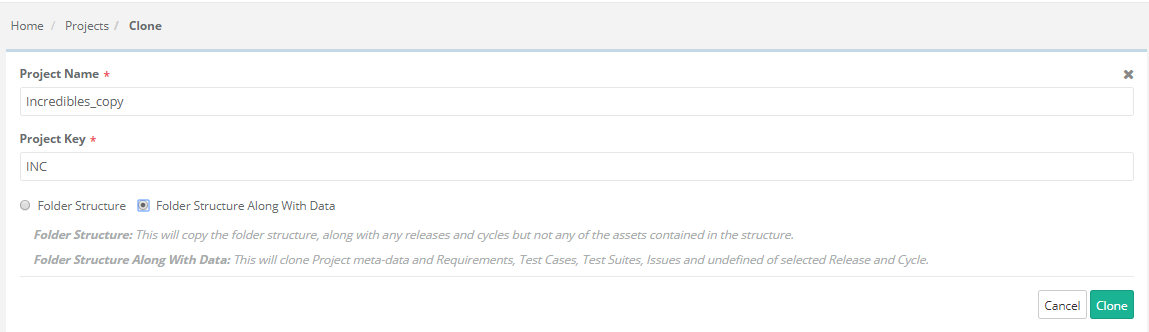
Select either of the options:
- Folder Structure: It will copy the folder structure along with releases and cycles. It will not copy assets contained in the folders.
- Folder Structure along with Data: It will clone project meta-data and requirements, test cases, test suites within folders along with releases cycles.
Then click on the Clone button.
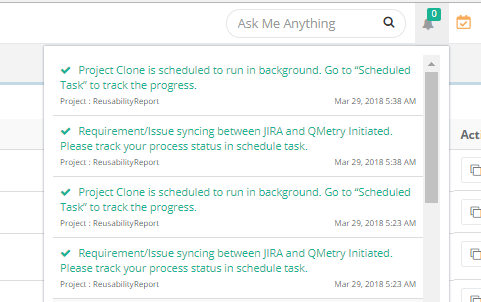
When you complete the cloning process, the message pops up to view notification for the clone progress. You can view the progress in the notification window on the application header. This allows scheduled clone operations to run in the background and allows users to continue with their other work.
Check the notification window on the application header. It shows the list of Activities.
Click on the Scheduled Task  icon the application header. The Scheduled Task icon turns Orange in color whenever any of the following actions is initialized. The icon color changes to original as soon as you click on it to view the task status.
- All bulk operations
- Import - IS, TC, TS, RQ
- Export - IS, TC, TS, RQ, Test execution
- Project clone
The screen shows all the activities completed or in queue.
For the Clone activity that has been carried out, you can view the details of Activity Executed By, Source Project, and Destination Project.

Back to QMetry All Products Help Page