In-place edit will always update the test asset.
To create a new version of test asset, follow the steps mentioned below.
On the Test Case module toolbar, click on the New button.
...
Note: To enable a rich text editor, the Enable Rich Text parameter should be enabled for the Project (Projects > Project / Release / Cycle). Refer to Enable Rich Text Editor for more details.
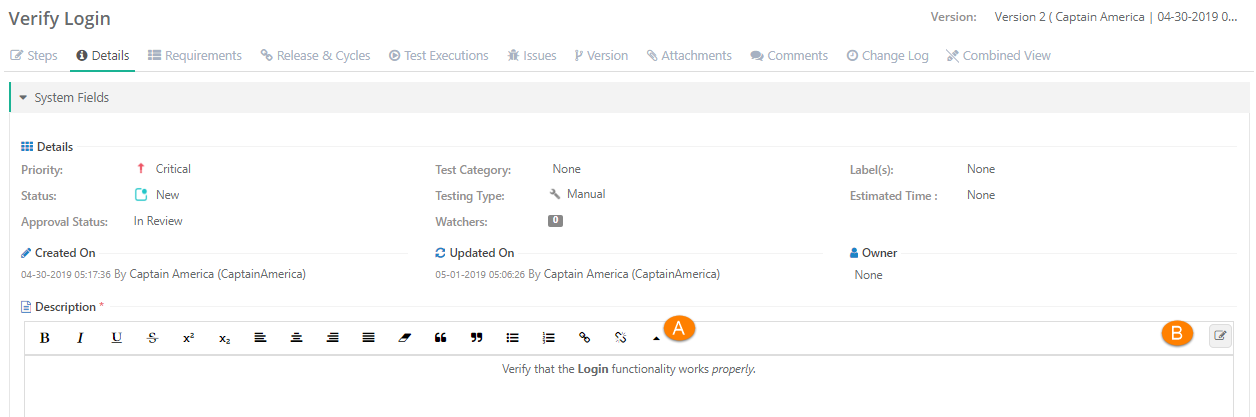
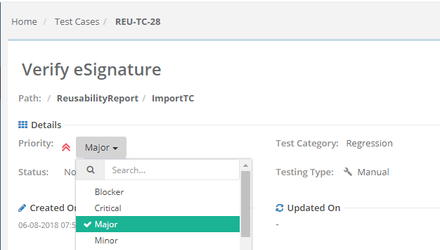
Testing Type: You can see this field on test case detail page once a test case is created. The field shows how the test case was created in QMetry: Manual or Automated. If a test case is created through UI or imported from Excel, then it is identified as a manual test case. Test Cases which are created through Automation APIs are identified as Automated test cases. The Testing Type field remains read-only.
User-Defined Fields: If UDFs are added for the test case module, then they are displayed on the Create Test Case screen and Test Case Details screen.
Enable Rich Text and Source Code Editor: Refer to the Description field above.
...
Repeat the same process to add other steps.
...
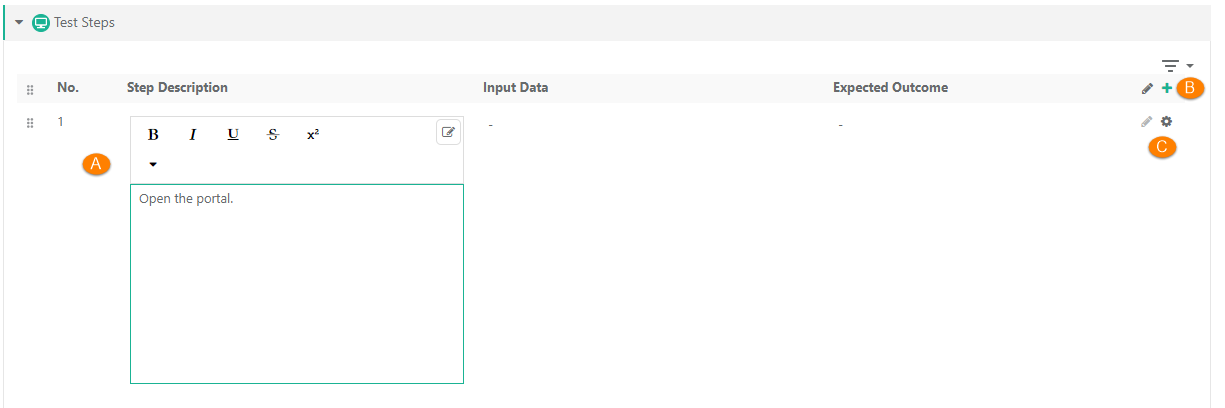
Rich Text Editor for Steps
There are two formats in which you can add test steps
...

Steps:
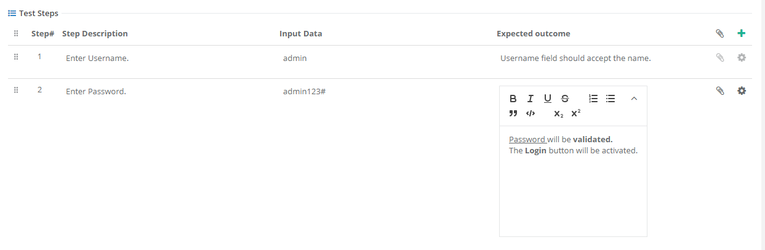
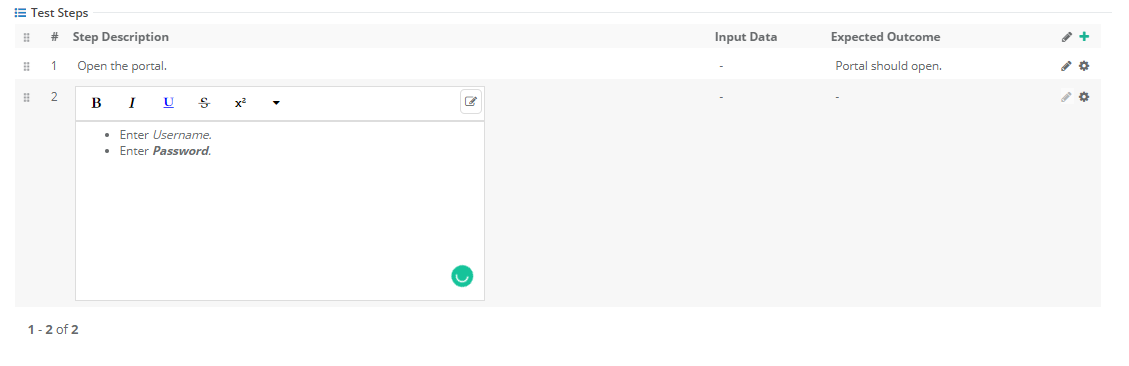
A blank row is added on the grid with auto-generated Step number. Enter Step Description, Input Data and Expected Outcome in respective fields by clicking in the cell.
Repeat the same process to add other steps.
There are two formats in which you can add test steps:
Note: To enable rich text editor, the Enable Rich Text parameter should be enabled for the Project (Projects > Project / Release / Cycle).
Click on the action menu icon.

: Plain Text and Rich Text.
Enable Rich Text and Source Code Editor: Refer to the Description field above.
Note: To enable rich text editor, the Enable Rich Text parameter should be enabled for the Project (Projects > Project / Release / Cycle). Refer to Enable Rich Text Editor for more details.
Show/Hide and Re-arrange Test Step Columns
Users can opt to show/hide test steps columns (Input Data, Expected Outcome) and arrange the test steps columns on test case create screen and the Steps tab on the test case detail page.
You can organize the test steps columns in the panel through drag and drop operation. You can also opt to hide/show Input Data and Expected Outcome columns on the screen.
Click Save once you make any changes for the Test Steps panel.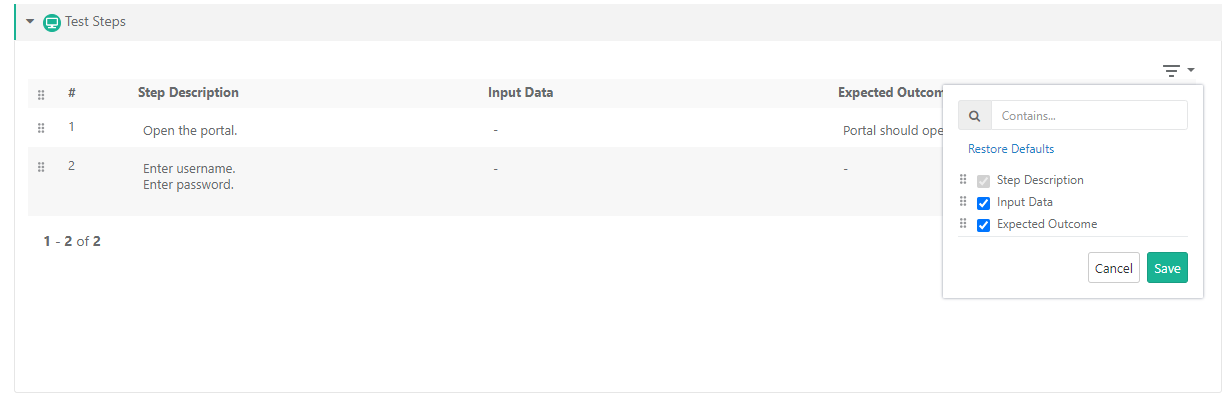
Any changes in the test steps column arrangement will reflect in other places where the test steps panel is used. For example, column arrangement changes on the Execution screen will reflect in the following places.
Test Case Create page
Test Case Detail Page
Create New Version page
Exploratory testing
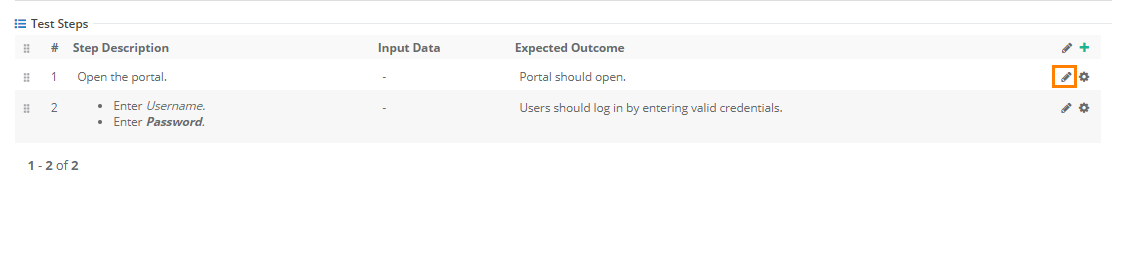
Edit entered steps
A. Click in the cell to modify the steps. It opens test case details page in editable mode. Just click the cell you want to edit the details of.
B. Click on the Edit icon for the step.
Also, refer to the Editing a Test Case section on this page.
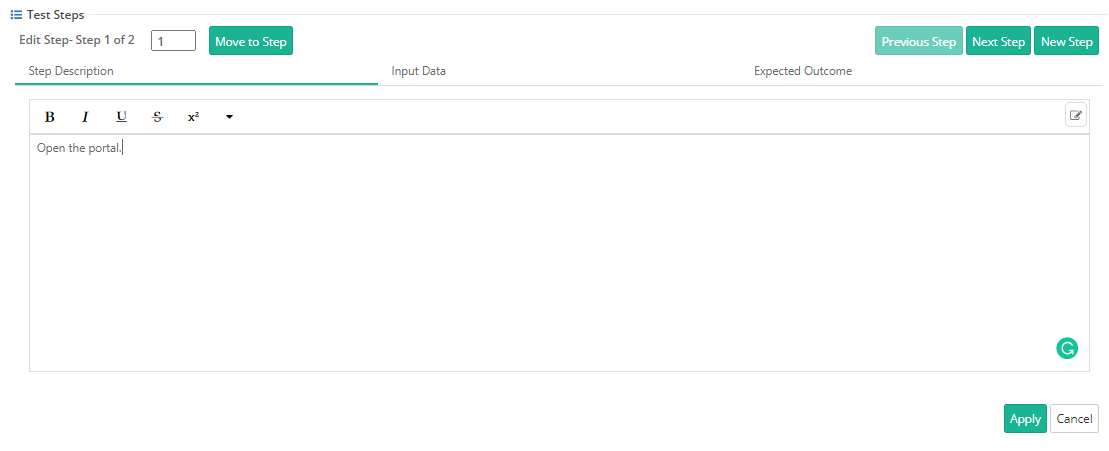
The step section opens in the expanded view.
You can switch between Step Description, Input Data, and Expected Outcome. To go back to the Step Description section, click on the Move to Step button.
You can use the Previous Step and Next Step buttons to navigate to the previous/next steps.
Use the New Step button to add a new step next to the current step.
Once you are done with editing the test step, click Apply to save the changes.
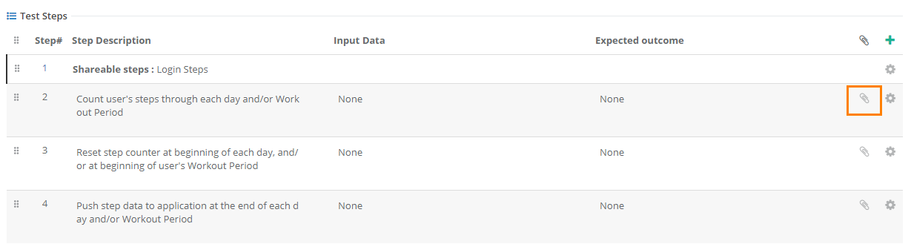
Click on the cog icon.
It allows you to perform the following actions on the Steps grid:
Insert Row
Insert Shareable Test Case
Remove Row
Duplicate Row
Move: Select Index to move the step to.
Click on the
...
Create
...
button to save the test case.
When you open the test case detail page, the
...
Test Case Folder Path
...
displays the path
...
up to the folder the test case lies within
...
...
.
Removing Test Case Steps
Open the test case details page in editable mode.
On the Test Case Step(s) grid, click the
...
Con icon for the step you want to remove.
Select Remove Row.
Changing Order of Test Case Steps
While executing test suite, the test case steps appear in the same sequence as you arranged them here for the test case.
You can easily change the order of test case steps through the following way:
On the Steps tab, click on the
...
Con icon at right and select Move.
Select Index to move the step
...
Users can get more granular details by adding attachments at test steps.
...
to
...
For example,
A test step needs to be tested with different test data. The tester attaches an excel sheet containing the test data to keep it ready for execution.
...
A test case can be edited in terms of its parameters and test case steps.
...
.
...
It opens the field in editable mode. In case of text field, enter the value and save the details.
To edit existing test steps, click on the Edit button in the Test Steps section.
In-place edit will always update the test asset.
To create a new version of test asset, follow the steps mentioned below.
If test case steps are added or edited in test case, which is already executed, then it is recommended to save the test case with Save as New Version.
If the User Role has Versioning rights (in Administration > Roles), then the button will be visible to the user. When you edit test case details, you can save the details with a new version of that requirement.
Follow either (A) or (B) as mentioned here.
A. Click on the Con icon for the requirement and select Create New Version.
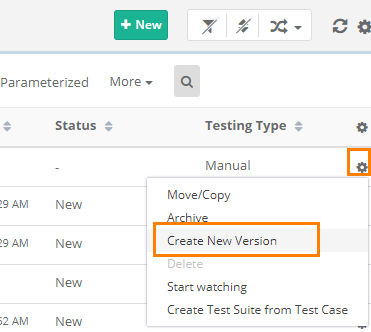
B. Open the test case detail page and click on the Create New Version icon on the header.
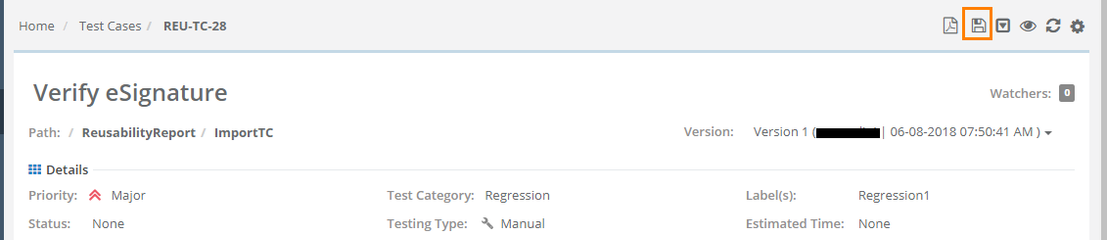
The next screen opens in editable mode.
Make required changes and click on the Save as New Version button to create a new version of the test case with updates.
If you add/edit test steps within a test case, click on the Save as New Version button to save the content of steps along with test case parameters. The associated test suite will still be associated with the previous version of the test case. To execute the latest version of test case on execution screen, click on sync button.
Example: TC1 has execution status “Passed” in TS1. User modifies TC1 details and selects this option to reset the test case execution status while saving TC1. Now TS1 will show TC1 execution status as “Not Run”.
If the above option is not selected, then on the Test Run screen the sync icon appears beside the current version of the test case.
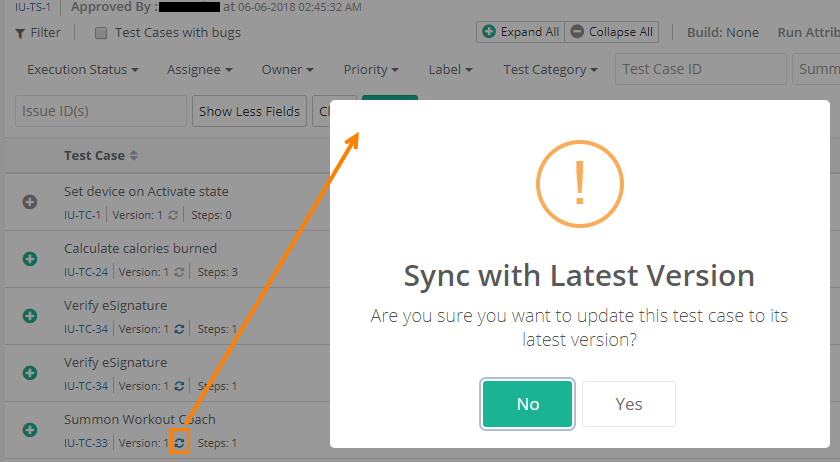
After syncing the test case with its latest version, its Execution Status changes to "Not Run".
If test steps were added in the latest version of test case, then these test steps will also be added on the execution screen.
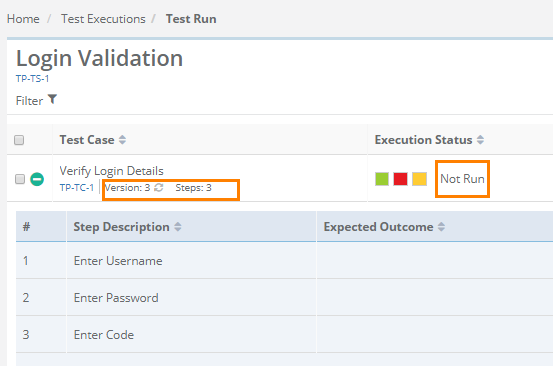
Note: QMetry allows you to use different versions of a test case for testing. Read more about it on the Managing Test Case Versions page.
All the versions of the test case should be archived to delete that particular test case.
You can not carry out further operations like adding attachments, linking test cases, issues, and release - cycles on an archived test asset.
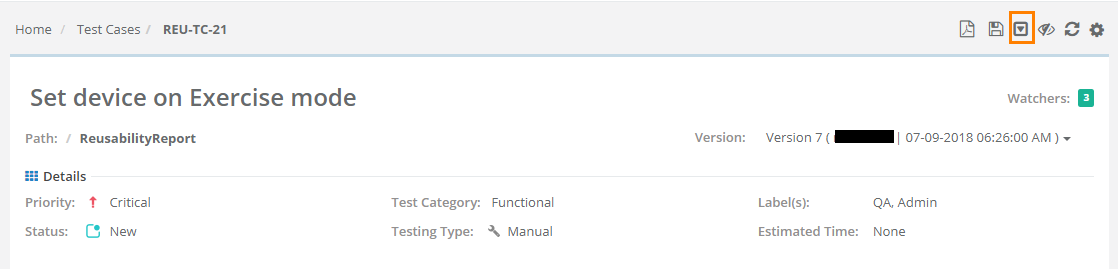
A. Archiving from Test Case detail page
B. Archiving from Test Case module list view
A. Archiving from Test Case detail page
Open the test case details page by clicking on the test case.
Click on the Archive icon on the top right corner of the page.
It will archive all the underlying versions of the test case.
B. Archiving from Test Case module list view
Open test cases module.
The test case list view opens with list of existing test cases within the project/folder.
Click on the settings icon for the test case you want to archive and select Archive. The test case is archived after confirmation.

To unarchive an archived test case, click on the Unarchive icon at the top right corner.
Read Archiving a Specific Test Case Version
To delete a test case, first you need to archive it. All the versions of the test case should be archived to delete that particular test case.
It is a two step process:
All the versions of the test case should be archived to delete that particular test case.
A. From Test Case detail page
B. From Test Case list view
A. From Test Case detail page
Once the test case is archived, it looks like below.
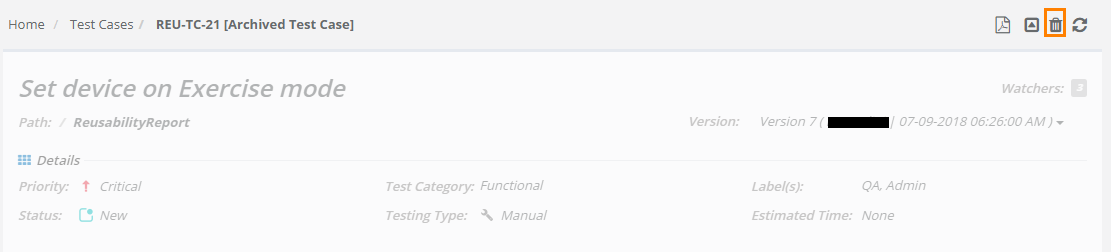
The Delete icon now appears at the top right corner of the page.
Confirm the operation on the pop-up.
B. From Test Case module List view
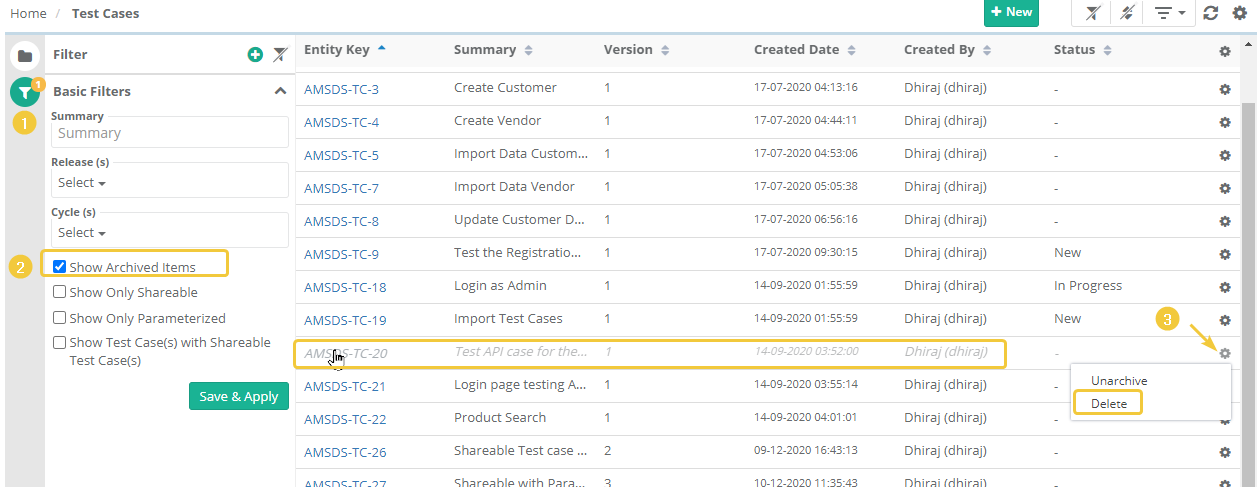
To view the archived test cases on the screen, select the Show Archived check box above the grid.
It displays archived test cases along with other test cases.
Click on the settings icon for the archived test case and select Delete.
...