| Table of Contents | ||
|---|---|---|
|
...
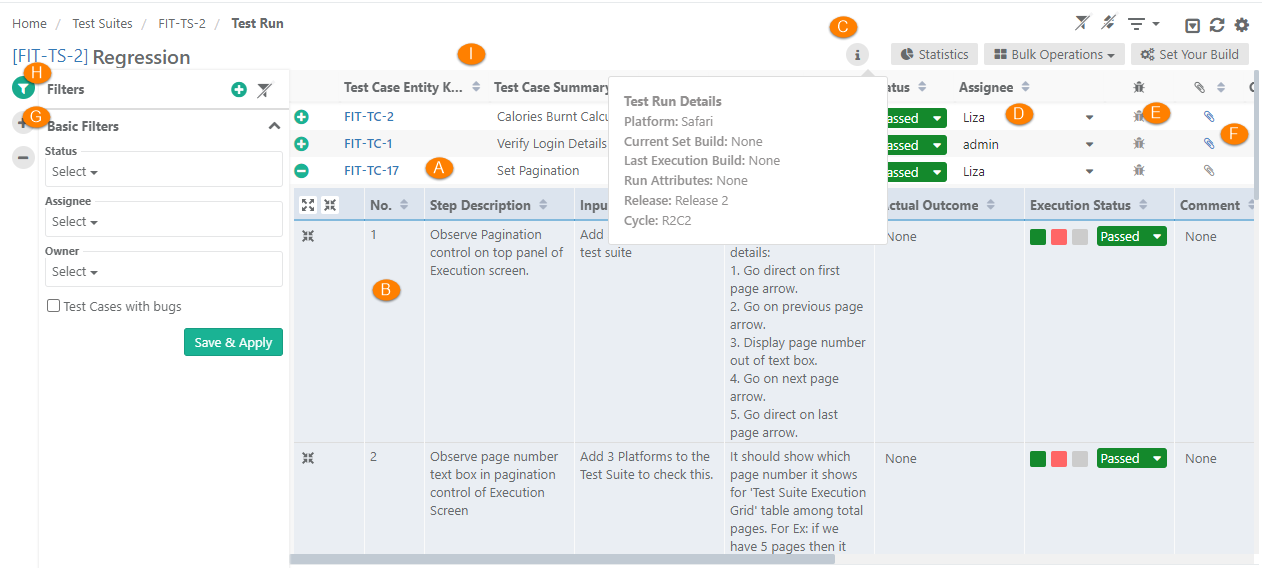
The columns for test case and test step will appear as per the column selection you made here.
...
H. Apply Basic Filters and Advanced Filters
I. Test execution screen allows testers to resize test case columns to view complete details and saves it in the cache for future usage.
→ Execution Type: The Execution Type column is added to the Test Suite Execution screen so that the testers can mark the executions as Automated or Manual. The column remains hidden by default. Users have to make the column visible from the column list. By default the execution type is "Manual". Users can change the value by opening the drop-down menu and selecting the "Automated" type.
Use Case: Testers need to run particular test cases as Manually and Automated way. Sometimes testers have to manually mark the status of test cases on the Execution screen. Therefore, testers need an ability to mark the executions as Automated or Manual on the execution screen.

Users can also set Execution Type for bulk test cases at once. Refer to Bulk Operations section on this page.
Modify Execution Time Stamp
...
Setup vs. Attended Time
Users can enter Actual Setup Time and Actual Attended Time for each test case on the execution screen.
...
Use Case: A new build is received from the development team and the QA Manager has scheduled Regression Test. The scope covers multiple modules and functionalities thereof. Testers are well aware of the test cases and test steps associated with each module. So they jump start on executing the test cases one after another without going into details. They keep running continuous execution without updating the run status of each test case. At the end or at a certain point they just update the status of bulk test cases with a few clicks instead of assigning status one by one on each test case execution.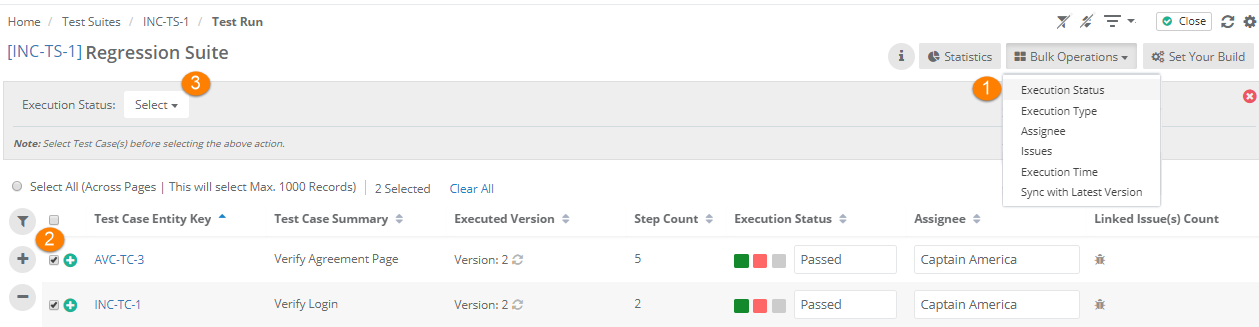
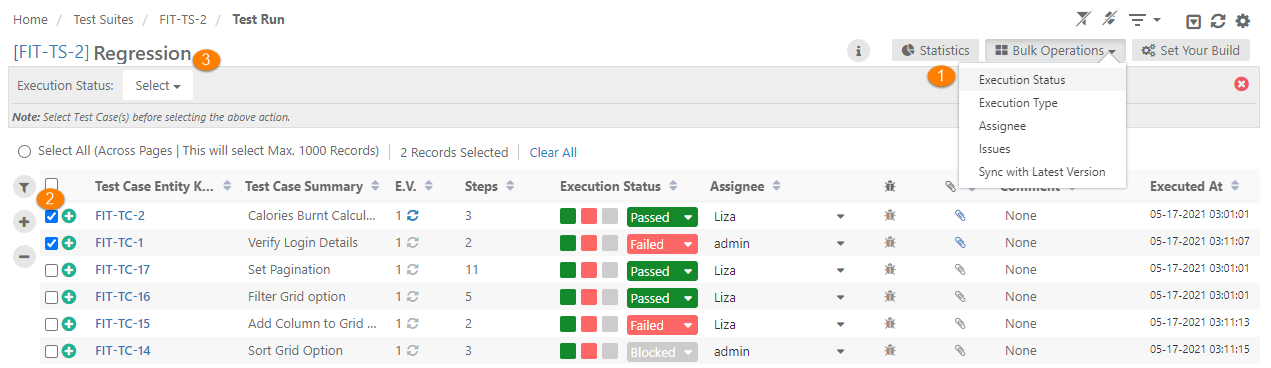
1. Open the Bulk Operations drop-down and select the Execution Status option on the it. It makes the Status drop-down visible which has Passed, Failed, Not Run, Blocked and Not Applicable statuses on it.
...
3. Select required status on the Execution Status drop-down. It applies to all the test cases selected on the grid.
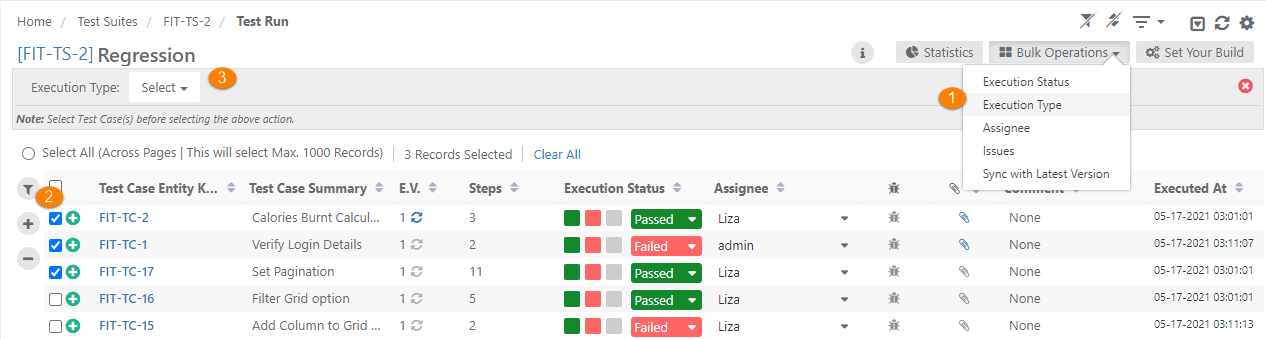
Execution Type
Users can assign Execution Type in bulk to test cases whose execution type is similar. Users do not have to update the Execution Type of test cases one by one.
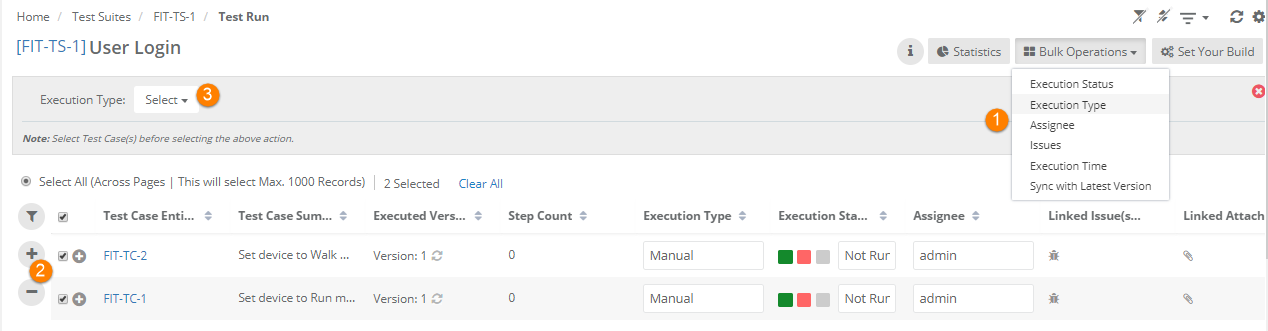
1. Open the Bulk Operations drop-down and select the Execution Type option on it. It makes the Execution Type drop-down visible which has the list of users on it.
...
3. Open the Execution Type drop-down and select the type that is to be assigned to the selected test cases.
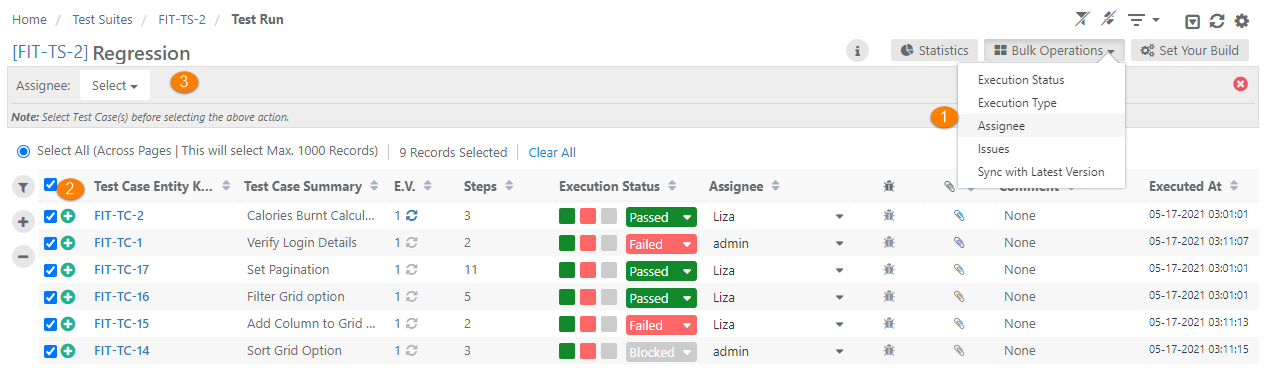
Assignee
Users can assign test test cases in bulk to a tester to execute. It saves QA Lead/Manager's time to assign multiple test cases to the same tester.
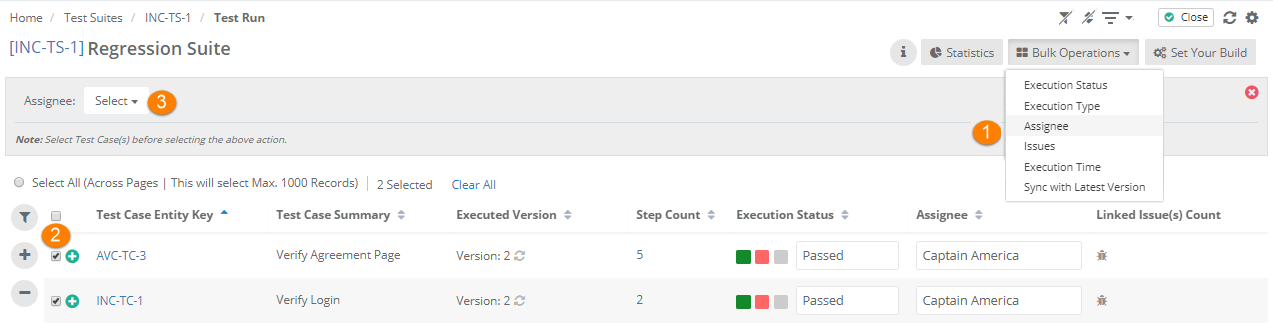
1. Open the Bulk Operations drop-down and select the Assignee option on it. It makes the Assignee drop-down visible which has the list of users on it.
...
3. Open the Assignee drop-down and select the tester to whom all the selected test cases are to be assigned for execution.
Issues
Users can link QMetry issues or Jira defects to multiple test cases at a time.
User Case: A testing team has some test suites containing many test cases. They want to link a Jira issue with multiple test cases. Linking an issue to each execution can be very time consuming. Thus, they want the ability to link a JIRA issue to multiple executions at once.

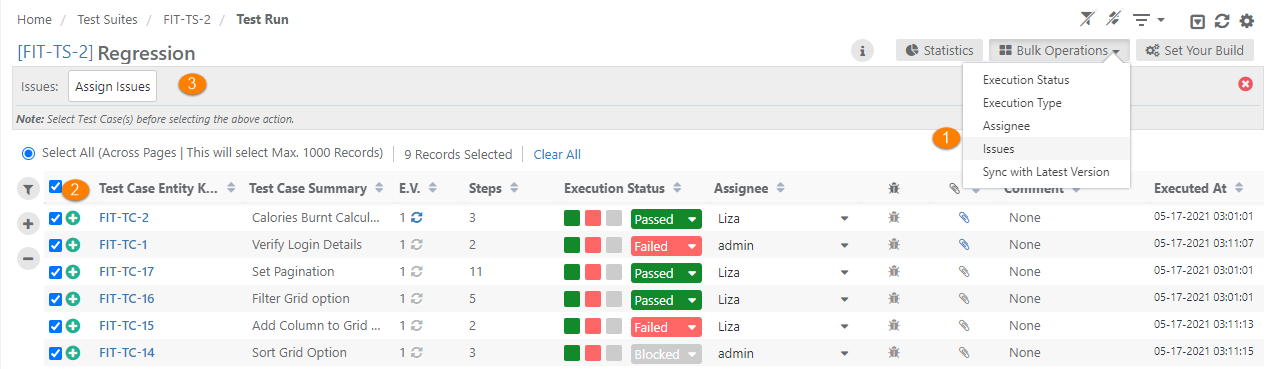
1. Open the Bulk Operations drop-down and select the Link Issues option on it. It makes the Assign Issues button visible.
...
Execution Time
Users can modify the execution date and time for multiple test cases at a time.
To enable the editing of the Execution date and time, go to Customization > General Settings & Audit and turn the Allow manual edit of last executed date/time flag On.
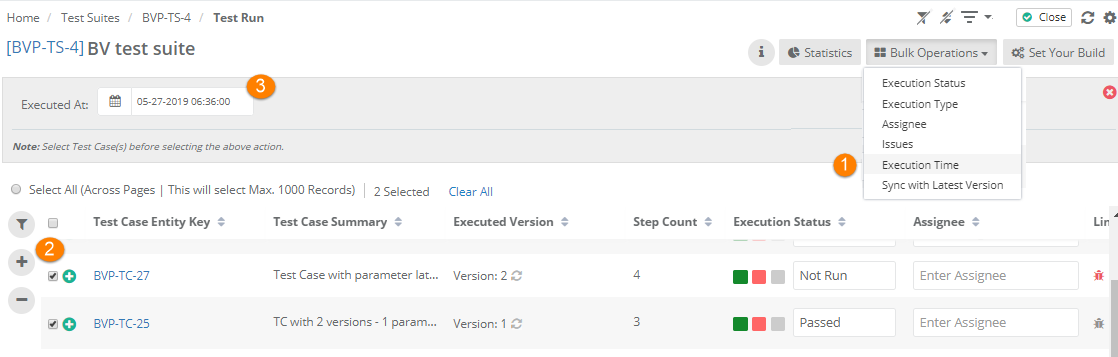
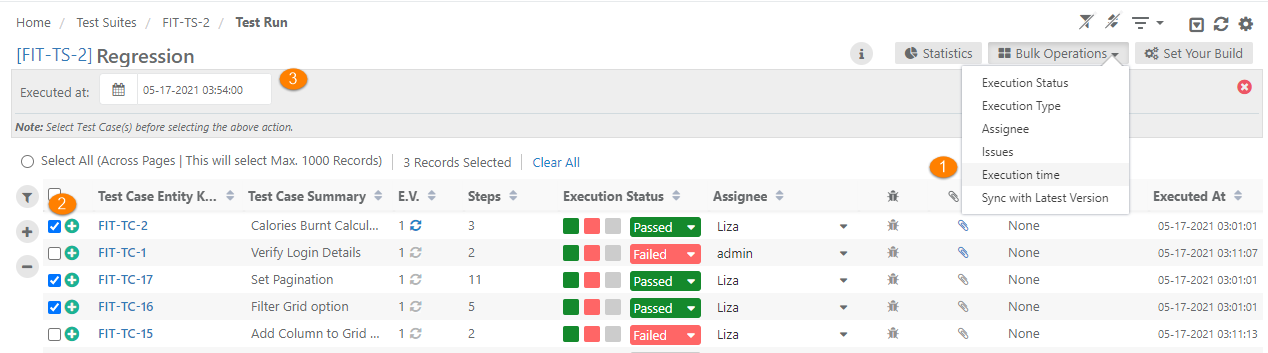
1. Open the Bulk Operations drop-down and select the Execution Time option on it. It makes the Execution At field visible.
...
QMetry defines a Build as a specific iteration of the product/domain to be tested. The feature allows the tester to assign a "build" (aka patch, drop, or increment) to test suites that indicates indicate the version of the product being tested. It helps to track multiple builds of software more dynamically without having to add separate test suites with every new build.
...
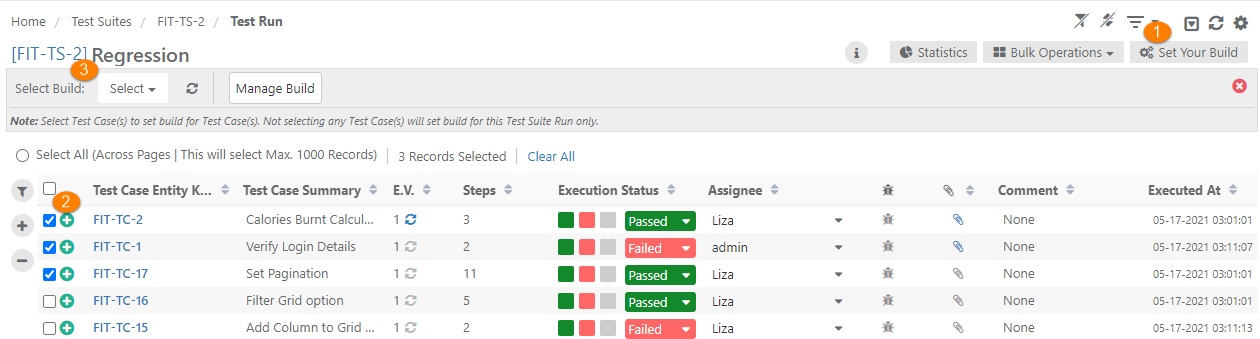
Users can create builds from the Execution screen.
Click on the Set Your Build button.
Then click on the Manage Build button.
, select the test cases to which you want to apply the build and select the build from the drop-down.
Manage Build: Clicking on the Manage Build button opens Builds section (Projects > Builds) in another tab. Refer to Managing Builds to know more about adding a new build.

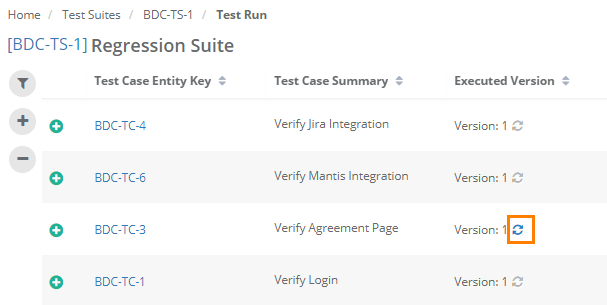
Link Latest Test Case Version at Run-time
...
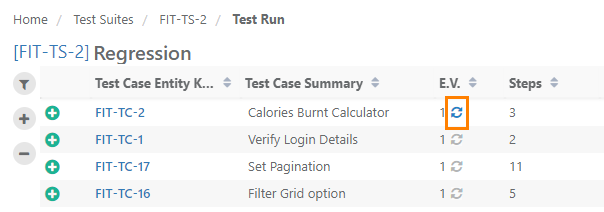
Clicking on the Refresh icon, the test case version will be updated to the latest one. Any changes related to test case parameters and test steps will be updated. The execution status of the updated test case will be reset to Not Run.
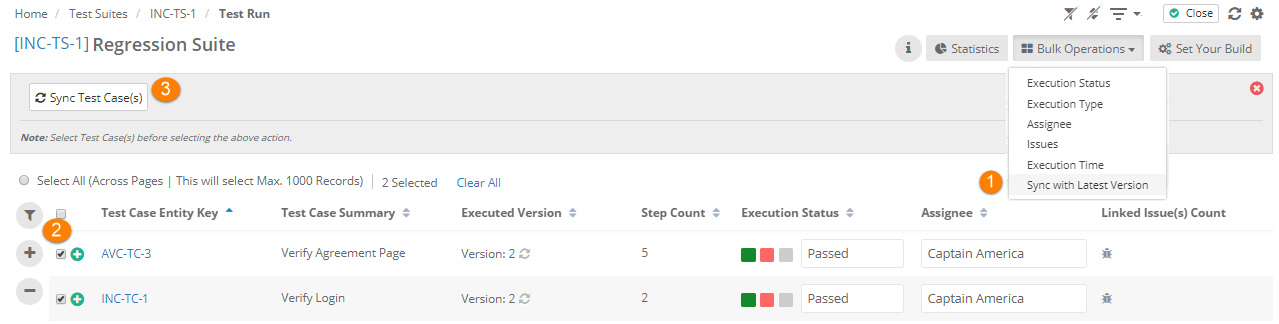
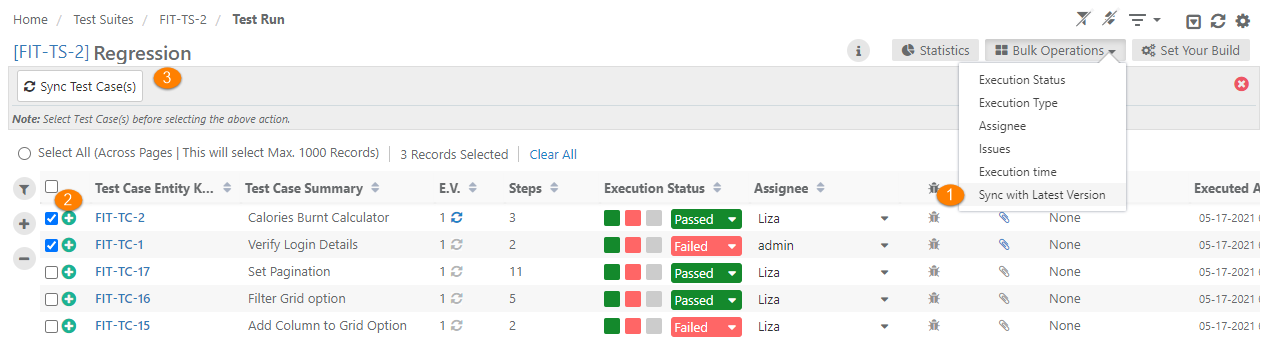
Bulk Sync Test Cases to Latest Version
...
- On the Test Execution Screen, open the Bulk Operations drop-down menu and select Sync with Latest Version.
- First select the test cases that you want to sync with their latest version.
- Then click on the Sync Test Cases button.
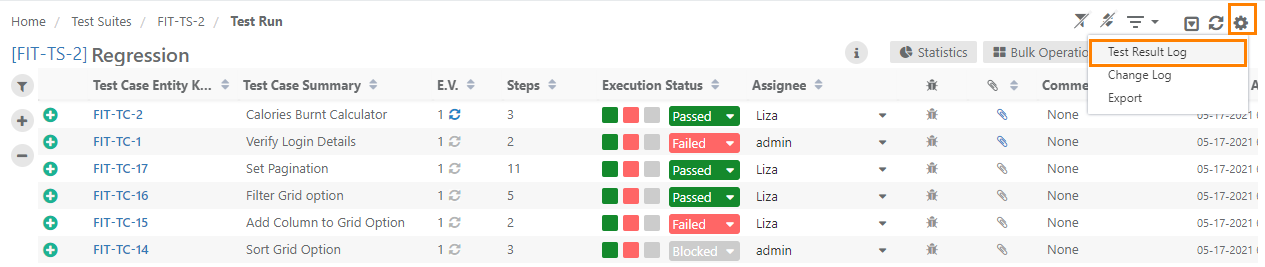
Test Result Log
...
Click on the Settings icon at top right corner and click on the Test Result Log option.
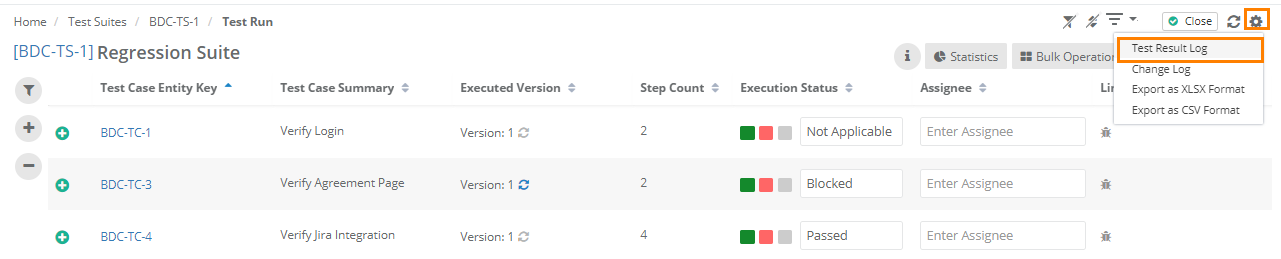
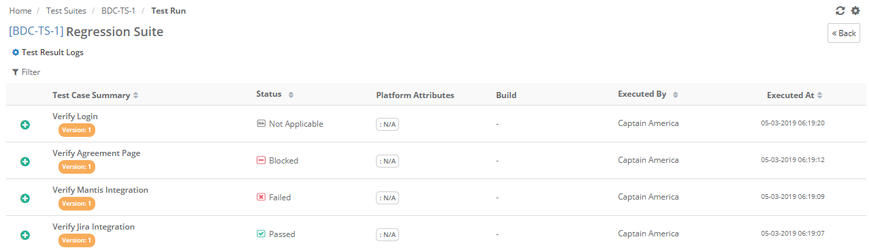
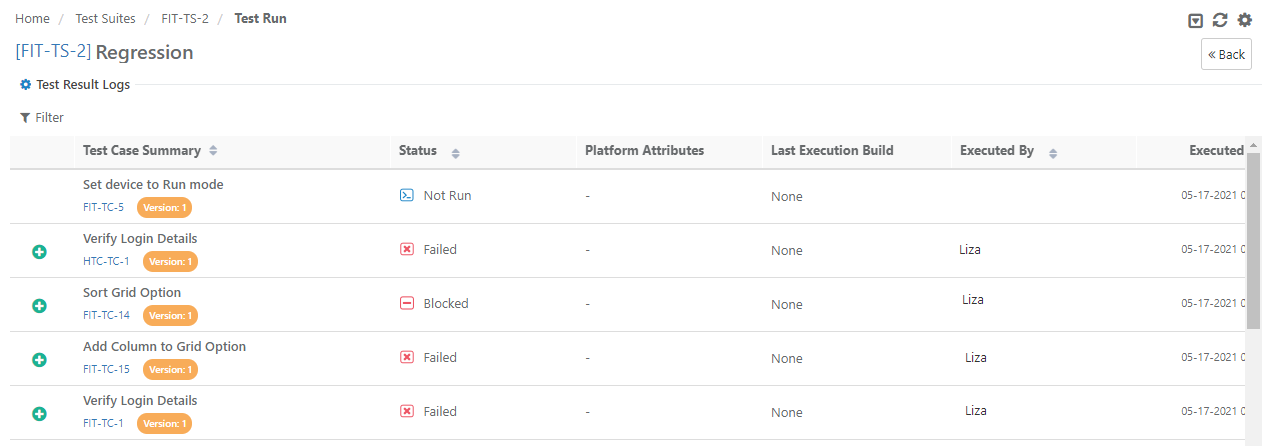
The Test Result Log is displayed with the following details on it:The test log contains all relevant information about the test run, such as Test Case Summary, Test Case Version, Test Case Step, Status, Executed By, and Executed Date and time and so on.
You can apply filter view required logs.
Change Log
Open the Test Suite Execution screen.
Click on the Settings icon at top right corner and click on the Change Log option.
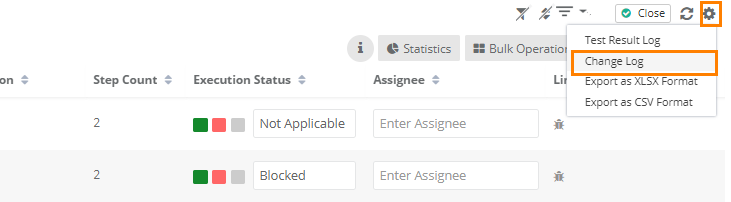
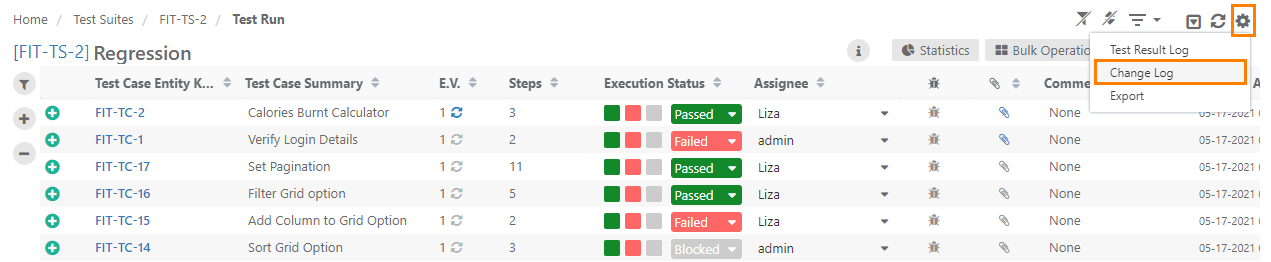
The Change log displays logs of the following activities carried out on the execution screen for a particular Test Execution.
...
Change Log helps you to track the changes done at the execution level.
The details include Actor, Action, Test Case Summary, Field, New Value, Old Value, and Date. You have the option to filter the records.


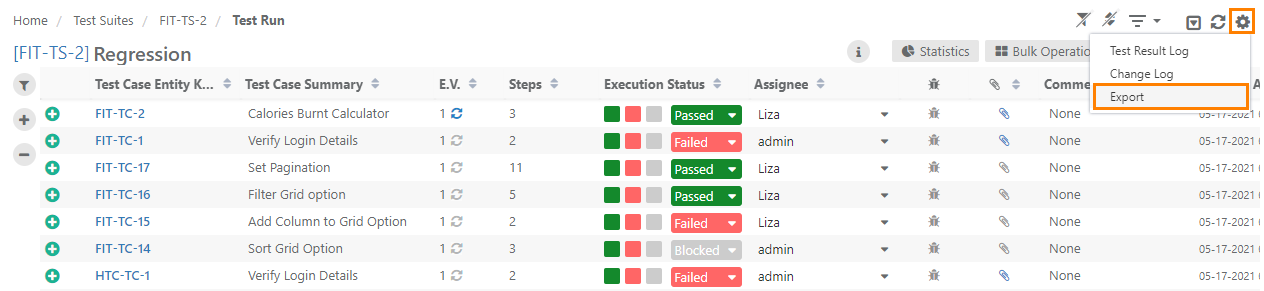
Export Test Execution
...
2. Click on the cog icon at the top right corner of the application header.
3. Select Export.

The next screen opens with the following options. Select options to export test execution.
...