...
Step 1: Select either Export As XLSX or Export As CSV and click Next.


Step 2 Select records: Select the requirements you want to export by selecting individual issues.
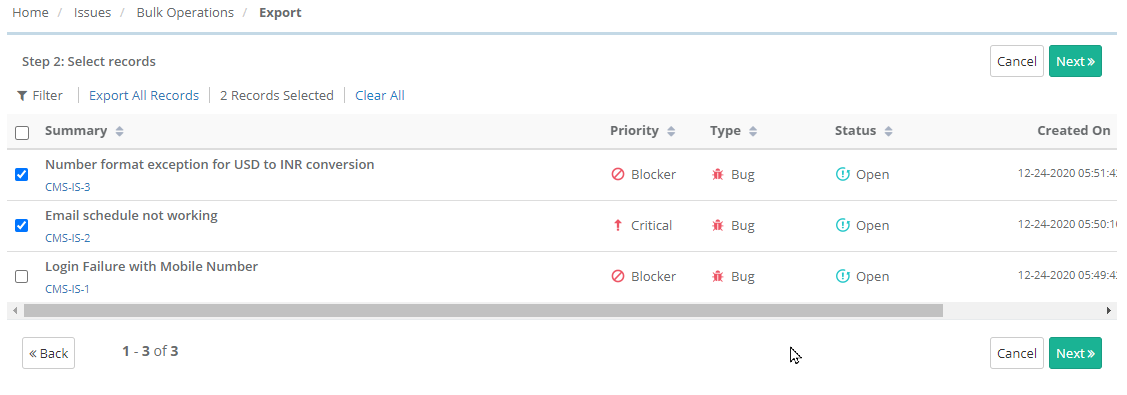
Once you are done with selecting issues, click on the Export button.
Export All Records: Click on the Export All Records link to select all the records across pages to export.
A confirmation window pops up

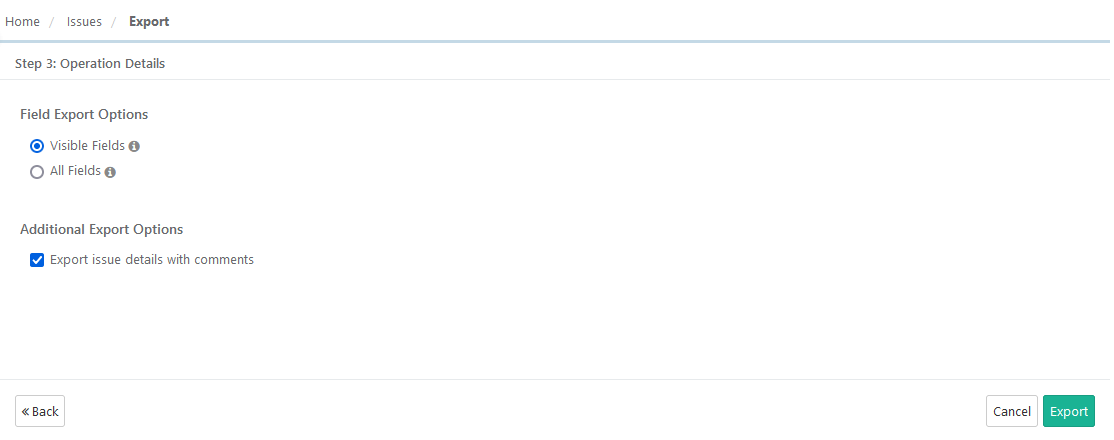
Step 3 Field Export Options
- Visible Fields: Select the option to export only visible fields on the List view screen. The export will exclude the columns which are hidden.
Note: The test case description and step description fields are included in the export irrespective of any field export options. - All Fields: Select the option to export all the fields irrespective of whether the columns are visible or hidden.
Additional Export Options
Export issue details with comments: Select this option to export the comments entered for the issue along with issue details. The option enables you to share the bug details with comments to other teams who do not access QMetry.
For example,
The testing team is using the internal Issue module to track bugs but the development team is not using the Issue module or is outside QMetry. The issue details can be exported with comments and shared with the development team so that they can access the details easily.
Notes:
The option “Export issue details with comments” is available only for the QMetry internal Issue module.
The comment is exported as the last column in the Excel file with details like User Alias, Date, and Time of comment.
If there are multiple comments added for an issue, each comment is exported in a separate column in the sequence starting from the oldest comment to the most recent comment.
If the comment includes rich text data, it will be converted into Wiki Markup syntax during the export and the data will be displayed in the Excel file accordingly.
Click Export.
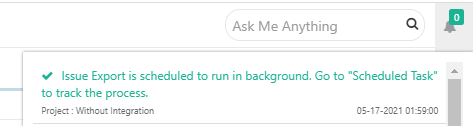
A confirmation window pops up. Click Yes to proceed.
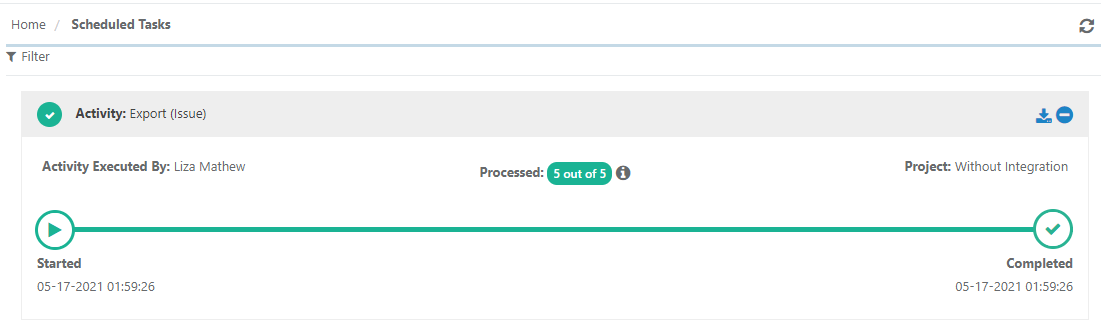
A notification is displayed in the notification window. You can also view the progress in the notification window on the application header. This allows scheduled exports to run in the background and allows users to continue with their other work.