This feature is only available for Java projects with QMetry Automation Framework.
Introduction
The Test Data functionality allows testers to execute same test case multiple times with different data inputs; without having to create duplicate/repeated test cases. It replaces the traditional practice of entering hard-coded input values with parameters. Test Data allows QA teams to store reusable test data in one centralized location and import existing parameters and data sets. Managing test cases with test data is one of the ways to make your tests consistent and manageable. You can create automated data-driven tests quickly using Test Data in QAS.
Example
The following values need to be validated against Username and Password in the Login test case.
| Username | Password |
|---|---|
| David | admin123! |
| Liza | admin123$ |
| Mathew | admin123% |
Create Test Data
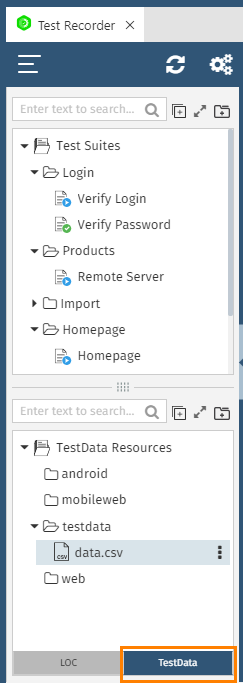
On the lower panel at left, switch to the TestData Resources tree by clicking on the Test Data tab at the bottom.
You can add a new file for test data in the existing folder or you can also add a new folder and then add the test data file in it.
Manage Columns
To add columns for test data, select the file on the tree and click on the Columns tab.

The Manage Columns screen opens with default columns on it.
A. You can edit the default column name. If you do not require the default columns, you can delete them too.
B. To add a new column, enter the new column name.
C. Then click on the Add button to add the column. You can also change the sequence of the columns through the drag & drop operation.
D. Once you are done with adding/editing columns, click on the Apply button at the bottom.
The column headings for the test data file will appear in accordance with what you have saved on the Manage Columns screen.
Add Properties to Columns
Now it's time to add properties to the test data columns.
Click on the Add tab. A blank row is added on the grid.
The cells are editable. Click in the cell and enter the property values.
This way, you can add multiple columns and their properties for a test data.

Import Test Data
You can import readily available CSV file containing test data in it.
Click on the Import tab.
Select the file path and click on the Import button to initialize the test data import.
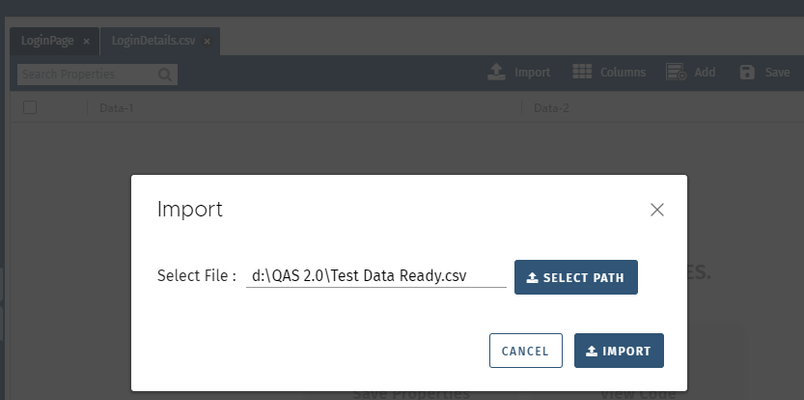
Once the file is imported, the test data starts displaying on the screen.

Use Test Data
1. Record a test case
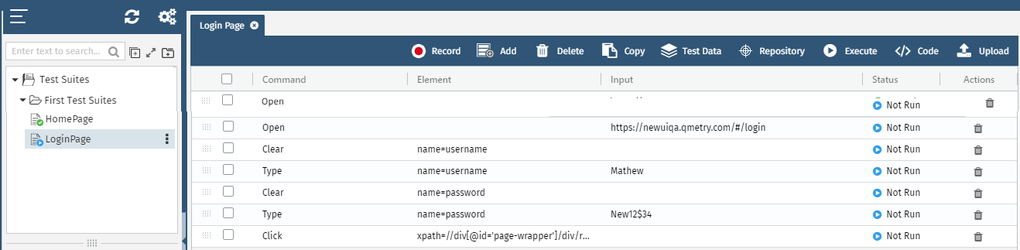
You need to record the first test case to construct a basic format of test steps.
See the Input field of test steps. It contains the actual values you entered while test recording.
2. Import Test Data to Apply
Click on the Test Data tab.
It opens a pop-up to select and import the test data repository file.
Select the CSV file you want to import and click on the Apply button.

3. Replace Input field values with placeholder
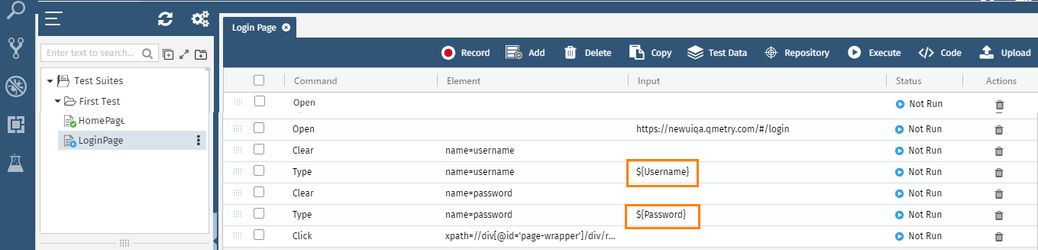
Open the test case recorded in Step 1.
Replace the Input field values on the grid with placeholder in the format as mentioned below.
Syntax of placeholder: ${column_name}
As per the Login example cited in the previous sections, we have multiple combinations of Username and Password in the test data file.
There are two columns in the test data file: Username and Password.
For Command = "Type" and Element name = "username", replace the Input field values with ${Username} placeholder
For Command = "Type" and Element name = "password", replace the Input field values with ${Password} placeholder
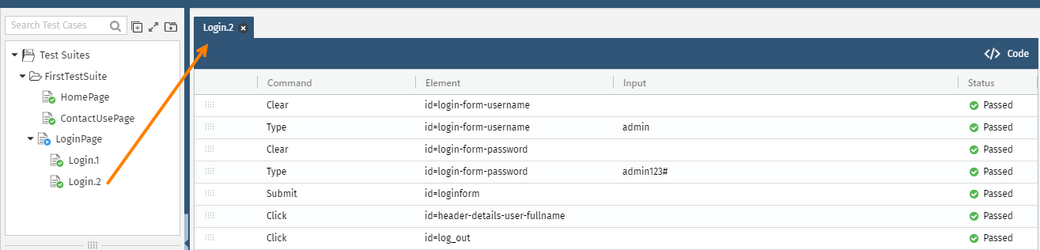
4. Execute Test Case with Test Data
Execute the test case by clicking on the Execute button.
The test will run multiple iterations in accordance with the properties entered in the test data file.
The test step will be executed for each value of the Input field.
The resultant files will be added as child nodes to the parent test case on the Test Suites tree.
The child nodes of the test case will be added as test steps in QMetry/QTM4J when the test results will be uploaded.