There are two tabs on the page: General Settings and Audit.
General Settings
These are general settings that will be applicable to all the users of QMetry unless the System Admin or the user makes any changes in the settings.
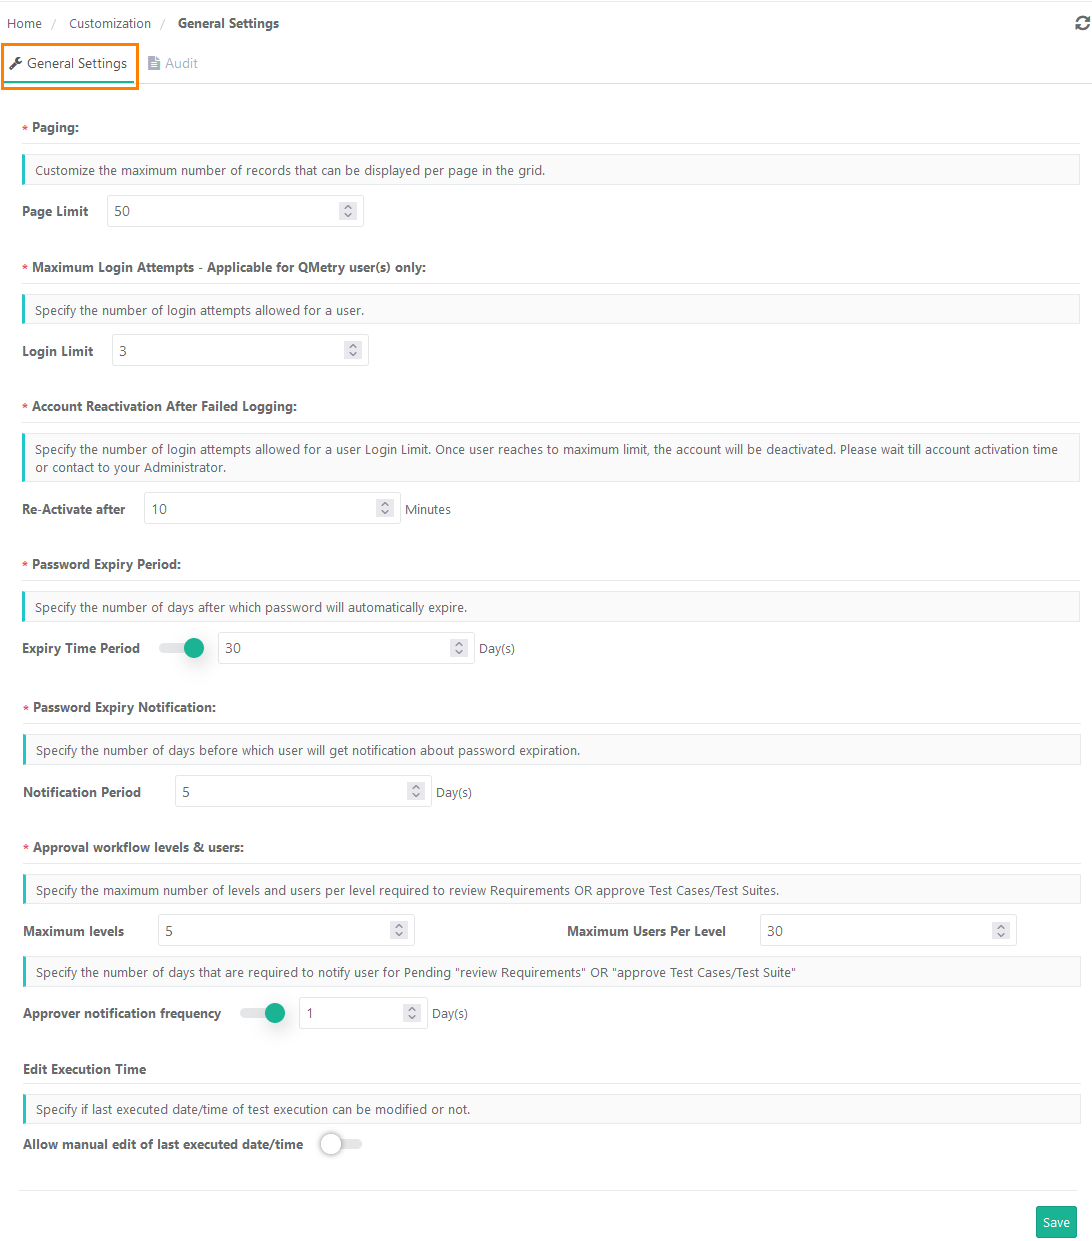
Paging: Customize the maximum number of records that can be displayed per page in the grid. You can restrict total number of records to be displayed on one page by setting value of Page Limit. Maximum is 100 records per page.
Note: "Records initially loaded" value in Default User Settings cannot exceed the number mentioned here.
Maximum Login Attempts: Specify the number of login attempts allowed for a user. Mention the number of attempts in the Login Limit field.
Account Reactivation After Failed Logging: Once user reaches the maximum Login Limit as mentioned above, the account will be deactivated. Set the time in the Re-activate after for a user-account to stay locked after exceeding the Login Limit.
Password Expiry Period: Specify the number of days after which password will automatically expire. Enable the Expiry Time Period and the enter the number of days in the Days field.
Password Expiry Notification: Specify the number of days before which user will get email notification about the password expiry. This option is enabled only if the Password Expiry Period is set.
Only QMetry authenticated users (Non-LDAP and Non-SAML) will receive this email notification.
Note:
The ability to customize the settings is available only for users who have purchased the Customization app.
Users who do not have the Customization app, the setting defaults to five days before password expiry.
Make sure the Notification Period is less than the Password Expiry Period mentioned in the settings.
Approval workflow levels and users: Specify the number of levels and users per level required to review Requirements OR approve Requirements/Test Cases/Test Suite. (if the eSignature feature is enabled)
→ Maximum Levels: Specify the maximum number of levels required to review Requirements OR approve Test Cases/Test Suites.
→ Maximum 5 approval levels can be added to the approval workflow.
Once the Maximum Level is set and levels are added, Admin cannot alter the Maximum Level to make it lesser than the levels which are already added.
For example, initially the Maximum Levels is set as 5. Admin has already added 4 levels. Now, the Admin can not make the Maximum Level 3 which is lesser than the levels already added i.e. 4 in this example.
→ Maximum Users per Level: Specify the number of users per level required to review Requirements OR approve Test Cases/Test Suites.
→ Maximum 30 users can be added as approvers per level.
Once the Maximum Users per Level is set and approvers/reviewers are added, Admin cannot alter the Maximum Users per Level to make it lesser than the approvers/reviewers which are already added for a level.
For example, initially the Maximum Users per Level is set as 25. Admin has already added 20 approvers/reviewers for a level. Now, the Admin can not make the Maximum Users per Level 15 which is lesser than the approvers/reviewers already added i.e. 20 in this example.
Approver notification frequency: Specify the number of days that are required to notify user for Pending "review Requirements" OR "approve Test Cases/Test Suite". The reminder emails will be sent to the recipient every specified day here. (if the eSignature feature is enabled)
Edit Execution Time: To allow users to modify test case execution date and time on the Execution Screen, enable Allow manual edit of last executed date/time.
The Executed At field is editable only if this flag is turned On. The Date and Time can be changed at two levels: individual test cases and bulk test cases through Bulk Operation.
Click Save to save the settings.
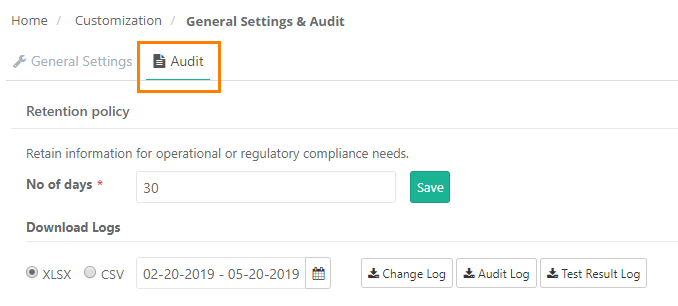
Audit
Users can configure the number of days they require to retain information of Audit and Change Log within QMetry Test Management. They can download the logs for the days configured here. The logs can be downloaded in XLSX and CSV format.
Mention the days in the box and click Save to save the configuration.
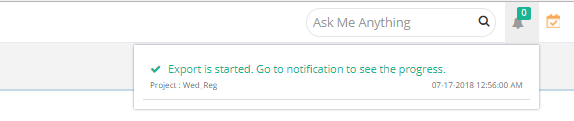
When you click on Change Log to download the logs, a notification is added to the notification window.
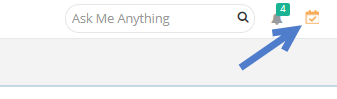
Click on the notification icon on the header. It shows the list of Activities.
Click on the Scheduled Task button.
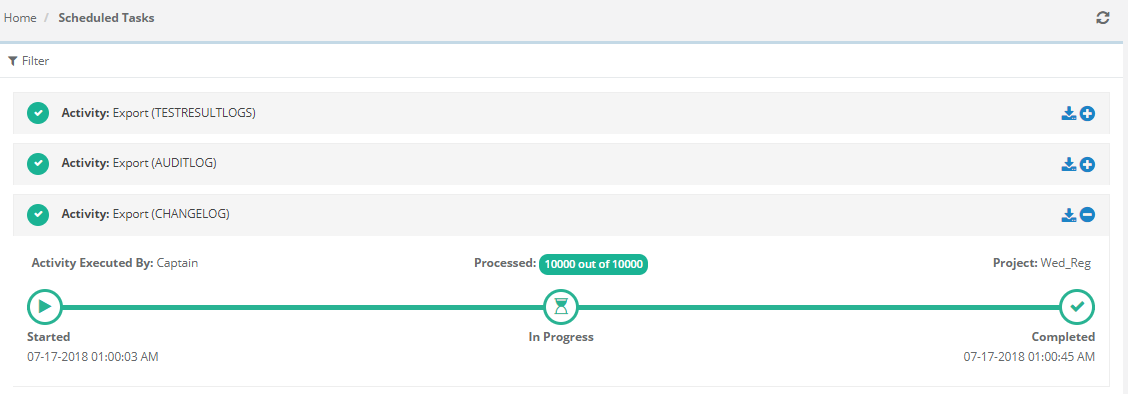
The screen shows all the activities completed or in queue.
Expand the Activity related to Audit Log and you can see its progress. You can also download the log by clicking on the Download icon for the activity.
Note: You cannot modify the above settings if the Customization package is disabled on your QMetry instance.