Back to QMetry All Products Help Page
Exporting Issues
Introduction
QMetry allows its users to export issues out of QMetry in an Excel file. User can save the Excel file on to the hard drive of computer. Users with User Role that has “Export” rights assigned for the Issue module can export issues. Role based user access control for the module is managed under User Management > Roles. If the role assigned to the user does not have rights to export issues, the Export option will appear in disabled mode for that user.
Note: On integration of Jira with QMetry, the Issues module of QMetry will not be available.
Steps
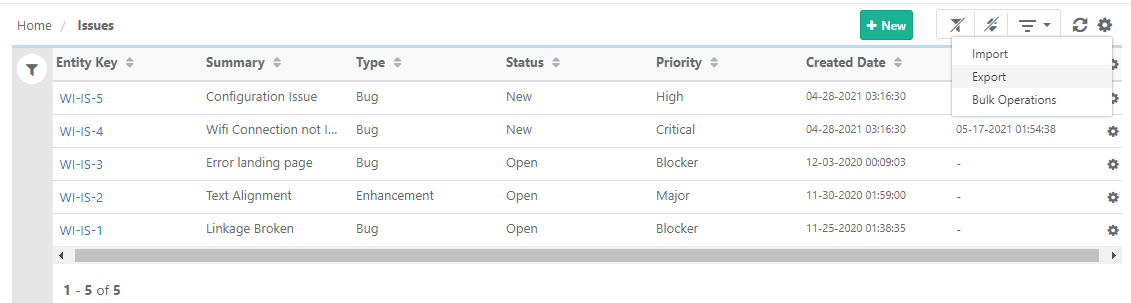
1. Go to the Issue module.
2. You can apply Filter criteria to issue records to export only preferred issues.
3. Click on the cog icon  at the top right corner on the toolbar and select Export.
The next screen opens.
Select Export as XLSX/CSV and click Next.

Step 2 Select records: Select requirements you want to export by selecting individual issues.
Export All Records: Click on the Export All Records link to select all the records across pages to export.
Once you are done with selecting issues, click on the Next button.

Step 3 Field Export Options
- Visible Fields: Select the option to export only visible fields on the List view screen. The export will exclude the columns which are hidden.
Note : The test case description and step description fields are included in the export irrespective of any field export options. - All Fields: Select the option to export all the fields irrespective of whether the columns are visible or hidden.
Click Export.

A confirmation window pops up. Click Yes to proceed.
A notification is displayed in the notification window. You can also view the progress in the notification window on the application header. This allows scheduled exports to run in the background and allows users to continue with their other work.
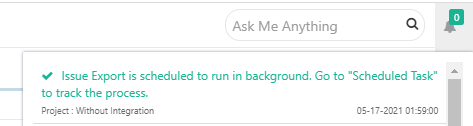
Go to the Scheduled Tasks section to download the exported issues.

Refer to Notification Window for Export Progress for more details.
Back to QMetry All Products Help Page