Installing the JDK Software and Setting JAVA_HOME
Java installation will only be required when using Java based projects.
(Note: JDK installation and Setting JAVA_HOME and PATH is not part of QAS and is not included as under basic QAS support services. These are just guidelines for customers to achieve these settings.)
Steps to Install the JDK Software, Set JAVA_HOME & PATH on a Windows System
QAS Supports Oracle JDK & Open JDK
Supported versions:
- Oracle JDK 1.8 or higher
- Open JDK 1.8 or higher
- Download and Install the JDK software.
Select the appropriate JDK software (Java 14, 11 or 8) and click Download.
The JDK software is installed on your computer, for example, at C:\Program Files\Java\jdk1.8.0_231.
- Set JAVA_HOME:
- Right-click on My Computer and select Properties.
- On the Advanced tab, select Environment Variables.
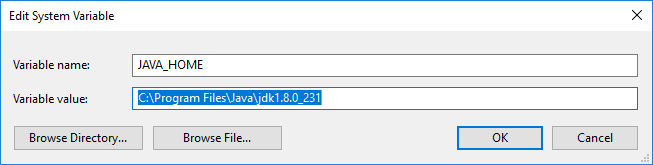
- Under “System variables” click the “New…” button and enter JAVA_HOME as “Variable name” and the path to your Java JDK directory under “Variable value”.
- Update PATH
- In “Environment Variables” window under “System variables” select Path > click on Edit.
- In “Edit environment variable” window click “New”
- Type in
%JAVA_HOME%\bin 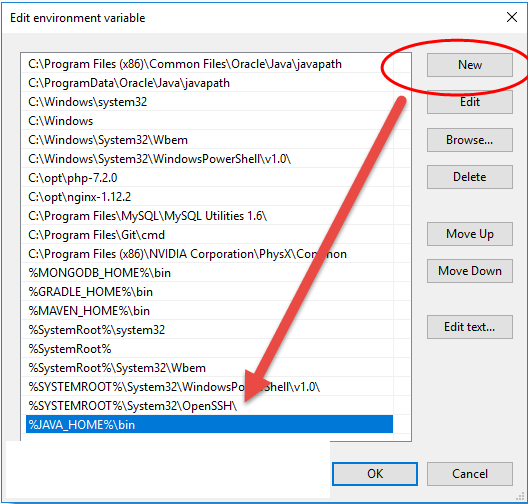
- Open terminal and type java -version . The output should look like :
- java version "1.8.0_151"
- Java(TM) SE Runtime Environment (build 1.8.0_151-b12)
- Java HotSpot(TM) 64-Bit Server VM (build 25.151-b12, mixed mode)
[Reference: https://docs.oracle.com/cd/E19182-01/820-7851/inst_cli_jdk_javahome_t/ ]
Steps to Install the JDK Software and Set JAVA_HOME on Mac
- Install the JDK software.
Select the appropriate JDK software (Java 14, 11 or 8) and click Download.
- The JDK software is installed on your computer.
- You can check Java Installed Path by typing which java on new terminal. It should show something like /usr/bin/java
- Set Java variables on bash_profile.
- Open Terminal
- Type nano .bash_profile - This command will open the .bash_profile.
- Set the JAVA_HOME path and PATH as per example below.

export JAVA_HOME=/Library/Java/JavaVirtualMachines/jdk1.8.0_241.jdk/Contents/Home
PATH="$JAVA_HOME:${PATH}"
3. Save changes by typing ctrl +o and hit return to save. Exit editor by typing ctrl+x
4. Activate the changes made to using command source .bash_profile
5. Open terminal and type java -version . The output should look like :
- java version "1.8.0_151"
- Java(TM) SE Runtime Environment (build 1.8.0_151-b12)
- Java HotSpot(TM) 64-Bit Server VM (build 25.151-b12, mixed mode)