QMetry for Jira - Test Management v4.0 and above
QMetry for Bamboo – DevOps / CD add-on is designed for QMetry Test Management for Jira. QMetry for Bamboo – DevOps / CD is a free add-on.
Download Link: QMetry for Bamboo – DevOps / CD
Once you are done with its installation, follow these steps to set up a simple build Plan.
This document is only applicable for QMetry for Jira - Test Management v4.0 and above.
Build Plan
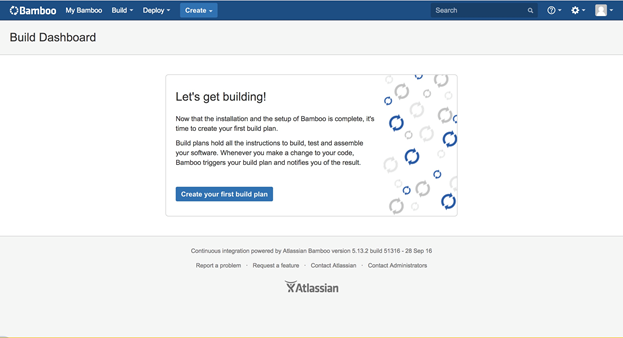
1. Launch Bamboo in a web browser.
2. Let's Create a simple plan. Open Create drop-down menu and select Create a new Plan. If you are using Bamboo for the first time, just click on the Create your first build plan button.
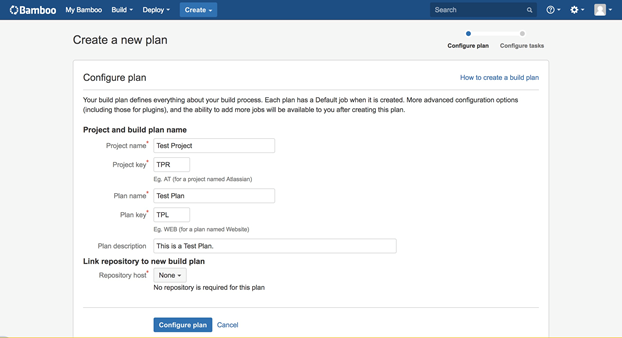
3. The Configure plan page opens. Provide Project name, Plan name and other details related to the plan. You can even link a code repository with the plan.
4. Finally, click on the Configure plan button.
5. The next screen of Configure tasks opens.
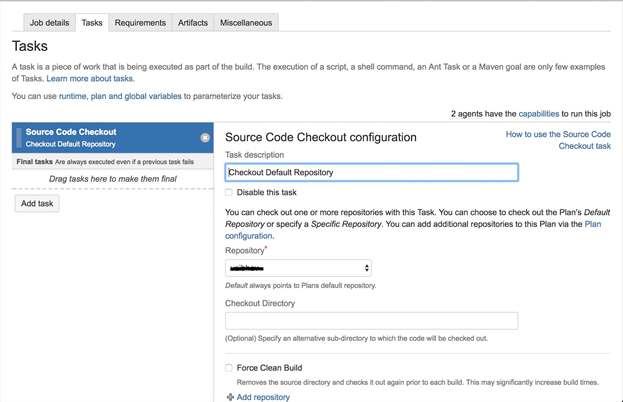
Note: Bamboo follows a hierarchical order: Plan > Stage > Job > Task.
This task remains under default Job and the default Job remains under default Stage.
Set up repository for the newly created test plan. Add “Source Code Checkout” task that uses the repository you created earlier.
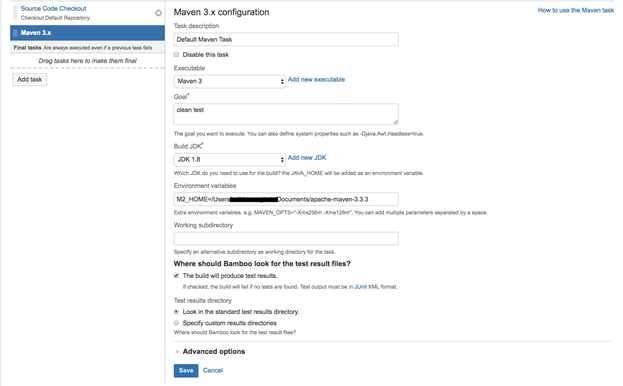
6. Add a Builder Task type. Maven 3.x task is added here.
7. Click on the Add task button to add more tasks to the plan.
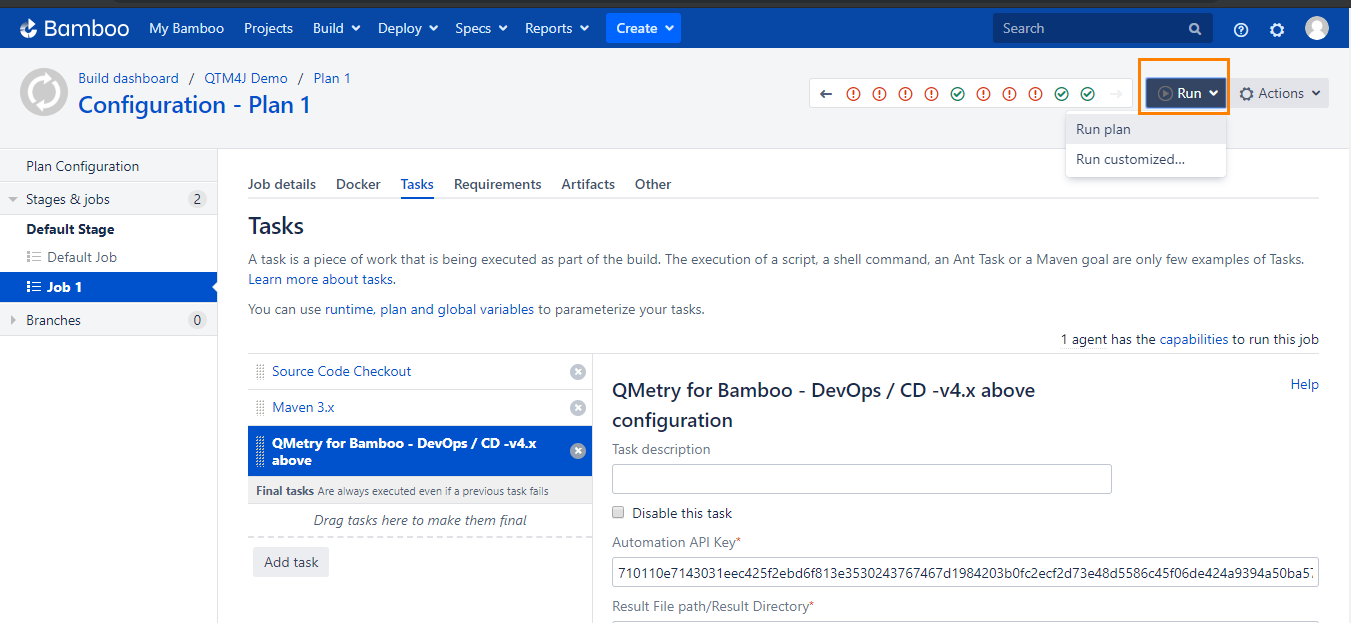
8. The Task types wizard opens next. Select task “QMetry for Bamboo – DevOps / CD V4” from the “All” tab.

9. Configure the QMetry for Bamboo – DevOps / CD V4 task.
Jira Cloud

Parameter | Type | Required | Description |
Automation API Key | string | Yes | Your API Key. API Key is unique for a specific user in a single project. The result will be imported for the project associated with the given API Key. |
Result File path/Result Directory | string | Yes | Path to your result file to be uploaded. |
Attachment | checkbox | No | Check to upload attachments in execution. Default value: false. Supported formats: cucumber/json qaf/json |
Format | selection | Yes | Format of result file to be imported. Supported formats: cucumber/json testng/xml junit/xml qaf/json hpuft/xml specflow/json |
Test Cycle To Reuse | string | No | Key of the test cycle to be reused. |
Build | string | No | Name of the build for test cycle execution |
Environment | string | No | Name of the environment on which test cycle has to be executed. |
| Test Case and Test Cycle Fields | |||
Parameter | Type | Required | Description |
Summary (only for Test Cycle) | string | No | Summary of test cycle. |
Priority | string | No | Priority to be added to the test case/test cycle. |
| Status | string | No | Status to be added to the test case/test cycle. |
| Components | string | No | Comma separated names of Components to be added to the test case/test cycle. |
| Labels | string | No | Comma separated names of Labels to be added to the test case/test cycle. |
| Fix Version Id (How to find the Fix Version Id) | number | No | Id of Fix Version to be added to the test case/test cycle. |
| Sprint Id (How to find the Sprint Id) | number | No | Id of Sprint to be added to the test case/test cycle. |
Note: If Test Case and Test Cycle are being reused, then the above field values will not be updated in QMetry for Jira.
Jira Server

Parameter | Type | Required | Description |
| QMetry Automation API URL | String | Yes | Enter Jira URL |
Jira Username | string | Yes | Jira Username |
Jira Password | string | Yes | Password for Jira instance. |
Automation API Key | string | Yes | Your API Key. API Key is unique for a specific user in a single project. The result will be imported for the project associated with the given API Key. |
Result File path/Result Directory | string | Yes | Path to your result file to be uploaded. |
Attachment | checkbox | No | Check to upload attachments in execution. Default value: false. Supported formats: cucumber/json qaf/json |
Format | selection | Yes | Format of result file to be imported. Supported formats: cucumber/json testng/xml junit/xml qaf/json hpuft/xml specflow/json |
Test Cycle To Reuse | string | No | Key of the test cycle to be reused. |
Build | string | No | Name of the build for test cycle execution |
Environment | string | No | Name of the environment on which test cycle has to be executed. |
| Test Case and Test Cycle Fields | |||
Parameter | Type | Required | Description |
Summary (only for Test Cycle) | string | No | Summary of test cycle. |
Priority | string | No | Priority to be added to the test case/test cycle. |
| Status | string | No | Status to be added to the test case/test cycle. |
| Components | string | No | Comma separated names of Components to be added to the test case/test cycle. |
| Labels | string | No | Comma separated names of Labels to be added to the test case/test cycle. |
| Fix Version Id (How to find the Fix Version Id) | number | No | Id of Fix Version to be added to the test case/test cycle. |
| Sprint Id (How to find the Sprint Id) | number | No | Id of Sprint to be added to the test case/test cycle. |
Note: If Test Case and Test Cycle are being reused, then the above field values will not be updated in QMetry for Jira.
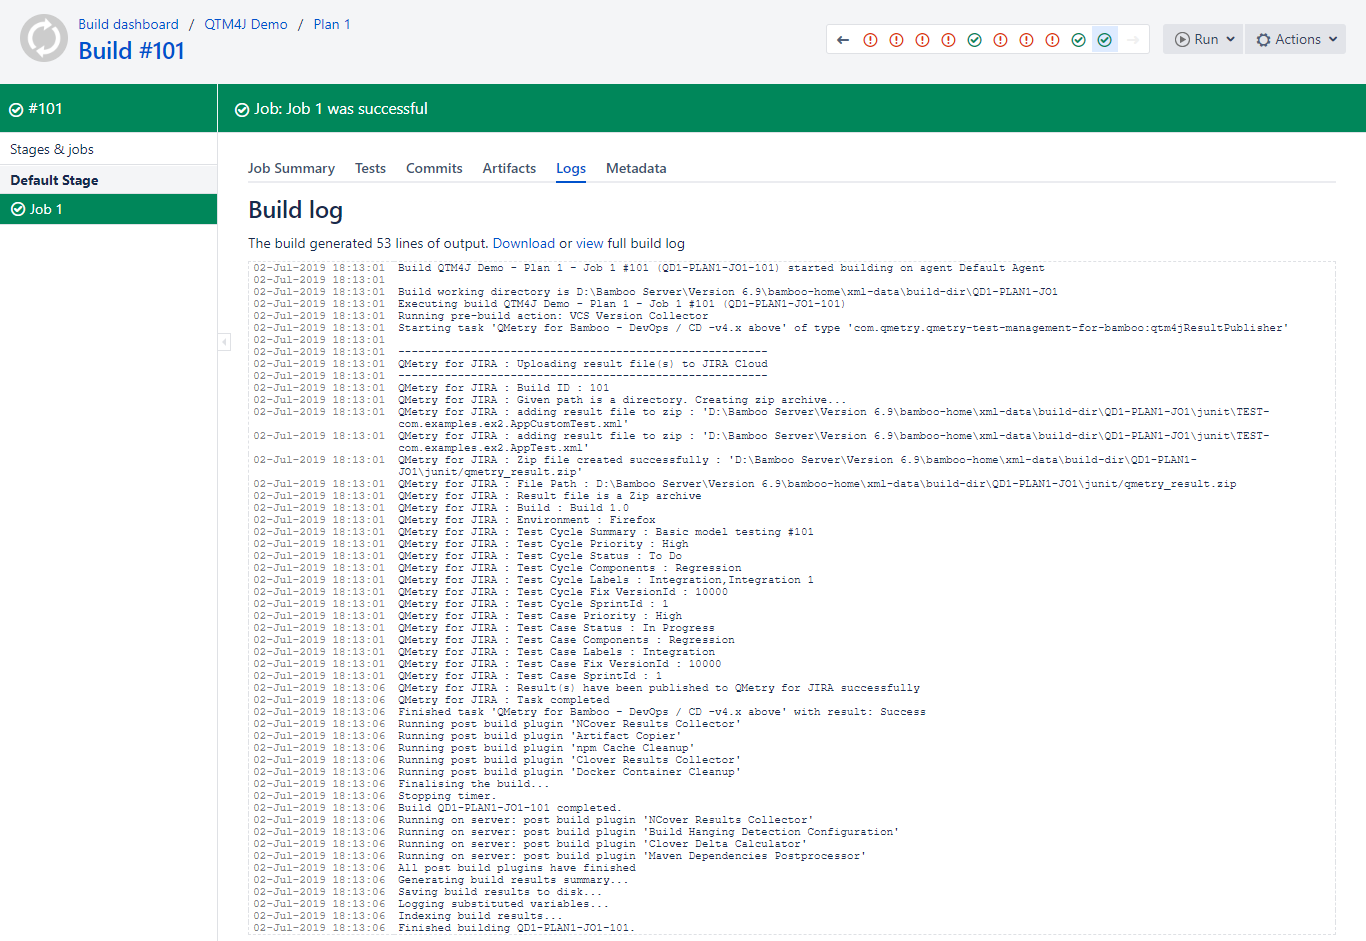
10. Open the Run drop-down menu at top right and select the Run plan option.
11. You can see the success message in the logs for the job.
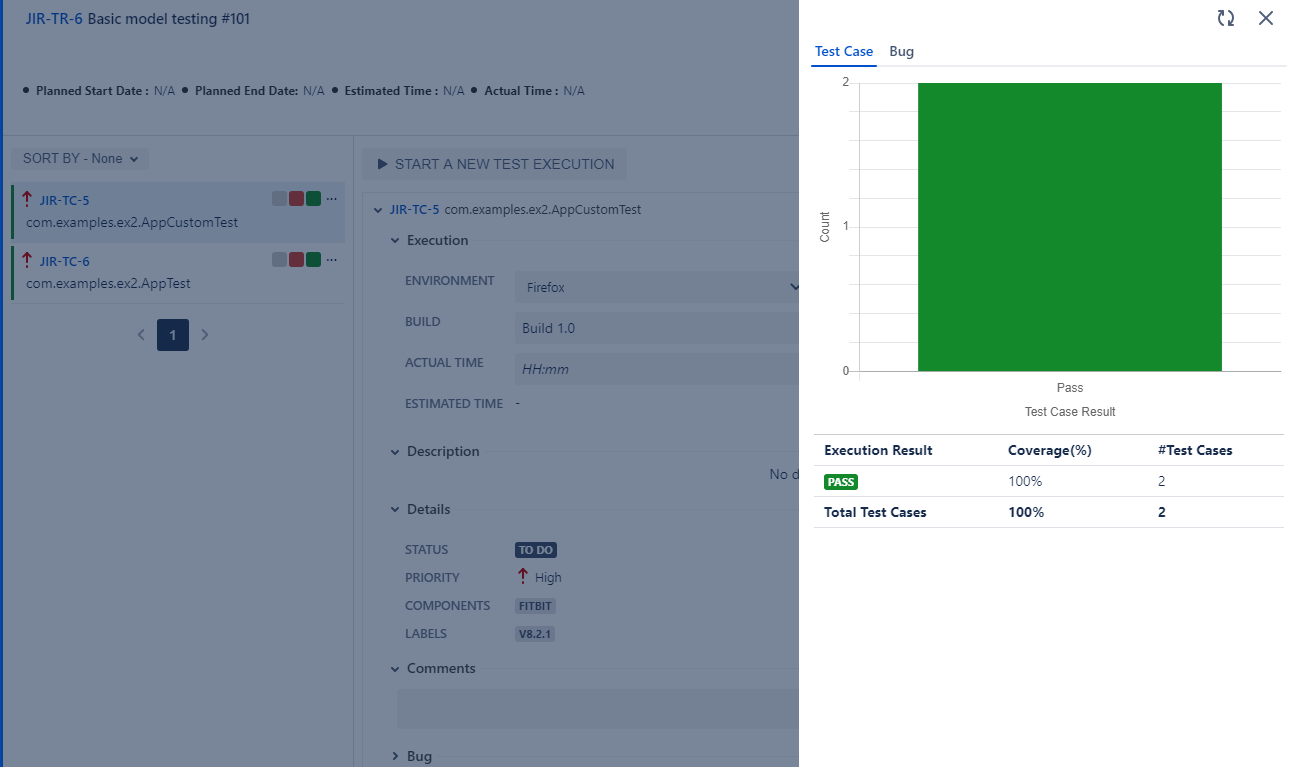
12. Now open your JIRA Issue page. You can view the report by clicking on the graph icon.
Configure Specflow
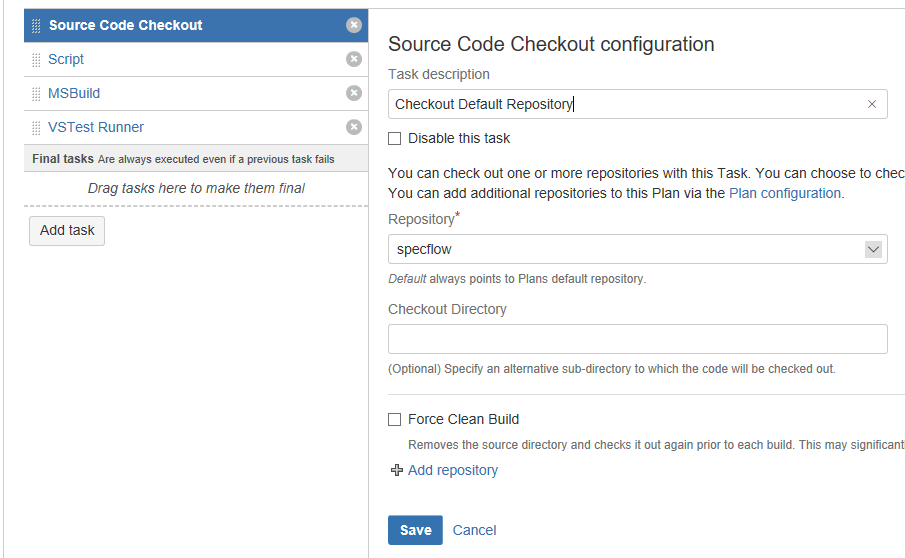
1. Source Code Checkout
Checkout the code from repository.
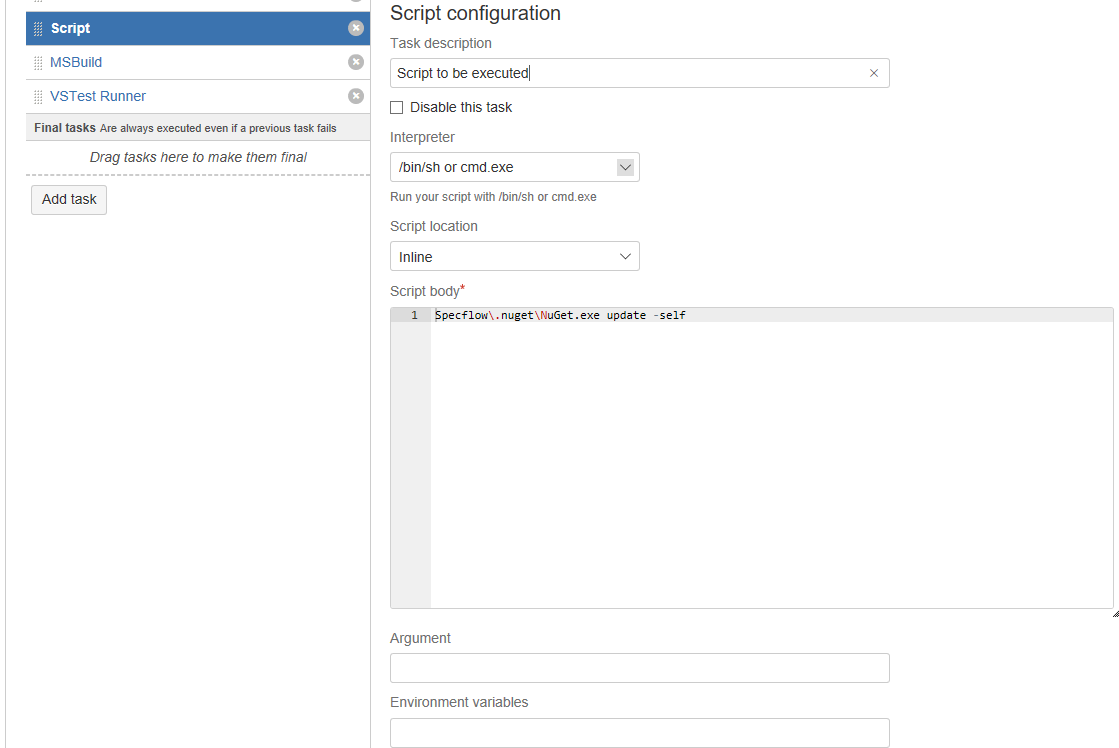
2. Script
Add script in Script body field to update packages for msbuild using NuGet.exe file from checkout repository.
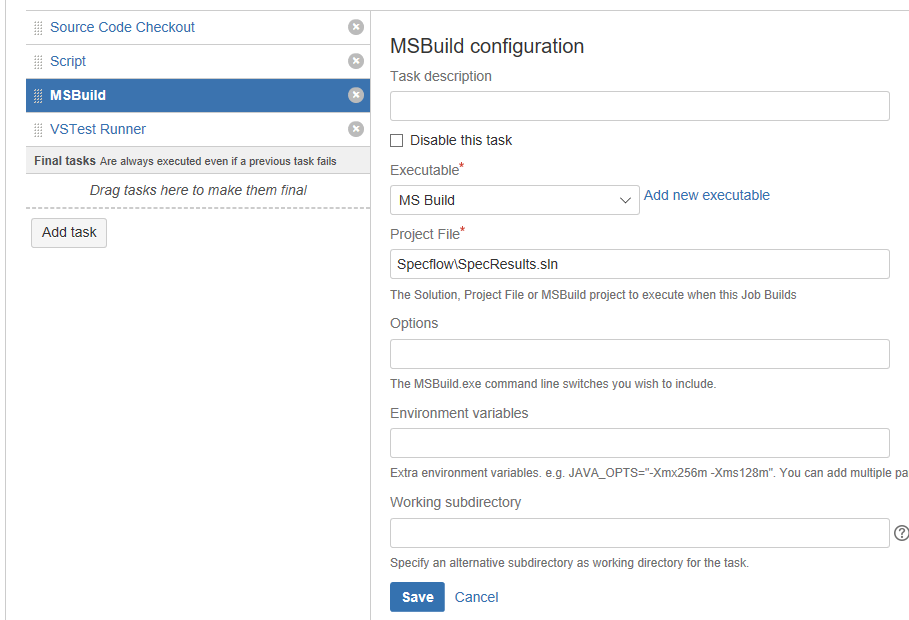
3. Configure MS Build Executable
Click on Add new executable.
Set path for executable.

4. MS Build Configuration
Project File: Give path to the Solution. Project File or MSBuild project will be executed when this Job runs.
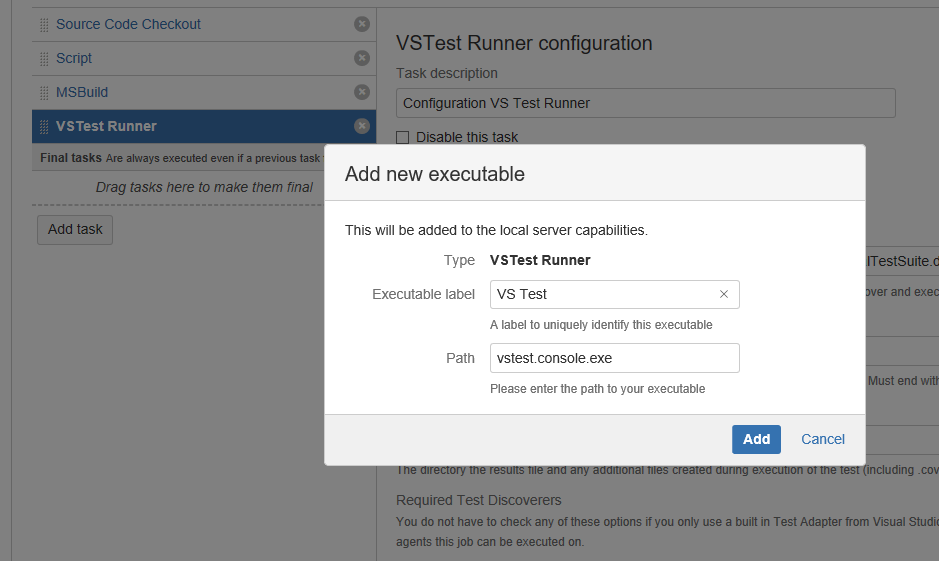
5. VS Test Executable
Click on Add new executable.
Add executable for vstest.
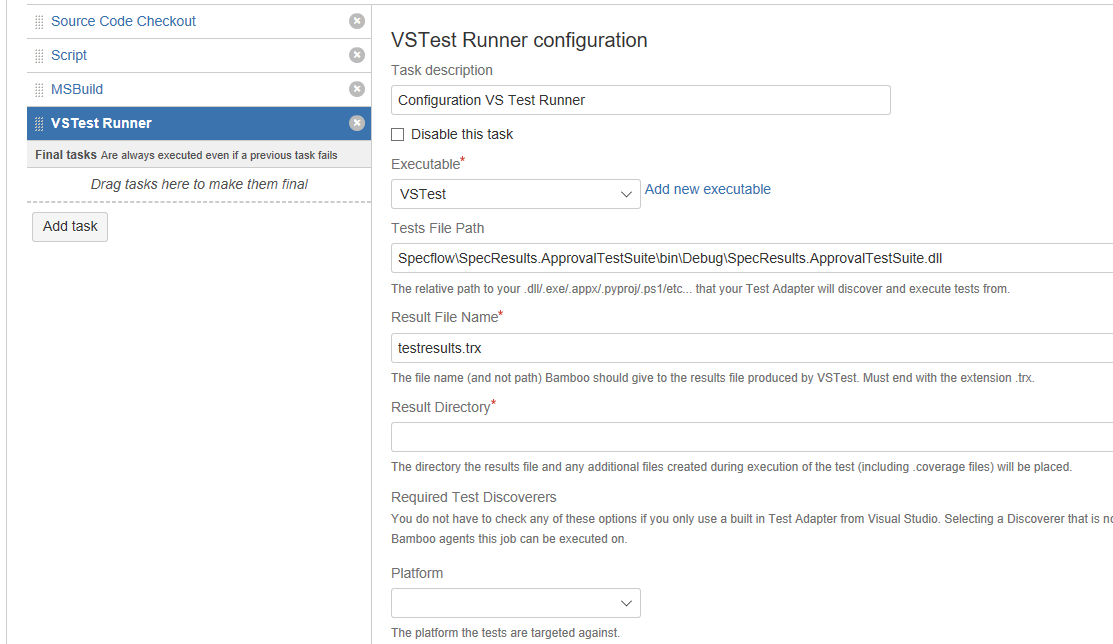
6. VS Test Configuration
Tests File Path: The relative path to your .dll/.exe/.appx/.pyproj/.ps1/etc... that your Test Adapter will discover and execute tests from.