Back to QMetry All Products Help Page
Log Defects
Log Defects/Bugs from Execution Screen
You can log defect to Test Steps, Test Cases and Test Scenario individually. The defect can be already existing in JIRA or can be created anew.
A. Search and link existing issues
B. Create a new issue
Steps
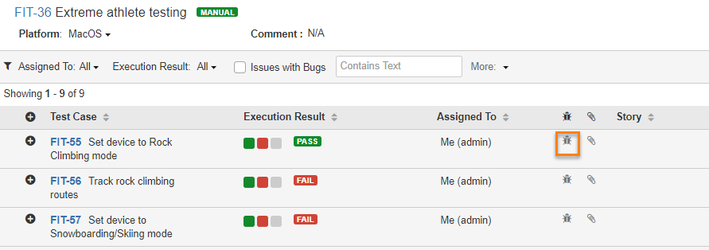
- Under the Action column, click the Bug icon.
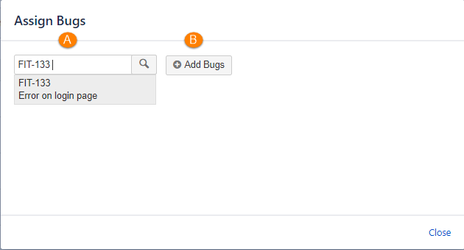
- It opens the inline dialog box, which has the search text box and the add button on it.
- You can search from the existing JIRA issues and link it. Issues can be searched by its Summary as well as by its JIRA ID.
- To create a new issue to link with the entity, click the add button. It opens the Create Issue screen with the default Issue Type of “Bug”. Create an issue like other JIRA issues.
- The ID of such logged defects are then displayed on the inline dialog box for that specific entity. To remove the linkage, click the "X" cancel sign for that particular issue.
- The color of Bug icon gets changes as soon as you associate a bug to it.
Assign Bugs Pop-up
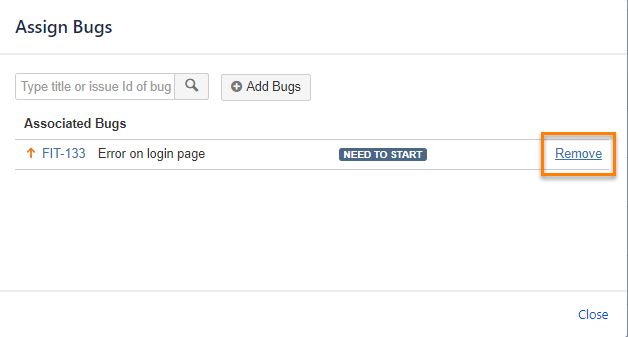
The Assign Bugs pop-up opens on clicking the Bug icon on the Test Execution screen. The linked issues are displayed in Associated Bugs grid with priority, issue key, and issue status.
User Case: Testers who execute the tests, want to know the status of the bug on the same Execution screen. It helps them validate the bug, change state of the step and continue with next steps.
Remove Association
Open the Assign Bugs pop-up. Click on the Remove link to remove the bug association.
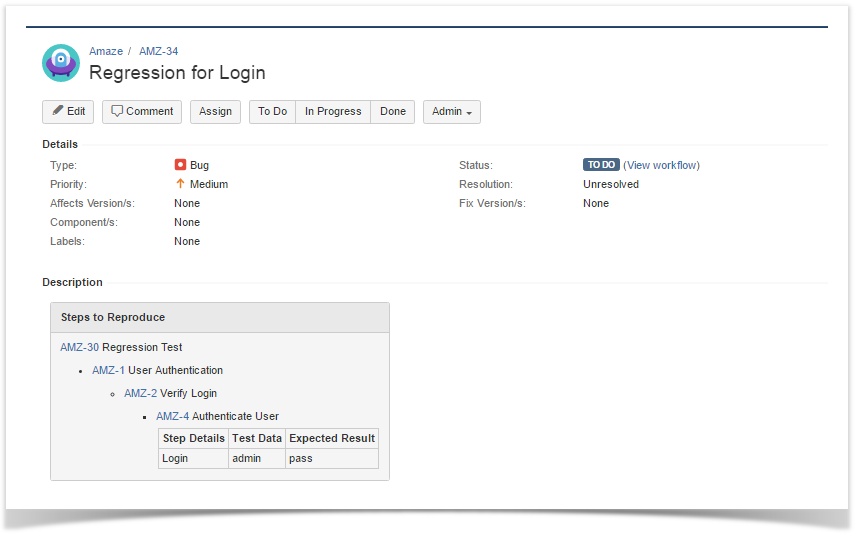
Description Field Value
When you enter/log defects from the Test Run Detail page, the hierarchy of Story – Test Scenario – Test Case – Step Details is added as field values to the Description field of the defect depending upon the level from which you are creating the defect.
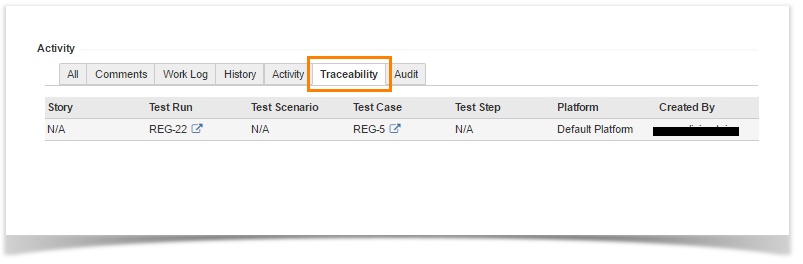
Traceability of Defect
For the issues with Issue Type "Bug", the Traceability tab is added under the Activity section. The tab provides details like the particular Bug is associated with how many test scenarios, which Platform it has been logged from and who logged that bug.
Back to QMetry All Products Help Page