QMetry Offline Installation using Docker - 3 Tier

In this guide we'll run you through installing QMetry Test Management application and QMetry Reporting Tool on a server without an internet connection.
Pre-requisites
1. Following should be installed on the server
- OS - CentOS 7.x or Redhat 7.x / 8.x
- Docker
- Docker Compose
- Yum-tools
- To install the docker and docker-compose on QMetry Application server:
- cd /opt
- sudo su
- Find the QMetryApp.zip and perform unzip
- unzip QMetryApp.zip
- cd QMetryApp/QMetry
- sh QMetry.sh
- You will be prompted with the following message - "docker installation complete, run 'docker-compose up' to continue with QMetry installation."
- You will be prompted with the following message - "docker installation complete, run 'docker-compose up' to continue with QMetry installation."
- To install the docker and docker-compose on QMetry Database server :
- cd /opt
- sudo su
- Find the QMetryRDS.zip and perform unzip
- unzip QMetryRDS.zip
- cd QMetryRDS/QMetry
- sh docker_install_122.sh
- You will be prompted with the following message - "docker installation complete, run 'docker-compose up' to continue with QMetry installation."
- You will be prompted with the following message - "docker installation complete, run 'docker-compose up' to continue with QMetry installation."
2. Docker installation requires root user access. To install using a non-root user, follow the steps specified here before starting the install on both QMetry and Report servers.
3. Docker is installed under /var/lib/ directory. We recommend allocating enough space here to ensure QMetry has enough space to save your data.
- Data of QMetry database is saved under : /var/lib/docker/volumes/qmetry_mysql_data/_data
- Data of QMetry attachments added is saved under : /var/lib/docker/volumes/qmetry_attachment/_data
- Data of QMetry Logs added is saved under : /var/lib/docker/volumes/qmetry_logs/_data
4. Following Ports should be open:
Installation | Ports that need to be enabled |
|---|---|
| QMetry Application | 80/443 |
| QMetry Database | 3306 |
| QMetry Reporting Tool | 80/443, 3000 & 56982 |
Installing QMetry Application
Step 1. Download the below file images from the links provided by QMetry Support and save them in a directory (i.e. /opt) on the server.
- QMetryApp.tar
- docker-compose.yml
Step 2. Go the directory where the download images are saved and execute the commands in the below steps. (i.e. cd /opt)
Step 3. Execute the below commands to ensure the docker containers auto-start during system reboot
- sudo systemctl start docker
- sudo systemctl enable docker
Step 5. Load and Tag the QMetry Docker Image
- sudo docker load -i QMetryApp.tar
- sudo docker images

Copy the image id <qmetryimage id> generated above and use it in the below command.
- sudo docker tag <qmetryimage id> qmetry:qmetry
Execute the command to check whether the Repository and TAG are assigned -
- sudo docker images

Change the YML configuration based on your database/MySQL container
- cd QMetryApp/QMetry/
vim docker-compose.yml (verify the following parameter values based on the database container configuration)
DB_HOST : 127.0.0.1
DB_PORT : 3306
DB_SCHEMA : qmetry
DB_USER : root
DB_PASS : qmetry
Step 6. Install QMetry Application and start docker container
- sudo /usr/local/bin/docker-compose up
- sudo /usr/local/bin/docker-compose start
Step 7. Getting your QMetry License and Installing it.
- For users evaluating QMetry
- You should have received an evaluation license valid for 30 days along with the installation.
- Follow the Steps to Apply License file.
- For users requiring commercial license
- Server's domain name and mac address are required to generate your QMetry License. Follow the below steps to get your server mac address and send this information along with the domain name to QMetry Support to get your QMetry License generated. Send an email to qtmprofessional@qmetrysupport.atlassian.net to reach QMetry Support.
- Execute the below command to get your server mac address. Then send the MAC address to QMetry Support to receive license file.
- ifconfig (MAC address of Ethernet card e.g. eth0/eth1 )
- Once you receive license.key from QMetry Support, you can follow the Steps to Apply License file.
- Execute the below command to get your server mac address. Then send the MAC address to QMetry Support to receive license file.
- Server's domain name and mac address are required to generate your QMetry License. Follow the below steps to get your server mac address and send this information along with the domain name to QMetry Support to get your QMetry License generated. Send an email to qtmprofessional@qmetrysupport.atlassian.net to reach QMetry Support.
Step 8. Access QMetry application using the following address.
http://<your IP Address OR Domain Name>
Default QMetry login credentials.
- Username: admin
- Password: qmetry@123
Note : With installation, MySQL 5.7 will be installed on port 3306. Below are the details
- Username : root
- Password : qmetry
- Schema : qmetry
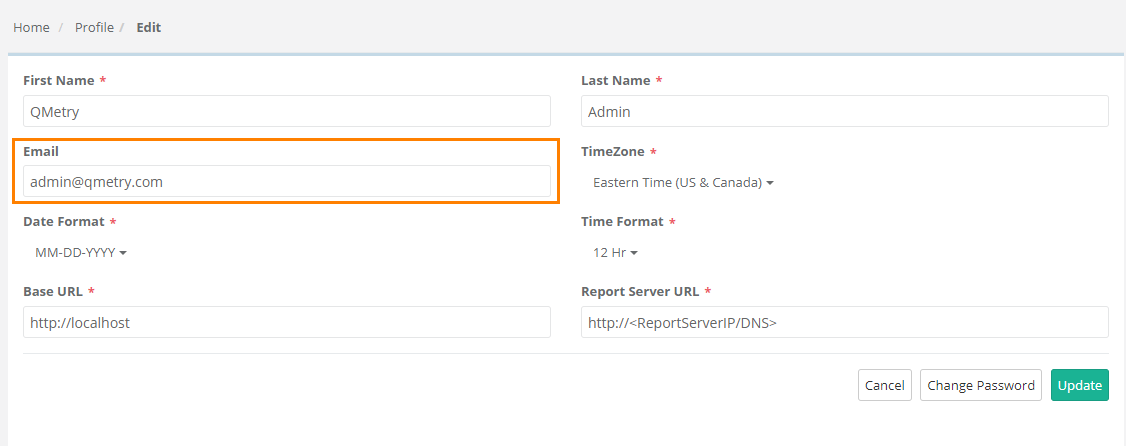
Step 9. After the above steps are completed, log into QMetry application.
- Go to "Admin" Profile and Edit the Profile.
- Update Email of Admin in the Email field.
Step 10. Additional Tomcat Configuration: QMetry is installed with a default configuration of minimum and maximum heap memory utilization. You can modify these settings depending on your hardware configuration. Refer Additional Configuration for more details.
Installing QMetry Database Application
Step 1. Download the below file images from the links provided by QMetry Support and save them in a directory (i.e. /opt) on the server.
- QMetryRDS.tar
- docker-compose.yml
Step 2. Go the directory where the download images are saved and execute the commands in the below steps. (i.e. cd /opt)
Step 3. Execute the below commands to ensure the docker containers auto-start during system reboot
- sudo systemctl start docker
- sudo systemctl enable docker
Step 4. Load and Tag the Mysql Docker Image
- sudo docker load -i QMetryRDS.tar
- sudo docker images

Copy the image id <mysqlimage id> generated above and use it in the below command.
- sudo docker tag <mysqlimage id> rds:rds
Execute the command to check whether the Repository and TAG are assigned -
- sudo docker images

Step 6. Install QMetry Application and start docker container
- sudo /usr/local/bin/docker-compose up
- sudo /usr/local/bin/docker-compose start
Installing QMetry Reports
Step 1. Download the below file images from the links provided by QMetry Support and save them in a directory on the server.
- qmetryreport851.tar
- report_discovery.tar
- docker-compose.yml
Step 2. Go the directory where the download images are saved and execute the commands in the below steps.
Step 3. Execute the below commands to ensure the docker containers auto start during system reboot
- sudo systemctl start docker
- sudo systemctl enable docker
Step 4. Load and Tag the Report Docker Image
- sudo docker load -i qmetryreport851.tar
- sudo docker images

Copy the image id <qmetryreport851limage id> generated above and use it in the below command.
- sudo docker tag <qmetryreport851image id> qmetryreport851:qmetryreport851
Execute the command to check whether the Repository and TAG are assigned -
- sudo docker images

Step 5. Load and Tag the Discovery docker Image
- sudo docker load -i report_discovery_272.tar
- sudo docker images

Copy the image id <report_discoveryimage id> generated above and use it in the below command.
- sudo docker tag <report_discoveryimage id> report_discovery_272:report_discovery_272
Execute the command to check whether the Repository and TAG are assigned -
- sudo docker images

Step 6. Install QMetry Report and start docker container
- sudo /usr/local/bin/docker-compose up -d
Step 7. Execute the following commands.
- docker ps
- docker exec -it qmetryreport851 /bin/bash
- chmod 755 change_setting_lgx_file.sh
- sh change_setting_lgx_file.sh
- ou will be asked for the below details
| Options | Type | Comments / example |
|---|---|---|
| Enter Mysql Database Host IP / DNS Name | Mandatory | QMetry DB Host Public IP/DNS, example: 10.10.11.100 |
| Enter Mysql Database Port | Mandatory | QMetry DB Port, example: 3306 |
| Enter Mysql Database Schema | Mandatory | Name of existing QMetry Application DB, example: qmetry |
| Enter Mysql Database UserName | Mandatory | QMetry DB Username, example: root |
| Enter Mysql Database Password | Mandatory | QMetry DB Password |
| Enter SMTP HostName | Optional | SMTP Server Host IP/DNS, for sending report emails |
| Enter SMTP From Email | Optional | From email address that appears while emails are received |
| Enter SMTP Authentication Password | Optional | SMTP Server Authentication Password (hit enter if no password is required) |
| Enter SMTP Port | Optional | SMTP Server Port, example: 587 |
| Enter Qmetry Application Service URL with Port No. (http://demo.qmetry.com) | Mandatory | Complete QMetry URL, example : http://demo.qmetry.com |
Do you have configured Load Balancer for Report Server? Y/N | Mandatory | Y/N |
Do you have https (SSL) configured for Report Server (Y/N) ? In case of having Load Balancer, consider SSL of Load Balancer. | Mandatory | Y/N |
Mention DNS/IP Address (accessible in network) of Report Server. In case of Load Balancer, specify DNS of Load Balancer. | Mandatory | Report Server's DNS/IP Address, example:<ReportServerIP/DNS> |
Enter IP Address of QMetry & Report Server (Add Multi IP Address separated by comma. If you have Load Balancer, then enter subnet IP range). | Mandatory | QMetry App and Report Server IP Addresses, comma separated without space. If you have Load Balancer or range of IP, then you need to allow range. For example, to allow all addresses in the range of 172.16.*.*, specify: 172.16.0.0 0.0.255.255 |
- exit
Step 8. Verify installation of QMetry Reporting tool through the following URL.
- http://<IP Address>:3000/datahub
You should see the following login page. (There is no need for login).
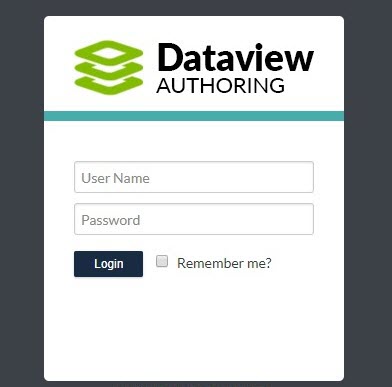
Once this page opens up, it means that the QMetry Reports have been installed properly. There is no need for login.
Step 9. After the above steps are completed, log into QMetry application.
- Go to "Admin" Profile and Edit the Profile.
- Update QMetry Base URL and Report Server URL
- The ports must be mentioned in the URL if QMetry URL OR Report URLs are running on ports other than 80/443 (example 8080).

Installing Redis Caching Server
With the release of v8.5.2, QMetry is providing capability of installing Redis server. Overall performance and scalability can be improved using Redis caching. To install the Redis Server, refer to Installing Redis Caching Server.
If you are facing any issues during the installation process, write us at qtmprofessional@qmetrysupport.atlassian.net. This will automatically open a ticket with our support team and help you to follow the progress.