Back to QMetry All Products Help Page
eSignature and Approval Workflow
About eSignature and Approval Workflow
Security and Audit compliance are critical for regulated enterprises. QMetry offers Approval workflow and auditing reports with eSignature to produce evidence that can be used for SOW and other Audit compliance. The eSignature feature helps organizations to regularize the Approval Workflow of test cases and test executions. Test Case executions can be approved using an eSignature that verifies that the test run was documented correctly and also authenticates the test run status assigned to the Test Case. On test case export, Approval Status also gets exported along with other details of test cases.
Requirement Review helps users validate requirement documentation and verify test case association. If requirements are imported from an external tracker, reviewers can validate the import into QMetry. To help QA teams align all their efforts to construct quality test cases, QMetry empowers the management to keep a check on the changes to a test case and how they can be integrated into test executions.
When a test case is approved, it means that the particular version of the test case is ready for execution. When test execution is approved, it authenticates its execution and prevents further modifications to the run.
QMetry supports multi-level approver workflow that enables organizations to adhere to their approval policy where pre-approval is required before the final approver signs off. For example, a sequential approval policy that requires approval of test cases from QA Lead then further from QA Manager and then Project Manager.
Pre-requisites:
The Approval Workflow will be enabled only if the eSignature package is purchased. The Approval Workflow can be enabled project-wise.
Enable eSignature Feature
Once the eSignature flag is enabled, it cannot be disabled.
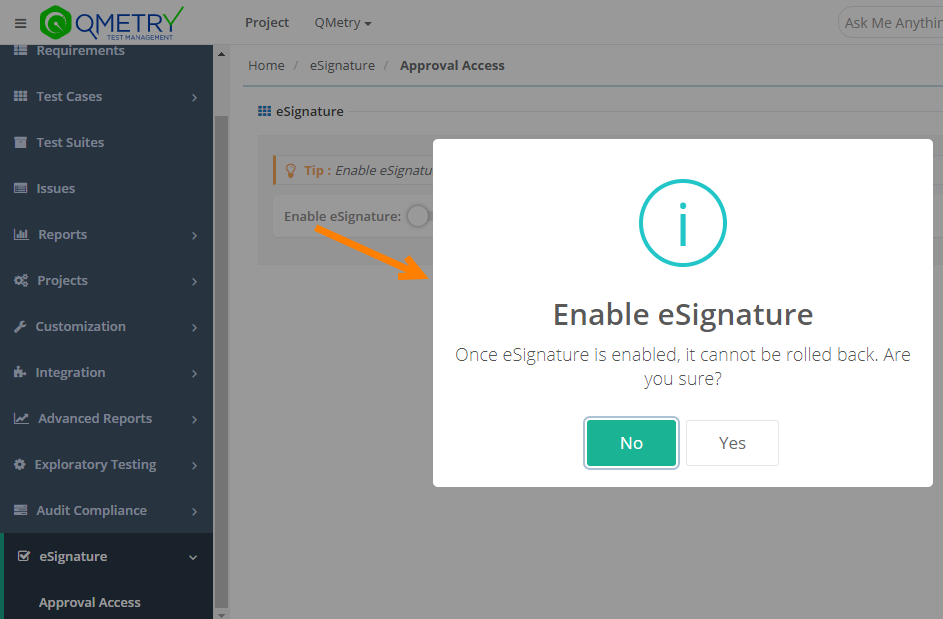
Click on the eSignature feature on the tree.
You can see the relevant configuration for eSignature feature on the screen.
Enable eSignaure feature for the project.
The confirmation message pops up. Click Yes to proceed.
Once you enable the eSignature feature, you can click on the Approval Access option on the tree, wherein you can assign Test Case Approvers, Test Run Approvers and Test Run Closers.
Approval Levels and Mechanism
- If you have the eSignature feature enabled even before QMetry Test Management v8.8, then your existing test case and test suite approvers will be carried forward at Level 1 in respective sections.
- Maximum 5 levels can be added for Approval Workflow, the settings are done from Customization > General Settings & Audit > General Settings.
- Customization “Modify” rights are required to be able to add/remove levels.
- In the General Settings section of the project, the admin defines the frequency to send a notification to reviewers, approvers/closers of pending level.
- The entity will be considered as approved only on approval at all the defined Levels, else the entity will be displayed in an In-review state.
- In case the entity gets rejected later on at any of the levels, it will be moved back to the first level of approval i.e. In Review state.
- There can be multiple approvers/reviewers at each level. But to mark an entity as approved, approval from a single approver is required. The entity will then move to the next level of approval.
- During the approval process, if users make any change to the entity, the entity will be moved back to the first level of approval irrespective of its current level of approval. All the approvals of that entity will be revoked.
- You can not add the next level when the lower level does not have reviewers/approvers in it.
Whenever assets are reviewed/approved, a notification is sent to reviewers/approvers of all levels except the one who reviewed/approved the assets and to Created By, Watchers, Owners of those assets.
QMetry sends a notification to the "Created by" user when reviewers/approvers/closers reject an entity with Request Change.
Approval Access
Refer to Approval Access to read about:
- Adding a New Level
- Edit Level Name
- Change sequence of Levels
- Delete Approval Levels
- Add Requirement Reviewers to Levels
- Add Test Case Approvers to Levels
- Add Test Run Approvers to Levels
- Add Test Run Closers to Levels
Review a Requirement
Users may want to verify whether the requirements are written in accordance with the specifications. In the case of an external tracker like Jira, users can verify the requirements imported from Jira into QMetry and associate relevant test cases.
In case the requirement gets rejected later on at any of the levels, it will be moved back to the first level of review i.e. In Review state.
A reviewed requirement can still be edited. If users make any change to the requirement, the requirement will be moved back to the first level of review irrespective of its current level of review.
The following table narrates scenarios for internal requirements and requirements from the external tracker.
| Requirement Type | Sync | Entities edited in | Status in QMetry | Is "Request Change" option available? |
|---|---|---|---|---|
| Internal | - | QMetry | In Review and Pending at Level 1 | Yes |
| External | Imported for the first time in QMetry | - | Reviewed | No |
| Manual Sync | - | Reviewed | ||
| Auto Sync | Jira (for Jira Fields) QMetry (for System Fields) | In Review and Pending at Level 1 |
Review at Level 1
You can review requirements from:
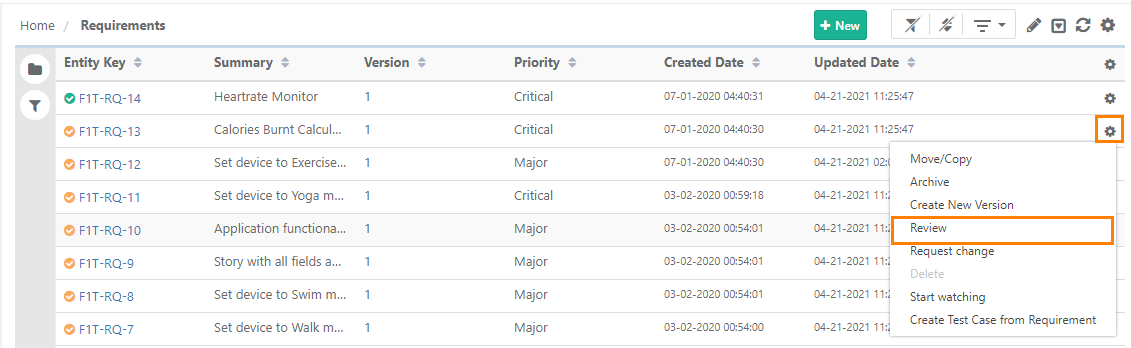
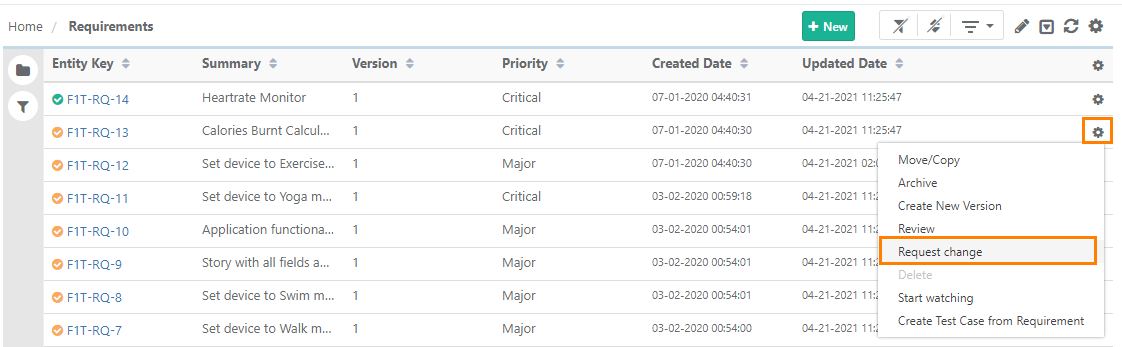
(A) On the requirement list view, open the Cog icon for the requirement and select Review.
Or
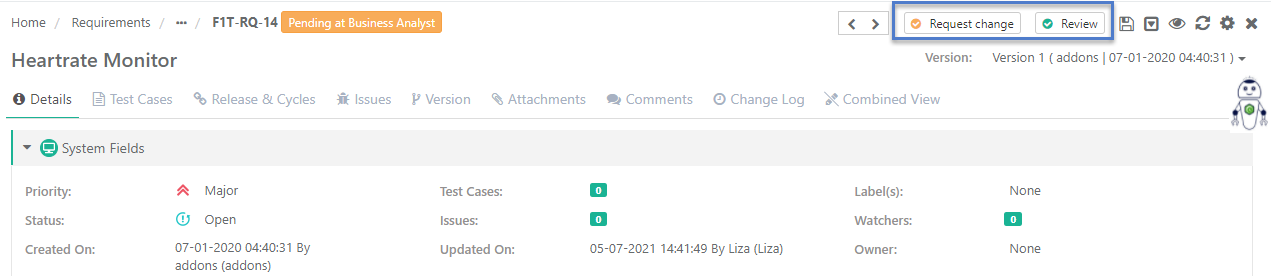
(B) Open the requirement detail page and click on the Review option at the top. There are two options: Request Change and Review.
The Request Change option will not be available for Requirements imported from external trackers like Jira.
- Review: The requirement will be marked as Reviewed by the reviewer at <Level 1>.
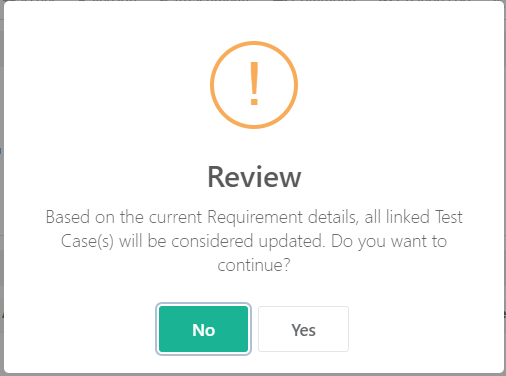
Enter remarks regarding the review and click Review.

On Reviewing the requirement at a level, the email notification is sent to all the reviewers of the next level in accordance with the defined frequency to send a notification to reviewers of pending level.
- Request Change: If the reviewer wants some modifications in the requirement, then they can ask for the required change by clicking on the Request Change button.
Review at Level 2/Next Level
The requirement reviewed at Level 1 is moved to the next level for further validation. For example, to check whether the associated test cases are in sync with the modified requirements. There are two options for a reviewer at this level:
- Review: The option behaves the same as Level 1. The requirement will be marked as Reviewed by the reviewer at Level 2.
- Request Change: If the reviewer wants some modifications in the requirement, then they can ask for the required change by clicking on the Request Change button. The Request Change option will not be available for Requirements imported from external trackers like Jira.
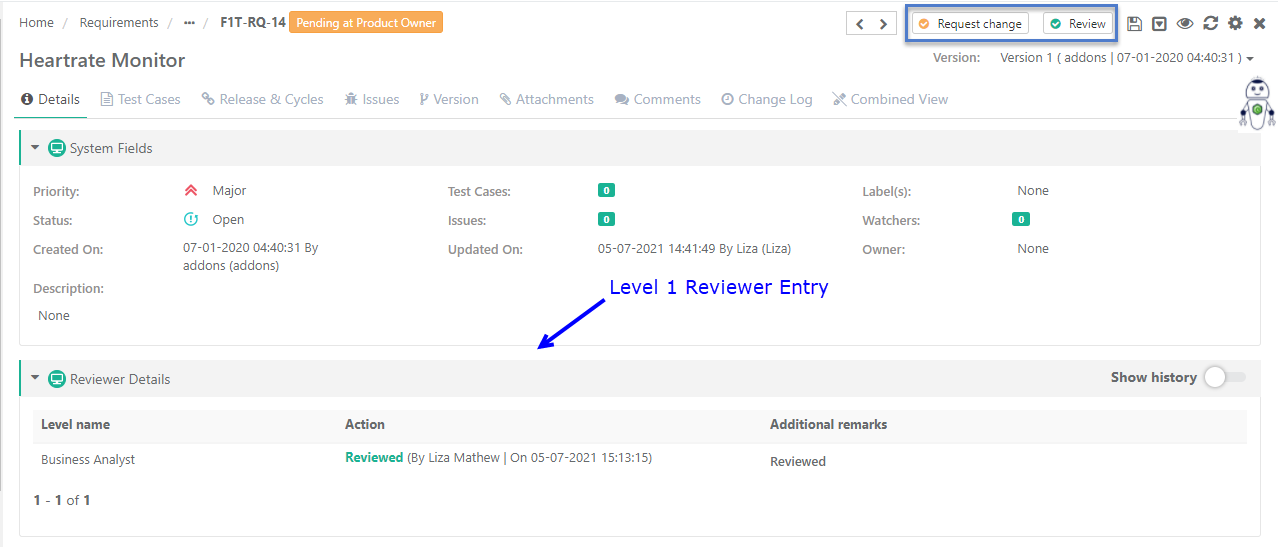
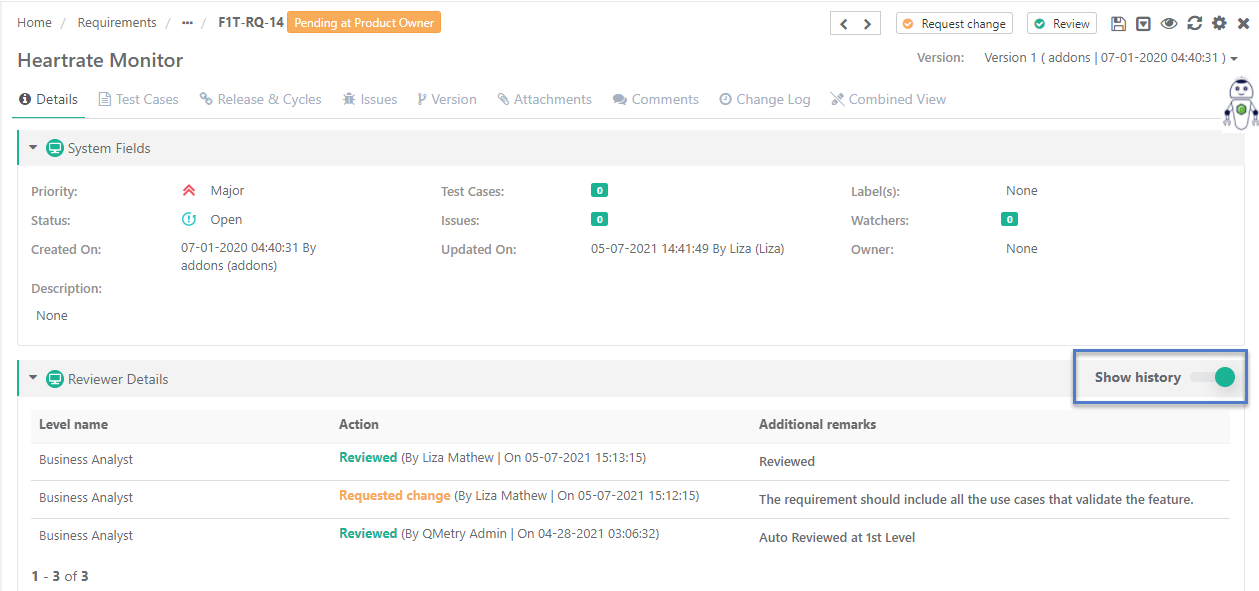
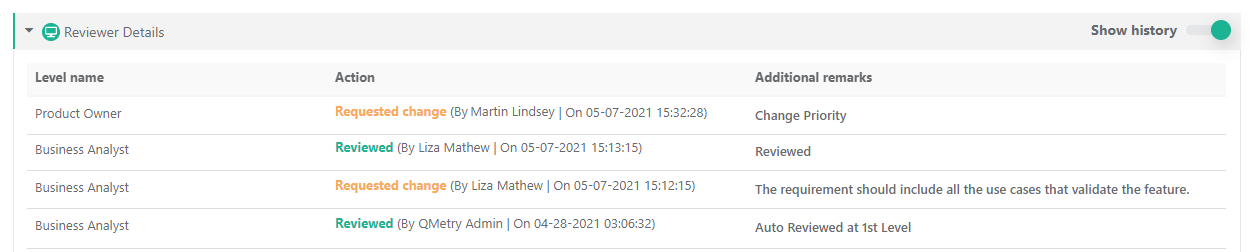
The Reviewer Details section shows the latest reviewer details based on level.
Enable the Show History option to view all the entry logs including Request Change.
Request Change
Follow either of the ways to mark a requirement for request change:
(A) On the requirement list view, open the Cog icon for the requirement and select Request Change.
(B) Open the requirement detail page and click on the Request Change option at the top.
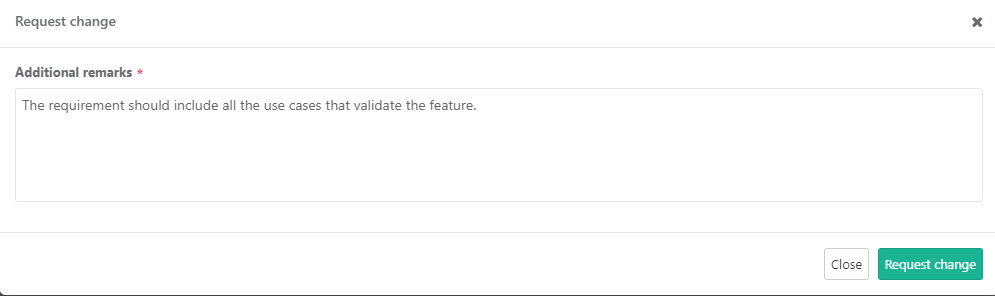
When the reviewer clicks on the Request Change option, the pop-up opens to enter remarks regarding it. Add remarks and click on the Request change button.

The requirement is moved back to Level 1 for review. The Review Details display blank.
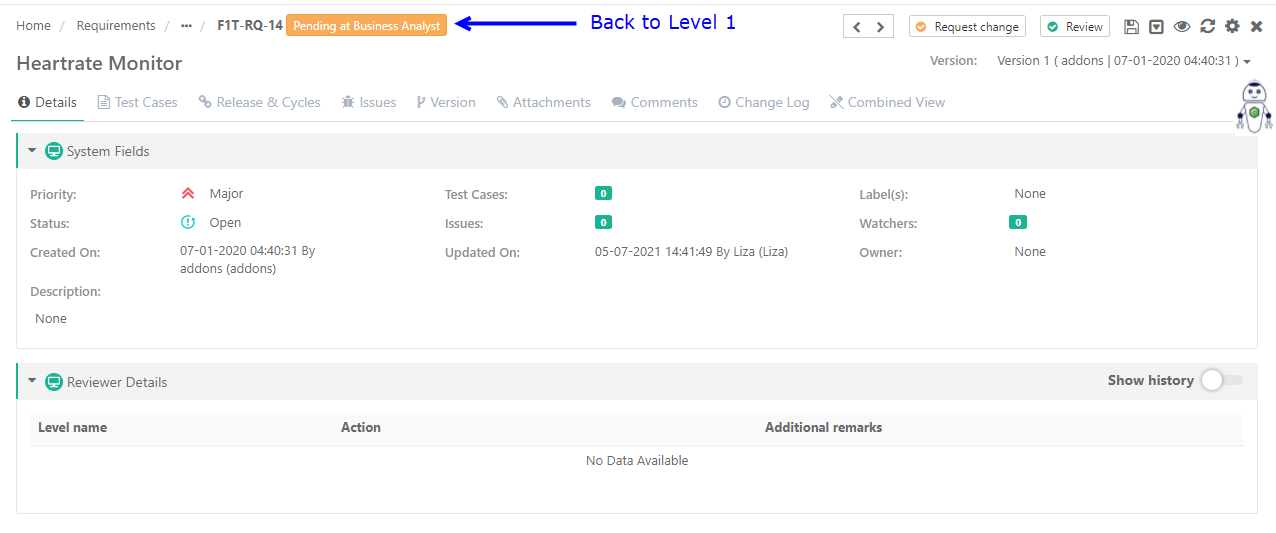
Enable the Show History option to view the Reviewer Details.
The email notification about the review status and details is sent to the "Created By" users when reviewers request changes.
View Review Logs
Once the requirement gets reviewed at all the subsequent levels the corresponding entries are displayed -
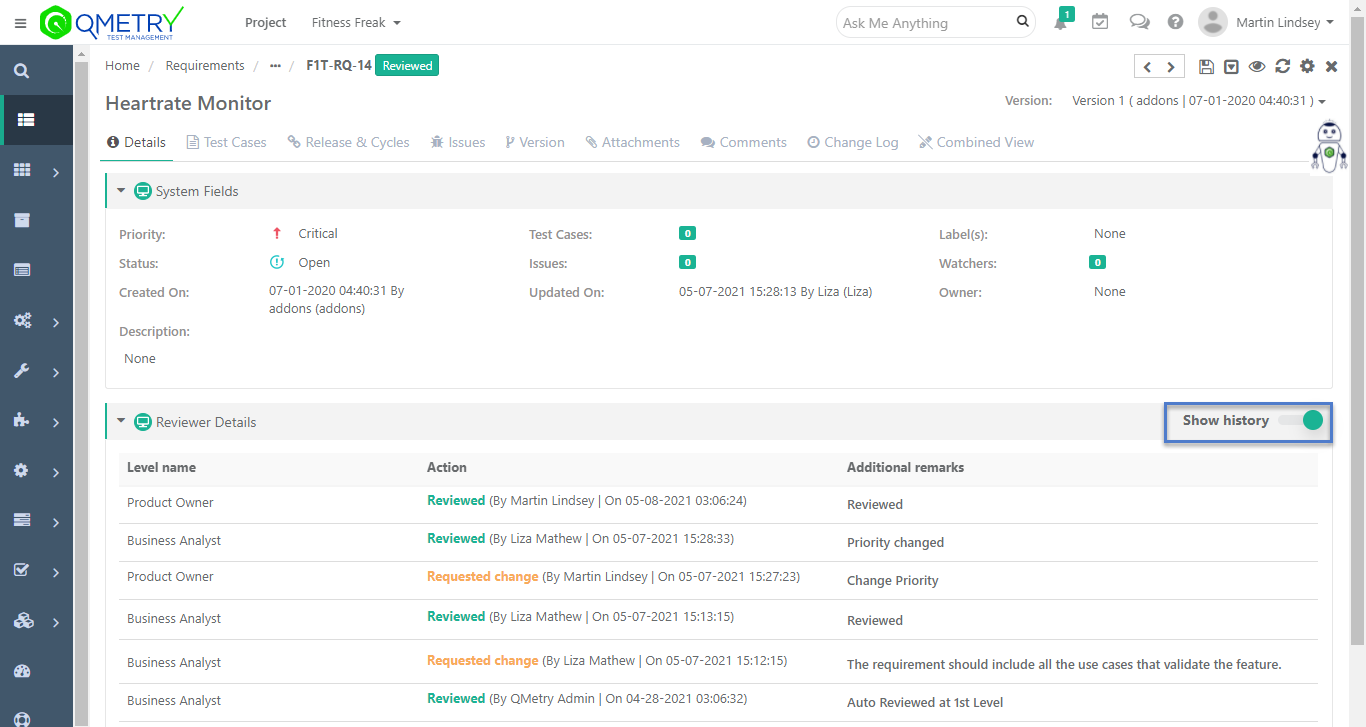
(A) On the requirement details page > Details tab
The Reviewer Details section shows the latest reviewer details based on level. Enable the Show History option to view all the entry logs including Request Change.
(B) On hovering the icon on the Requirement list view
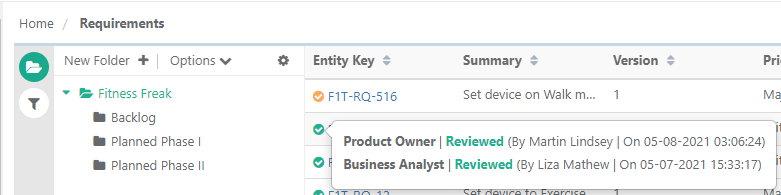
(C) On the Change Log tab on the requirement details page
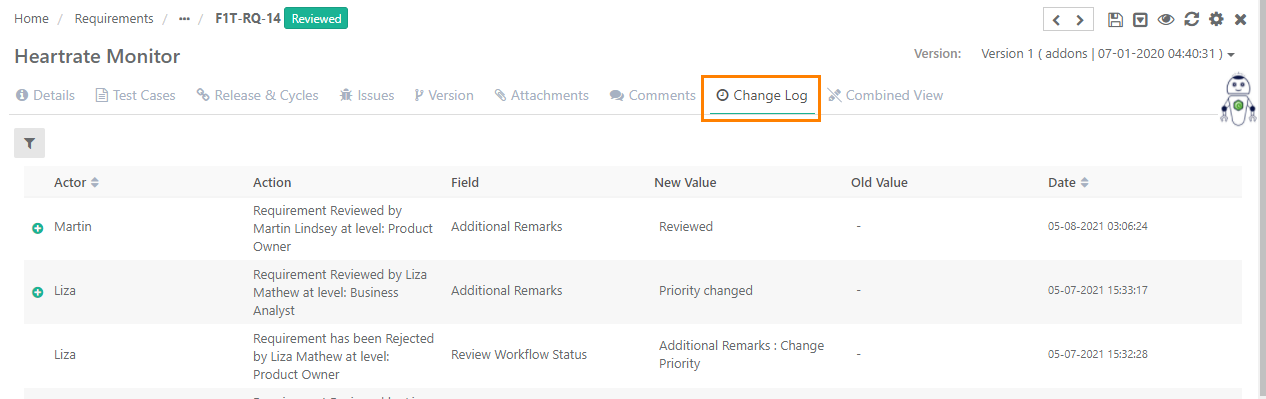
Approve a Test Case
You can link test suites to only those test cases which are approved. Hence, you can not execute a test case until it gets "Approved" State.
The test cases are approved version-wise and not as a whole. If the Approval Workflow is enabled and the test case version is in "Approved" state, then users can not modify that particular version of the test case. In this case, a new version of a test case can be created and that new version will be in the "In Review" state.
- If the eSignature is enabled, then shareable test cases will be created with the "Approved" State by default. Once shareable test cases are created, users can not edit the steps of a shareable test case. However, user can create a new version of the shareable test case, if required.
- If a test case is approved at all the existing levels and a new level of approval is added afterward, then the test case will be shown pending approval for the latest added level. If the test case is already linked to a test suite, then its execution will not be allowed.
- If a test case is pending for approval at the last level. If this last level is deleted before the approval process complete, then the pending approvals at the level will be marked as Approved.
- If a test case is approved at all the existing levels and a new level of approval is added afterward, then the test case will be shown pending approval for the latest added level. If the test case is already linked to a test suite, then its execution will not be allowed as it is still pending for approval for the newly added level.
Steps to Approve a Test Case
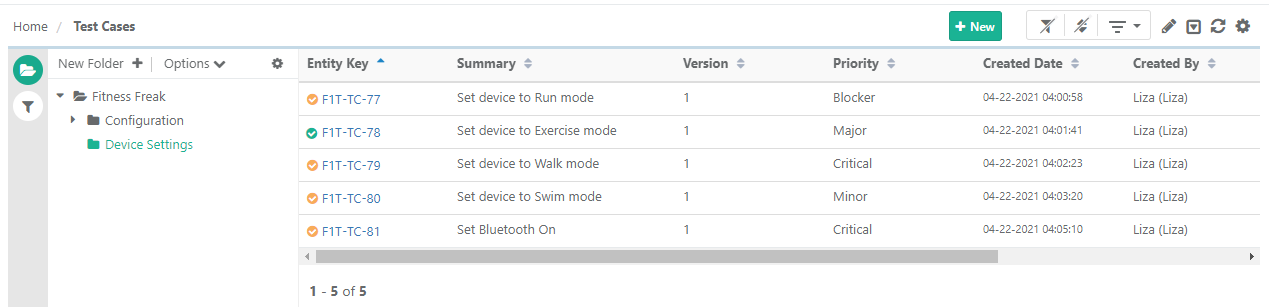
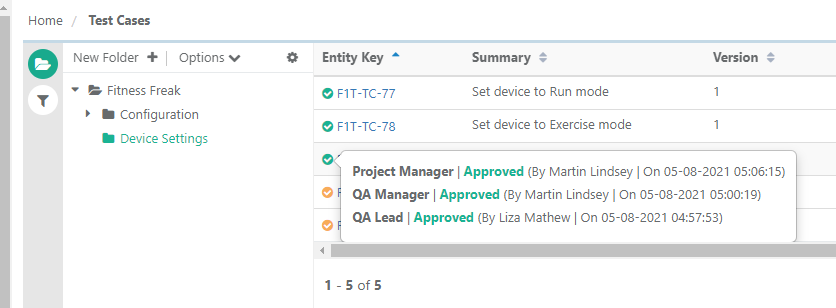
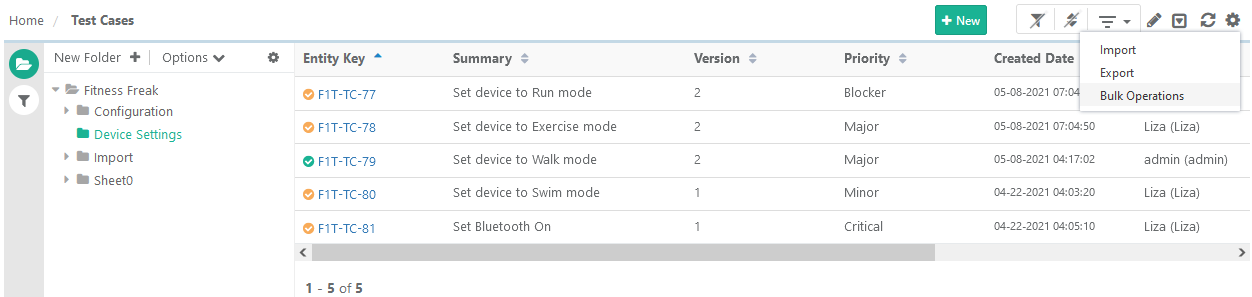
Open the list view of the Test Cases module, you can view the test case Entity Key with a corresponding symbol to denote the test case’s approval status. The test case grid displays the test case State as per its latest version.
| Symbol | Test Case State | Description | When eSingature is enabled later in Project |
|---|---|---|---|
| In Review | When a new test case is created in the project, it will have "In Review" State by default. | All the new test cases will be created with "In Review" State |
| Approved | When a test case is approved to mark it ready for test execution. Test Suites can only be linked to approved test cases. | All the existing test cases will have "Approved" State |


Every new test case is added with an orange symbol indicating its State as "In Review".
Approval at Level 1
Follow either of the ways:
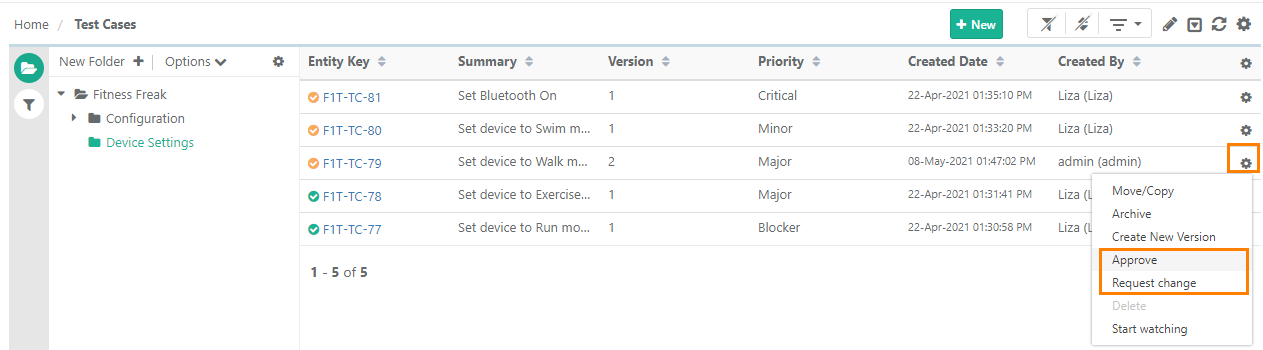
(A) On the test case list view, open the Cog icon for the test case and select Approve.
(B) Open the test case with the “In Review” State.
To approve the test case, click on the Approve option at the top right.
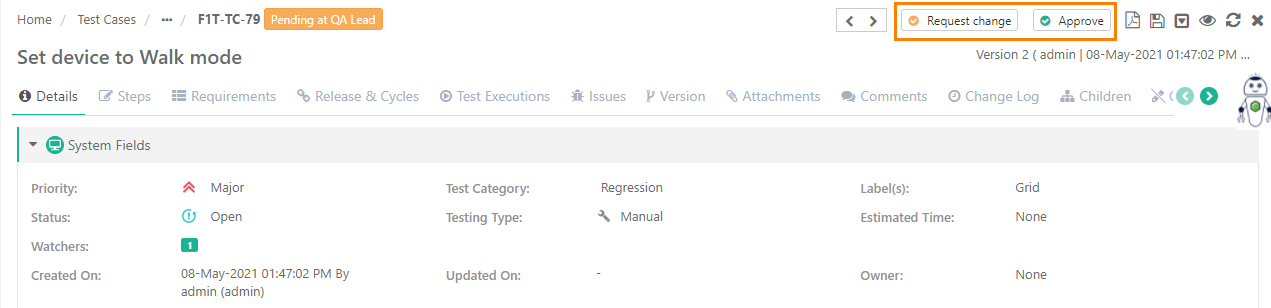
Request Change: If the approver wants some modifications in the test case, then they can ask for the required change by clicking on the Request Change button.
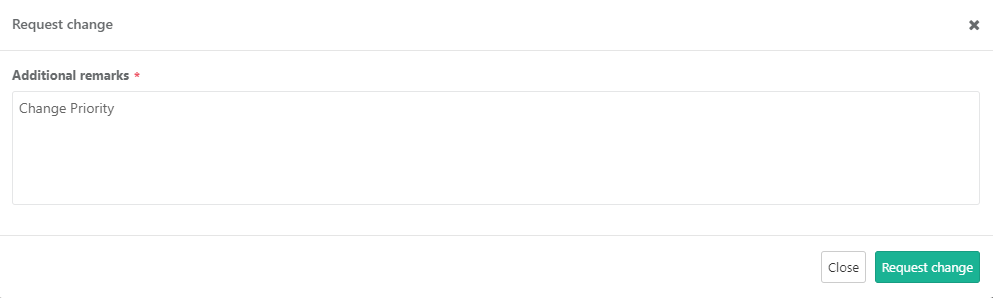
When the approver clicks on the Request Change option, the pop-up opens to enter remarks regarding it. Add remarks and click on the Request change button.

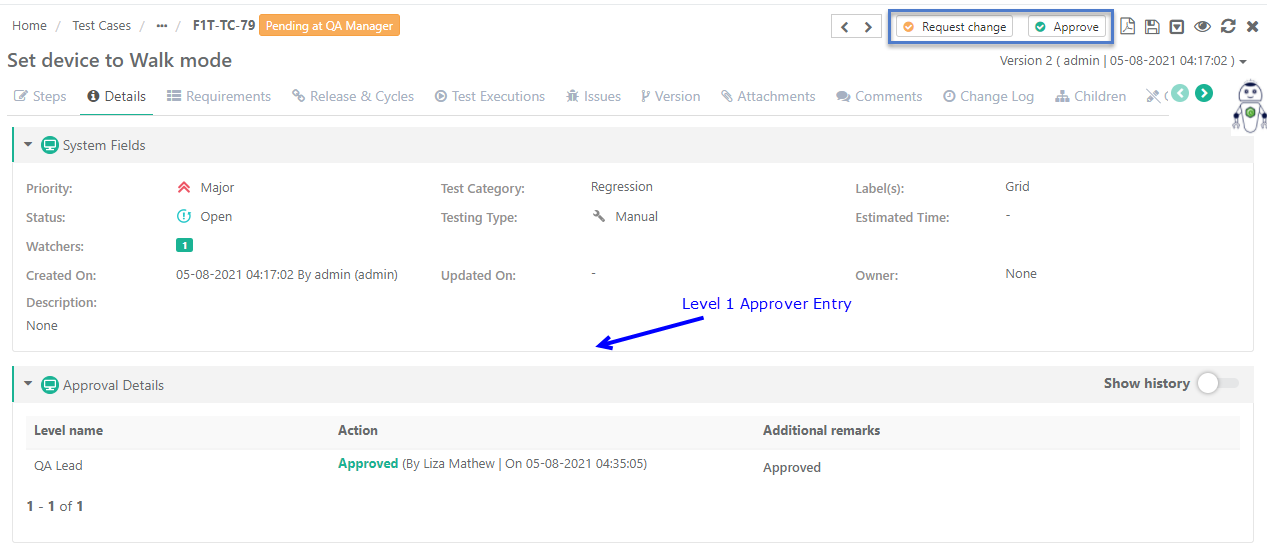
Approve: The test case will be marked as Approved by the approver at <Level 1>.
The following pop-up opens asking for confirmation. Click “Yes” to approve the test case.
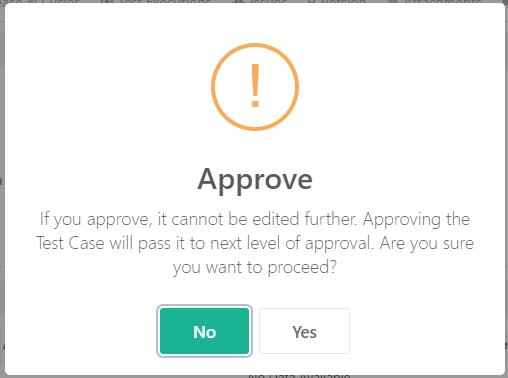
A pop-up opens to add remarks.

On approving test cases at one level, the email notification is sent to all the approvers of the next level in accordance with the defined frequency to send a notification to approvers of the pending level.
Approval at Level 2/Next Level
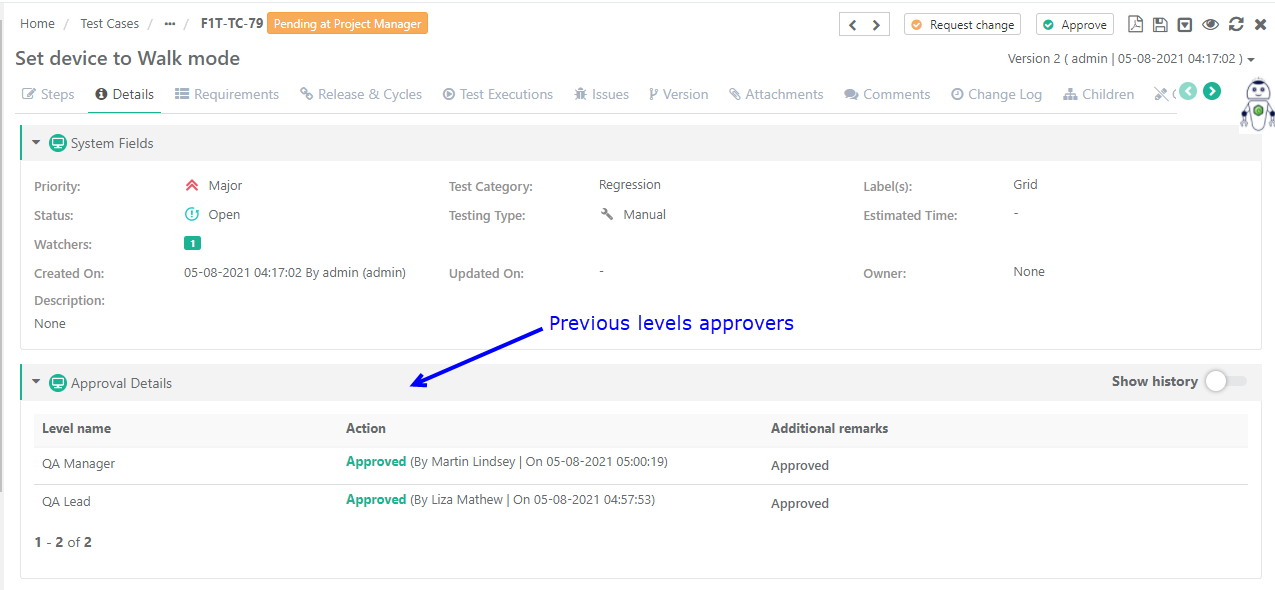
The test case approved at Level 1 is moved to the next level for review. The entity state is changed from “Pending at <Level 1>” to “Pending at <Level 2>”.
There are two options for an approver at this level:
- Approve: The option behaves the same as Level 1. The test case will be marked as Approved by the approver at Level 2.
- Request Change: If the reviewer wants some modifications in the test case, then they can ask for the required change by clicking on the Request Change button.
Request Change
When the approver clicks on the Request Change option, the pop-up opens to enter remarks regarding it. Add remarks and click on the Request change button.
The test case is moved back to Level 1 for approval.
The Review Details recorded earlier will be hidden by default. You can view the records by enabling the Show history option.
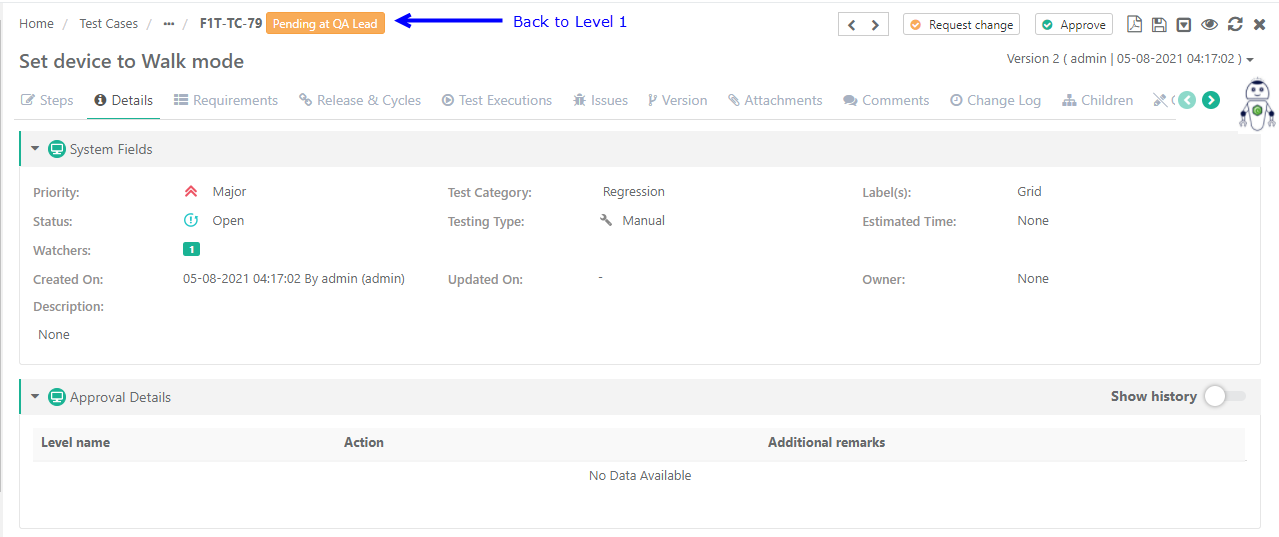
Enable the Show history option.
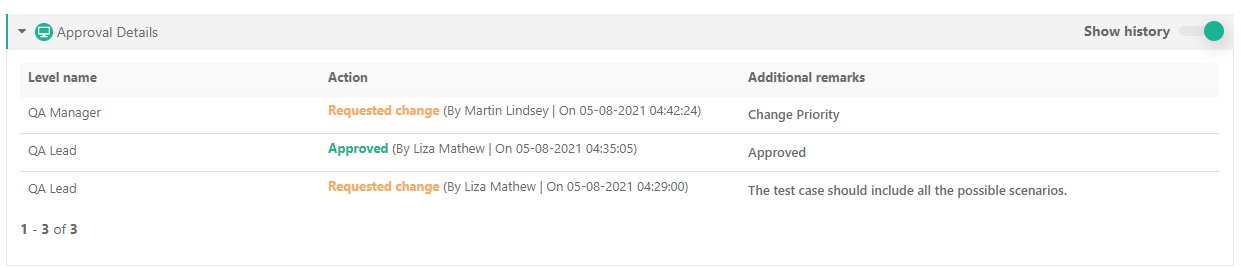
The email notification about the approval status and details is sent to the "Created By" users when approvers request changes.
Approval at Last Level
Once you approve the test case, it cannot be edited further. However, you can create a new version or clone this test case.
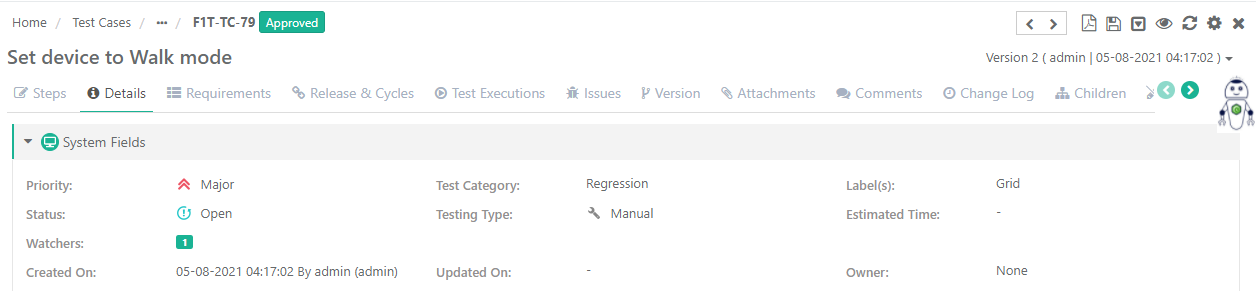
On approval at the last level, the test case will have the Approved state.
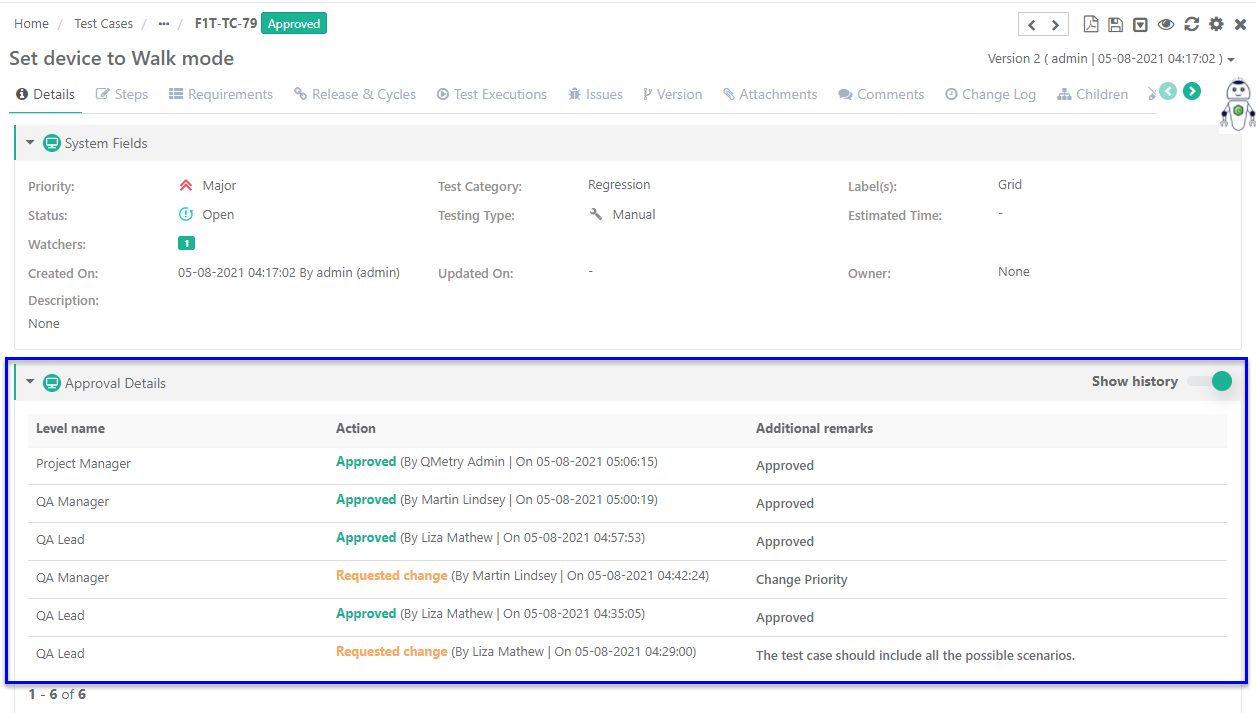
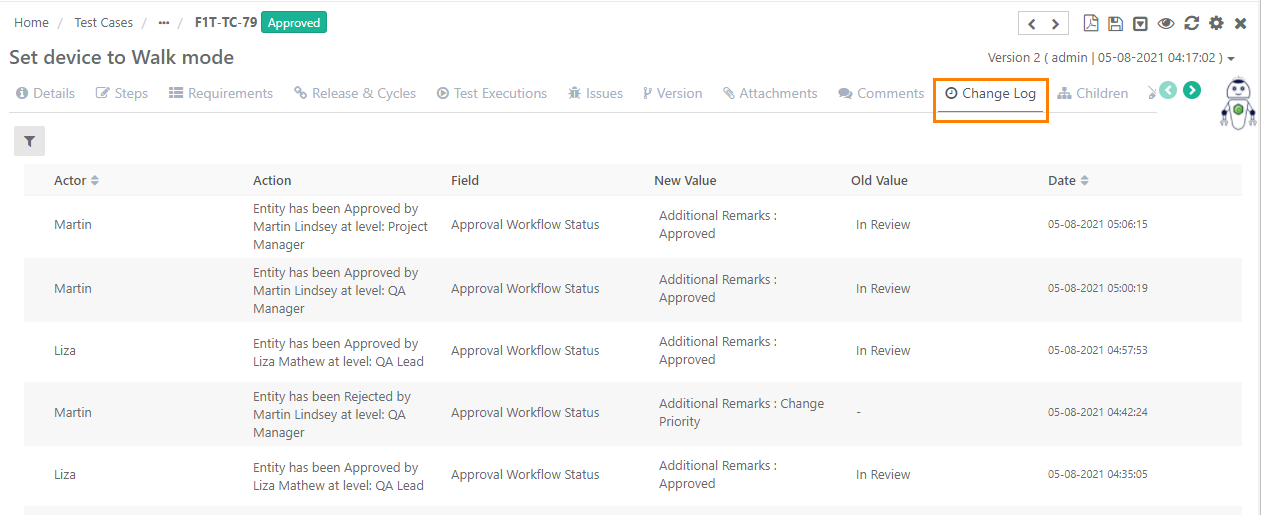
View Approval Logs
As the test case passed through subsequent levels, the corresponding entries are displayed as Logs.
(A) On the Approval Details panel on the test case details page > Details tab
(B) On hovering the icon on the Test Case list view
See that the Orange symbol is replaced with the Green symbol after approval at all the levels.
(C) On the Change Log tab on the test case details page.
Operations on "Approved" Test Cases | Impact on Test Case State |
|---|---|
Copy | Will reset the State to “In Review” |
Move in same project | Will preserve the State |
Move in other project | Will reset the State to “In Review” |
Export | Will export the State of test case |
Re-import | Will create a new version of test case and reset the State to “In Review” |
Linking Release/Cycle/Requirement/Test Execution | Will not reset the test case State |
Adding Comments | Will not reset the test case State |
Approve a Test Execution
Test Case executions are approved through the Approval Workflow that verifies that the test execution was documented correctly.
You can only link approved test cases to test suites for execution. The execution screen allows syncing of only approved versions of test cases.
When you add test executions, they are "In Review" State. To execute the test suite and assign status to test cases, it needs to be marked as "Approved".
If the test suites are created from requirements, then they will only contain "Approved" test cases.
You can approve a test execution from multiple places in the application:
- Test Suite > Test Executions tab
- Test Execution Screen
- Bulk Operations
- Bulk Request Change Operation for Test Executions
The following is the list view of test executions available in the Test Suites module (Test Execution tab). Later in the section, we have used the test execution screen.
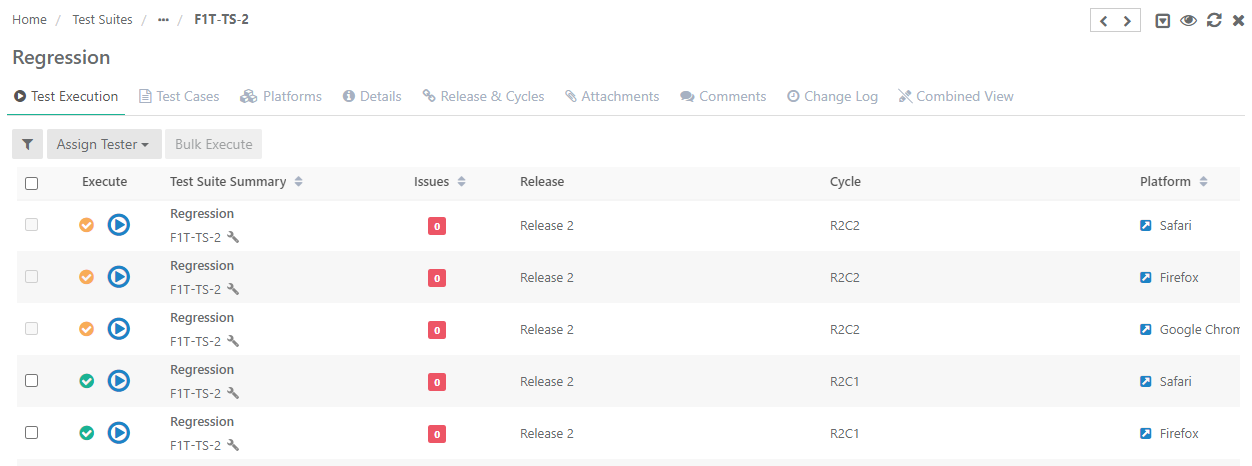
When new test execution is added, it is added with the orange symbol and "In Review" state. You can directly Approve the test execution by clicking on the orange symbol. The symbol turns green indicating the test execution is approved. You close the test execution by clicking on the green symbol. It turns black indicating the test execution is closed now.
| Symbol | Test Execution State | Description | When eSingature is enabled later in Project |
|---|---|---|---|
| In Review | When a new test suite is created in the project, it will have "Review" State by default. It will contain the approved test cases. | All the new test suites will be created with "In Review" State; execution will not be allowed. |
| Approved | When a test suite is approved to mark it ready for test execution. | All the existing test suites will have "Approved" State; execution will be allowed. |
| Closed | When a test suite is executed and then closed for further modification in the test execution. | Test Suites should be manually "Closed" |

Approval at Level 1
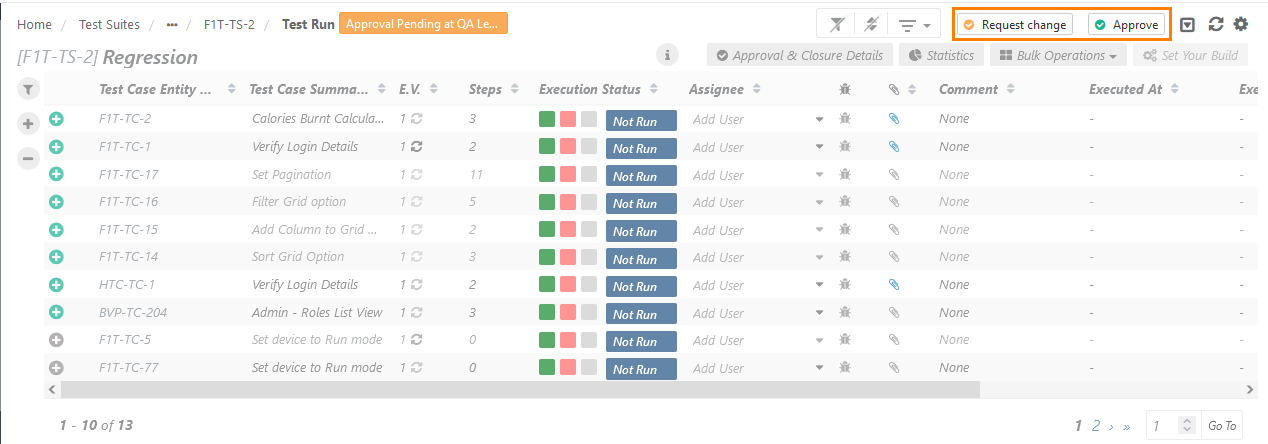
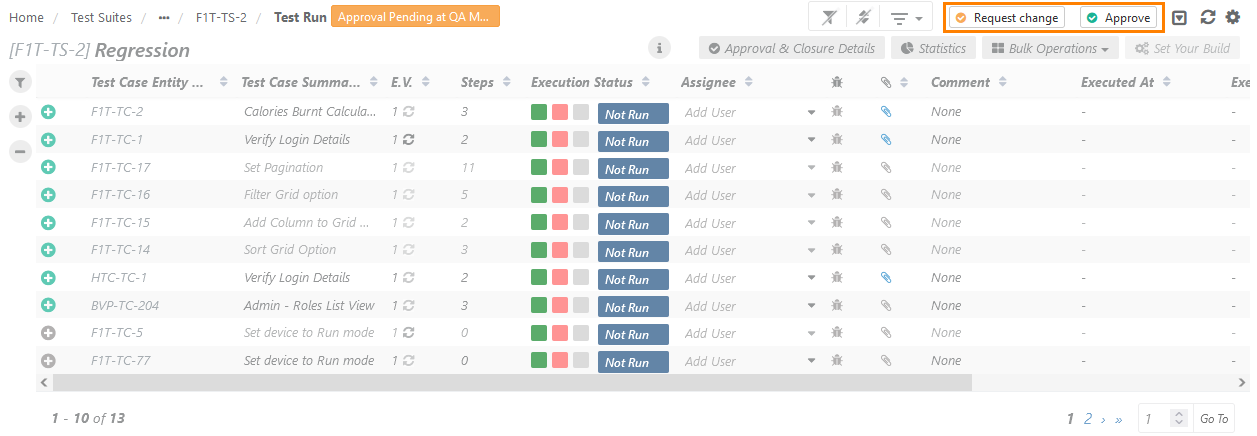
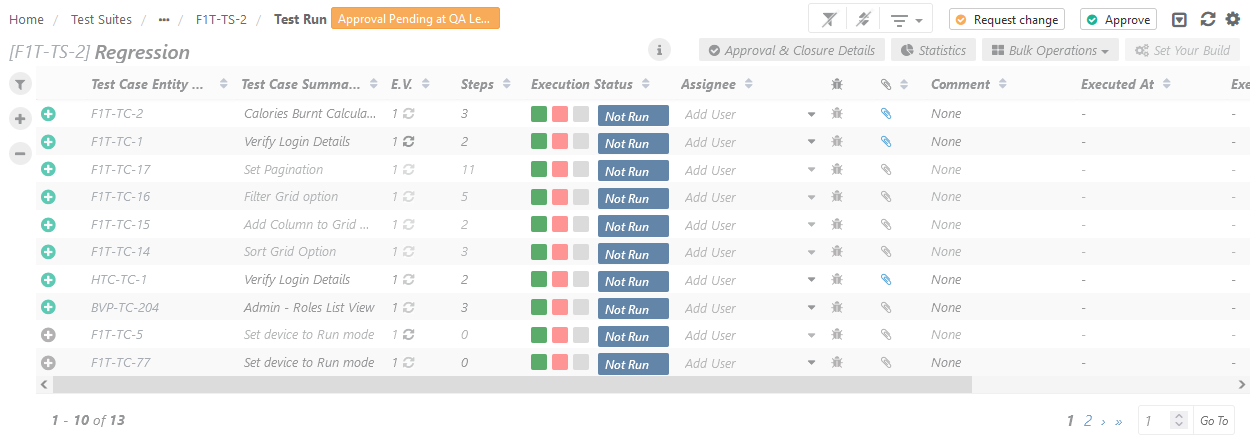
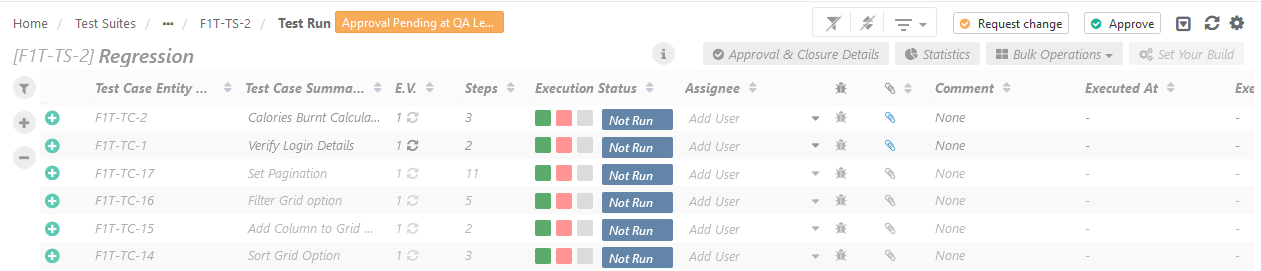
1. Open the test execution with the “In Review” State.
2. To approve the test execution, click on the Approve option at the top right. Once you approve the test execution, it cannot be edited further.
The Test Execution screen appears disabled until you approve the test execution. Once you approve the test suite for execution, the Test Execution screen is displayed in editable mode.
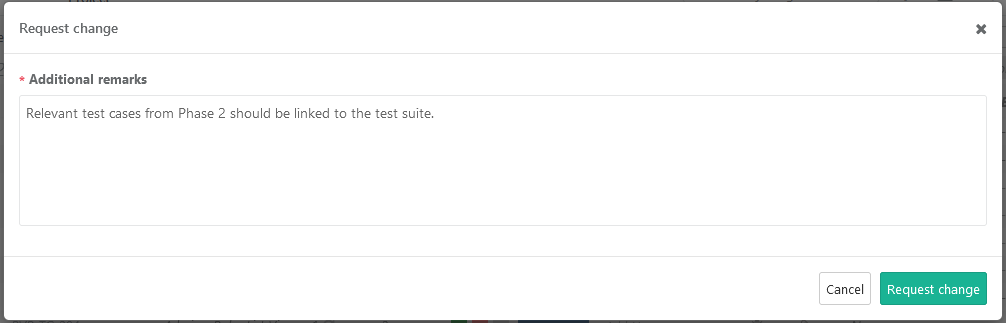
Request Change: If the approver wants some modifications in the test case, then they can ask for the required change by clicking on the Request Change button.
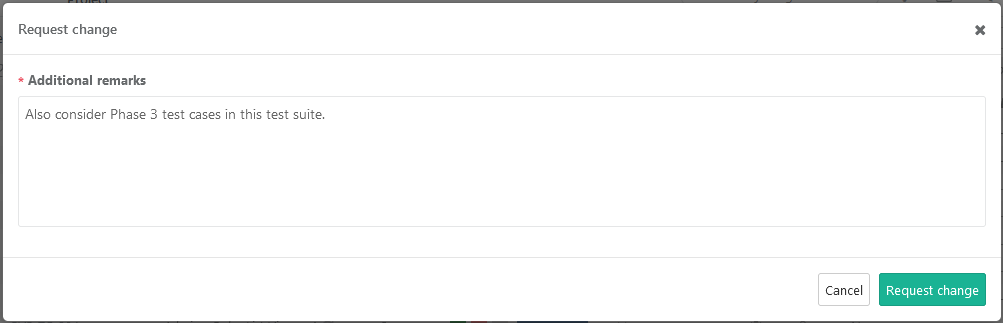
When the approver clicks on the Request Change option, the pop-up opens to enter remarks regarding it. Add remarks and click on the Request change button.
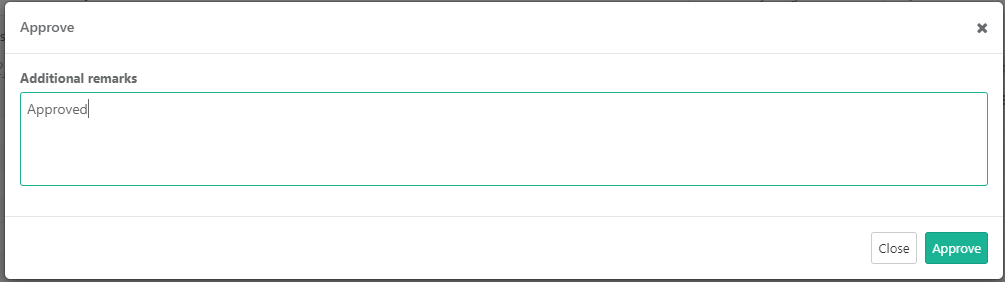
Approve: The test execution will be marked as Approved by the approver at <Level 1>.
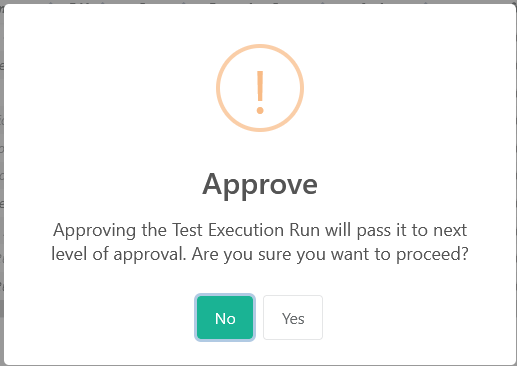
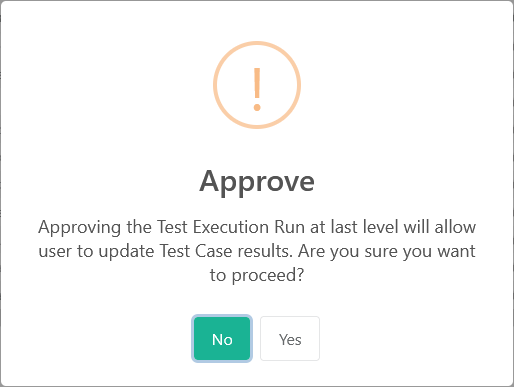
The following pop-up opens asking for confirmation. Click “Yes” to approve the test case.
A pop-up opens to add remarks.
On approving test executions at one level, the email notification is sent to all the approvers of the next level in accordance with the defined frequency to send a notification to approvers of the pending level.
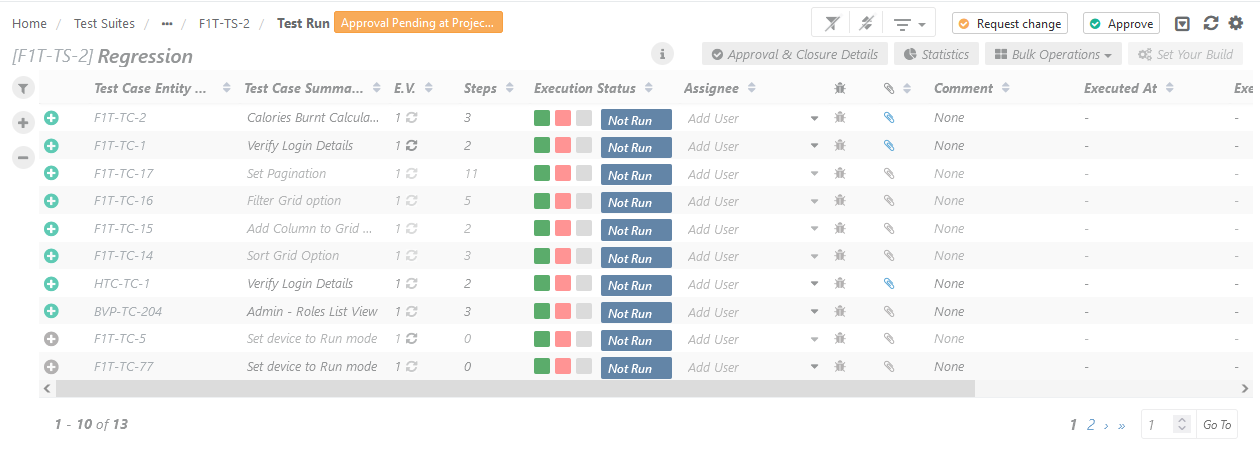
Approval at Level 2/Next Level
The test execution approved at Level 1 is moved to the next level of approval. The entity state is changed from “Pending at <Level 1>” to “Pending at <Level 2>”.
There are two options for an approver at this level:
- Approve: The option behaves the same as Level 1. The test execution will be marked as Approved by the approver at Level 2.
- Request Change: If the approver wants some modifications in the test execution, then they can ask for the required change by clicking on the Request Change button.
Request Change
When the approver clicks on the Request Change option, the pop-up opens to enter remarks regarding it. Add remarks and click on the Request change button.
The test execution is moved back to Level 1 for approval.
The email notification about the approval status and details is sent to the "Created By" users when approvers request changes.
Approval at Last Level
The test execution is moved to the last level of approval. The entity state is changed from “Pending at <previous level>” to “Pending at <Last level>”.
There are two options for an approver at this level:
- Approve: The option behaves the same as Level 1. The test execution will be marked as Approved by the approver at the last level.
- Request Change: If the approver wants some modifications in the test execution, then they can ask for the required change by clicking on the Request Change button.
Approving the Test Execution Run at the last level will allow the user to update Test Case results.
On approval at the last level, the test case will have the Approved state.
Once the test execution is approved for execution, an email will be sent to its Owner/Assignee informing that it is ready for execution.
Close Test Execution
Once the approved test suite is executed, proper status is assigned and bugs are logged with relevant test cases/test steps, the test execution can be marked as "Closed" by the users with test execution closer access. In the case of multiple hierarchy levels defined for test execution closers, only the last level closer can close the test execution.
Once you close the test execution, test case results cannot be modified/executed further. However, you can view the bugs and download the attachments associated with the test cases and test steps.
Use Case: The QA Manager in an organization wants to freeze the execution of the test suite once it is executed to preserve the test execution and prevent any modification in the test suite execution.
Business Rules:
Test Suite Execution is “Approved” and not closed at any level i.e. "Closure Pending at Level 1”: If new Approval Level is added then Approved level will be changed to Pending at {New Level}.
Test Suite Execution is “Approved” and closer is initiated at any of the Level: If new Approval Level is added, then Closure status will remain as it is.
- If a Closure cycle is not initiated any of the levels and requires tester to change execution or add additional information on execution, then by Request Change, Approver can reset the status back to Approval Pending at Level 1.
Once Closure cycle is initiated, adding a new level of Approval will not impact the current status of Closure cycle.
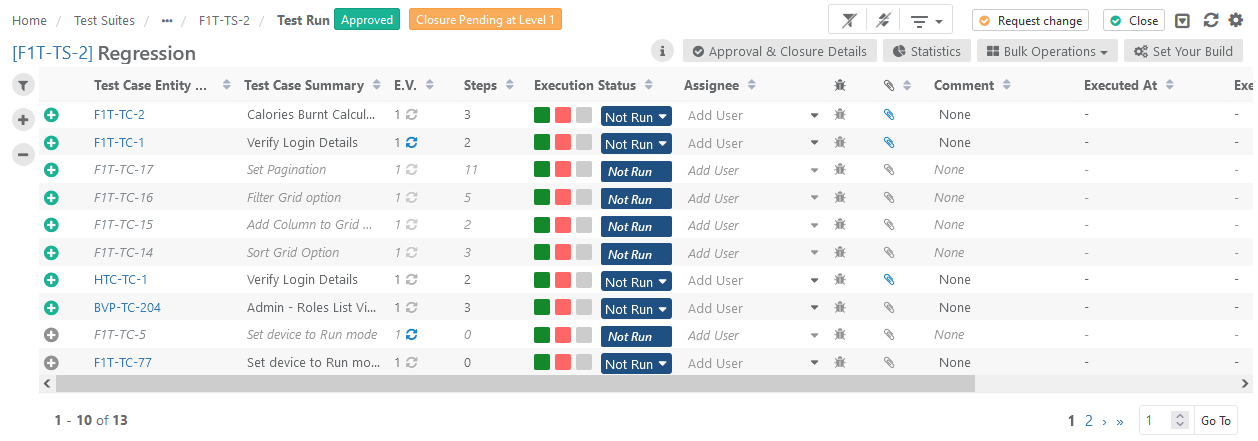
To close the execution of the test suite, click on the Close option at the top-right of the Test Execution screen.
Closure at Level 1
Steps:
1. Open the test execution with the “Approved” State.
2. To close the test execution run, click on the Close option at the top right. Once you close the test execution, it cannot be edited further.
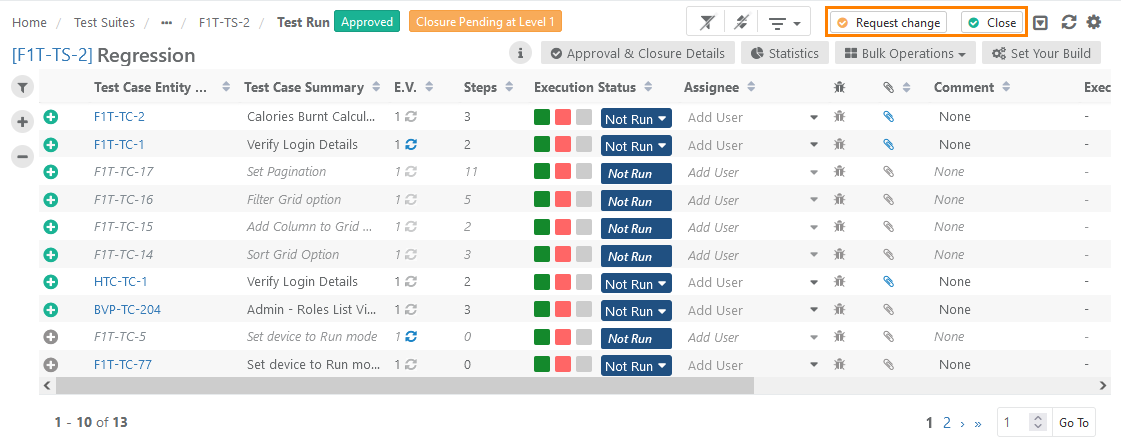
Request Change: If the closer wants some modifications in the test case/test suite, then they can ask for the required change by clicking on the Request Change button.
When the closer clicks on the Request Change option, the pop-up opens to enter remarks regarding it. Add remarks and click on the Request change button.
Once the test execution is requested for change at closure level, its approved status will reset and set as "Approval Pending at Level 1".
The entire cycle of approval needs to be performed on the test execution. Once the test execution achieves the status of "Approved", it becomes available for Closure cycle.
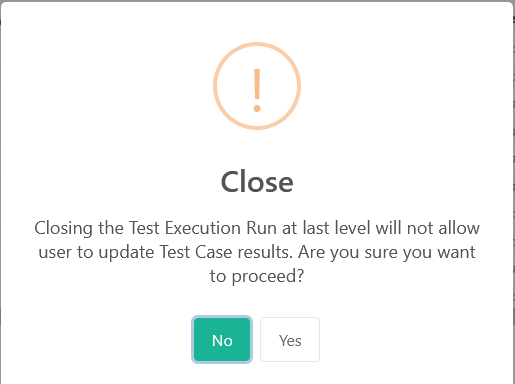
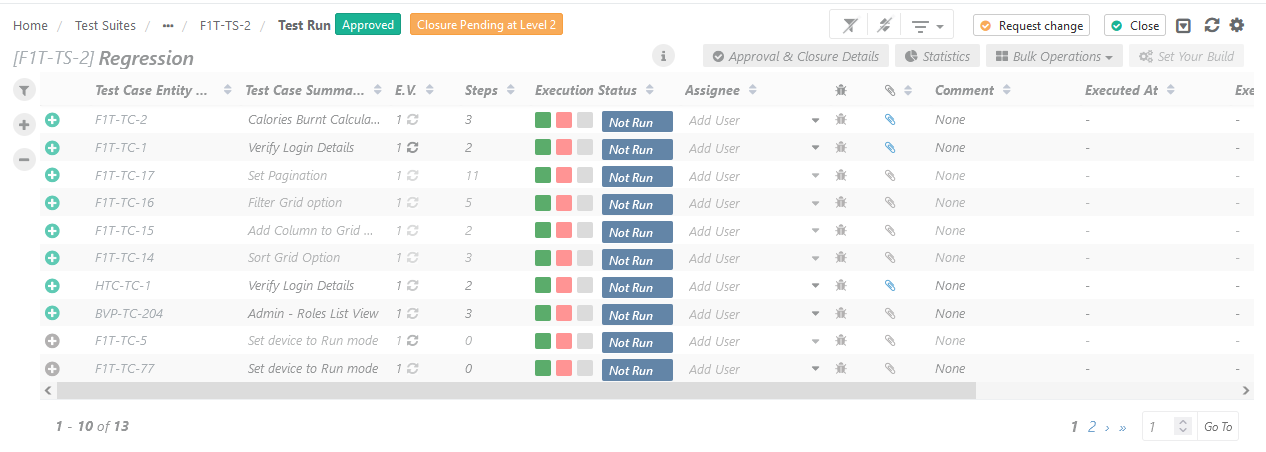
Close: The test execution pending for closure will show "Closure Pending at <Level 1>. Once you click the Close option, The following pop-up opens asking for confirmation. Click “Yes” to close the test execution.
Multiple Hierarchy for Closure:
Once the closure is performed at level 1, the status shows Closure Pending at <Level 2>. The test execution will be marked as "Closed" only if the closer at last level closes the test execution.
The test execution gets closed at the last level of test execution Closure. The test execution is greyed out and its status is changed to "Closed".
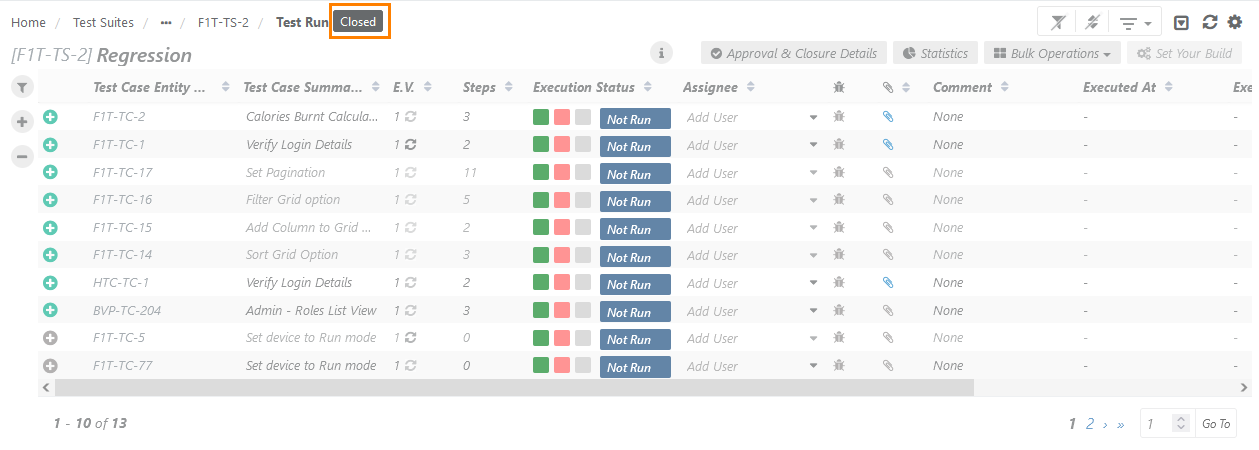
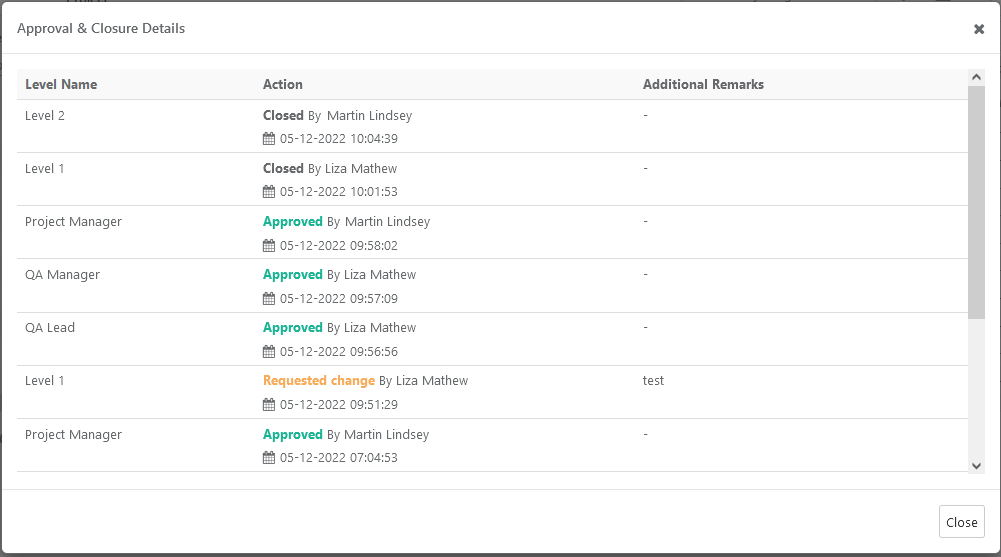
You can view the approval details by clicking on the Approval & Closure Details button.

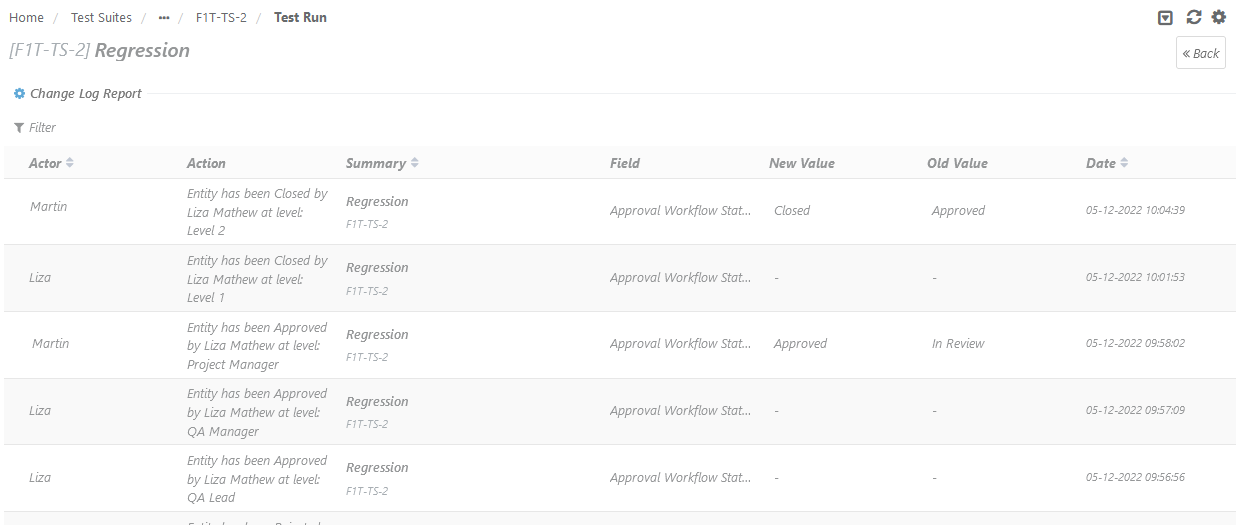
View Approval Logs
As the test execution passed through subsequent levels, the corresponding entries are displayed under Change Log.

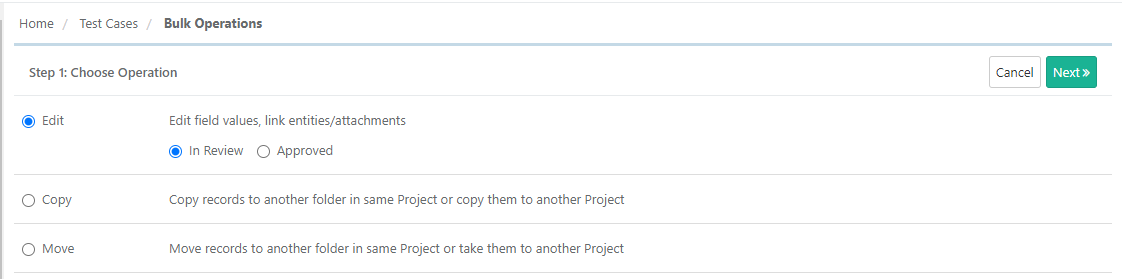
Bulk Edit
For test case Bulk Edit, users can select either "In Review" and "Approved" test cases at a time.
Note: Users can perform bulk edit on unarchived and non-shareable records.
You can add/edit the following for Approved test cases:
- Linkages (like Attachments, Requirements, Releases & Cycles)
- Comment
Approval Workflow for Cross Projects
Approval Workflow in Project A (current project) | Approval Workflow in Project B | Linking assets of Project B to Project A |
|---|---|---|
| enabled | disabled | NA (For Approval Workflow enabled projects, the Link Test Cases screen shows only those projects which has Approval Workflow enabled) |
| disabled | enabled | NA (For Approval Workflow disabled projects, the Link Test Cases screen shows projects without Approval Workflow) |
| enabled | enabled | Only Approved test cases from Project B |
| disabled | disabled | All test cases from Project B |
Automation Testing
If the eSignature feature is enabled in the project, then -
a) Test Cases created or linked through Automation (Automation API/Jenkins/Bamboo/Rest API) will be approved automatically irrespective of user's permissions for Approval.
b) Test Suite Executions created through Automation (Automation API/Jenkins/Bamboo/Rest API) will be in the "Approved for Execution" State irrespective of user's permissions for Approval.
Audit Log
All the activities related to approval workflow are logged under Audit Compliance > Audit Log.
Approval Workflow Details
Users can open test case detail in PDF by clicking on the Export Test Case Detail icon on the test case detail page.
If the eSignature feature is enable for the project, then the report also includes Approval Workflow details for the test case including approval statuses i.e. "In-Review", "Approved", etc.
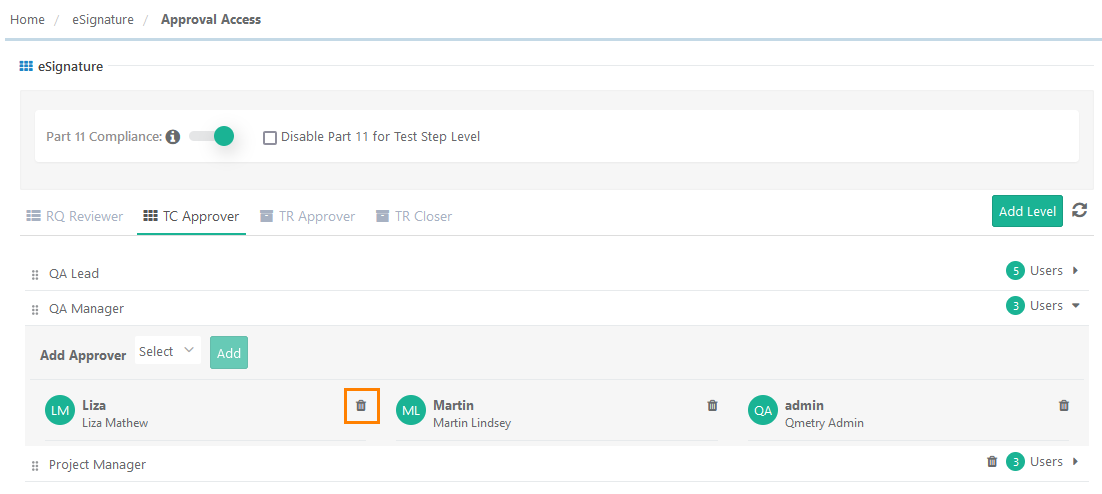
Remove Reviewers/Approvers/Closers from Project
Expand eSignature on the tree and click on the Approval Access option. The screen opens with three tabs on it: RQ Reviewer, TC Approver and TS Approver.
To remove a reviewer/approver, click on the Delete icon adjacent to that particular reviewer/approver. The user will not have the right to review/approve requirements/test cases/ test suites for the project anymore.
Entities reviewed/approved earlier by this reviewer/approver will not have any impact.
You can also view Approval Workflow Report.
Bulk Review Requirements
The Review option of Bulk Operation is only available in Requirements modules. Users can now review requirements in bulk for the e-Signature feature.
When the reviewer is confident about the requirements covered in the release and cycle, they prefer to review them at a time instead of reviewing them one by one.
Note: Users can only review the In-Review and unarchived requirements in bulk.
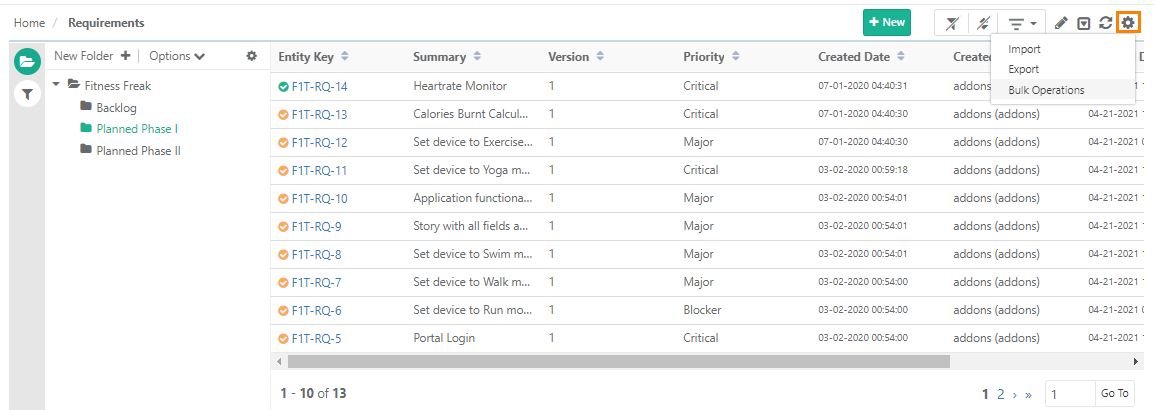
1. Go to Bulk Operations.
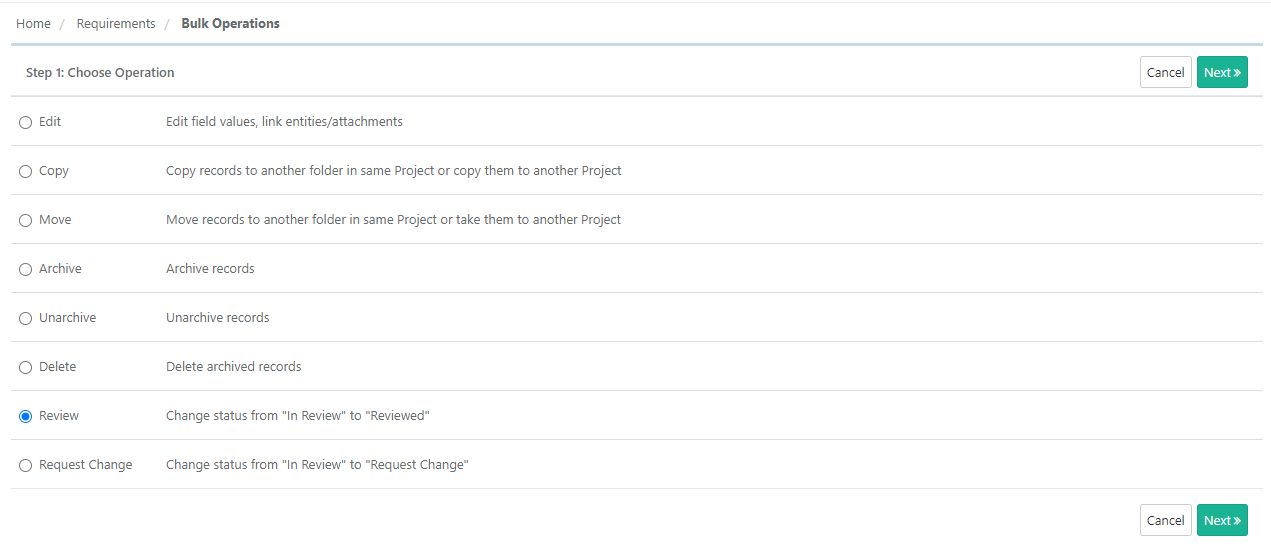
2. Select Review as the operation to perform and click Next.
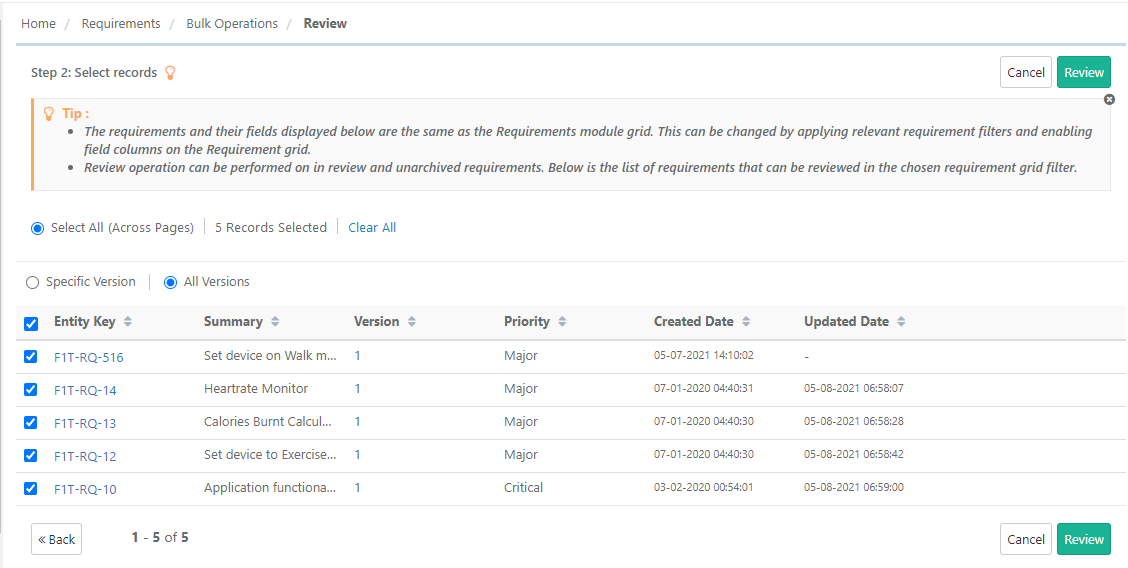
The screen shows entity records. Select the requirements that you want to mark as reviewed.
Then click on the Review button.
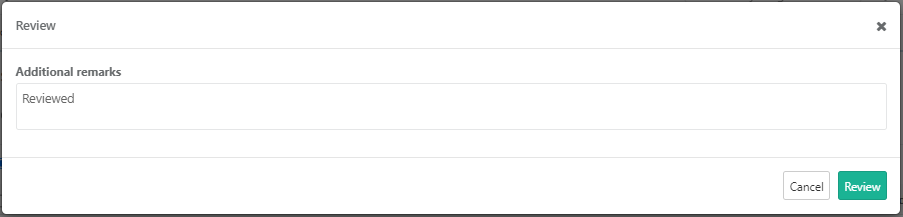
Enter remarks and click Review.
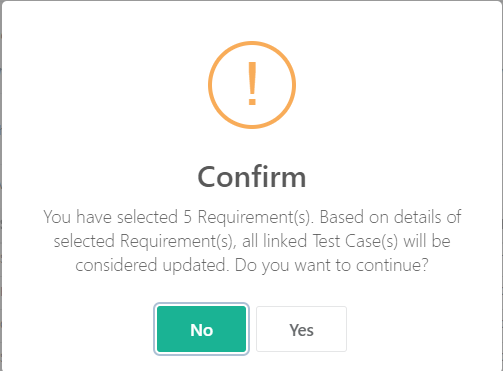
The confirmation message pops up. Click "Yes" to proceed.
Bulk Approve Test Cases
Approve option of Bulk Operation is only available in Test Cases and Test Suites modules. Users can now approve test cases and approve/close test executions in bulk for the e-Signature feature.
When QA Manager/Approver is confident about the test cases and test suites covered in the release and cycle, they prefer to approve them at a time instead of approving them one by one.
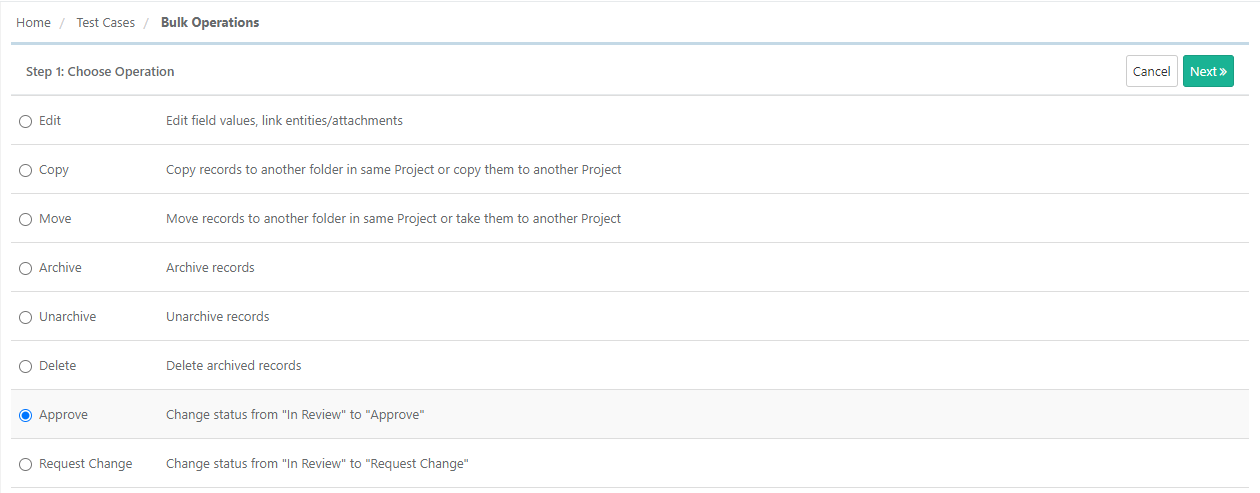
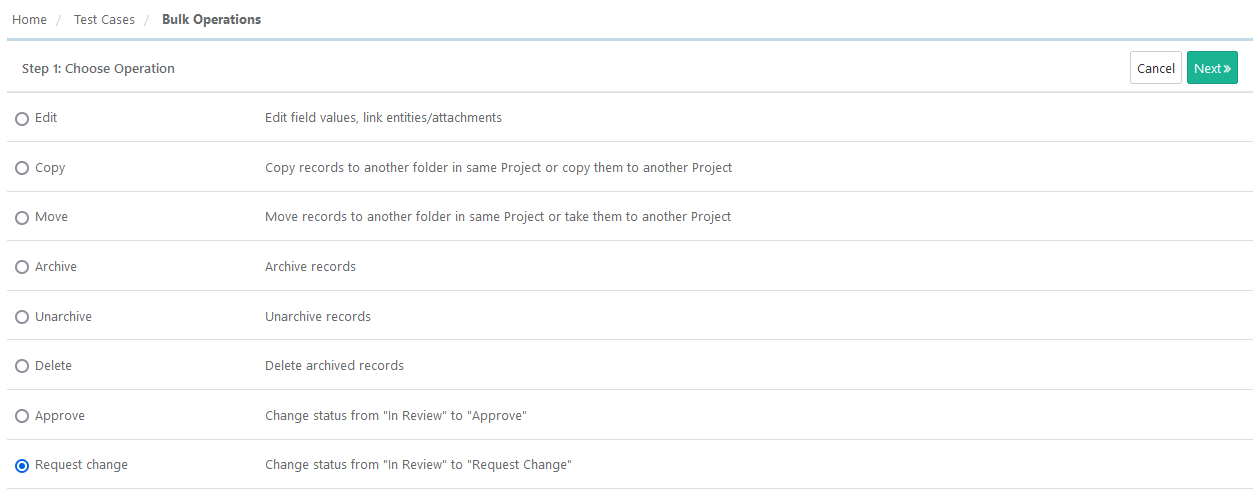
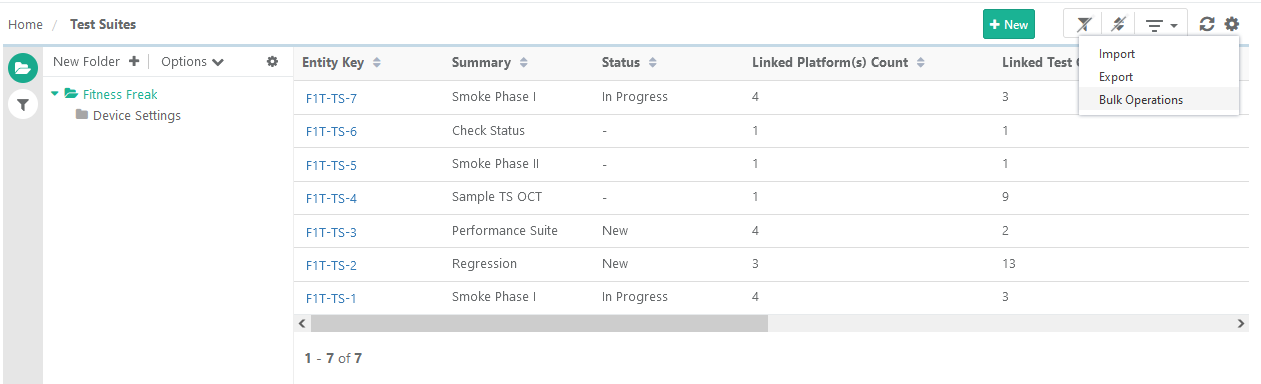
1. Go to Bulk Operations.

2. Select Approve as the operation to perform and click Next.
The screen shows entity records.
Select the test cases you want to approve or test cases you want to approve/close. Then click on the Approve button.
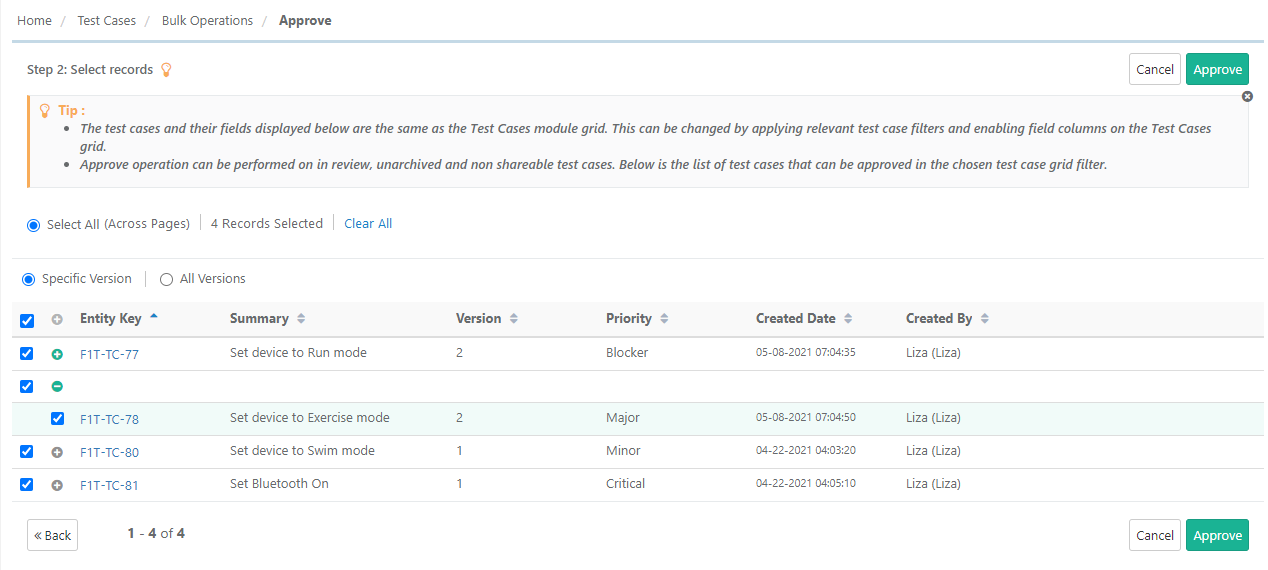
The confirmation message pops up. Click "Yes" to proceed.
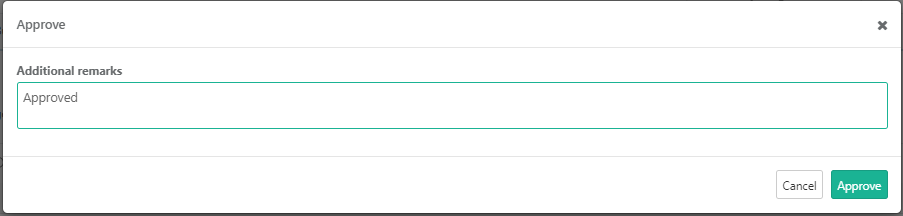
Enter remarks and click Approve.
Bulk Request Change
Bulk Request Change can be applied to test assets (requirements and test cases) that have been approved at least once in any of the previous levels.
The “Request Change” option is not applicable to requirements that are imported from an external tracker like Jira. These imported requirements will not appear in the list of Bulk Operations > Request change.
1. Go to Bulk Operations.
2. Select Request Change as the operation to perform and click Next.
The screen shows records that are approved in the previous levels.
Select the records for which you want to apply Request Change and click on the Request Change button.
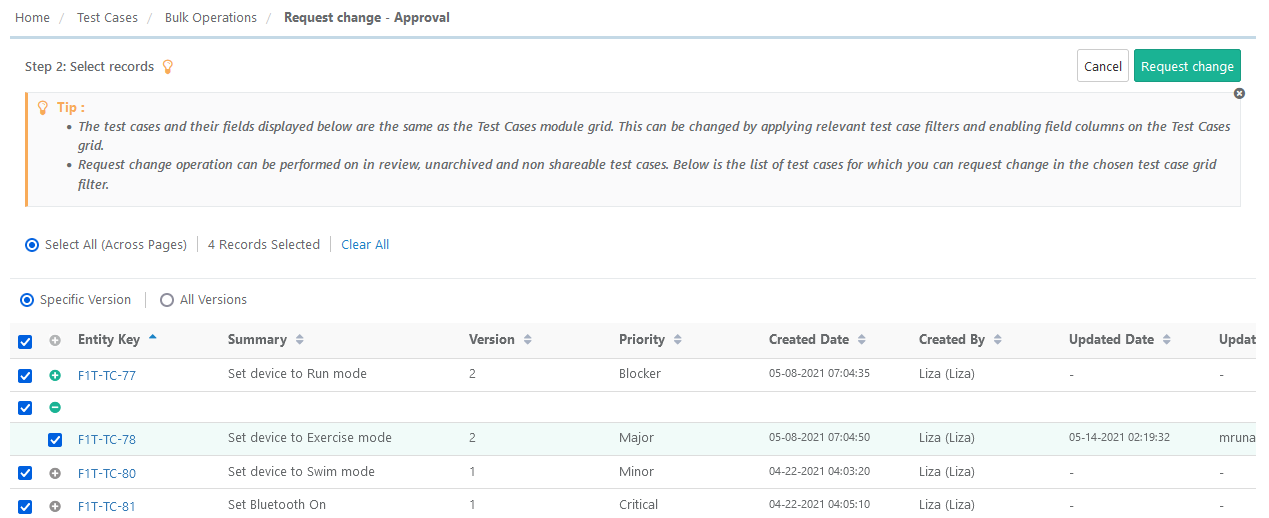
The confirmation message pops up. Click "Yes" to proceed.
Add remarks and click on the Request Change button.
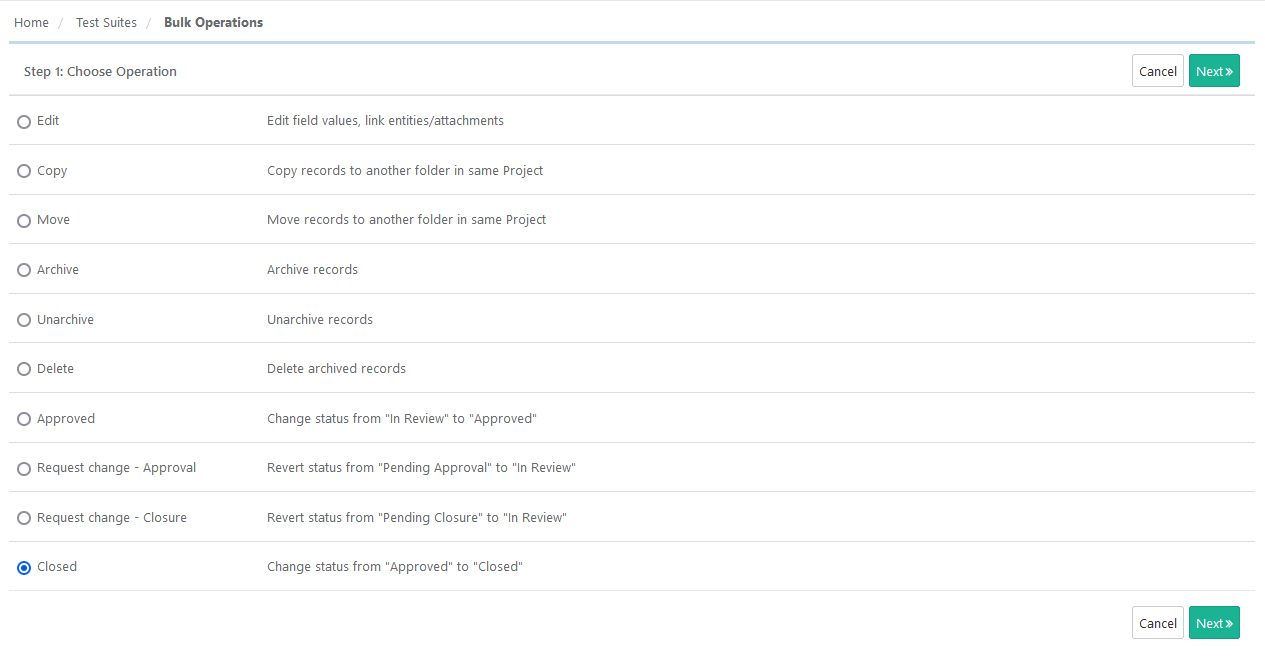
Bulk Approve Test Suites/Test Executions
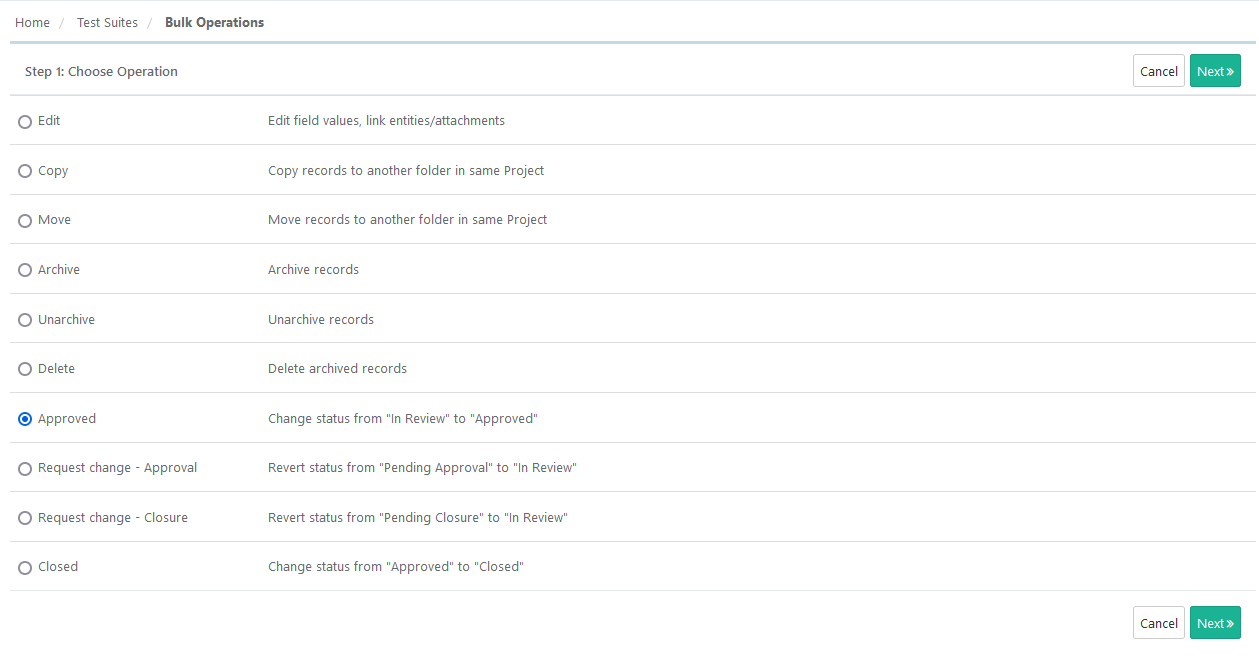
In Bulk Operations for test suite, the Approve, Request Change - Approval, Request Change - Closure and Close options are for test execution.
1. Go to Bulk Operations.
2. Select Approve as the operation to perform and click Next.
If the records exceed 1000, then you can apply the required Filters to filter out records of test executions.
Select records that should be approved and click Approve.
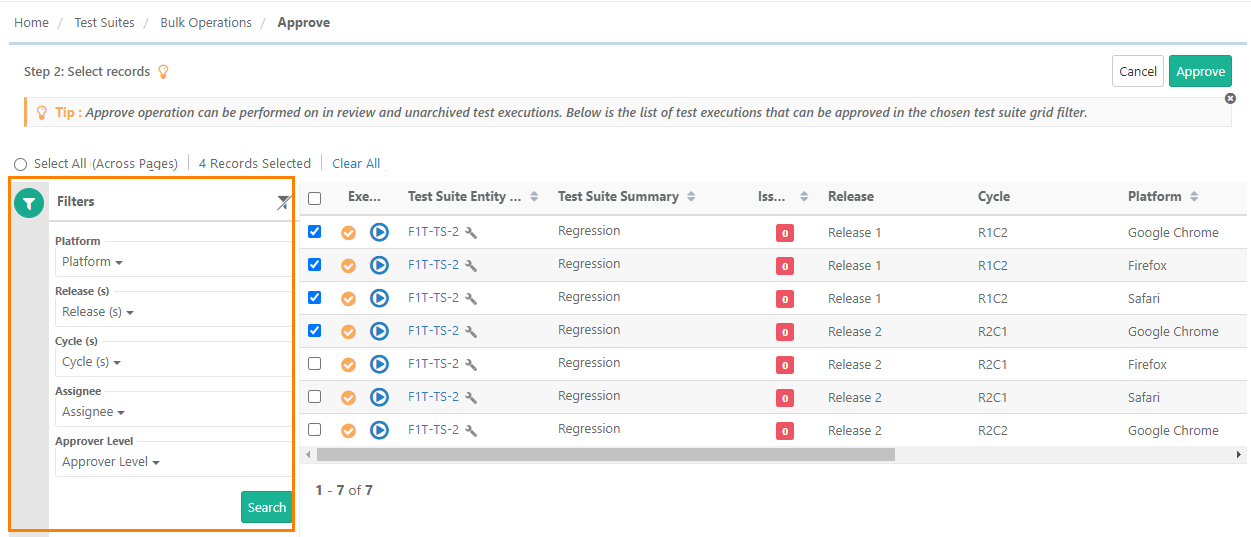
The confirmation pop-up opens. Click Yes to proceed.
Add remarks and click Approve.
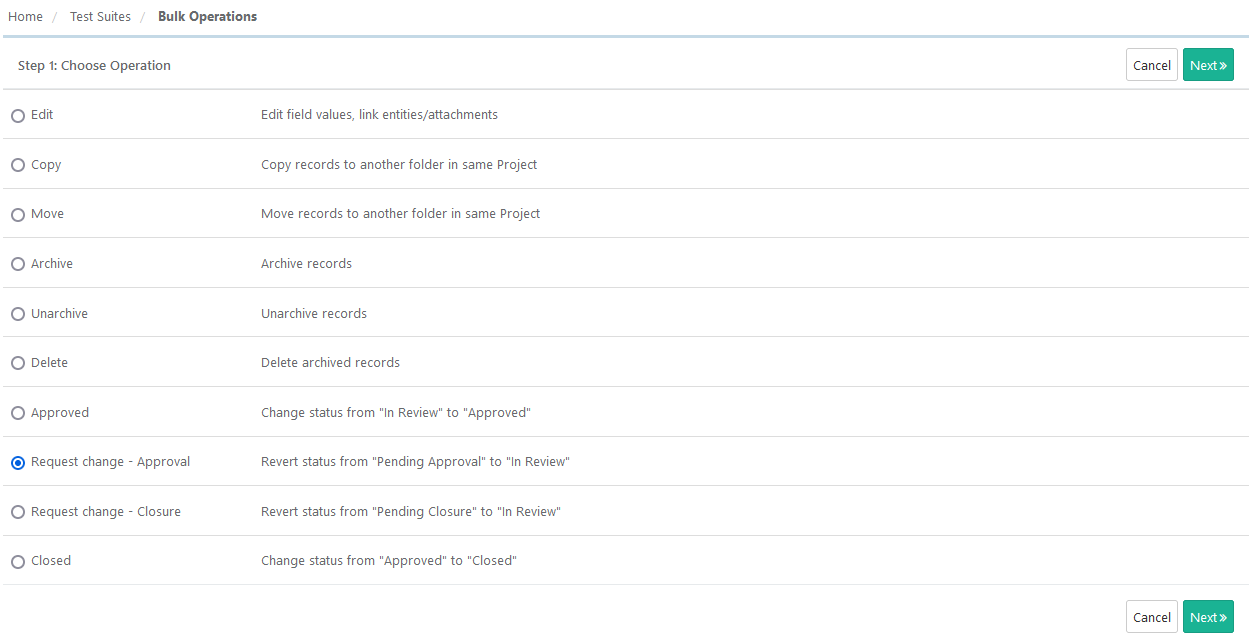
Bulk Request Change - Approval
Bulk Request Change - Approval can be applied to test executions that are pending for approval. It will revert test execution's status from "Pending Approval" to "In Review".
1. Go to Bulk Operations.
2. Select Request Change - Approval as the operation to perform and click Next.
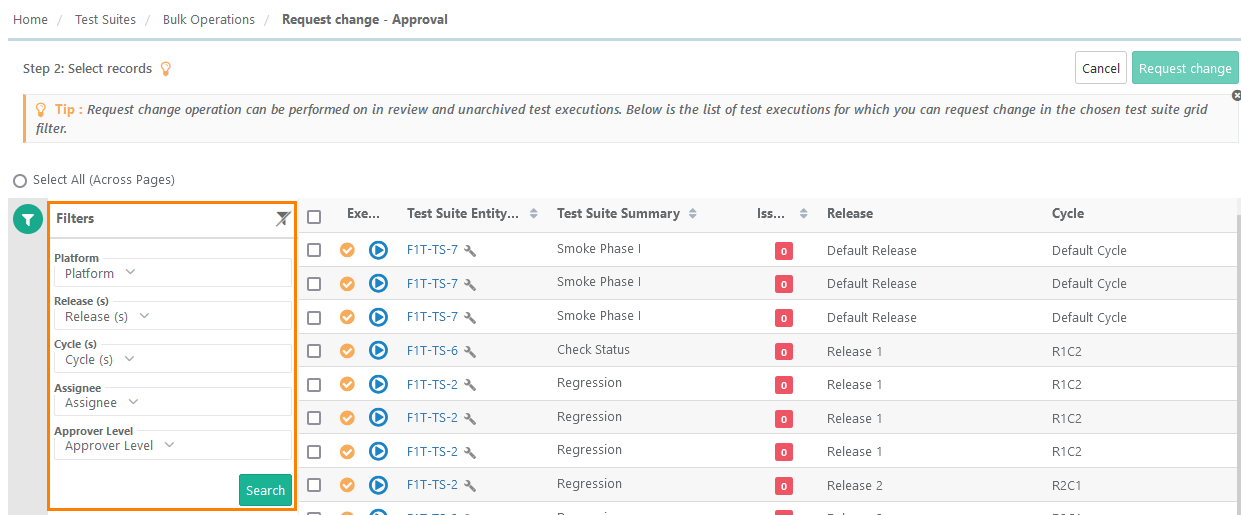
The screen shows records that are pending for approval.
If the records exceed 1000, then you can apply the required Filters to filter out records of test executions.
Select the records for which you want to apply Request Change - Approval and click on the Request Change button.
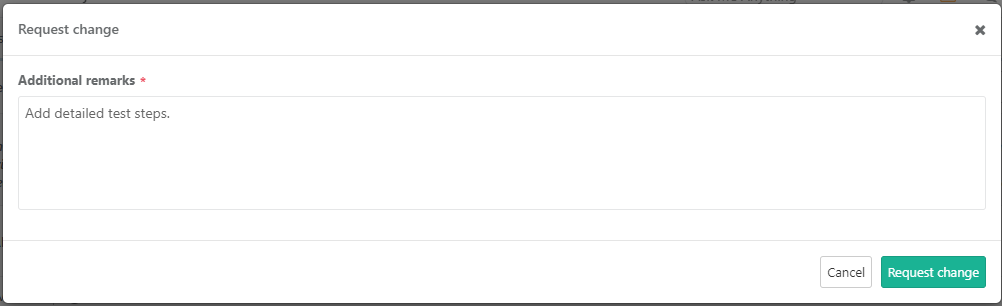
The confirmation message pops up. Click "Yes" to proceed.
Add remarks and click on the Request Change button.
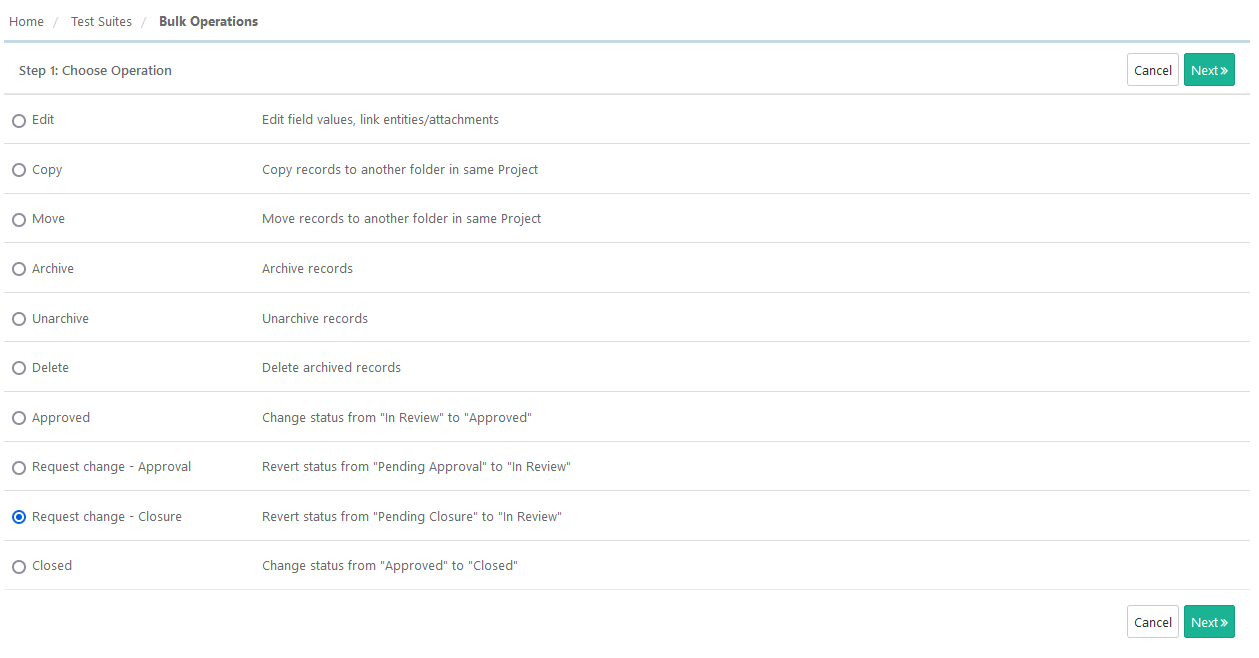
Bulk Request Change - Closure
Bulk Request Change - Closure can be applied to test executions that have been approved at all the approval levels. It will revert test execution's status from "Pending Closure" to "In Review".
If the records exceed 1000, then you can apply the required Filters to filter out records of test executions.
Select the records for which you want to apply Request Change - Closure and click on the Request Change button.
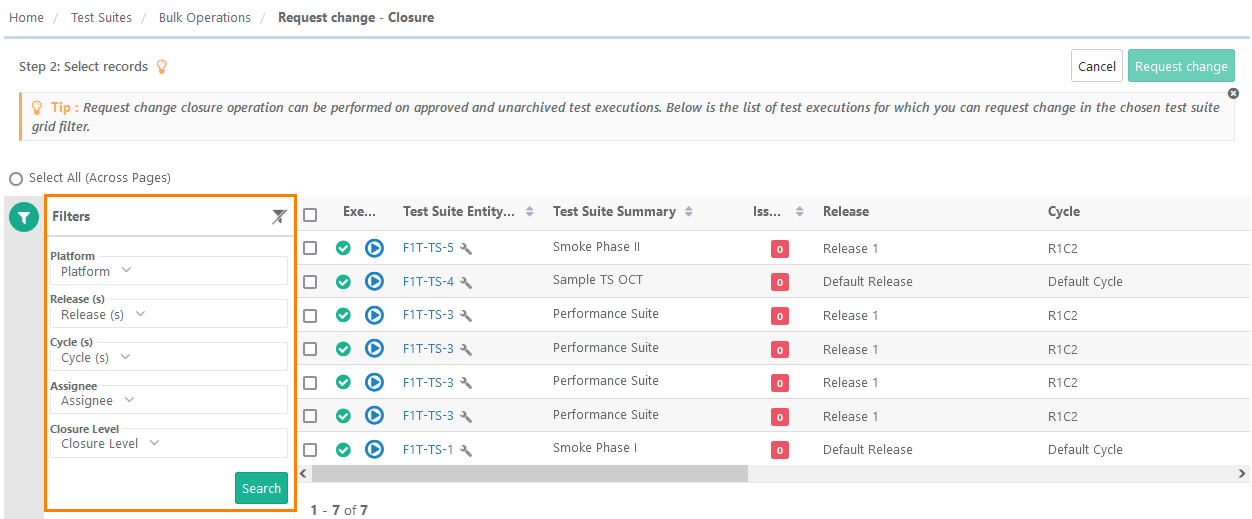
The confirmation message pops up. Click "Yes" to proceed.
Add remarks and click on the Request Change button.
Bulk Close Test Executions
Closers can change the test execution status from "Approved" to "Closed". They can mark the test executions as "Closed" in bulk at a time.
1. Go to Bulk Operations.
2. Select Close as the operation to perform and click Next.
If the records exceed 1000, then you can apply the required Filters to filter out records of test executions.
Select the records that you want to mark as "Closed" and click Close.

The confirmation pop-up opens. Click Yes to proceed.
Add remarks and click Close.
Back to QMetry All Products Help Page