Back to QMetry All Products Help Page
QAS CLI
Introduction
QAS CLI allows you to execute your automation tests in CLI mode/headless testing mode. It can be useful in different scenarios and in integration with CI/CD system.
You can execute an automation test without launching QMetry Automation Studio by using the command line mode execution. It is identified as QAS CLI. It helps you run your test suite/test case in headless browser. You can also schedule recurring execution of projects through Command Line Interface. CLI supports Chrome and Firefox browsers for project execution.
While executing project in CLI mode, web driver mismatch will be detected and automatically updated.
Notes:
- QAS CLI only works for QAS Web and Mobile Web projects.
- To execute the Salesforce project in CLI, users should have a valid SFDC App license for SFDC CLI.
Use Cases
QAS CLI is only required for executing automation tests in CLI (command-line interface) mode. The following are the common scenarios for using QAS CLI:
- Creating batch operations to control multiple executions. For example, testers want to set automated run of Test Suite_2 after running Test Suite_1.
- Integrating your tests with your CI/CD system.
Download QAS CLI
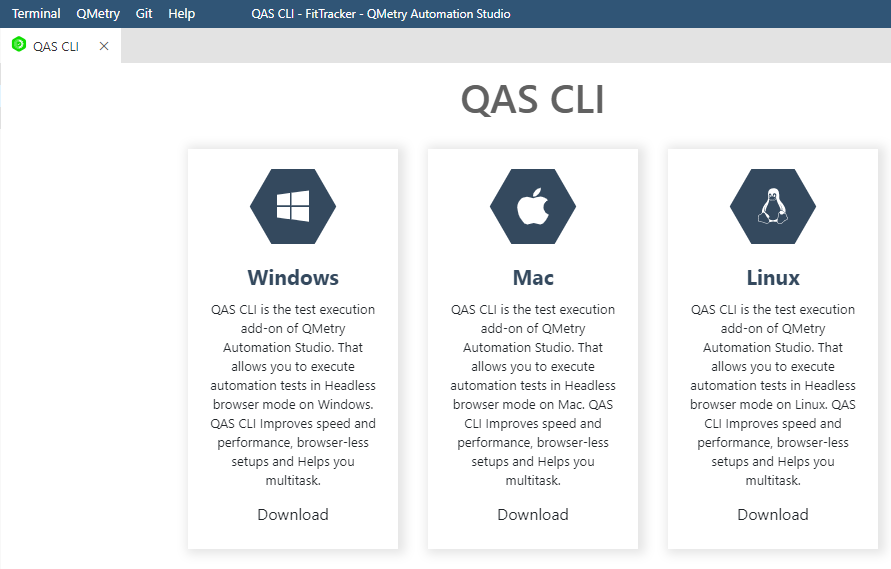
You can download QAS CLI according to your system OS.
- Open QMetry Automation Studio.
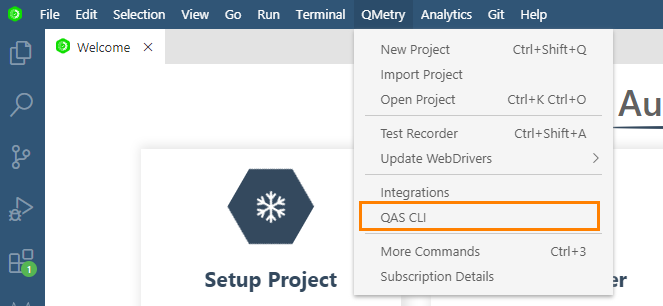
- Go to QMetry menu > QAS CLI.
The screen opens with the options to download QAS CLI as per the OS: Windows, Mac, Linux.
3. Download QAS CLI accordingly on the machine.
Note: You can download QAS CLI zip for Mac and Linux. Extract the zip in the directory from where you want to run it.
Run QAS CLI
After downloading the QAS CLI according to the OS, open/extract and open it.
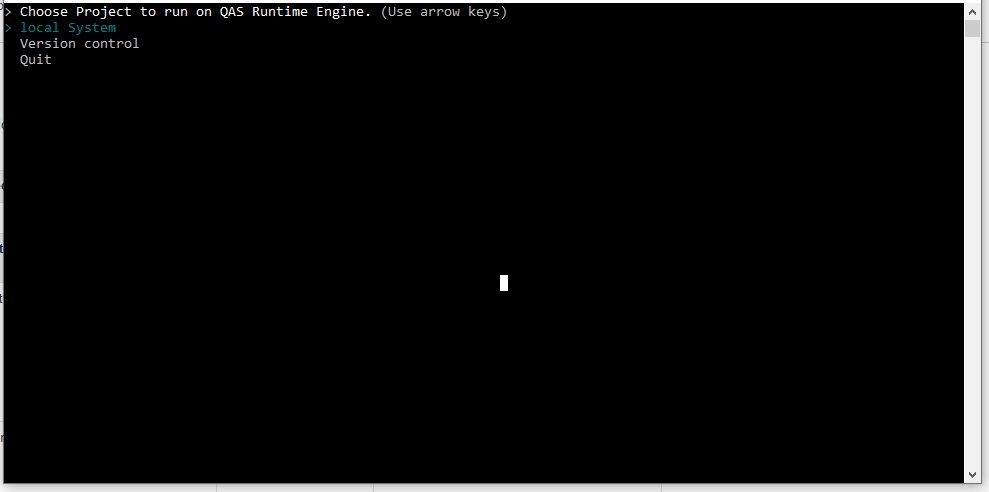
You can run the project either from Local System or from Version Control.
Enter the following details on the terminal:
Run Project from | Input Value | Notes | |
|---|---|---|---|
| A. | Local System | Use Keyboard Arrow keys to select the option and press ENTER | |
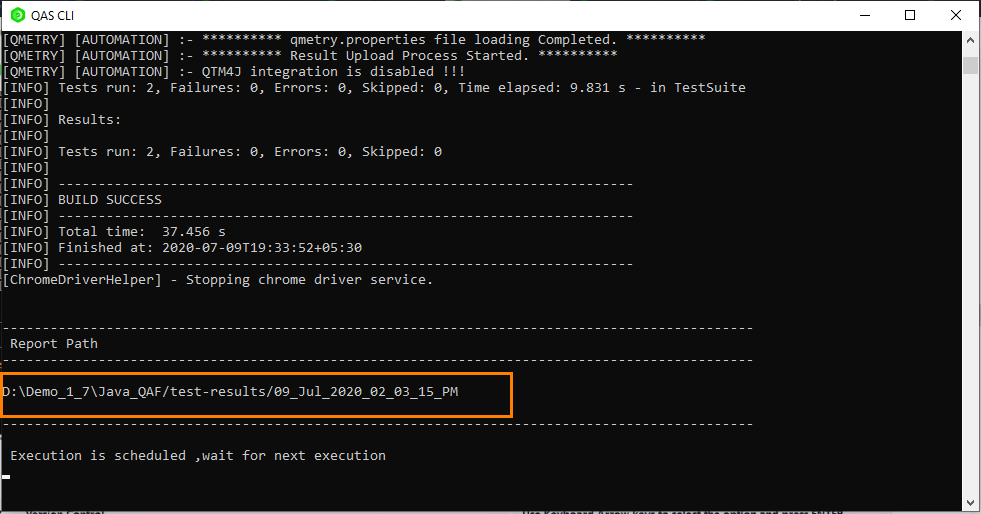
| 1. | Project Path (where the project is located) | The next set of parameters to be set Based on the project. | It will start executing the project in headless mode. After execution it will show the count for Tests Run, Failures, Errors and Skipped. The report link will be generated to view the test results. |
| 2. | Select webdriver to run CLI | chromeDriver/firefoxDriver | Use Keyboard Arrow keys to select the option and press ENTER |
| 3. | Automatic update of compatible driver, if it is not compatible. | ||
| 4. | Do you want to schedule execution? | Yes/No | Select "Yes" to schedule recurring execution of QAS project in CLI mode. Else, select "No". Use Keyboard Arrow keys to select the option and press ENTER |
| 5. | Enter Command for Execution | Only relevant command will be accepted based on the framework. | For example, for a Java project it will accept – mvn clean test. |
| 6. | Enter time in HH:MM to schedule script re-execution | HH:MM | Execution will be repeated by given time period. For example, 00:05 to execute the script at the interval of 5 minutes |
| 7. | Enter end date of scheduling | YYYY-MM-DD HH:MM:SS | Enter the end date to stop the script. The script will keep running until this date at specific time of interval. For example, 2020-04-03 11:00:00 |
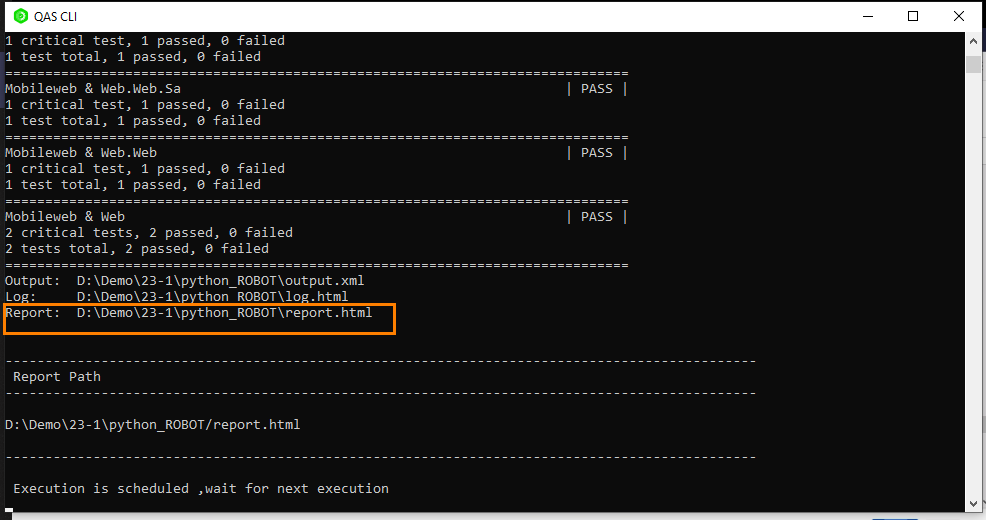
| 8. | The project starts executing as per the mentioned time. The execution result will be displayed once the execution is over. The report link is generated as highlighted in the image below. | ||
| B. | Version Control | Use Keyboard Arrow keys to select the option and press ENTER | |
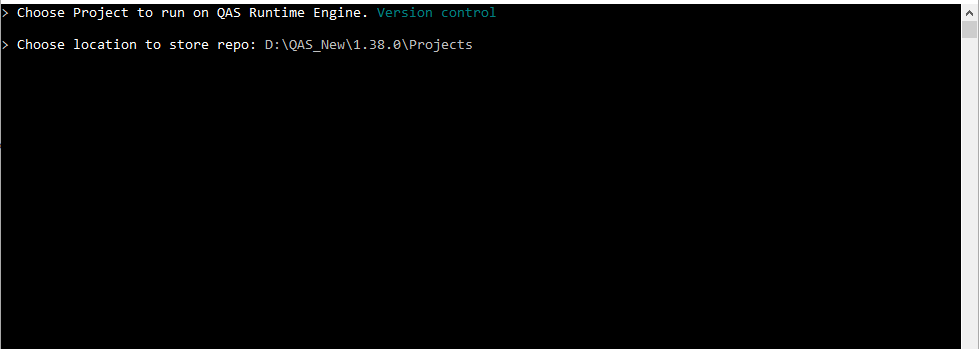
| 1. | Choose location to store repository | Enter Directory path to store the repository | Bit Bucket, GitHub, etc. should be installed on the same system from where the Headless Execution is being triggered. |
| 2. | Select webdriver to run CLI. | chromeDriver/firefoxDriver | Use Keyboard Arrow keys to select the option and press ENTER |
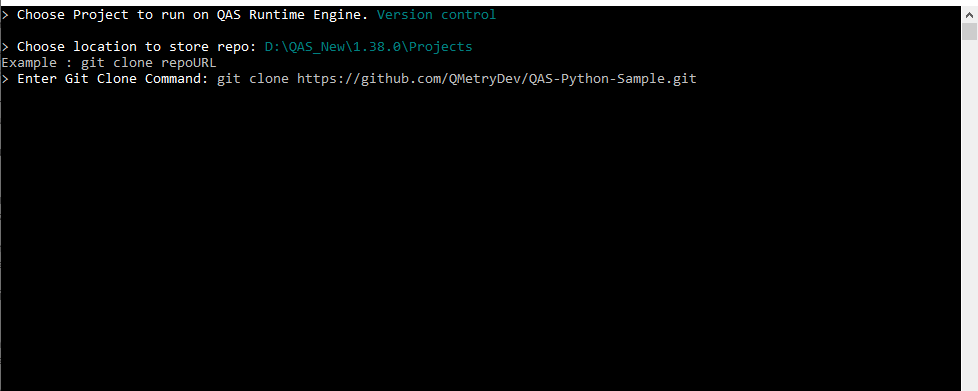
| 3. | Enter Git Clone Command | git clone {https://.....git} | It will clone the repository on the mentioned path. |
| 4. | Do you want to schedule execution? | Yes/No | Select "Yes" to schedule recurring execution of QAS project in CLI mode. Else, select "No". Use Keyboard Arrow keys to select the option and press ENTER. |
| 5. | Enter Command for Execution | Enter command in accordance with the Project. | |
| 6. | Enter time in HH:MM to schedule script re-execution | HH:MM | Execution will be repeated by given time period. For example, 00:02 to execute the script at the interval of 2 minutes. |
| 7. | Enter end date of scheduling | YYYY-MM-DD HH:MM:SS | The date and time until which the re-execution of the script will keep running. For example, 2020-04-03 11:00:00 |
| 8. | The project starts executing as per the mentioned time. The execution result will be displayed once the execution is over. The report link is generated as highlighted in the image below. | ||
| C. | Quit (to exit from the QAS console) | Use Keyboard Arrow keys to select the option and press ENTER | |
Stop Scheduler Forcefully
If you want to terminate the execution scheduler, enter the following command as per OS to stop the repeated executions.
- Window and Linux: Ctrl + c
- Mac: Cmd+.
Related content
Back to QMetry All Products Help Page
