Back to QMetry All Products Help Page
Installation - Server
- Mrunalini Potnis
Analytics
Watch Video
Table of Contents
Introduction
You can get an evaluation license for this add-on. You can install the add-on through either of the following methods:
- Atlassian Marketplace
- JIRA
Note : QMetry add-on supported on Jira Software Data center. Here is the link on how add-ons are installed on Atlassian Datacenter. Follow below steps for installing the QMetry add-on.
Method 1: Through Atlassian Marketplace
Log into Atlassian Marketplace.
The Overview page for QMetry Test Management for JIRA opens.

There are two options – (1) Cloud (2) Server on the drop-down menu at right. Select Server to install the Server edition of QMetry Test Management for JIRA add-on.
Click on the Try it free button at top right corner.
A pop-up opens with buttons on it for JIRA Server and JIRA Cloud.
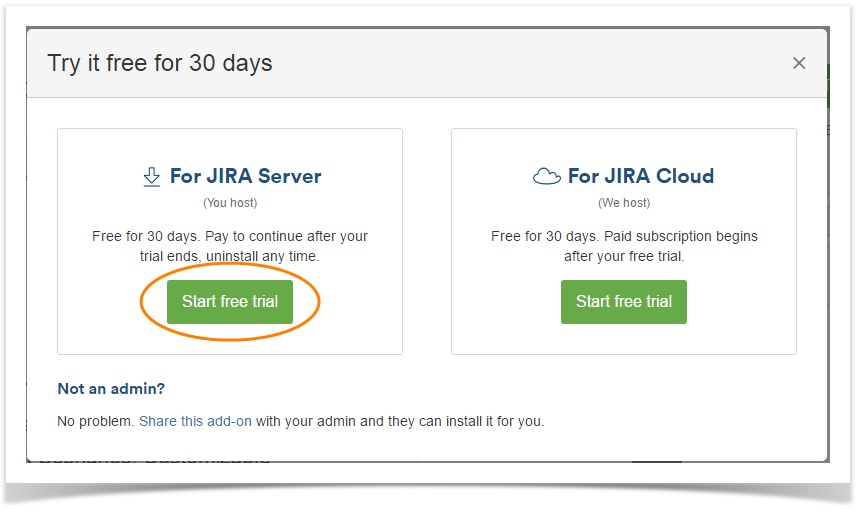
In the For JIRA Server Section, click on the Start free trial button.
The next screen opens to generate a new license.

- Mention the client name to whom the license is to be issued.
- Accept the terms by checking the agreement check box.
- Click on the Generate License button.
The Getting started with your new add-on screen opens with the license key generated on it.

- The license key is generated for the client. You can copy it to the clipboard.
- Click on the Download button to download the JAR file to your local system. The JAR file is downloaded.
How to upload the JAR file?
Apart from the license key and JAR download button, the Getting started with your new add-on screen displays steps to Install Add-on and Apply Your license. Follow the same steps to upload the JAR file and provide the license key to the add-on.

Method 2: Through JIRA
You can get an evaluation license for this add-on.
Pre-condition: User should have admin rights for the JIRA instance.
Log into your JIRA instance.
Click the Administration icon on the application header and click Add-ons.

You are navigated to the Add-ons tab of the Administration page.

There are two options on the left panel:
A. Find new add-ons
B. Manage add-ons
Click the Find new add-ons option.
The list of add-ons is displayed at right.

- Search for “QMetry Test Management” through the search box and locate the add-on.
- Click the Free Trial button for it.
The Accept terms and agreements dialogue box appears. Accept the end user license agreement by clicking on the Accept button.
The progress bar starts showing the progress of installation process and closes itself once the installation is finished.
Associate Issue Types with New Projects
For every new project in JIRA, you have to associate QMetry Test Management for JIRA Server Add-on issue types manually. The issue types Test Scenario, Test Case and Test Run will come into effect only after associating them manually with a particular project’s issue scheme. Once you associate, the issues types are then displayed on the Issue Type drop-down with other default issue types across JIRA.
Steps:
1. Click the Administration icon at top right on the navigation bar and select Issues.

2. Select Issue type schemes on the vertical menu bar at left.

Issue Type Schemes display various schemes with different combinations of issue types.
3. Locate the Scheme you want to use and click on the Associate link. Select the project you want to associate the Issue Type Scheme with.

4. To change the shceme, click on the Edit link. It opens the Modify Issue Type Scheme screen, which shows list of issue types currently included in the scheme and another list of available issue types that are not yet included in the scheme.

5. Add the Issue Types Test Case, Test Scenario and Test Run to the Issue Types Scheme of the project through drag and drop.

6. Click Save.
7. In the link provided, mentioned are the List of QMetry for Jira add on features not supported on Default H2 DB Configuration
Back to QMetry All Products Help Page