Setting up Android Studio takes just a few clicks.
First, be sure you download the latest version of Android Studio.
Windows
To install Android Studio on Windows, proceed as follows:
1. If you downloaded an.exefile (recommended), double-click to launch it.
If you downloaded a.zipfile, unpack the ZIP, copy the android-studio folder into your Program Files folder and then open the android-studio > bin folder and launch studio64.exe (for 64-bit machines) or studio.exe (for 32-bit machines).
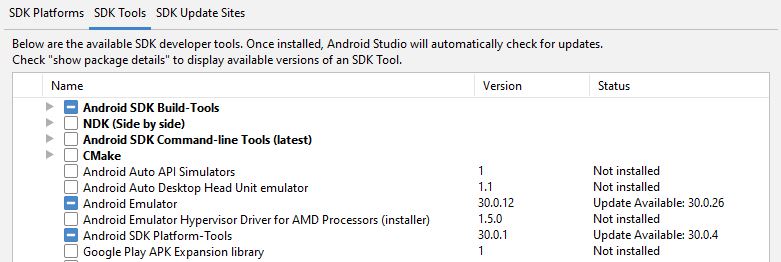
2. Follow the setup wizard in Android Studio and install any SDK packages that it recommends.
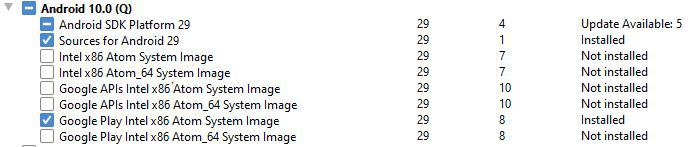
→ Install SDK tool package in Android Studio (go to Tool >SDK Manager).
3. Create a Virtual Device using AVD Manager in Android Studio and launch it once to check whether it is working properly.
As new tools and other APIs become available, Android Studio tells you with a pop-up, or you can check for updates by clicking Help > Check for Update.
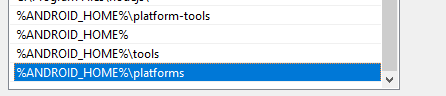
Setup Environment Variable for Android:
set ANDROID_HOME=C:\ installation location \android-sdk

- set PATH=%ANDROID_HOME%\tools;%ANDROID_HOME%\platform-tools
3. After setting PATH variables, kindly Reload QAS.
Refer to this article.
Mac
Steps
To install Android Studio on your Mac, proceed as follows:
1. Launch the Android Studio DMG file.
2. Drag and drop Android Studio into the Applications folder, then launch Android Studio.
3. Select whether you want to import previous Android Studio settings, then click OK.
4. The Android Studio Setup Wizard guides you through the rest of the setup, which includes downloading Android SDK components that are required for the development.
→ Install SDK tool package in Android Studio (go to Tool >SDK Manager).
5. Create a Virtual Device using AVD Manager in Android Studio and launch it once to check whether it is working properly.
As new tools and other APIs become available, Android Studio tells you with a pop-up, or you can check for updates by clicking Android Studio > Check for Updates.
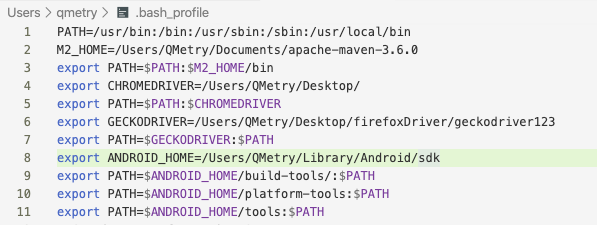
Setup Environment Variable for Android:
- Set Android PATH variable in .bash_profile, as shown in the below screenshot.
Reference: 1
Reference: 2
export ANDROID_HOME=/Users/mac_username/Library/Android/sdk
PATH="/Library/Frameworks/Python.framework/Versions/3.8/bin:$ANDROID_HOME/tools:$ANDROID_HOME/platform-tools:$M2_HOME/bin:$JAVA_HOME:${PATH}"
export PATH
2. After setting PATH variables, kindly Quit and Start QAS.